How to Grow Dill at Home (Beginner’s Guide)
If you’re new to gardening, this easy guide will help you grow dill at home—even in small spaces. We’ll walk you through choosing the right variety, planting and care tips, when to harvest, and handy ways to use your fresh dill in everyday cooking.
Introduction to Dill & Its Benefits
If you’re curious about how to grow dill, you’re in for a rewarding and surprisingly simple gardening adventure. Dill is a versatile, aromatic herb that adds a burst of fresh flavor to salads, soups, seafood, and is absolutely essential for classic homemade pickles.
For home gardeners—especially beginners—dill is a dream addition: it grows easily from seed, flourishes in containers or garden beds, and offers a double harvest. You can snip its feathery leaves for cooking throughout the season and later collect dill seeds for spice racks or next year’s planting.
Beyond its kitchen appeal, growing dill offers a range of benefits for your garden. Its pretty yellow flowers attract beneficial pollinators like bees and butterflies, boosting the health and productivity of your entire garden. Dill is also famous for being a great companion plant, making nearby veggies like cucumbers and onions more resilient to pests.
In this beginner’s guide, you’ll learn step-by-step instructions on how to plant, care for, and harvest dill at home, along with clever tips for maximizing flavor and yield. Whether you have a sunny windowsill or a backyard plot, let’s get started with everything you need to know to grow healthy, abundant dill right where you live.
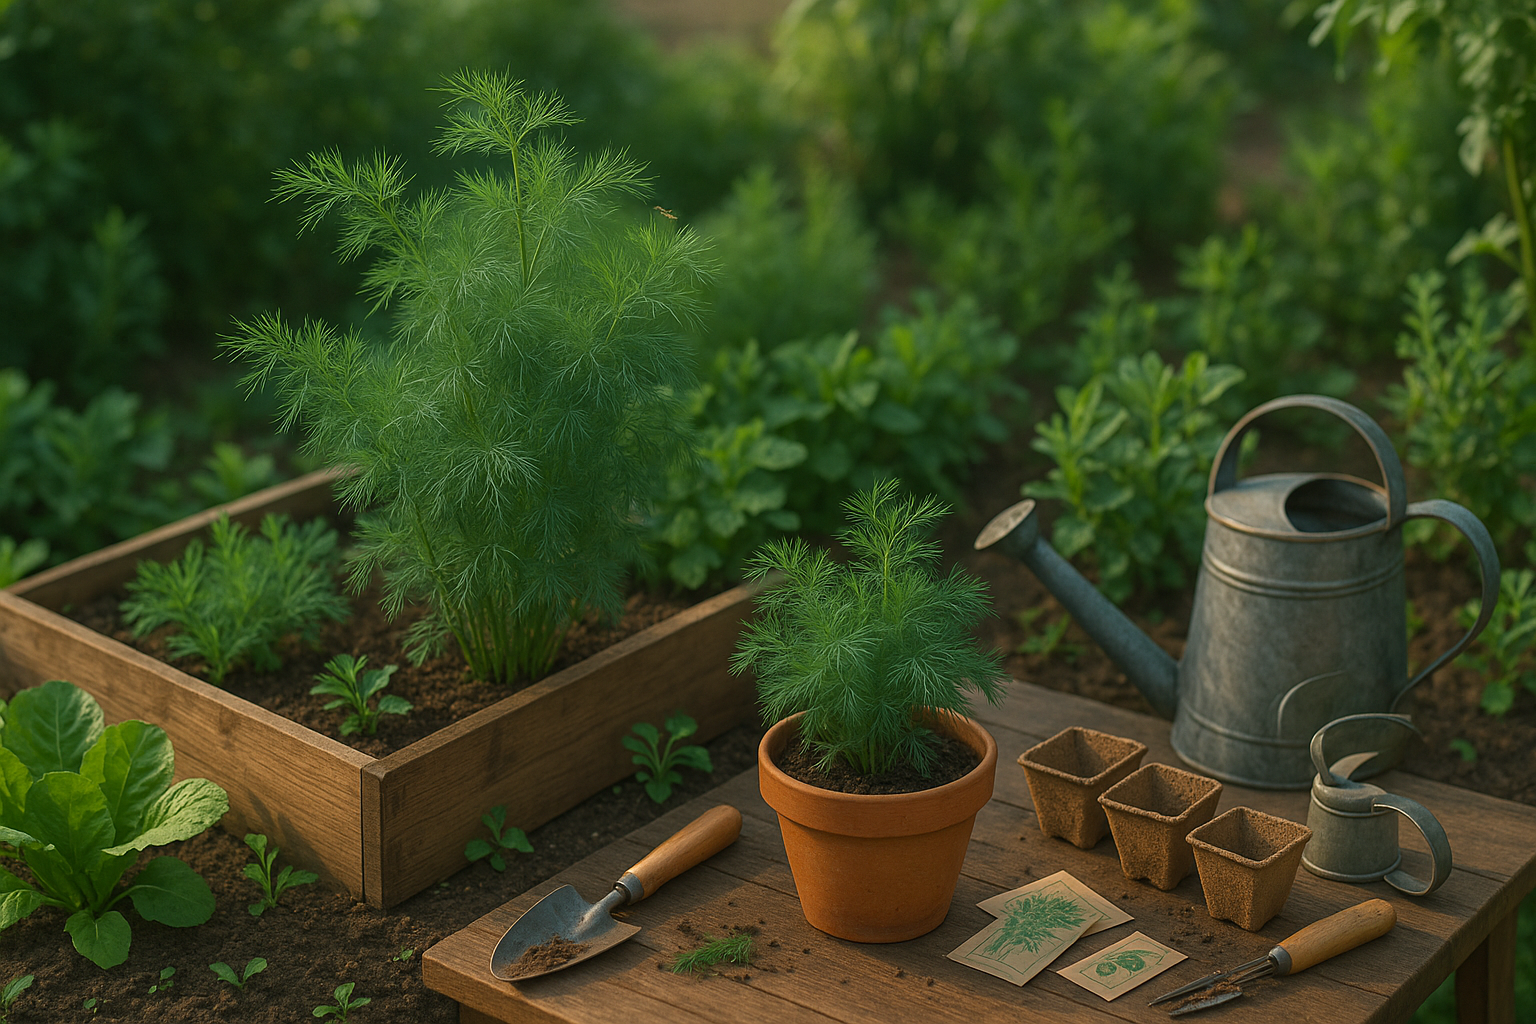
Choosing the Right Dill Variety
When picking the best dill variety for your garden, it helps to consider both your space and culinary needs.
Bouquet is a classic choice, valued for its rapid growth and large, aromatic seed heads, making it ideal for pickling and seed harvesting. These upright stems and showy blooms even dress up garden beds as airy ornamentals.
Fernleaf dill, with its compact, bushy growth habit, is perfect for containers, windowsills, or squeezing into small garden corners. It stays under two feet tall, resists bolting, and has a soft, mild flavor well-suited for garnishing salads, fish, or egg dishes.
For those with bigger spaces, Mammoth (also called Long Island Mammoth) matures to a towering three to five feet. Its feathery foliage and pronounced flavor make it popular with cooks, plus the substantial umbels attract pollinators all season.
If you plan to harvest mainly leaves for fresh use, Fernleaf is your best bet, while Bouquet and Mammoth excel for collecting seeds or adding visual punch to borders.
When sourcing seeds or seedlings, check local nurseries and reputable garden centers first—they often stock region-appropriate varieties and can offer firsthand advice. For a broader choice, online suppliers like Johnny’s Selected Seeds, Baker Creek Heirloom Seeds, and Burpee boast a wide selection of dill cultivars, detailed descriptions, and helpful customer reviews.
No matter which variety you choose, starting with fresh, quality seeds ensures better germination and more vigorous plants—so invest a little time in your selection process, and you’ll reap flavorful rewards all season.
Planting Dill
For thriving dill plants, start with the right soil: dill prefers well-draining, moderately fertile soil with a pH between 5.5 and 6.5. Avoid heavy, waterlogged ground—sandy or loamy soils work best. If your soil is clay-heavy, consider raised beds or mix in some compost to improve drainage and fertility.
Dill loves full sun, so choose a spot that gets at least six hours of direct sunlight each day. The ideal temperature for sowing dill seeds is between 60°F and 70°F (16°C–21°C), making spring and early summer the perfect time for outdoor planting.
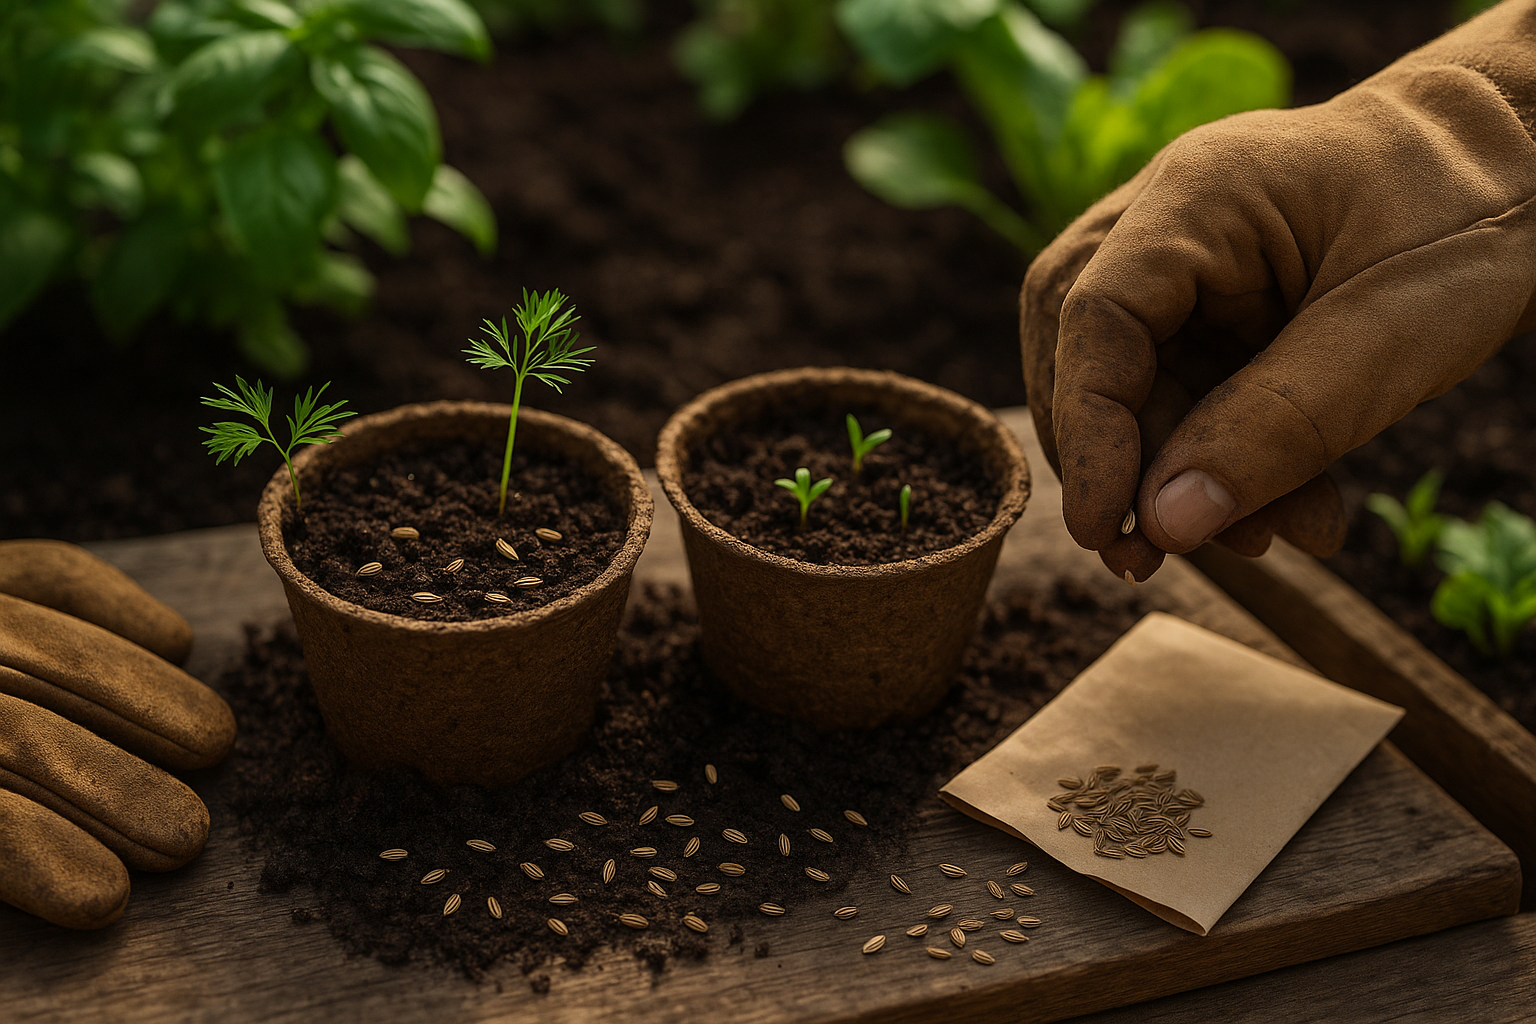
For direct sowing outdoors, plant seeds about 1/4 inch deep and space them a foot apart in rows. If you’re planting multiple rows, keep them at least 18 inches apart to ensure good air circulation. Once seedlings reach a couple of inches tall, thin them so the strongest plants are spaced 12–18 inches apart—dill grows tall and needs room to spread.
To jumpstart your harvest, you can sow dill indoors 4–6 weeks before your last expected frost, using biodegradable pots to minimize disruption to the taproot during transplanting. Transplant seedlings outdoors when the soil warms up and all danger of frost has passed.
For a constant supply of fresh dill throughout the season, try succession planting: sow a new batch of seeds every 2–3 weeks until midsummer. This simple technique ensures you always have young, leafy dill plants ready to snip for salads, soups, and pickles.
With the right timing and attention to soil and spacing, you’ll enjoy a bountiful dill harvest for months on end.
Caring for Your Dill Plants
Caring for your dill plants is easier when you understand their changing needs through each growth stage. Seedlings are especially sensitive to moisture—keep the soil consistently damp but not soggy by watering lightly every day or whenever the top inch feels dry.
As the plants mature, they develop deeper roots and require less frequent watering; a thorough soak once or twice a week is often enough, especially if you mulch to lock in moisture and reduce weeds. Mulching with straw or shredded leaves also keeps roots cool and prevents soil from splashing onto the feathery leaves.
When dill grows tall, it can become floppy or snap in strong wind—gently tie the stems to bamboo stakes or garden twine for support, spacing plants so each has room to expand.
Fertilization is seldom necessary unless your soil is poor. If the leaves look pale or growth is slow, feed the plants with a diluted all-purpose liquid fertilizer once a month—avoid overfertilizing, as this can make the plants lanky and reduce flavor.
To keep your dill from bolting (flowering prematurely), especially in hot weather, plant seeds in early spring or late summer and provide dappled afternoon shade. For bushier growth, pinch or snip the growing tips regularly; this encourages side shoots and yields fuller, more productive plants.
Harvesting the leaves frequently—not just the stems—also helps delay flowering, stretching out the period for fresh dill in your kitchen. With thoughtful care, your dill patch will deliver fragrant, healthy leaves for months.
Dealing with Common Problems
Common garden issues like aphids, caterpillars, and fungal infections can appear quickly, but organic gardeners have plenty of ways to manage them.
For aphids, a strong spray of water can knock them off plants, or you can introduce beneficial insects like ladybugs that naturally eat these pests.
Caterpillars can be handpicked in small gardens or controlled with organic solutions such as Bacillus thuringiensis (Bt), which targets caterpillars without harming other beneficial insects.
Fungal diseases often result from excess moisture, so water at the base of plants in the morning and maintain good air circulation by spacing plants appropriately. A simple homemade spray using diluted neem oil or baking soda can help prevent and treat early fungal infections.
Environmental stress, especially heat, can cause some crops like lettuce or spinach to bolt—meaning they quickly go to seed and become bitter. To prevent bolting, choose heat-resistant varieties, provide afternoon shade with cloth covers, and water consistently to keep the soil cool.
Most importantly, make it a habit to check your garden every few days. Early detection allows you to catch issues before they spread, making organic interventions much more effective and keeping your garden healthy all season long.
Harvesting and Storing Dill
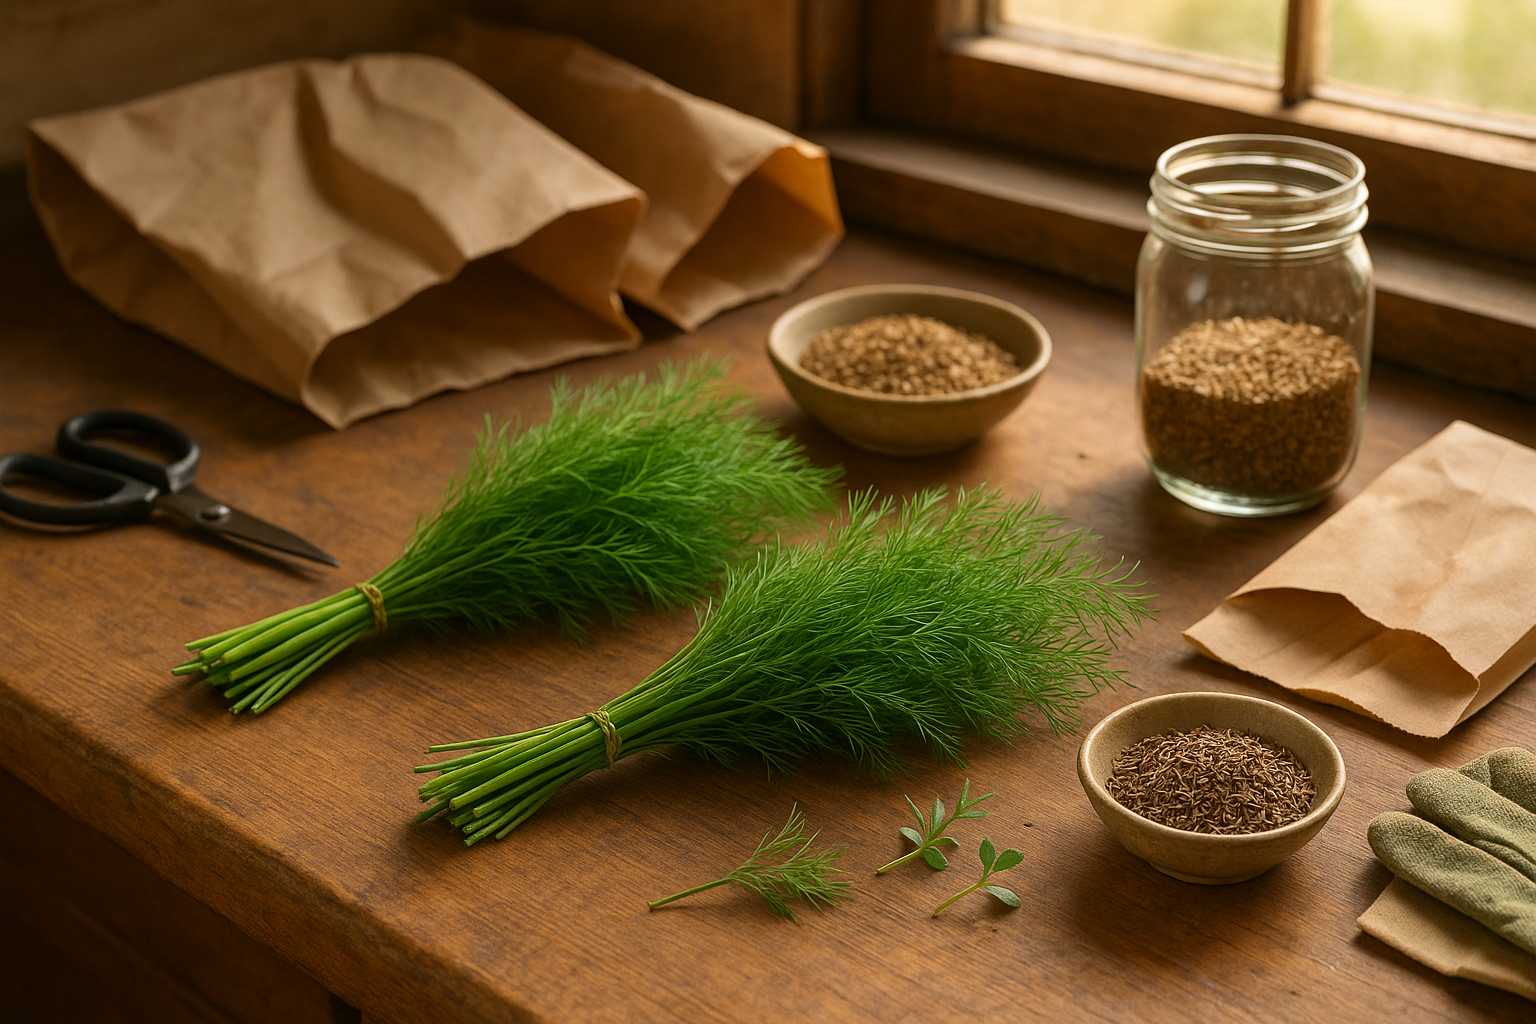
The ideal time to harvest fresh dill leaves is just before the plant starts to flower, as this is when the flavor is strongest and most vibrant. Early morning, after the dew has dried but before the sun gets too hot, is perfect for picking. Snip the feathery leaves with clean scissors, choosing younger growth for the best taste, and gather what you need—dill grows back quickly if you leave a third of the plant.
For dill seeds, wait until the flower heads turn brown and the seeds are easily shaken loose; this usually happens about two to three weeks after flowering. Cut the mature seed heads and place them upside-down in a paper bag to dry in a cool, airy spot for about a week, then shake to collect the seeds.
When storing fresh dill, wrap the stems in a damp paper towel and seal them in a plastic bag or airtight container in the refrigerator, where they’ll last up to a week. For longer storage, chop and freeze dill in ice cube trays with water or oil, or simply freeze the whole sprigs in small bags—this keeps the color and flavor better than drying.
Store dill seeds in airtight jars in a cool, dark pantry, making sure they’re fully dry to prevent mold. Avoid crushing or bruising leaves and seeds until you’re ready to use them—this preserves essential oils and keeps that signature dill flavor bright and fresh.
Whether you’re seasoning pickles or saving seeds for next year’s garden, proper handling makes all the difference in maintaining quality and taste.
Creative Ways to Use Homegrown Dill
Homegrown dill is a versatile herb that adds a unique, fresh flavor to countless dishes. Most people know dill as a key ingredient in pickling recipes, thanks to its bright, tangy taste. But it’s also delicious sprinkled over salads for a burst of green flavor or stirred into creamy sauces and dressings.
Dill pairs especially well with fish, particularly salmon, and can be minced and mixed into yogurt or sour cream to create an easy, herbaceous dip.
Beyond the kitchen, dill offers several benefits in your garden. It’s a top choice for attracting pollinators like bees and butterflies, which helps your entire garden thrive. Dill also serves as a great companion plant for veggies like cucumbers and cabbage by deterring pests.
If you’re looking for new flavors, try adding fresh dill to scrambled eggs, potato dishes, or even homemade bread for a creative twist. Dill’s feathery leaves are easy to snip, grow quickly in small spaces, and reseed themselves for next season.
Whether you’re an experienced gardener or just getting started, growing a patch of dill is a low-effort way to enjoy big rewards in both your cooking and your backyard ecosystem. Give it a try and discover just how much this humble herb can do!