
Introduction to Lettuce Microgreens
Lettuce microgreens are the tiny, vibrant shoots of lettuce harvested just a couple of weeks after sprouting, quickly becoming a favorite among home gardeners and urban dwellers alike. Unlike mature lettuce, which you find in full heads at the market, these microgreens are picked at the seedling stage—usually after the first true leaves appear.
They pack a surprising punch: not only do they grow far faster than their full-grown counterparts, but they also concentrate flavor and nutrients into every bite. That’s why lettuce microgreens have been popping up in homes and city apartments, grown on sunny kitchen windowsills or compact vertical gardens.
The appeal is easy to see: you don’t need a big backyard or fancy equipment. Even a shallow tray, a sprinkle of seeds, and access to indirect sunlight is enough to start your own mini greens farm.
For those interested in healthier eating, lettuce microgreens are especially compelling. They’re loaded with vitamins, antioxidants, and minerals thanks to being harvested at their peak of nutrition, and many studies suggest they can contain more nutrients per gram than mature greens. Plus, their delicate texture and fresh, concentrated flavor elevate salads, sandwiches, and even smoothies.
In a world where time and space for gardening may be in short supply, lettuce microgreens offer a solution that’s both practical and rewarding. Whether you’re looking to boost your health, add a gourmet touch to your meals, or simply enjoy the satisfaction of growing your own food, this is one gardening trend worth exploring.
Benefits of Growing Lettuce Microgreens
Lettuce microgreens pack a surprising nutritional punch in a tiny package, making them an excellent addition to your daily diet. Compared to mature lettuce, these young greens are significantly richer in essential vitamins such as A, C, E, and K, which play crucial roles in immune function, skin health, and bone strength. They’re also abundant in minerals like iron, magnesium, calcium, and potassium, helping keep your heart, muscles, and nerves healthy.
One standout benefit of lettuce microgreens is their high concentration of antioxidants, such as beta-carotene and lutein, which neutralize free radicals and support eye health. This antioxidant content can surpass that of traditional leafy greens, making microgreens a smart choice for those looking to boost their body’s defense against oxidative stress. In addition, lettuce microgreens contain more phytonutrients and enzymes, which aid digestion and may help reduce inflammation.
Another advantage is that these microgreens offer a milder flavor profile compared to stronger-tasting greens like kale or arugula, making them versatile for a wide range of dishes. They’re also softer in texture, which is helpful if you find mature lettuce too fibrous or tough. Since microgreens grow quickly and don’t require much space, they can be harvested fresh year-round, ensuring you get the maximum nutritional benefit with every bite.
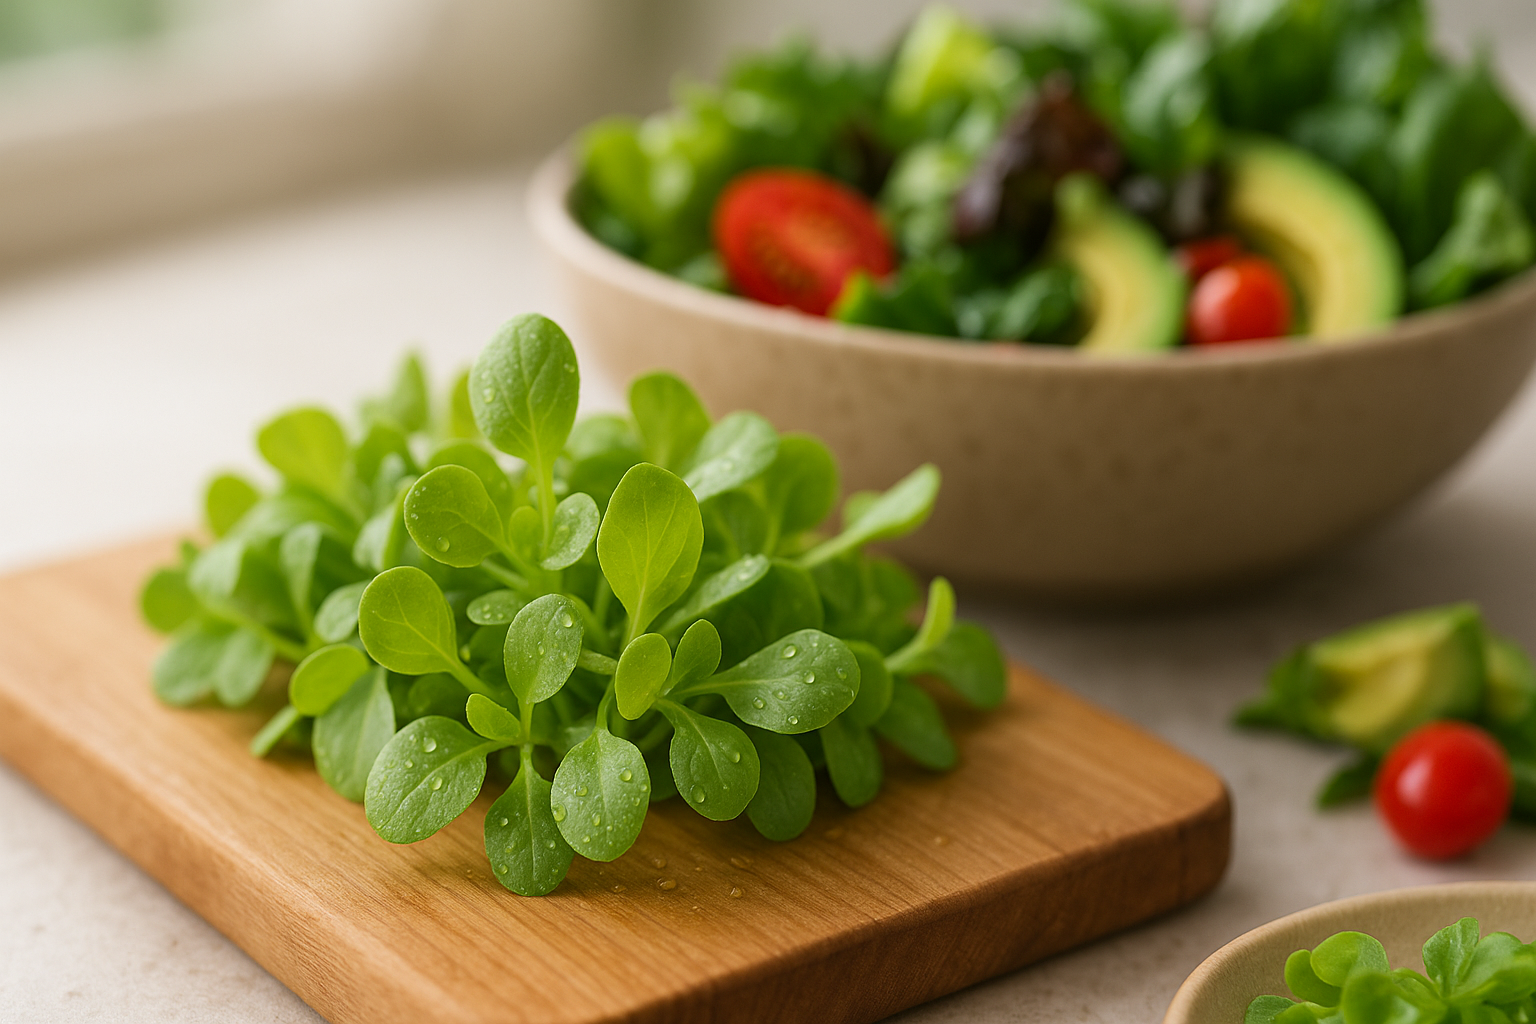
In the kitchen, lettuce microgreens shine as salad bases, sandwich toppers, wraps, and smoothie additions. A handful tossed on just-cooked pizza or mixed into scrambled eggs instantly elevates color, flavor, and nutrition. For busy home cooks, microgreens are a fast, no-prep way to supercharge meals—simply snip, rinse, and sprinkle.
Their delicate, crisp taste also appeals to picky eaters and kids, offering an easy gateway to healthier eating habits. By including lettuce microgreens in your meals, you not only diversify flavor and texture but also enjoy a powerhouse of nutrients tailored for busy, health-conscious lifestyles.
What You’ll Need to Get Started
Getting started with growing lettuce microgreens at home is surprisingly simple, even for beginners. First, gather your essential supplies:
- Quality lettuce seeds (look for varieties like Black Seeded Simpson, Red Romaine, or Oak Leaf, all known for their tender microgreens)
- Shallow growing trays or containers with drainage holes
- A lightweight growing medium such as seed-starting mix or coco coir
- A gentle spray bottle for watering
- A reliable light source—either a bright, south-facing windowsill or a basic LED grow light if natural light is limited
When sourcing seeds, try reputable suppliers like Johnny’s Selected Seeds, True Leaf Market, or Baker Creek Heirloom Seeds, which offer microgreen-specific packs to ensure good germination and flavor.
Place your tray somewhere easy to access and free from drafts, pets, and kitchen mess; a windowsill or kitchen countertop often works well, especially if it gets 4-6 hours of light. If using artificial lights, keep them about 6 inches above the trays for the best growth.
Before sowing, always double-check that your chosen space stays between 60-75°F—lettuce microgreens love cool, consistent conditions.
Finally, start small; use a tray that fits your available space so you aren’t overwhelmed. With just a few reliable materials and the right spot in your home, you’ll be harvesting fresh, nutrient-packed lettuce microgreens in no time.
Step-by-Step Guide

Starting your lettuce microgreens journey at home begins with choosing and preparing the right trays and growing medium. Look for shallow trays about 1.5 to 2 inches deep, with drainage holes to prevent waterlogging. For the growing medium, you can opt for quality seed-starting soil or a soilless option like coconut coir, both easily found at garden centers.
If you use soil, make sure it is fine-textured and sterile to reduce the risk of disease. Spread a thin, even layer (around an inch) in the tray and gently level it. If using coconut coir, pre-moisten it until it feels like a wrung-out sponge before spreading.
Next, sprinkle lettuce seeds evenly over the surface; aim for dense coverage without overlap. Use roughly a teaspoon of seed per 10×20-inch tray, since microgreens don’t need much spacing. Gently press the seeds into the medium with a piece of cardboard or your hand, but don’t bury them—they need light contact.
Once sown, mist seeds thoroughly with a spray bottle, then cover the tray with another tray or a damp paper towel. This creates a humid, dark environment for germination, typically lasting two to three days.
After sprouts begin to appear, remove the cover and move trays into indirect sunlight or under grow lights. Lettuce microgreens thrive in temperatures of 65–75°F and moderate humidity, so avoid drafty windows or excessively humid spaces.
Water once or twice a day with a spray bottle, targeting the roots and avoiding soggy conditions. A good tip is to water from the bottom using a second tray to minimize mold risk. Check daily for signs of mold (fuzzy white patches) and improve airflow with a fan or by slightly propping the cover if it appears. Good ventilation also keeps leaves dry and healthy.
With these simple steps, you’ll have crisp, flavorful lettuce microgreens ready to harvest in 8–12 days—perfect for sandwiches, salads, and snacks.
Harvesting Lettuce Microgreens

Knowing exactly when to harvest your lettuce microgreens ensures the best flavor, nutrition, and yield. Look for the appearance of their first set of “true leaves” — the tiny leaves that emerge after the initial round ones, usually 10-14 days after sowing. These true leaves indicate your microgreens are mature and ready for picking. Waiting too long can result in tougher stems and bitter flavors.
To harvest, grab a pair of clean, sharp scissors or a dedicated microgreen knife, and sterilize it with rubbing alcohol to prevent bacteria transfer. Hold a small bunch of microgreens gently between your fingers and snip just above the soil line. Be careful not to pull or tug, as this can disturb neighboring seedlings.
Harvest only what you need, or cut batches over a few days to allow some seedlings to continue growing. Although most lettuce microgreens won’t regrow fully, minimizing disturbance helps maintain a clean tray and prevents mold or rot. Always harvest onto a clean, dry surface. Use food-safe gloves or wash your hands thoroughly before handling, and avoid harvesting if the greens are wet to reduce contamination risk.
Immediately rinse the harvested microgreens in cool, filtered water to remove any residual soil, then dry them thoroughly with a salad spinner or by gently patting with paper towels—wet greens spoil quickly. By focusing on timing, gentle technique, and food safety, you can enjoy crisp, vibrant lettuce microgreens in your salads, sandwiches, and smoothies every time.
Storing and Using Your Lettuce Microgreens
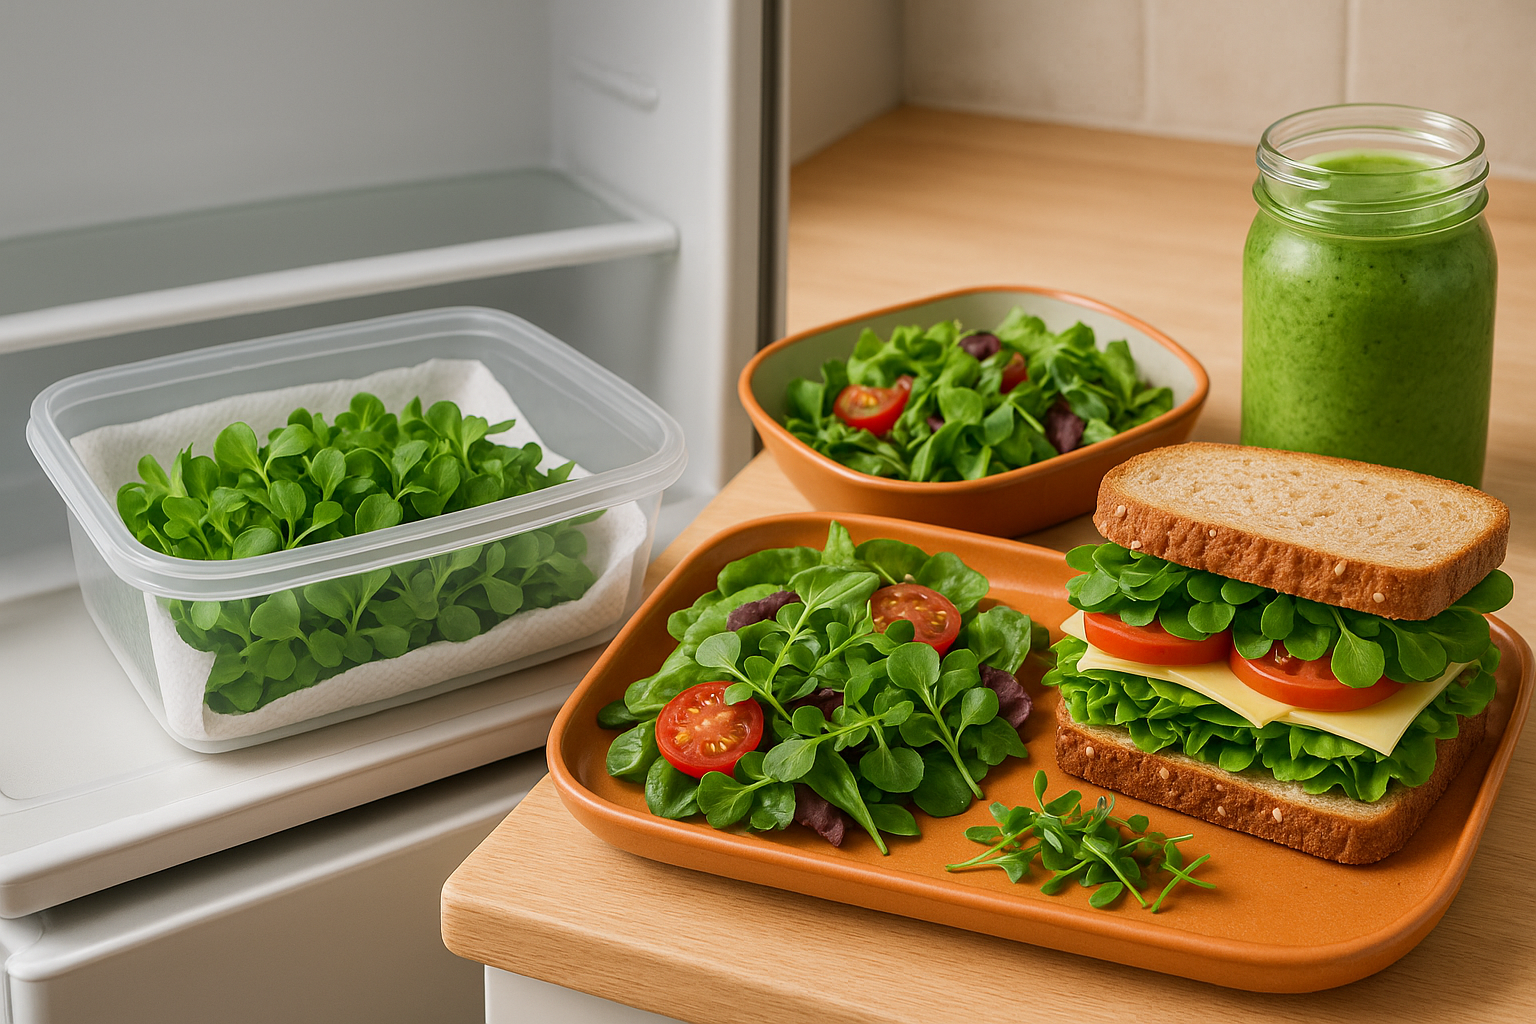
To keep your lettuce microgreens fresh after harvesting, store them in a clean, airtight container lined with a dry paper towel to absorb any excess moisture. Place the container in the refrigerator’s crisper drawer. Ideally, microgreens should be eaten within five days for the best taste and texture.
Before using, gently rinse the leaves with cold water to remove any soil or residue. Use a salad spinner or pat them dry with a paper towel to prevent sogginess.
Lettuce microgreens are incredibly versatile in the kitchen. You can:
- Sprinkle them over salads for a nutrient boost.
- Layer them in sandwiches and wraps for an extra burst of flavor and crunch.
- Upgrade your breakfast by tossing a handful on top of eggs, avocado toast, or omelets.
- Blend them into smoothies for a subtle leafy taste that won’t overpower fruit.
- Use them as attractive garnishes for soups, pastas, or homemade pizzas, instantly elevating a simple dish.
Always handle microgreens gently to avoid bruising their delicate leaves, and avoid seasoning or dressing them until just before serving to preserve their crispness.
By following these simple storage, cleaning, and handling tips, you’ll maximize the shelf life and culinary appeal of your lettuce microgreens, making them an easy, delicious addition to everyday meals.
Troubleshooting and Tips for Success
Growing microgreens indoors can be incredibly rewarding, but it’s normal to encounter a few bumps along the way. Mold is one of the most common issues—usually caused by overwatering or poor air circulation. To prevent it, use a spray bottle to keep the soil damp but not soggy, and make sure your trays have proper drainage. Keeping a small fan nearby for a few hours each day can help too.
Poor germination often comes down to old or low-quality seeds, or planting them too deep. Stick to reputable seed suppliers, and gently sprinkle seeds onto the soil’s surface without burying them.
Legginess—when seedlings grow tall and spindly—is usually due to insufficient light. Place trays in a bright spot or under a grow light for at least 12-16 hours daily to ensure thick, healthy growth.
Maximizing Yields in Limited Spaces
Maximizing yields is all about optimizing your setup:
- Stack multiple trays using shelving units.
- Choose compact varieties like radish and arugula.
Keep a simple journal, noting which seeds and conditions work best for you, to fine-tune your process over time.
Don’t be afraid to experiment with different seed mixes—mustard, basil, and sunflower microgreens each bring their own flavors and nutrients. Mix seeds for unique harvests or rotate crops to keep mealtimes interesting.
Expanding Your Indoor Garden
As you gain confidence, consider expanding beyond a windowsill by using vertical shelves, old bookshelves, or even kitchen racks to create a thriving indoor garden. With a bit of tinkering and creativity, you can enjoy fresh, nutrient-packed greens all year, tailoring your indoor farm to your taste and space.
Remember, every grow is a learning experience—embrace the trial and error, and soon you’ll find your perfect formula.
Optional
Many beginners wonder if they can reuse soil for multiple microgreen crops. While it’s possible, it’s best to compost and refresh your growing medium to avoid mold and depleted nutrients.
Another common question is how many seeds you need. As a rule of thumb, densely scatter seeds so they almost cover your chosen tray in a single layer, but avoid overlapping to reduce the risk of rot.
To learn more, check out resources like Johnny’s Selected Seeds and True Leaf Market, both of which offer starter guides and varietal advice. Online communities such as the Microgreens Group on Facebook and the r/microgreens Reddit forum are also great spaces for troubleshooting and connecting with fellow growers. These resources offer a wealth of tips, from lighting advice to pest control, whether you’re just starting or looking to increase your yield.