Introduction to Lemon Balm and Its Appeal
Growing lemon balm from cuttings is one of the easiest and most rewarding ways to cultivate this beloved herb right in your garden or on your kitchen windowsill. Known for its fresh, citrusy scent and gentle flavor, lemon balm (Melissa officinalis) is a favorite among home gardeners and herbalists alike.
Whether you’re brewing a calming tea, adding zest to summer salads, or simply enjoying its lush green foliage as a decorative plant, lemon balm offers many benefits for both culinary and wellness uses. Its natural ability to attract pollinators makes it a valuable addition to herb gardens, while its potential to deter unwanted pests like mosquitoes adds yet another practical advantage.
For many gardeners, expanding their patch of lemon balm is an enticing prospect—after all, once you experience its fragrant leaves and versatile qualities, you’ll want more plants to harvest and share. Propagating lemon balm from cuttings is a fast, simple, and highly effective method—often even easier than starting from seed. If you’re new to gardening, this approach removes much of the guesswork and waiting, delivering healthy plants in just a few weeks.
In this post, we’ll guide you through the step-by-step process so you can quickly multiply your supply of this delightful herb with minimal fuss and maximum success.
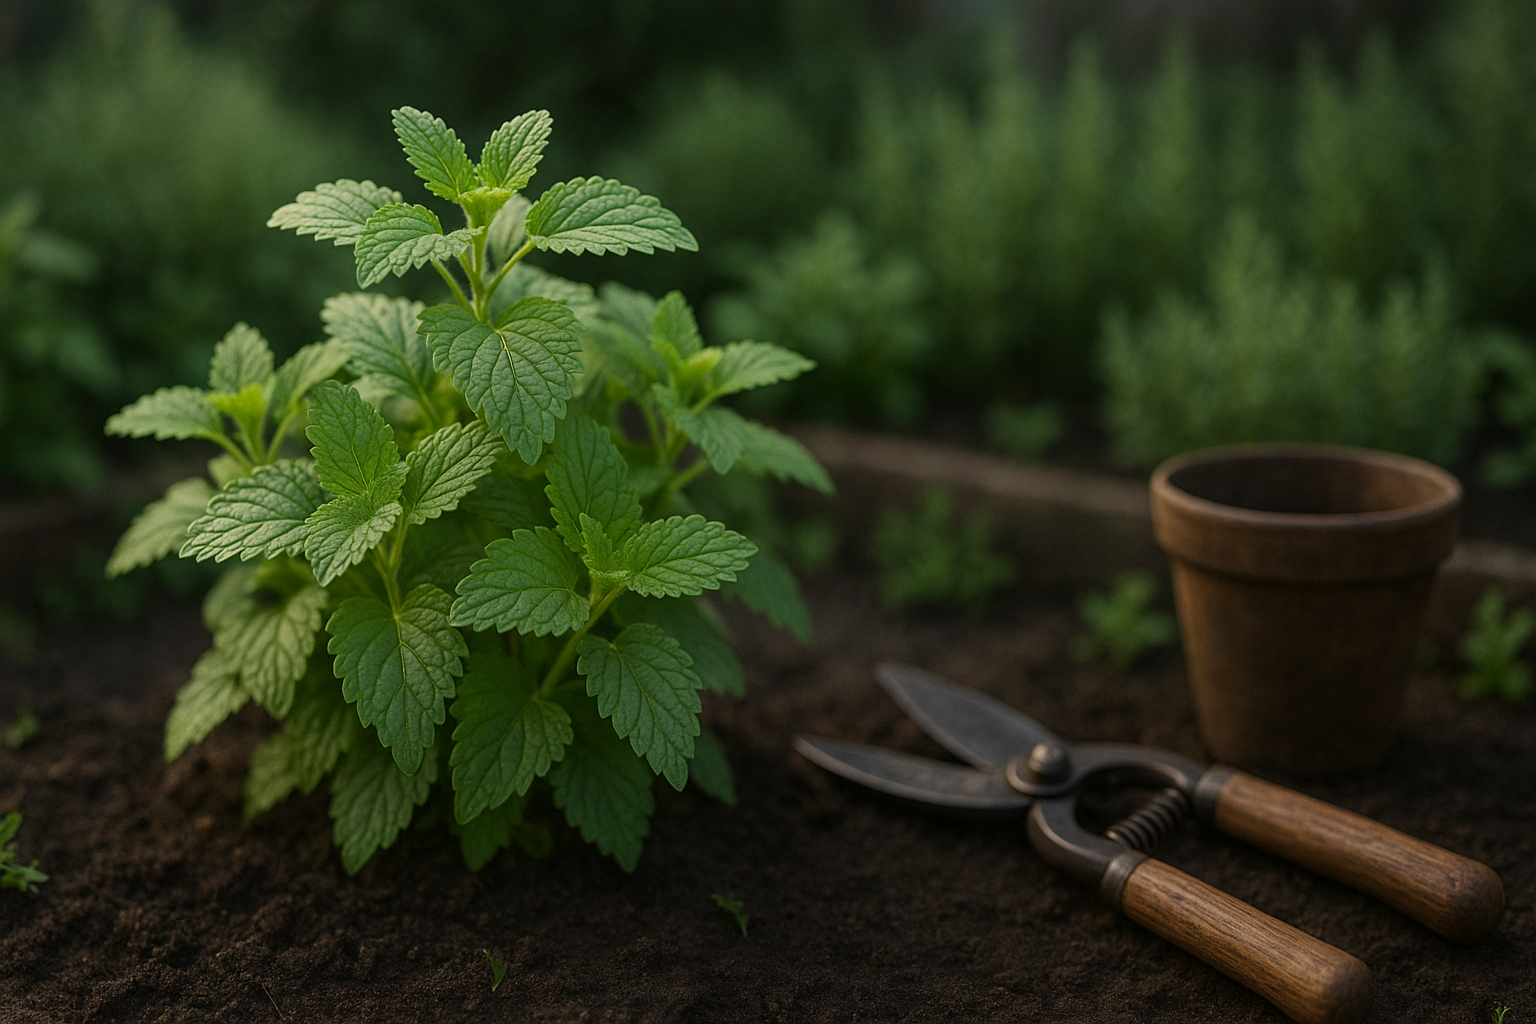
Selecting and Preparing Healthy Lemon Balm Cuttings
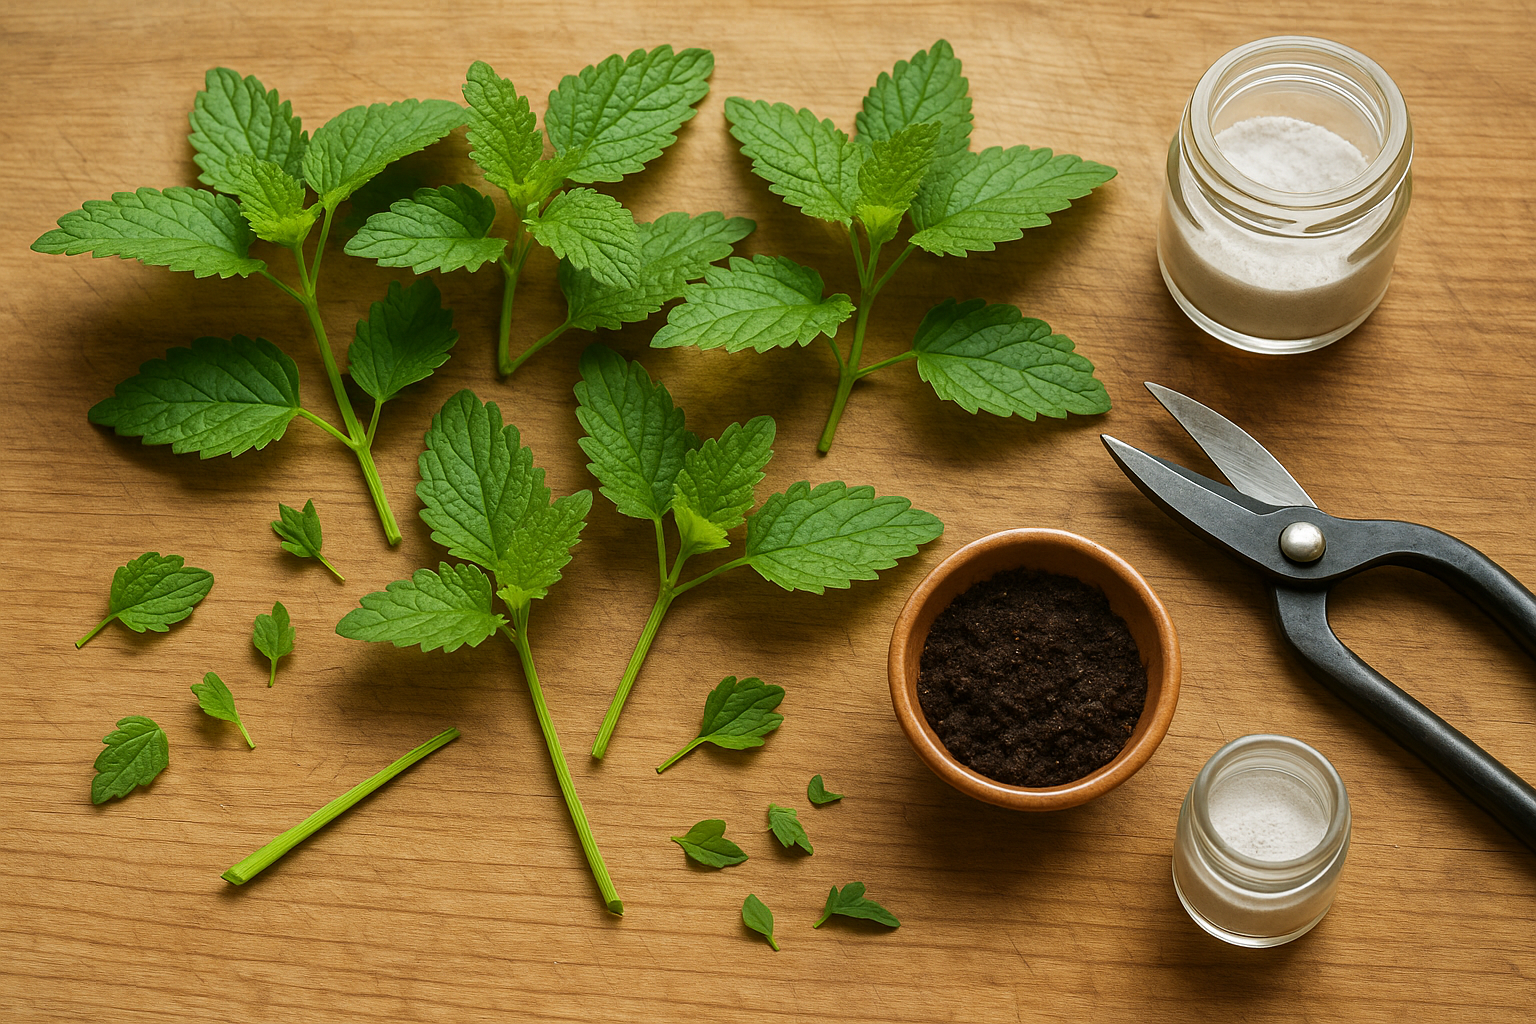
When selecting lemon balm cuttings, look for healthy, vibrant green stems free from signs of disease or insect damage. Make sure the stems are not flowering, as flowering can sap the plant’s energy and reduce your chances of successful rooting. Aim for stems about 4 to 6 inches long—shorter cuttings may not root vigorously, while longer ones can struggle to retain moisture.
Use sharp, clean pruning shears or scissors to take your cuttings, ensuring a clean cut that helps prevent infection and promotes faster healing. Always sterilize your tools with rubbing alcohol before and after each use to minimize the risk of disease transfer between plants.
After taking your cuttings, remove the leaves from the lower two-thirds of each stem so that the leafless portion will sit below the soil or water line. This reduces excess moisture loss and keeps leaves from rotting in contact with the growing medium. Trim the bottom of each stem at a 45-degree angle to increase the rooting surface area.
For an extra boost, dip the cut ends in rooting hormone powder before planting, though lemon balm usually roots easily without it.
If you don’t already have a lemon balm plant, try sourcing healthy specimens from local nurseries, farmers’ markets, or even ask a gardening neighbor for a small cutting. Just make sure the source plant looks vigorous and disease-free for the best results.
Rooting Lemon Balm Cuttings in Water
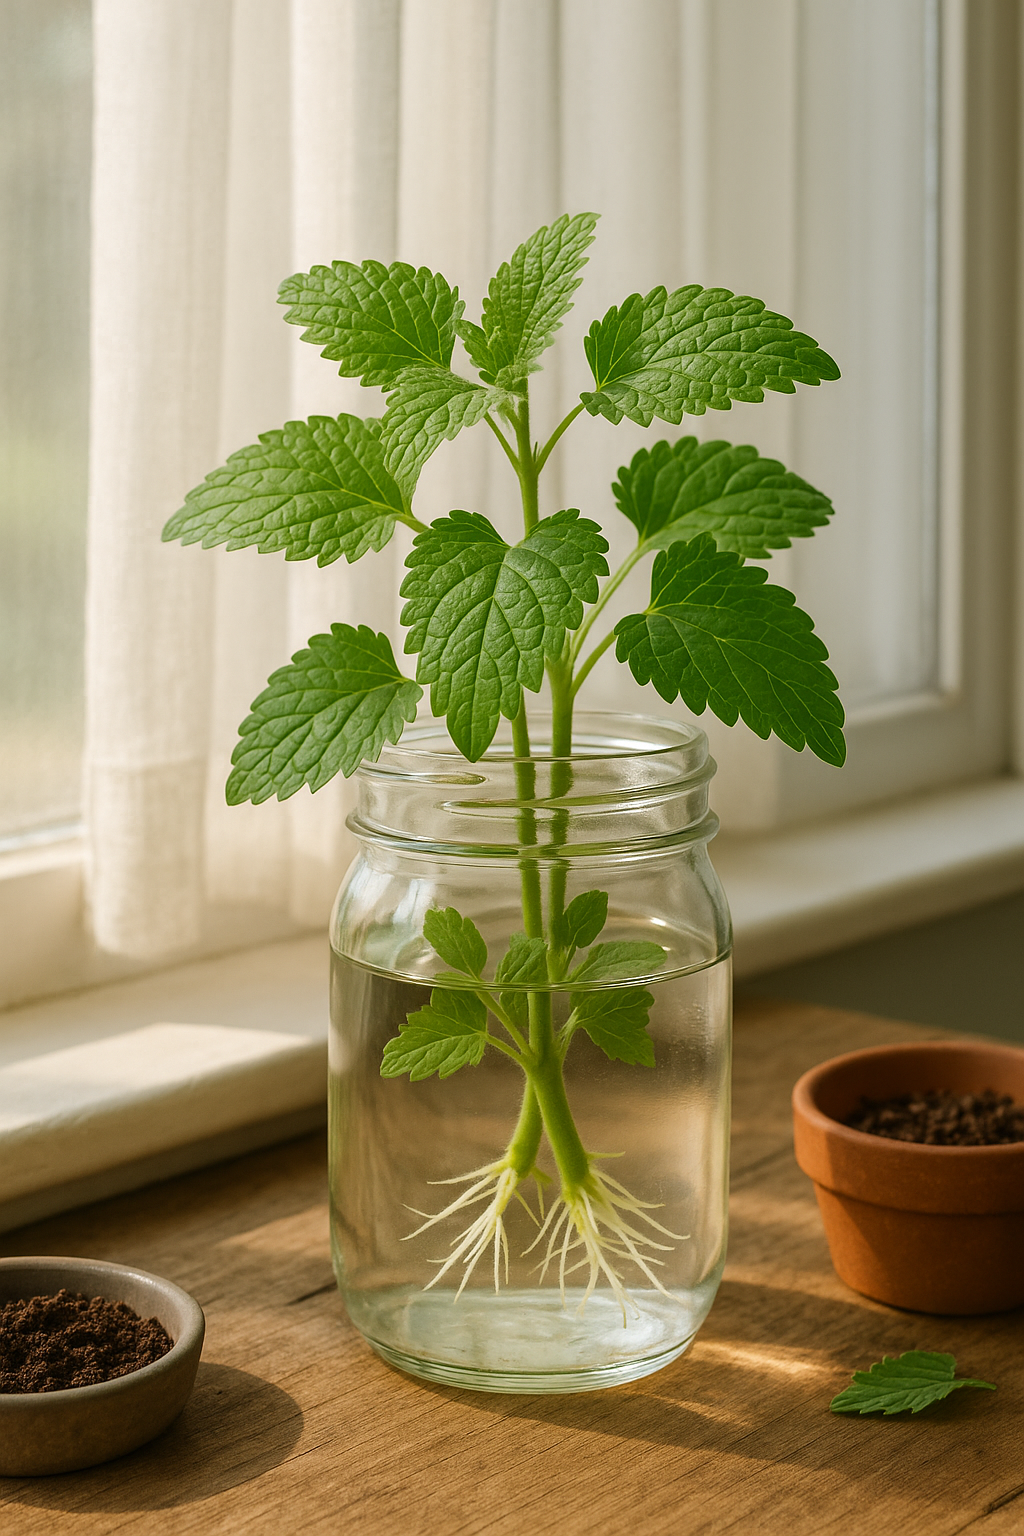
Rooting lemon balm cuttings in water is an easy method ideal for beginner gardeners or anyone wanting to multiply their plants. Start by snipping a healthy 4–6 inch non-flowering stem just below a node, where the leaves meet the stem. Remove all but the top few leaves to reduce moisture loss.
Place the cutting in a clear glass or jar filled with enough room-temperature tap water to cover the bottom two inches of the stem—be sure to keep the leaves above the waterline to prevent rot. Set your container in a spot with bright, indirect sunlight, such as a north- or east-facing windowsill; direct sun can stress the cuttings and promote algae growth.
Aim to maintain a mild room temperature around 65–75°F (18–24°C). You can also place a plastic bag gently over the container to increase humidity without sealing it completely, which helps prevent fungal issues.
Change the water every three to four days, rinsing the container each time to keep bacteria at bay. Within one to two weeks, you should see white roots emerging from the nodes submerged in water. Healthy roots will be white and slender—avoid using any cuttings with brown or mushy roots, as this indicates rot.
Once the roots are about 1–2 inches long, your lemon balm cutting is ready to be transplanted into soil. Keep your new plant out of strong, direct sunlight for the first few days after potting to help it adjust and reduce transplant shock.
Rooting Lemon Balm Cuttings in Soil
Rooting lemon balm cuttings directly in soil is a practical and surprisingly simple method for propagating this fragrant herb, as long as you follow a few important steps. Start by selecting a lightweight, well-draining potting mix—look for one that contains perlite or sand to prevent waterlogging the cut ends.
Choose a small pot (4–6 inches wide) with drainage holes to avoid excess moisture, since lemon balm’s delicate roots are prone to rot if left in soggy conditions. Prepare your cuttings by snipping healthy, non-flowering stems about 4–6 inches long, and remove the lower leaves so you can plant the bare stem.
Stick each cutting into the soil about 2 inches deep, spacing them an inch or two apart if you’re using a larger container to ensure ample airflow. Gently firm the soil around the stems, then water thoroughly to settle everything in place.
To keep soil moisture optimal—not too wet, not too dry—cover the pot with a clear plastic bag or dome, but be sure to vent it daily to prevent mold buildup and allow fresh air in. Check the soil every day; it should feel damp but never soaked.
This method has some advantages over water rooting: the roots that form in soil are often sturdier and better adapted for transplanting into your garden or larger pots. However, soil rooting can take a bit longer and requires careful moisture management to avoid rot or fungal issues. In contrast, water rooting lets you visually monitor root growth but can sometimes yield weaker roots and a trickier transition to soil.
Whichever method you choose, patience and attentive care will reward you with thriving new lemon balm plants.
Transplanting and Caring for Young Lemon Balm Plants
Transplanting young lemon balm plants is best done on a mild, overcast day in spring, after the risk of frost has passed and your rooted cuttings are at least 3–4 inches tall with sturdy stems. Gently unpot the cuttings and space them about 18 inches apart in a well-draining garden bed, or use a pot at least 8–10 inches deep filled with rich, loose soil.
Lemon balm thrives in full sun but appreciates partial shade in very hot climates, so aim for about six hours of sunlight daily. Water new transplants thoroughly after planting and keep the soil consistently moist (but never soggy) for the first two weeks as roots establish. Check daily—especially in pots, since they dry out faster. Once established, water when the top inch of soil feels dry.
Fertilize lightly every four to six weeks with a balanced, diluted organic fertilizer during the growing season—too much fertilizer can reduce flavor. Watch for pests like aphids and spider mites; rinse them off with a strong spray of water or use insecticidal soap if necessary.
Common issues with new transplants include wilting, leaf yellowing, or rot, often caused by transplant shock or overwatering. To minimize shock, transplant in the evening or on cloudy days, shield new plants from intense midday sun for a few days, and avoid disturbing the roots. If leaves yellow or plants wilt, check the roots for rot, reduce watering, and ensure pots or beds drain freely.
With a bit of attention, your lemon balm will quickly rebound and begin bushy, fragrant growth.
Tips for Success and Common Mistakes to Avoid
Growing lemon balm from cuttings can be straightforward if you follow a few best practices. Always start with healthy, disease-free stock plants—leaves should look vibrant and free from yellowing or spots, as unhealthy mother plants often pass on problems to new cuttings.
Use clean, sharp scissors to snip 4-6 inch stems, and remove the lower leaves so you have several bare nodes for rooting. Give your cuttings plenty of bright, indirect sunlight—too little light can stall growth, while strong, direct afternoon rays may scorch tender leaves.
Keep the growing medium (like moist seed-starting mix or even a jar of water) damp but not soggy; overwatering is a frequent mistake that causes rot. Mist them occasionally, but never let the base sit in waterlogged conditions.
If your cuttings fail to root after 2-3 weeks, re-examine your process:
- Ensure you’re not using stems that are too woody or too young.
- Check that temperatures stay in the warm 65-75°F range.
- Consider dipping the cut end in rooting hormone powder for a boost.
If you see mold or mushiness, discard those cuttings, sterilize your tools, and try again with fresh segments.
Remember to be patient—root development may take a bit longer if conditions are cool or humidity is low. With these tips and some careful observation, your lemon balm cuttings will be well on their way to thriving, fragrant new plants.
Enjoying and Using Your Homegrown Lemon Balm
Homegrown lemon balm is a delightfully versatile herb that’s easy to enjoy in countless ways. Its bright, citrusy flavor makes it perfect for adding fresh leaves to fruit salads, marinades, and even baked goods—try sprinkling chopped lemon balm over strawberries for a refreshing twist.
If you love herbal teas, steep a handful of fresh lemon balm leaves in hot water for a soothing and calming drink, great for evenings.
Beyond the kitchen, lemon balm has a history as a gentle remedy: add it to homemade salves for skin irritations or infuse oil for a calming balm.
Plus, planting lemon balm in your garden not only brings fragrance but also attracts vital pollinators like bees and butterflies, supporting a healthy ecosystem.
To keep your supply plentiful, harvest the upper leaves before the plant flowers, ideally in the morning when their oils are strongest. Dry bundles in a cool, dark place and store crumbled leaves in airtight containers to preserve their aroma and potency.
Feel free to experiment with propagation—lemon balm is easily multiplied by root division or stem cuttings—so you can expand your herb garden or share with friends.
Once you see how simple it is, you might soon be growing other easy favorites like mint or oregano right alongside your lemon balm patch.