
Introduction
Hydroponic chives are quickly becoming a favorite among both beginner and experienced indoor gardeners, thanks to the growing popularity of soil-free growing methods. Hydroponics, which involves nurturing plants in nutrient-rich water solutions instead of traditional soil, is proving to be a game-changer for cultivating herbs like chives.
With hydroponics, you can enjoy a continuous supply of fresh herbs year-round, regardless of outdoor weather or soil conditions. Plus, this method allows you to grow more in less space—perfect for urban apartments, small homes, or anyone with limited garden square footage. Imagine snipping fresh, aromatic chives for your meals right from your kitchen countertop, anytime throughout the year!
So, can you grow chives hydroponically? Absolutely. Not only do chives thrive in a hydroponic environment, but they often grow faster and develop more flavor compared to their soil-grown counterparts. This article will guide you through everything you need to know—from choosing the right hydroponic system and caring for your chive plants, to useful tips for maximizing your harvest.
Whether you’re looking to cut down on grocery bills, embrace a greener lifestyle, or simply enjoy indoor gardening, hydroponic chives are a rewarding place to start.
Benefits of Hydroponic Chive Growing
Hydroponic chive growing offers a range of advantages over traditional soil-based methods, making it an appealing choice for everyone from home gardeners to chefs and commercial growers. One of the standout benefits is cleanliness—since hydroponics eliminates the need for soil, there’s far less mess and virtually no risk of soil-borne diseases or pests, which is especially helpful for indoor gardens or kitchens.
Hydroponic systems also create an ideal environment for faster, more consistent growth, allowing you to harvest fresh chives weeks ahead of a traditional garden. This consistency ensures uniform, steady yields year-round, regardless of weather or season. This reliability helps commercial growers serve restaurants and markets while letting home cooks always have a fresh supply on hand.
Fewer pest problems also reduce the need for pesticides, resulting in cleaner, safer produce. Hydroponically grown chives are celebrated for their concentrated flavor and high nutritional value, as you can customize the nutrients in the growing solution for optimal plant health. Some chefs even report that hydroponic chives are more aromatic and tender than their soil-grown counterparts.
From a sustainability perspective, these systems use far less water than traditional gardens and can be set up in small spaces, making them perfect for urban dwellers looking to reduce their environmental footprint while enjoying homegrown herbs. Whether you’re after fresher taste, consistent supply, or a cleaner, greener way to garden, hydroponic chives check all the boxes.
Getting Started
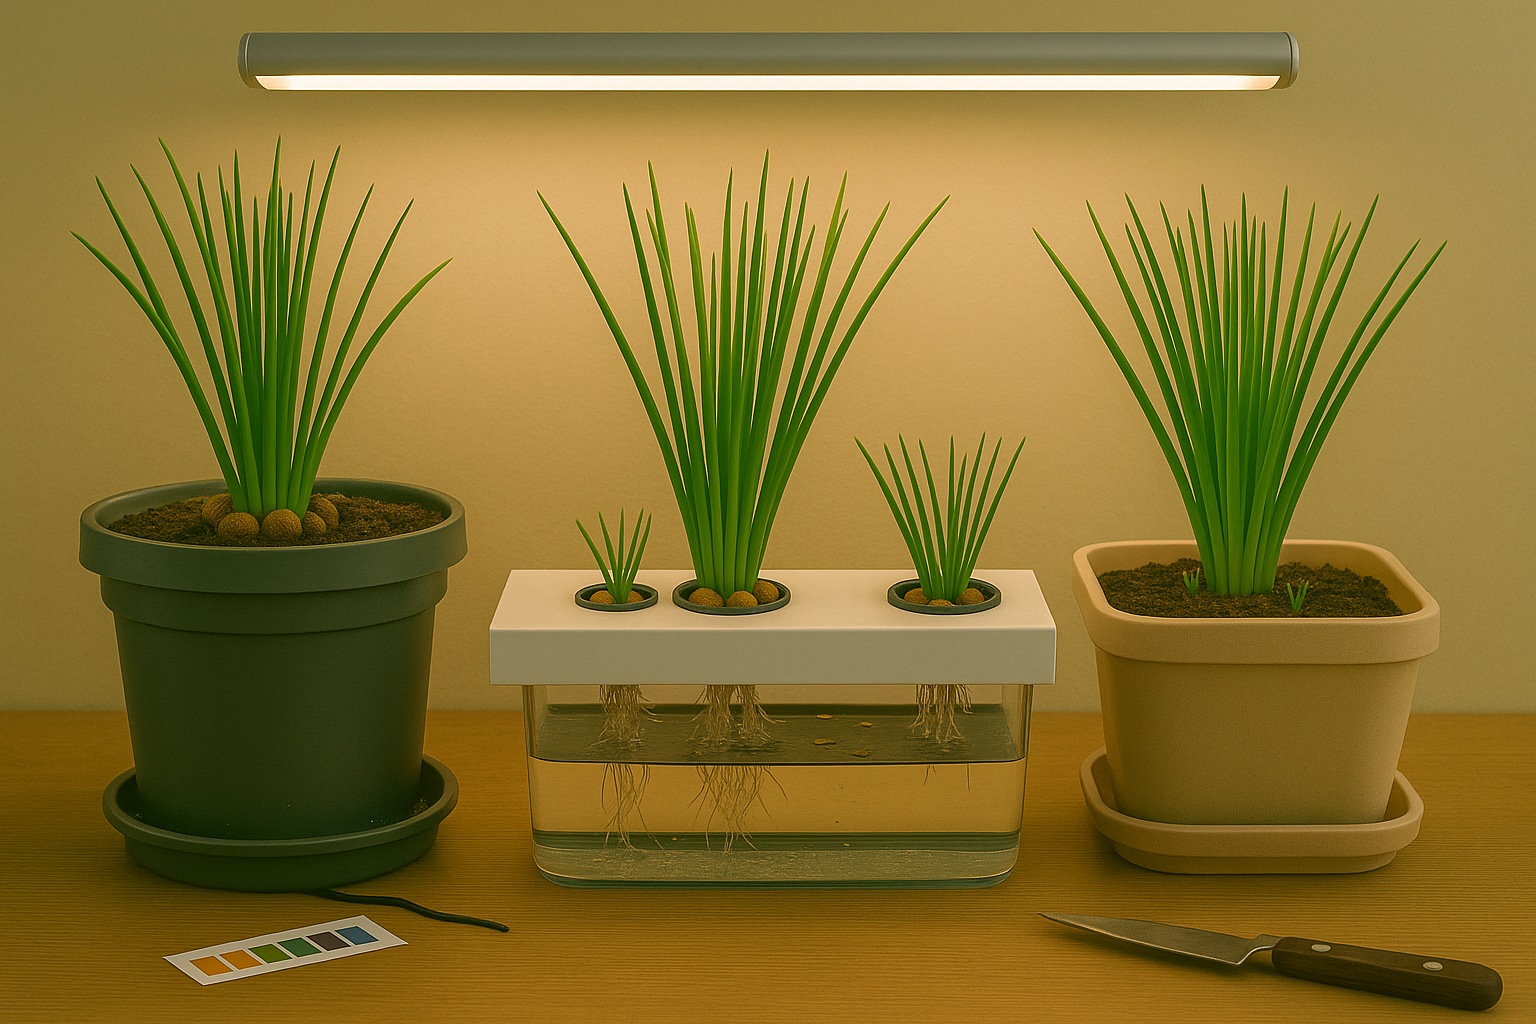
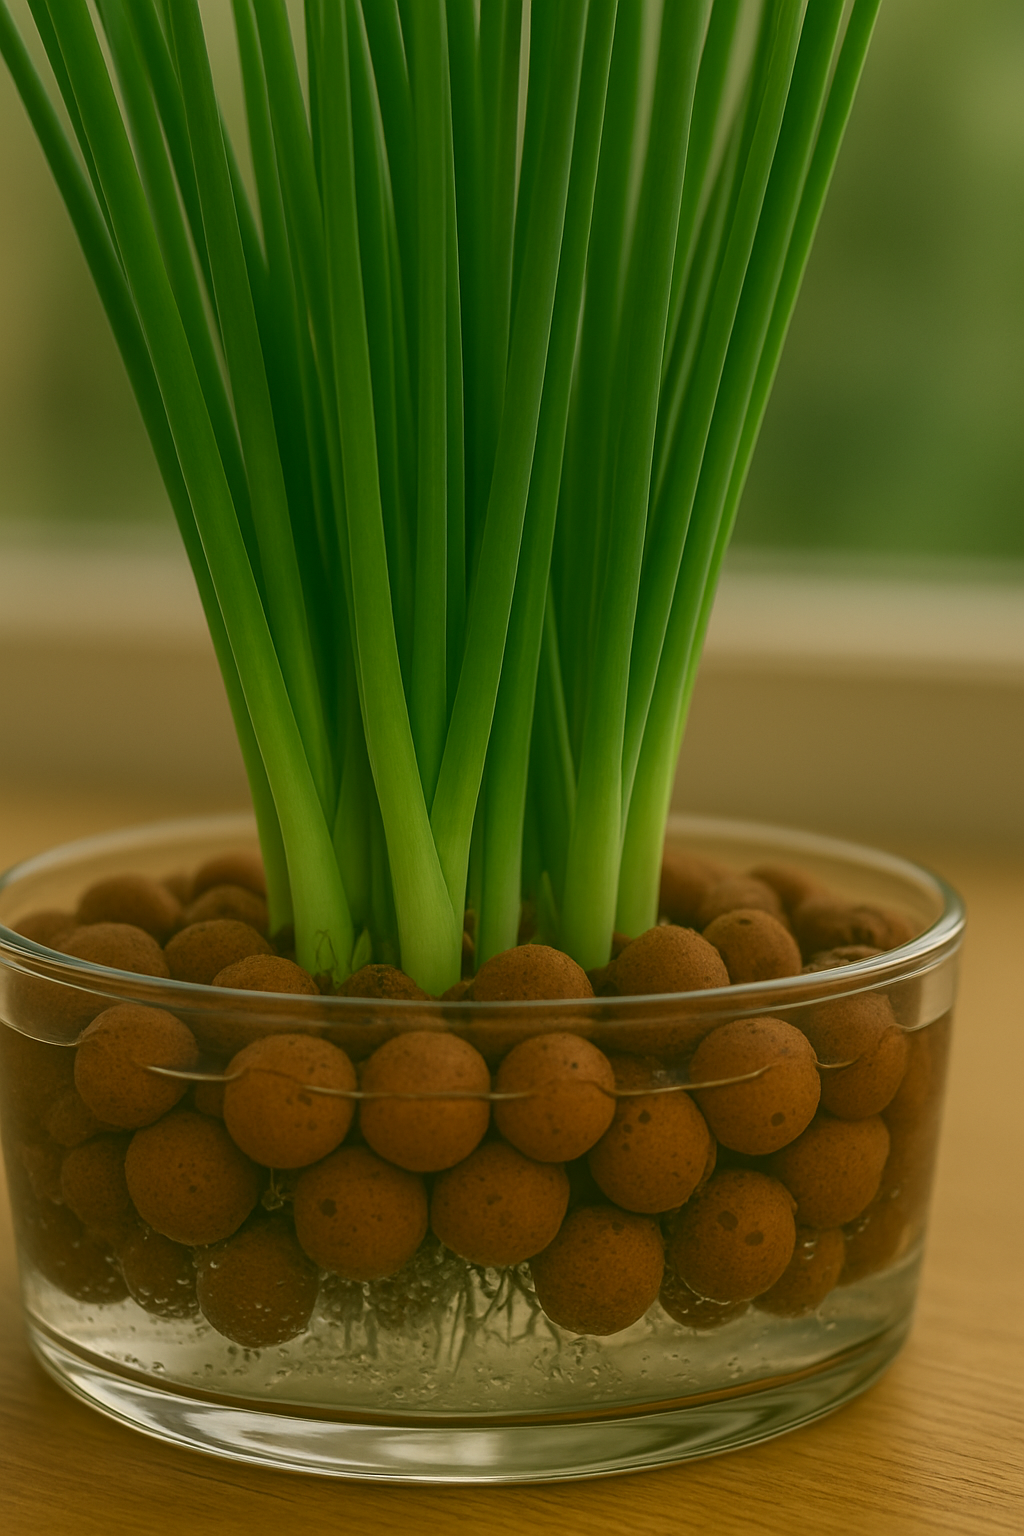
When starting your hydroponic chive garden, choosing the right system is key to growing healthy, flavorful herbs. For beginners, the Deep Water Culture (DWC) method is popular for its simplicity—plants float on a nutrient-rich reservoir with air stones providing oxygen, making it easy to manage.
The Nutrient Film Technique (NFT), where a thin film of nutrient solution flows past roots inside channels, is ideal if you want a continuous harvest. Chives regrow after cutting and thrive with steady moisture.
For low-cost, low-maintenance setups, the Kratky method is a favorite: just set up your container, fill it with nutrient solution, and let the roots do the rest—no pumps or timers needed.
No matter which method you choose, pay attention to growing conditions. Chives love 12–16 hours of bright, indirect light daily—LED grow lights work perfectly. Keep water clean, with a pH between 6.0 and 7.0, and maintain a temperature around 65–75°F (18–24°C) for steady growth.
Chives don’t need much space; even a small kitchen windowsill setup can yield fresh sprigs for cooking. When picking seeds or seedlings, look for reputable sources and choose varieties labeled “common chive” for reliable harvests. Starting from seed allows for a clean, pest-free process, but healthy seedlings can speed up your first harvest. Avoid limp or yellowing seedlings, as they might struggle in hydroponic systems.
By following these steps, you’ll set yourself up for a bountiful, stress-free chive harvest right at home.
Step-by-Step Guide to Growing Chives Hydroponically
To grow chives hydroponically, start by sowing seeds in a moist, sterile growing medium such as rockwool cubes, coconut coir, or peat pellets. Rockwool is especially popular because it retains moisture well and provides a stable base for delicate seedlings. Keep the seeds warm (around 70°F or 21°C) and under indirect light until they sprout—usually in 7 to 14 days.
Once the chive seedlings reach 2–3 inches tall and have developed a few sets of leaves, gently transplant them into your chosen hydroponic system, such as a nutrient film technique (NFT) channel or a deep water culture (DWC) bucket. At this stage, secure the roots in a container with pH-neutral clay pellets to stabilize the plants.
Maintain your nutrient solution at a pH of 6.0–6.5 and monitor electrical conductivity (EC) to ensure it stays between 1.8 and 2.2 for healthy growth. Feed your chives a balanced hydroponic nutrient mix rich in nitrogen and potassium, and change the water every two weeks to prevent salt buildup.
Ongoing maintenance involves:
- Checking for algae growth
- Adjusting lighting to provide 12–14 hours of brightness daily
- Regularly pruning the leaves to encourage bushier plants
If you notice slow growth or yellowing leaves, first test your pH and nutrient levels, as imbalances are a common culprit. Brown leaf tips may indicate a nutrient solution that’s too strong or roots drying out between waterings. Keep good airflow and avoid crowding your plants to reduce the risk of fungal problems.
With a little attention to these details, you’ll have a steady crop of fresh, flavorful chives ready to snip and enjoy all year round.
Caring for and Harvesting Your Hydroponic Chives
Caring for hydroponic chives is straightforward and rewarding, but consistency is key to a thriving, productive setup. Regularly check your water reservoir, topping up with clean, room-temperature water as needed to keep the roots hydrated. Also, ensure your nutrient solution stays within the recommended levels—chives are sensitive to nutrient deficiencies, so watch for pale or droopy leaves.
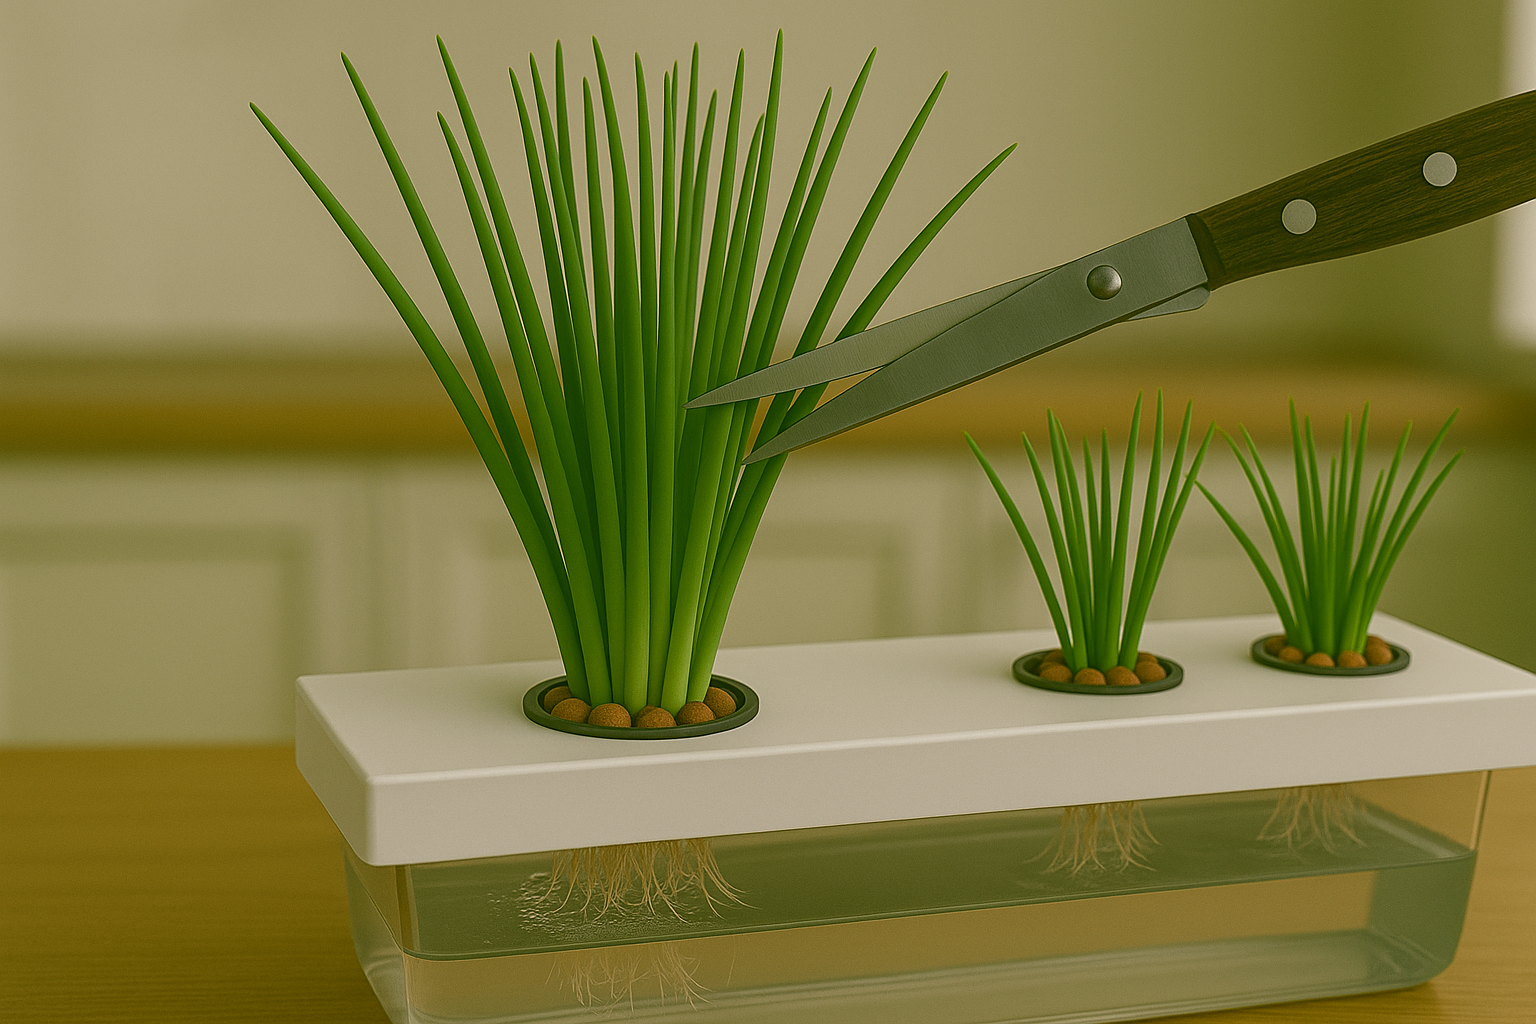
Pruning is simple: use clean scissors to trim any yellowing or damaged leaves, which helps direct the plant’s energy to healthy growth.
When it comes to harvesting, look for chive stems that reach at least six inches tall; this means they are mature and packed with flavor. To encourage continuous regrowth, always use sharp scissors to snip leaves about one inch above the base, taking no more than a third of the plant at once. Leave the inner, thinner leaves so the plant can recover quickly.
Harvest your chives every one to two weeks, depending on their growth speed, which can increase with optimal light and nutrient levels. Regular harvesting not only provides a fresh, flavorful supply for your kitchen but also stimulates new shoots and prevents the plants from becoming tough or leggy.
This routine of attentive care and strategic harvesting ensures a lush, ongoing yield and happy, healthy hydroponic chive plants.
Common Issues and How to Overcome Them
Pests, diseases, nutrient deficiencies, and overcrowding are some of the most common challenges gardeners face, but with a little know-how, they’re manageable.
To combat pests like aphids or spider mites, inspect your plants regularly and introduce natural predators such as ladybugs, or use neem oil as a safe, eco-friendly spray.
Watch for yellowing leaves or stunted growth—signs of nutrient deficiencies—and enrich your soil with organic compost or a balanced, slow-release fertilizer.
Fungus and root rot are frequent disease culprits, especially if plants remain damp; ensure good airflow and avoid watering leaves directly.
Overcrowding leads to weak, leggy plants and increased disease risk, so always follow proper spacing guidelines and thin out seedlings as needed.
Prevention is key: rotate crops, start with healthy seeds or transplants, and sanitize your tools.
Sometimes, despite best efforts, problems persist or spiral out of control; if an infestation or disease wipes out much of your crop, don’t hesitate to clear out the affected plants, dispose of the soil if necessary, and start fresh.
Learning from setbacks will help you grow a healthier garden next season.
Creative Uses for Fresh Hydroponic Chives
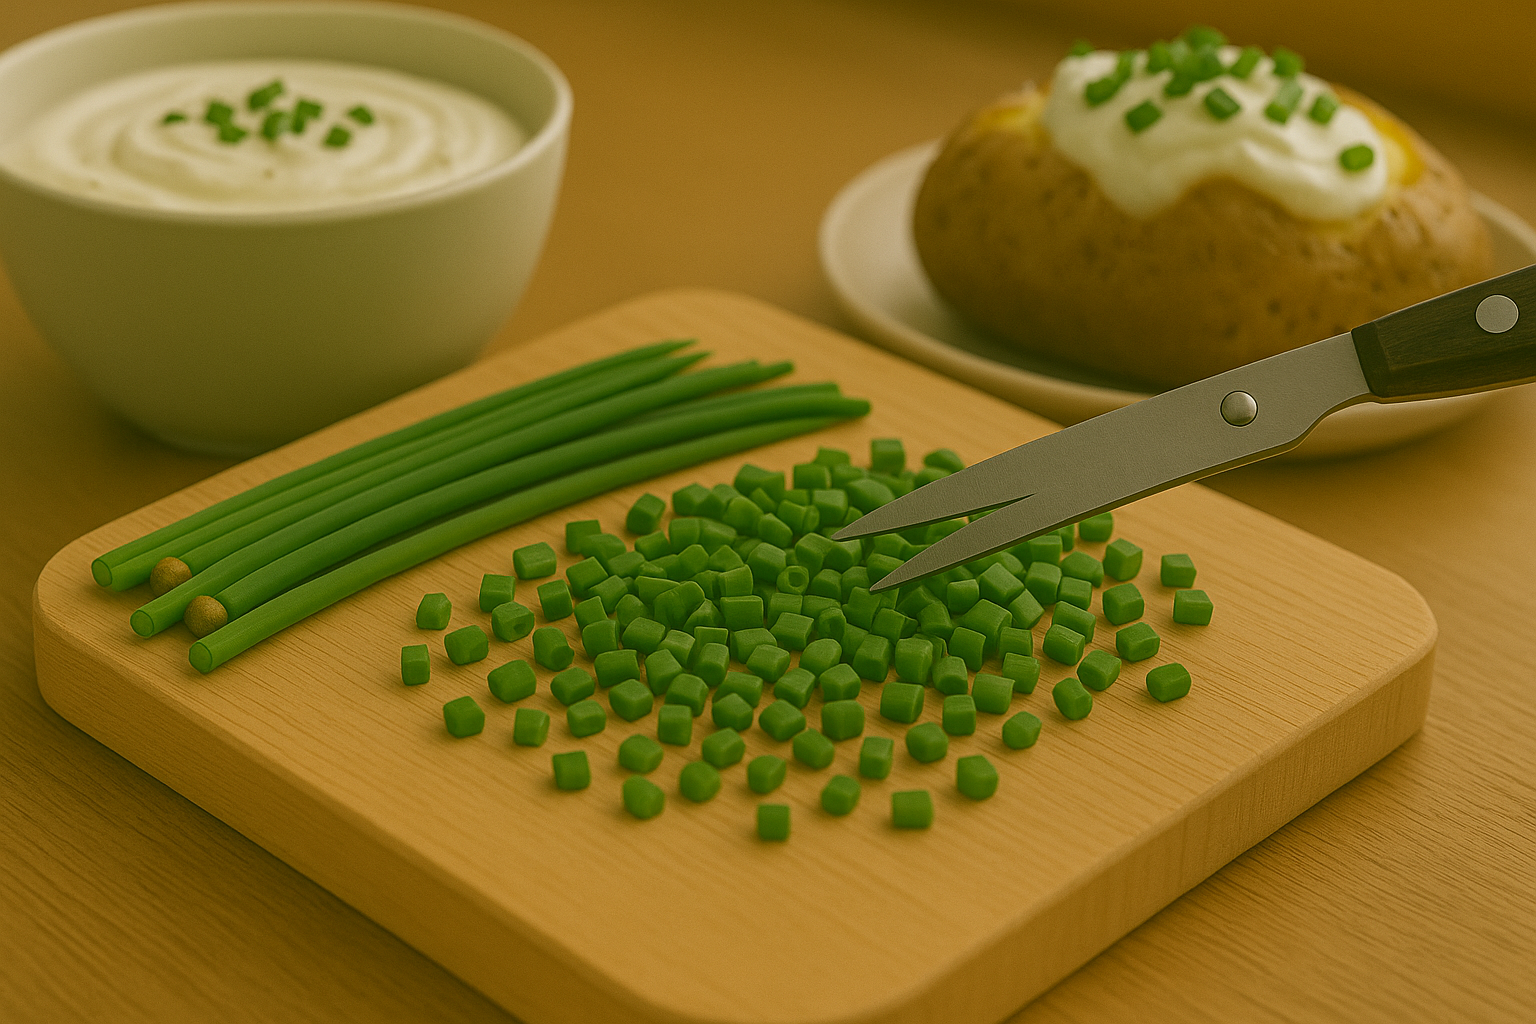
Fresh hydroponic chives are a versatile addition to any kitchen, perfect for elevating simple dishes with their mild onion flavor. Toss chopped chives into garden salads for a subtle zing, or sprinkle them over soups and stews just before serving to add vibrant color and freshness.
They also make an excellent garnish for baked potatoes, scrambled eggs, or creamy dips like ranch and sour cream blends.
To maintain their flavor, snip only what you need and store unwashed chive stalks in a sealed container or a glass of water in the fridge, loosely covering the greens with a plastic bag.
For ultimate convenience and variety, try growing chives alongside other hydroponic herbs like basil, parsley, and cilantro. This way, you’ll have a ready supply of fresh flavors right at your fingertips, making it easy to experiment with new recipes and keep meals interesting.
Conclusion
Growing chives hydroponically is a game-changer for anyone craving fresh, homegrown herbs without the mess of soil. With minimal space and effort, you’ll enjoy tasty, aromatic chives all year long—perfect for tossing into soups, salads, or omelets right from your countertop.
Beginners will find hydroponic chives both forgiving and rewarding, making them an ideal first project to try. Ready to get started? Explore guides and videos for step-by-step setups, and don’t forget to share your progress or tips with fellow growers online.
Your hydroponic journey can inspire others and lead to a kitchen brimming with flavor every season.