Introduction to Growing Bay Leaf from Seed
If you’ve ever dreamed of adding a unique, aromatic touch to your kitchen garden, learning how to grow bay leaf from seed is a rewarding skill to master. Bay leaf, known botanically as Laurus nobilis, is a classic culinary herb prized for its glossy leaves and distinctive flavor, making it a staple in soups, stews, and sauces around the world.
Herb gardening enthusiasts love bay laurel for its evergreen beauty and versatility, but starting a plant from seed isn’t always the first method that comes to mind—mainly because it demands a bit more patience than propagating from cuttings or purchasing young plants.
Growing bay leaf from seed is appealing precisely because it’s a true gardener’s challenge. Unlike many fast-sprouting herbs, bay seeds can take several weeks—sometimes even months—to germinate. This journey requires a gentle touch, careful monitoring, and above all, patience.
But don’t let that intimidate you! With the right guidance and a dash of determination, even beginners can nurture bay seeds into thriving shrubs. We’ll walk you through each step, share practical tips, and help you avoid common pitfalls, so you can enjoy the satisfaction of growing Laurus nobilis from scratch—and maybe even find calm in the slow, steady process.
Choosing and Sourcing Quality Bay Seeds
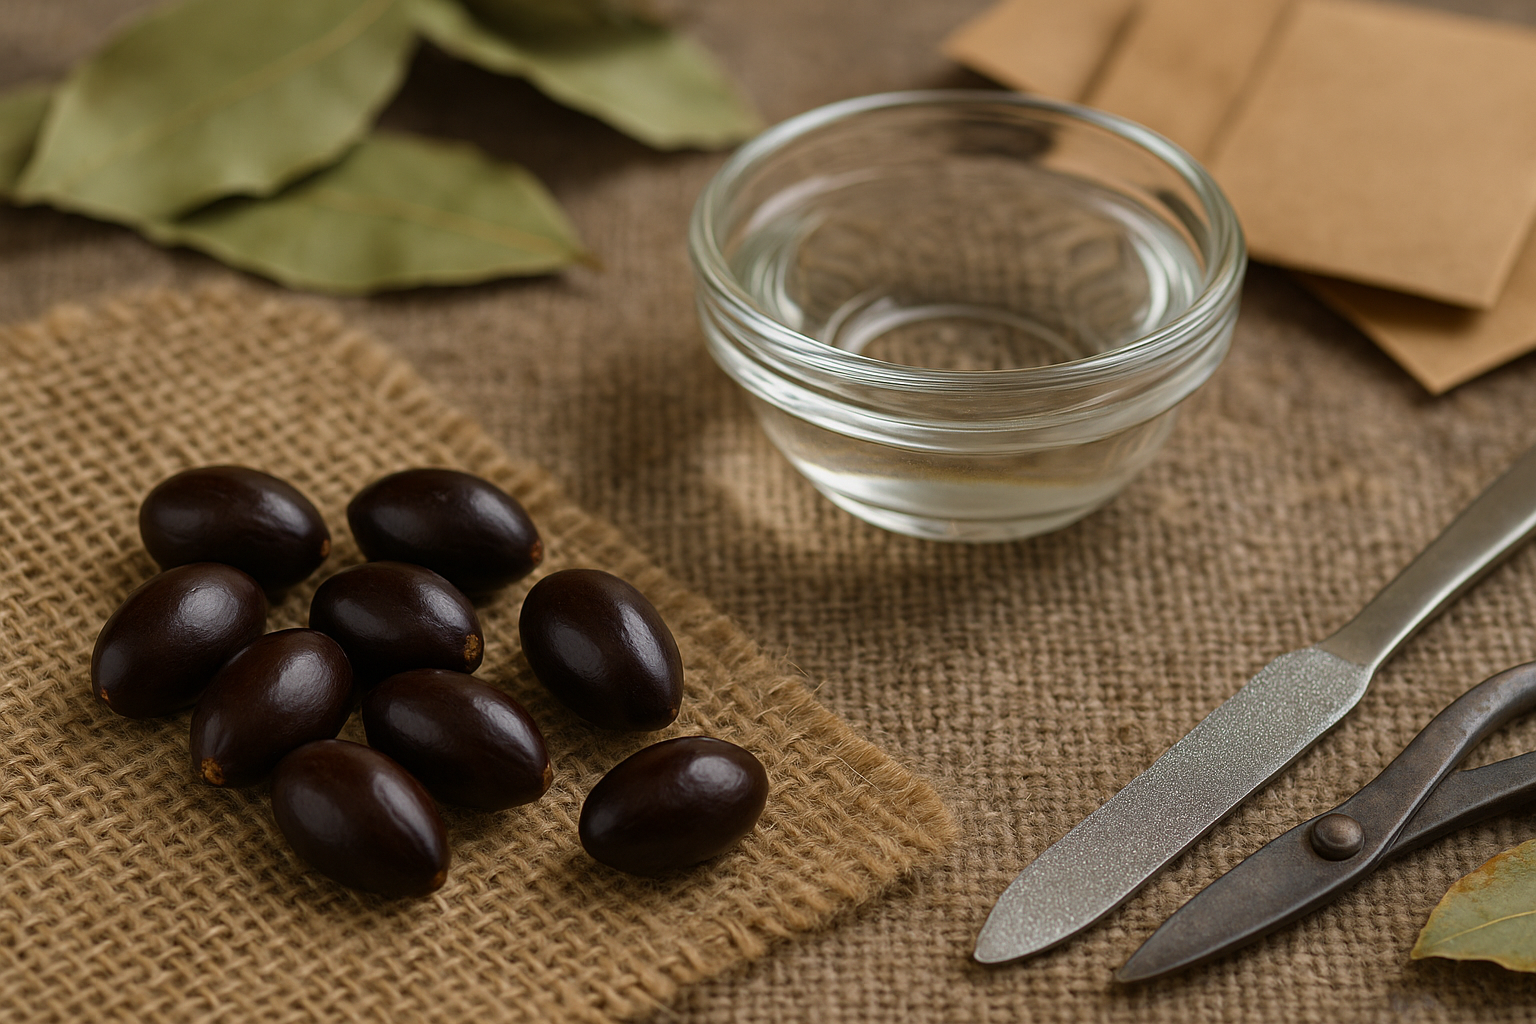
Finding quality bay seeds starts with knowing where to look—most gardeners have success at local garden centers, especially those that specialize in herbs or Mediterranean plants. If your search comes up short, reputable online seed suppliers or specialty nurseries often carry bay laurel seeds.
Always check seller reviews and ratings to avoid issues with old or poorly stored seeds. Freshness is key: bay seeds should be plump and firm, not shriveled, lightweight, or showing signs of mold. Since bay seeds have a short viability window, ask sellers about their harvest date to ensure you’re buying from the most recent batch.
Once you have your seeds, don’t skip proper preparation—bay seeds benefit from a bit of coddling before planting. Soak them in warm water for up to 48 hours to help soften the tough outer shell and speed up germination. For extra assurance, you can scarify the seeds by lightly nicking the seed coat with a file or sandpaper, making it easier for moisture to penetrate.
These small steps can make a big difference, increasing your chances of successful sprouting and giving your bay seedlings a healthy start.
Step-By-Step Guide to Planting Bay Leaf Seeds
Starting your bay leaf plants from seed can be rewarding, though it requires some patience and attention to detail. Begin by sourcing fresh, viable bay seeds (Laurus nobilis), as they quickly lose their ability to sprout. Plan your planting for early spring, when indoor temperatures are consistently above 65°F (18°C).
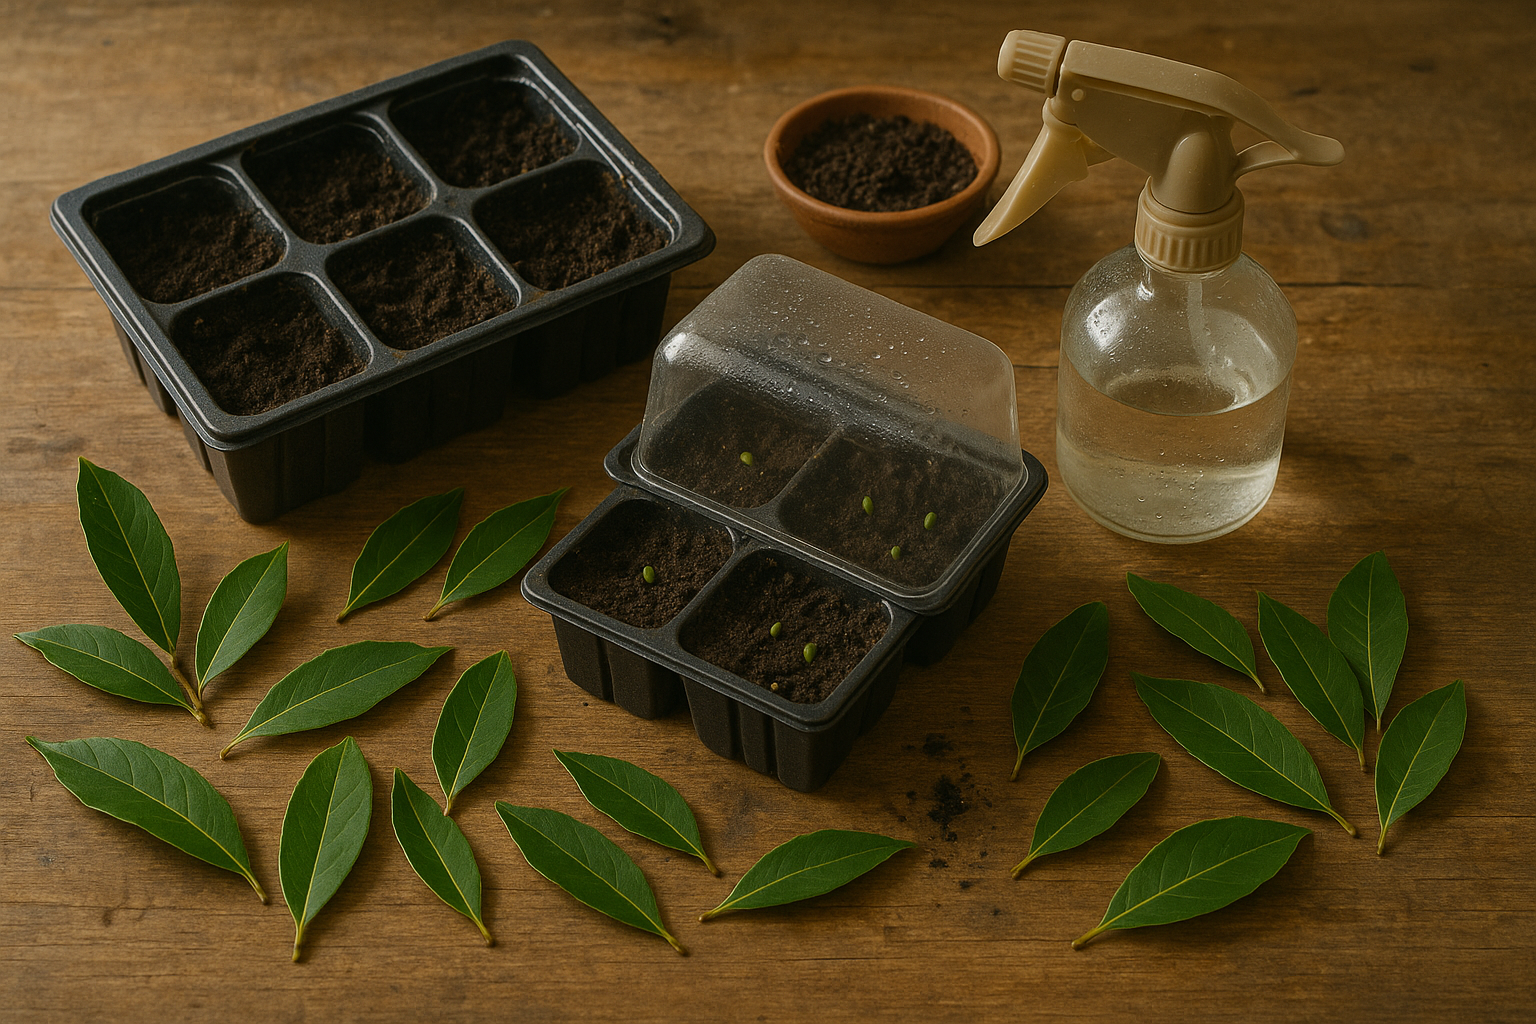
Bay seeds appreciate a light, well-draining soil mix—create your own by blending equal parts seed starting mix and perlite or coarse sand. Fill small seed trays or 3-inch pots with the mix, gently moistening but not soaking the soil.
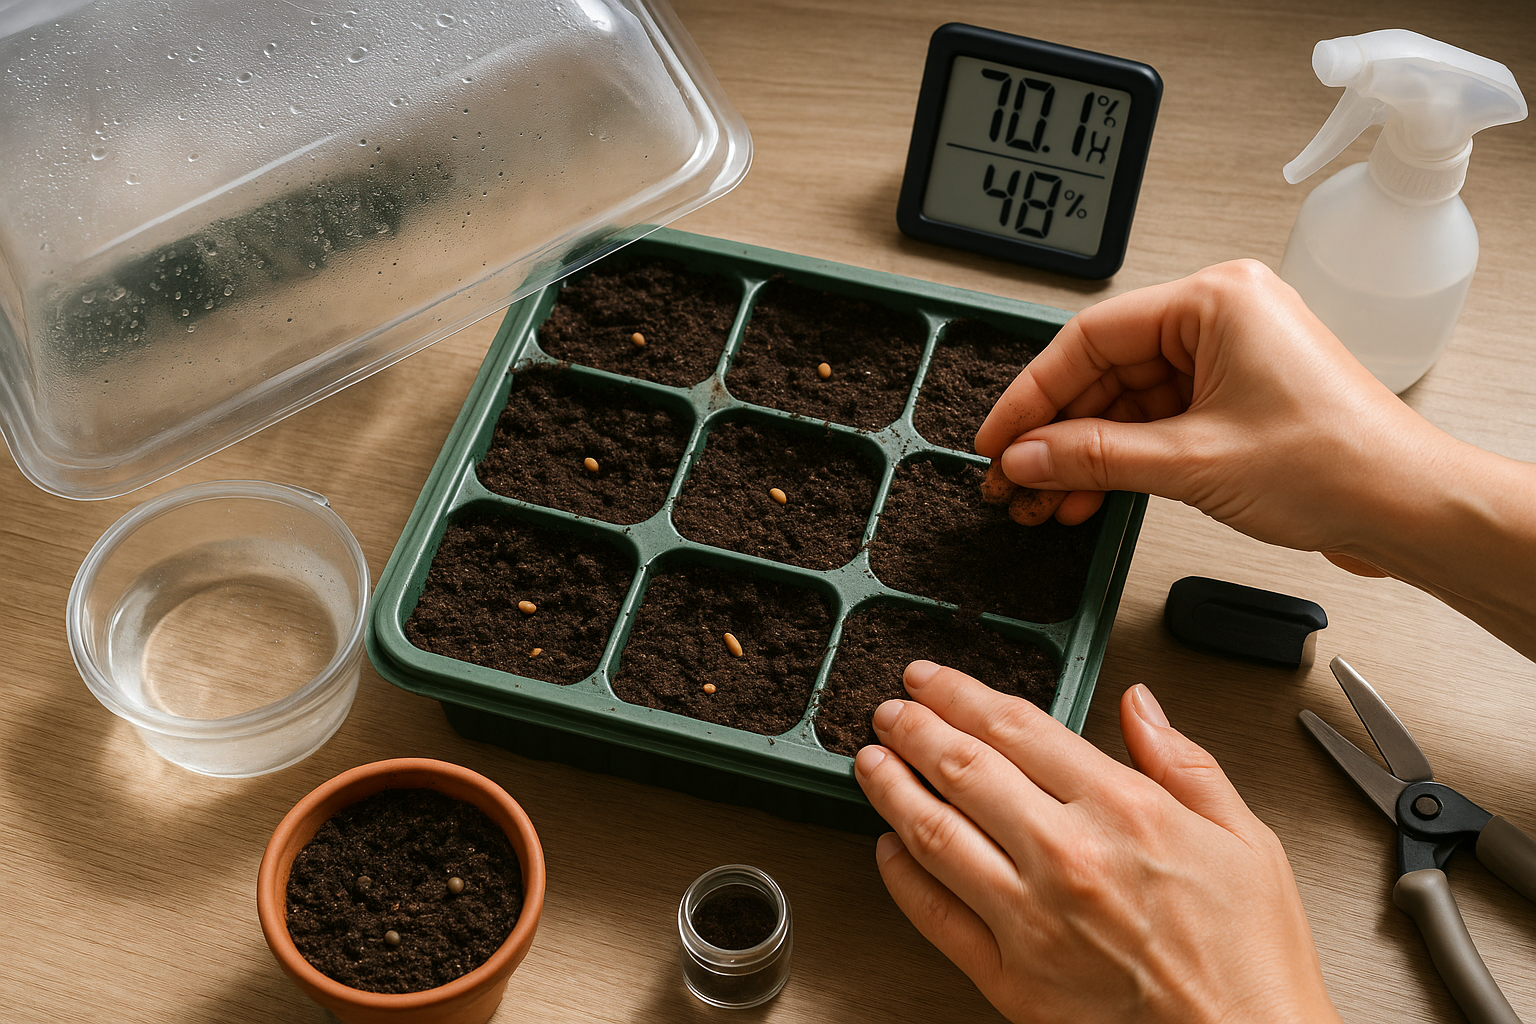
Sow seeds about ¼ inch deep using your fingertip; cover lightly with soil and press down, but avoid packing them too tightly, as bay seeds need a bit of air. Place your containers inside a clear plastic bag or cover with a humidity dome to lock in moisture; bay seeds germinate best with high humidity and temperatures between 70-75°F (21-24°C).
Place the trays in bright, indirect light—avoid direct sun, which can overheat the soil and damage seeds. Check soil moisture daily, misting with a spray bottle as needed so the surface stays slightly damp, not soggy.
Be patient—bay seeds are notoriously slow to sprout and can take anywhere from 4 to 12 weeks to germinate, sometimes even longer. Remove the plastic cover for brief periods each day to let in fresh air and prevent mold. If you notice condensation building up, crack the cover or plastic to improve airflow.
When seedlings appear, move them to more direct light and gradually acclimate them to normal room humidity.
Remember, successful bay seed germination requires consistency—careful attention to moisture, warmth, and patience will eventually reward you with your own aromatic bay plants.
Seedling Care and Transplanting
Caring for young seedlings is crucial for growing healthy, productive plants. As soon as your seeds sprout, move them to a spot with plenty of bright, indirect sunlight—or place them under a grow light for 12 to 16 hours a day to prevent them from becoming leggy and weak.
Seedlings are vulnerable to overwatering, so water only when the top of the soil feels dry, and ensure trays have drainage holes to prevent soggy roots. Use a spray bottle or a gentle watering can to avoid disturbing fragile stems.
A common problem at this stage is damping off, a fungal disease that causes seedlings to suddenly collapse. To prevent it, keep air flowing around the seedlings with a small fan and avoid overcrowding by thinning them.
Once your seedlings develop their first set of “true” leaves—not just the seed leaves, but the ones that follow—it’s time to thin them out by snipping weaker seedlings at the soil line with scissors, leaving the strongest ones about 2 inches apart.
If you’re transplanting to larger pots or a garden bed, handle the seedlings by their leaves (not stems) and transplant on a cloudy day or in the evening to reduce stress.
Before moving seedlings outdoors permanently, introduce them gradually through a process called hardening off: set them outside in a sheltered spot for a few hours a day, increasing the time and sun exposure over a week. This step toughens them up for unpredictable outdoor conditions and helps avoid transplant shock, giving your young plants the best possible start.
Ongoing Bay Leaf Plant Maintenance
Caring for a young bay leaf plant doesn’t have to be complicated, but consistency is key. Keep your plant healthy by watering whenever the top inch of soil feels dry—avoid soggy soil, as bay plants dislike sitting in water.
Every spring, feed your plant with a balanced, slow-release fertilizer to encourage healthy, fragrant leaves. Check the leaves often for pests like scale or aphids; a quick rinse with soapy water or neem oil is usually enough to keep infestations at bay.
Pruning is essential for shaping and promoting bushy growth. Snip away spindly or crossing stems in late winter or early spring, and trim lightly throughout the growing season.
Watch for signs your plant is ready for its first harvest, such as firm, mature green leaves and healthy new shoots. However, wait at least a year before you begin picking to avoid stunting growth.
If growth seems slow, check for root-bound conditions (when roots circle inside the pot), underfeeding, or insufficient sunlight—bay plants need at least six hours of bright light each day. Address yellowing leaves or limp stems by adjusting watering habits and boosting humidity.
Patience and small, regular care steps will lead to a lush, thriving bay plant ready to flavor your cooking for years to come.
Common Problems and Solutions When Growing Bay from Seed
Growing bay from seed can be a test of patience, but knowing the common problems—and how to address them—can make the process much smoother.
Slow or erratic germination is a frequent challenge, as bay seeds are notoriously slow to sprout. Soaking seeds in warm water for 24 hours before sowing and keeping the soil consistently moist (but not soggy) can help speed things up.
Fungal issues, like damping off, may strike seedlings if conditions are too humid or airflow is poor. To prevent this, use a sterile seed-starting mix, avoid overcrowding, and provide ventilation by cracking a window or using a small fan.
Sometimes, seedlings appear weak and spindly due to insufficient light. Position them in a bright spot or supplement with a grow light for at least 12–14 hours daily.
Poor seedling vigor can also result from nutrient-poor soil. Mix in some compost or use a diluted liquid fertilizer once true leaves appear.
Above all, remember that bay trees grow slowly and setbacks are normal. With patience, regular monitoring, and small adjustments, your efforts will pay off and healthy bay seedlings will eventually thrive.