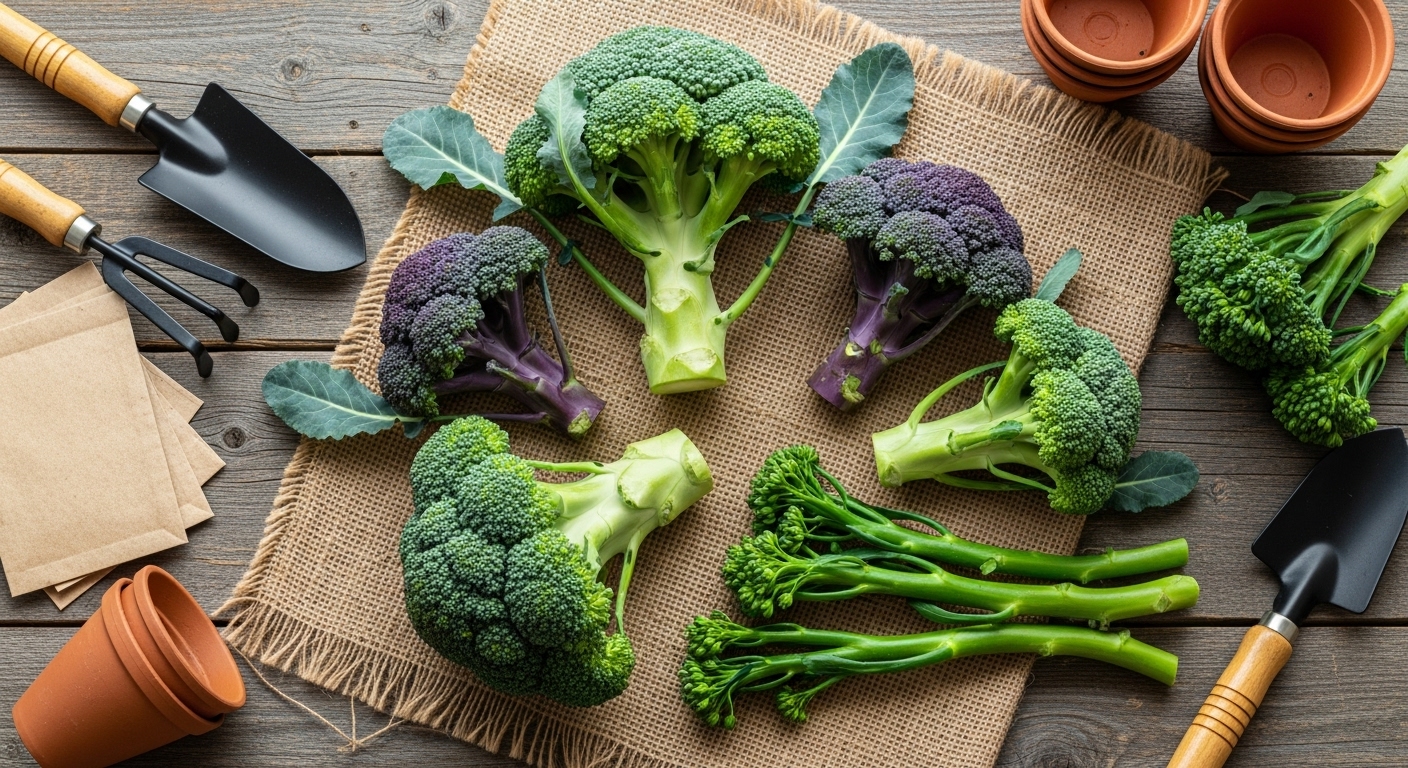
Choosing the Best Broccoli Varieties
Wondering about the ideal broccoli pot size when planning your next container garden? Choosing the right container is only half the battle—the other key to a successful broccoli harvest lies in selecting the best varieties suited to your needs. Broccoli comes in several main types: heading, sprouting, and purple.
Heading varieties, like the classic ‘Calabrese,’ form tight central heads and thrive in cooler climates with long growing seasons. Sprouting types, such as ‘Purple Sprouting’ or ‘Broccolini,’ produce multiple smaller heads and side shoots, making them great for continuous harvests in milder climates or shorter seasons. Purple broccoli varieties, besides their stunning color, often tolerate heat better and add a splash of visual interest (and antioxidants) to your meals.
When choosing a variety, consider your local climate and how much time you can dedicate to growing. For example, if you live in a shorter-season area, opt for fast-maturing hybrids like ‘Green Magic’ or sprouting types that don’t mind a little heat. Those in cooler regions can take advantage of traditional heading broccoli like ‘Waltham 29.’ Container gardeners should prioritize compact or dwarf varieties such as ‘De Cicco’ or ‘Santee’—these are bred specifically for smaller spaces and have root systems that adapt well to pots.
Always source your broccoli seeds or seedlings from reputable suppliers. Look for certified disease-free seeds, check expiration or packed-for dates, and read reviews or consult local garden centers for advice tailored to your area. Buying starter plants can save time if you prefer to skip the seed stage, but make sure they look healthy, with vibrant green leaves and no signs of wilt or pests.
By pairing the right broccoli pot size with a carefully chosen variety, you’ll set yourself up for a bountiful and delicious harvest, whether you’re working with a patio container or an in-ground garden bed.
Preparing to Grow Broccoli: Soil and Location
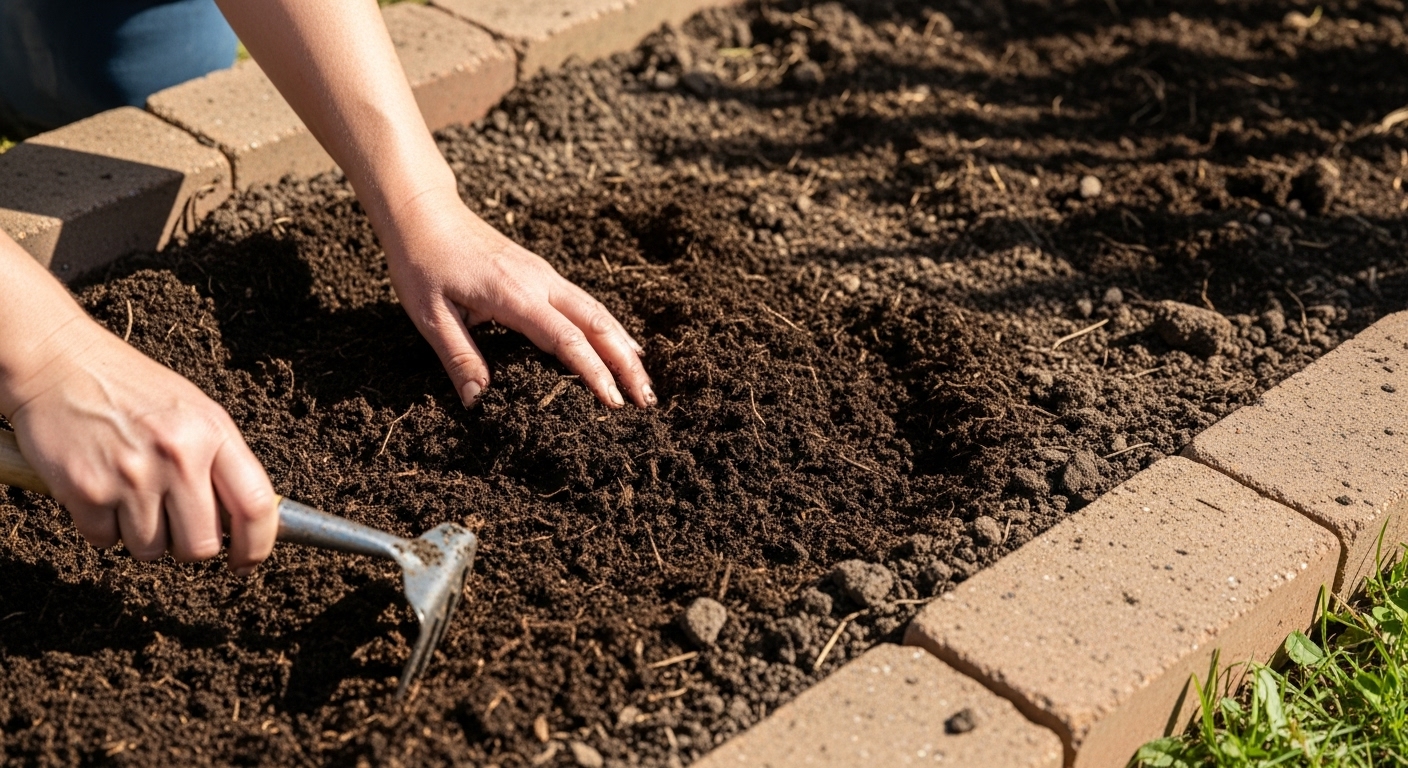
Broccoli thrives when given the right foundation, so start by choosing soil that’s rich, loamy, and drains well—try to avoid heavy clay or sandy spots. Aim for a soil pH between 6.0 and 7.0, which supports healthy growth and nutrient uptake. You can test your soil using a simple kit from a garden center. If your soil is too acidic, mix in garden lime; if it’s too alkaline, add some compost or peat moss.
Broccoli is a heavy feeder and loves fertile ground, so before planting, work in at least 2-3 inches of compost or well-rotted manure. For added nutrition, sprinkle a balanced, slow-release fertilizer according to package directions.
Choose a planting site that gets 6-8 hours of direct sunlight per day, but if you’re in a hot climate, a little afternoon shade can help prevent bolting. Avoid low-lying spots that stay wet and windy areas that could damage young transplants—fencing or shrubbery can provide helpful windbreaks.
Crop rotation is essential since brassicas like broccoli are prone to soil-borne diseases and pests. Avoid growing broccoli in areas where you’ve planted cabbage, cauliflower, or kale in the past 2-3 years. Instead, rotate with unrelated crops like beans, carrots, or onions.
Whether you’re prepping garden beds or containers, clear out all weeds and debris, then rake the soil until it’s fine and crumbly. In beds, make rows about 18 inches apart to give each plant room. In containers, be sure the pot is at least 12 inches deep and wide for each broccoli start.
Water thoroughly after prepping to settle the soil—a solid foundation now leads to stronger, healthier plants later on.
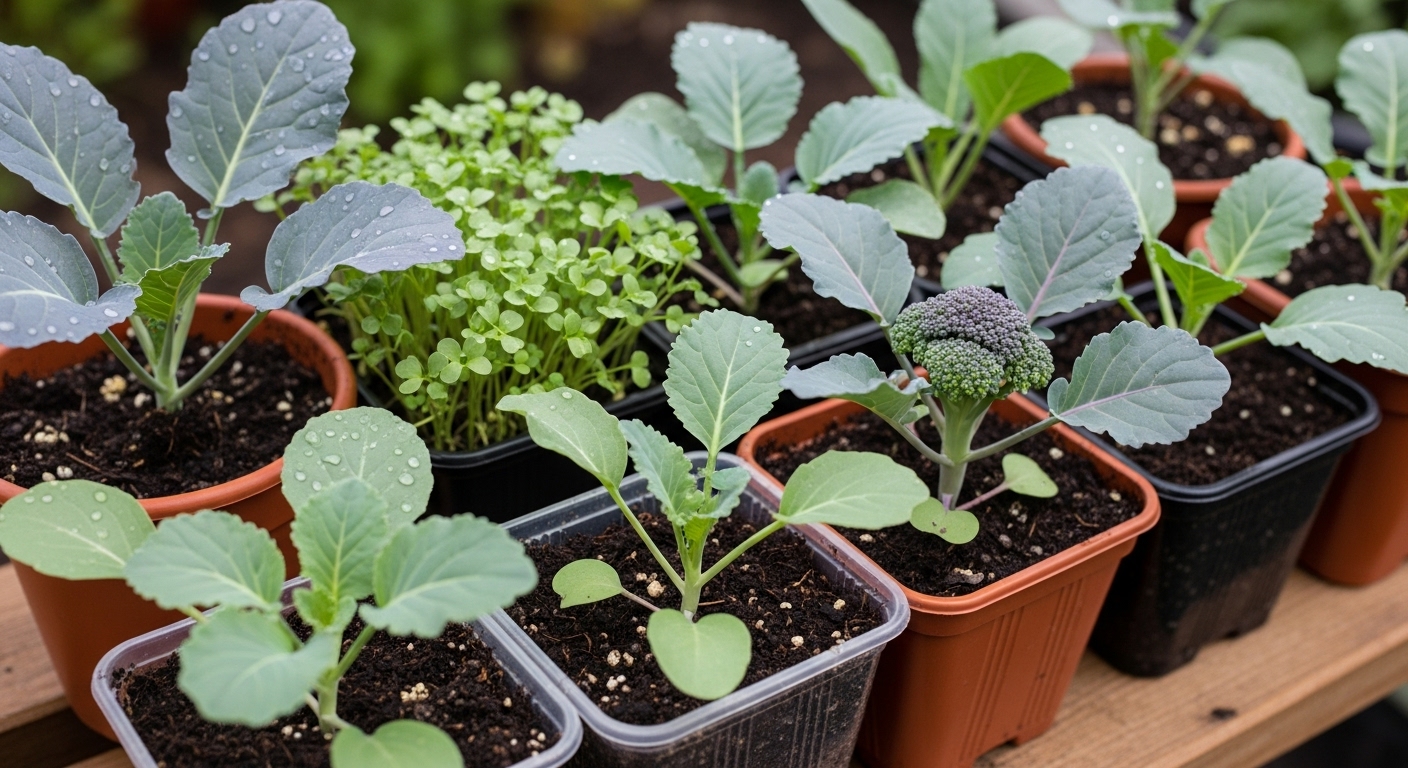
Sowing Broccoli Seeds & Transplanting Seedlings
When growing broccoli, timing is everything. For an early harvest, start seeds indoors 6-8 weeks before your last expected frost. For a fall crop, start seeds indoors in late spring or direct sow outdoors in midsummer.
Sow seeds a quarter-inch deep in trays or pots filled with seed-starting mix, keeping them moist and in a sunny location. When seedlings have two sets of true leaves, thin them so each has ample space—aim for one strong plant per container, snipping weaker ones at soil level.
Transplant seedlings outdoors when they’re 4-6 weeks old and about 4 inches tall, but only after hardening them off. Gradually introduce them to outdoor conditions over 7-10 days, increasing exposure to sunlight and wind to minimize shock. Space transplants 18-24 inches apart in rows set 2-3 feet apart for optimal airflow and growth.
If direct sowing, thin young seedlings to this same spacing once they’ve sprouted.
Buying nursery seedlings can save time and simplify the process for beginners, since you skip the finicky indoor phase. However, started plants may be costlier, and you’ll have less control over variety selection and seedling vigor.
Ultimately, whether sowing seeds or buying starts, following this careful timing and step-by-step method gives your broccoli a strong start and boosts the odds of a healthy, productive harvest.
Growing and Caring for Broccoli Plants
Keeping broccoli healthy starts with a consistent watering schedule—aim to water deeply once or twice a week, keeping the soil moist but never soggy. Early morning is the best time to water, as it gives the roots time to absorb moisture before the day heats up.
For feeding, use a balanced vegetable fertilizer once at planting and again every three to four weeks; a slow-release granular type works well, but liquid feeds can give a quick boost if plants seem sluggish.
Mulching with straw, compost, or shredded leaves helps the soil retain moisture, keeps roots cool, and reduces weeds—just keep mulch a couple of inches away from the broccoli stems to prevent rot.
To protect plants from sun and wind stress, choose a spot that gets gentle morning sun and some afternoon shade if your summers are hot. Consider using windbreaks like low garden fencing or strategically placed pots.
For container growers, pick a pot at least 12 inches deep and wide, with drainage holes. Use high-quality potting mix and check soil moisture daily since containers dry out faster.
If you spot leggy, weak plants, it often means they’re not getting enough light—move them to a brighter spot or add a grow light indoors.
Small heads can result from heat stress or poor nutrition, so plant early in spring or late summer for cooler weather harvests, and ensure regular feeding.
Remember, healthy broccoli thrives on attention, whether in a garden bed or a patio container—catching issues early means a more bountiful, tasty harvest.
Companion Planting and Crop Rotation
When growing broccoli, pairing it with the right companion plants can make a big difference in your garden’s health and productivity. Aromatic herbs like dill, rosemary, and sage not only enhance flavor but also repel common broccoli pests such as cabbage worms and aphids. Alliums like onions and garlic help deter insect infestations, while flowers like nasturtiums and marigolds attract beneficial insects that prey on pests.
Be sure to avoid planting broccoli near members of the nightshade family—such as tomatoes, peppers, and eggplant—as they can stunt each other’s growth by competing for nutrients and sharing similar diseases. Strawberries are also a poor match because they compete for the same soil nutrients and can attract fungal diseases.
To keep your soil healthy year after year, rotate your crops by changing their planting locations each season. This helps prevent the buildup of soil-borne diseases and pests that target specific crops and restores essential nutrients.
Sample Crop Rotation Plan for Small Gardens
- Grow broccoli and other brassicas in one bed this year.
- Plant legumes (like peas and beans) in that spot next year to boost nitrogen.
- Follow with root crops (such as carrots and beets) the year after.
- Then grow fruiting plants (like tomatoes or cucumbers) the following year.
This cycle not only keeps your soil fertile and balanced but also makes garden management easier and more productive in the long run.
Harvesting and Storing Broccoli
Knowing when to harvest broccoli is key to enjoying crisp, sweet florets from your own garden. Watch for tightly packed, dark green heads; once you notice the buds starting to swell or show tiny yellow flowers, it’s time to cut. Ideally, harvest in the cool morning hours when the heads are at their freshest, using a sharp knife to slice the head off at an angle, about 5–6 inches below the floret.
This angled cut helps water run off, reducing the chance of rot, and encourages your plant to produce smaller but tasty side shoots for weeks to come. After harvesting, don’t pull the whole plant—instead, keep it well-watered and fertilized to maximize secondary growth.
For storage, freshly cut broccoli lasts best when unwashed and placed in a loose produce bag inside the fridge, where it can keep up to a week. To preserve longer, blanch broccoli florets for three minutes in boiling water, quickly cool in ice water, drain, and pack into airtight freezer bags; this locks in color, nutrients, and flavor for up to a year.
If you’re working with a bumper crop, try roasting the side shoots with olive oil for a crunchy snack or adding chopped, blanched florets to omelets, stir-fries, or pasta. Even the peeled stems can be sliced thin and tossed into slaws or used in soups, ensuring the whole plant is enjoyed without waste.
Home-grown broccoli often tastes sweeter and more tender than store-bought, making it a versatile and rewarding addition to your kitchen.
Preventing and Managing Broccoli Problems
Growing healthy broccoli can be challenging, but understanding common threats and how to tackle them is key. Pests such as aphids, cabbage worms, and flea beetles love broccoli. You can control them using non-toxic methods like floating row covers, hand-picking, and encouraging natural predators such as ladybugs. Spraying leaves with diluted neem oil or soapy water also helps deter these pests without harming your veggies.
Diseases, especially clubroot, black rot, and downy mildew, are major concerns. Prevent them by practicing crop rotation—don’t plant broccoli or other brassicas in the same patch each year—and ensure good drainage to reduce wet conditions that encourage fungal growth. Removing and destroying infected plants immediately goes a long way in protecting the rest of your crop.
Weather and soil quality play big roles too: broccoli prefers cool, consistent temperatures and well-drained, fertile soil rich in organic matter. Hot weather can cause bolting, so try to plant early in spring or late summer for a fall harvest, and use mulch to keep soil cool and moist. Regularly test and amend your soil for optimal pH (around 6.0–7.0), and add compost to boost nutrients.
If a major setback happens—like a pest infestation wiping out most of your plants or disease sharply reducing yields—don’t despair. Remove sick or infested plants, clean up debris, and let the soil rest or plant a non-brassica cover crop for a season to break the cycle. If conditions improve, you can replant broccoli after correcting issues, aiming for more favorable weather or healthier soil.
Each setback is a chance to fine-tune your broccoli-growing strategy, making future crops stronger and more resilient.
Nutritional Benefits and Fun Facts
Broccoli packs a powerful nutritional punch, making it a top pick for anyone looking to boost their diet. This veggie is loaded with vitamins C and K—just one cup provides more than 100% of your daily needs for both. Broccoli is also rich in folate and fiber, supporting heart health and digestion, and it contains sulforaphane, a plant compound linked to cancer prevention.
Interestingly, broccoli originated in Italy over 2,000 years ago, and “broccoli” actually means “little arms” in Italian—quite fitting for its tree-like shape! Broccoli’s popularity has spread worldwide, with China and India now leading in production.
If you’re struggling to get kids or picky eaters to enjoy it, try tossing broccoli florets with olive oil and roasting them until they’re crispy, then adding a sprinkle of grated cheese. You can also blend it into creamy soups. Even raw broccoli becomes an appealing snack when paired with colorful dips like hummus or ranch dressing.
With a little creativity, broccoli can transform from a dinnertime standoff into a family favorite.