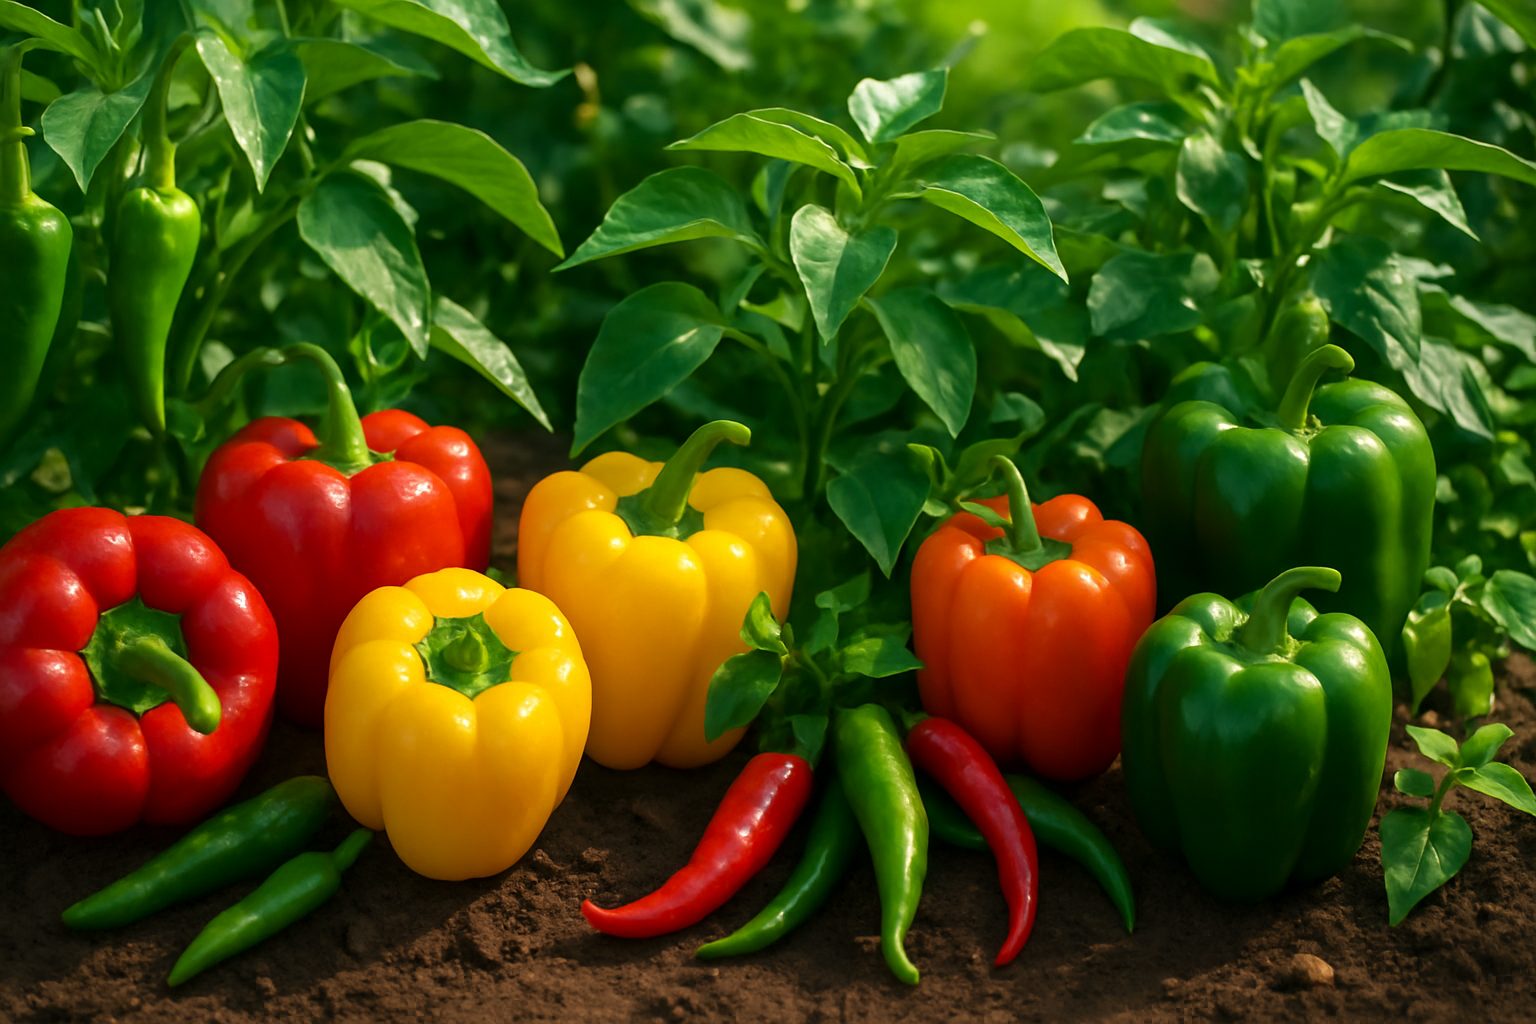
How to Grow Peppers from Seed
Learning how to grow bell peppers from seed is easier than you might think, and it’s a rewarding way to fill your garden with vibrant, tasty veggies. Whether you garden in containers on a balcony or have a bigger backyard plot, starting peppers from seed gives you more variety and control over your harvest.
In this step-by-step guide, we’ll show you exactly when and how to sow seeds, the best soil and lighting conditions, and simple real-world tips—like covering your seed tray with plastic wrap for quick germination. Let’s dive into the simple process that takes you from tiny seeds to colorful, flavorful homegrown bell peppers.
Introduction & Overview
Growing peppers from seed is an incredibly rewarding way to add flavor, color, and nutrition to your home garden. Not only is it cost-effective—you can start dozens of plants for the price of a single store-bought pepper—but it also gives you access to a wide variety of types. From sweet bell peppers, perfect for salads and snacking, to fiery habaneros and colorful heirlooms, you can grow varieties you rarely find in supermarkets.
Whether you love to cook spicy salsas, mild stir-fries, or simply want to enjoy fresh, homegrown produce, peppers offer versatility for every kitchen. Starting with the right seeds and nurturing them through each stage—germination, transplanting, care, and eventual harvesting—is all part of the gardening adventure. This guide will walk you through each step.
By understanding the basics and following a few practical tips, even first-time gardeners can enjoy a bumper crop of homegrown peppers, rich in both flavor and satisfaction.
Choosing & Preparing Pepper Seeds
When choosing pepper seeds, first consider your taste preferences and local climate. Sweet peppers, like bell peppers, offer milder flavors and do well in cooler, shorter growing seasons. Hot peppers—think jalapeños or habaneros—require more heat and a longer summer to truly thrive. If your summers are short, opt for early-maturing varieties or stick to milder types.
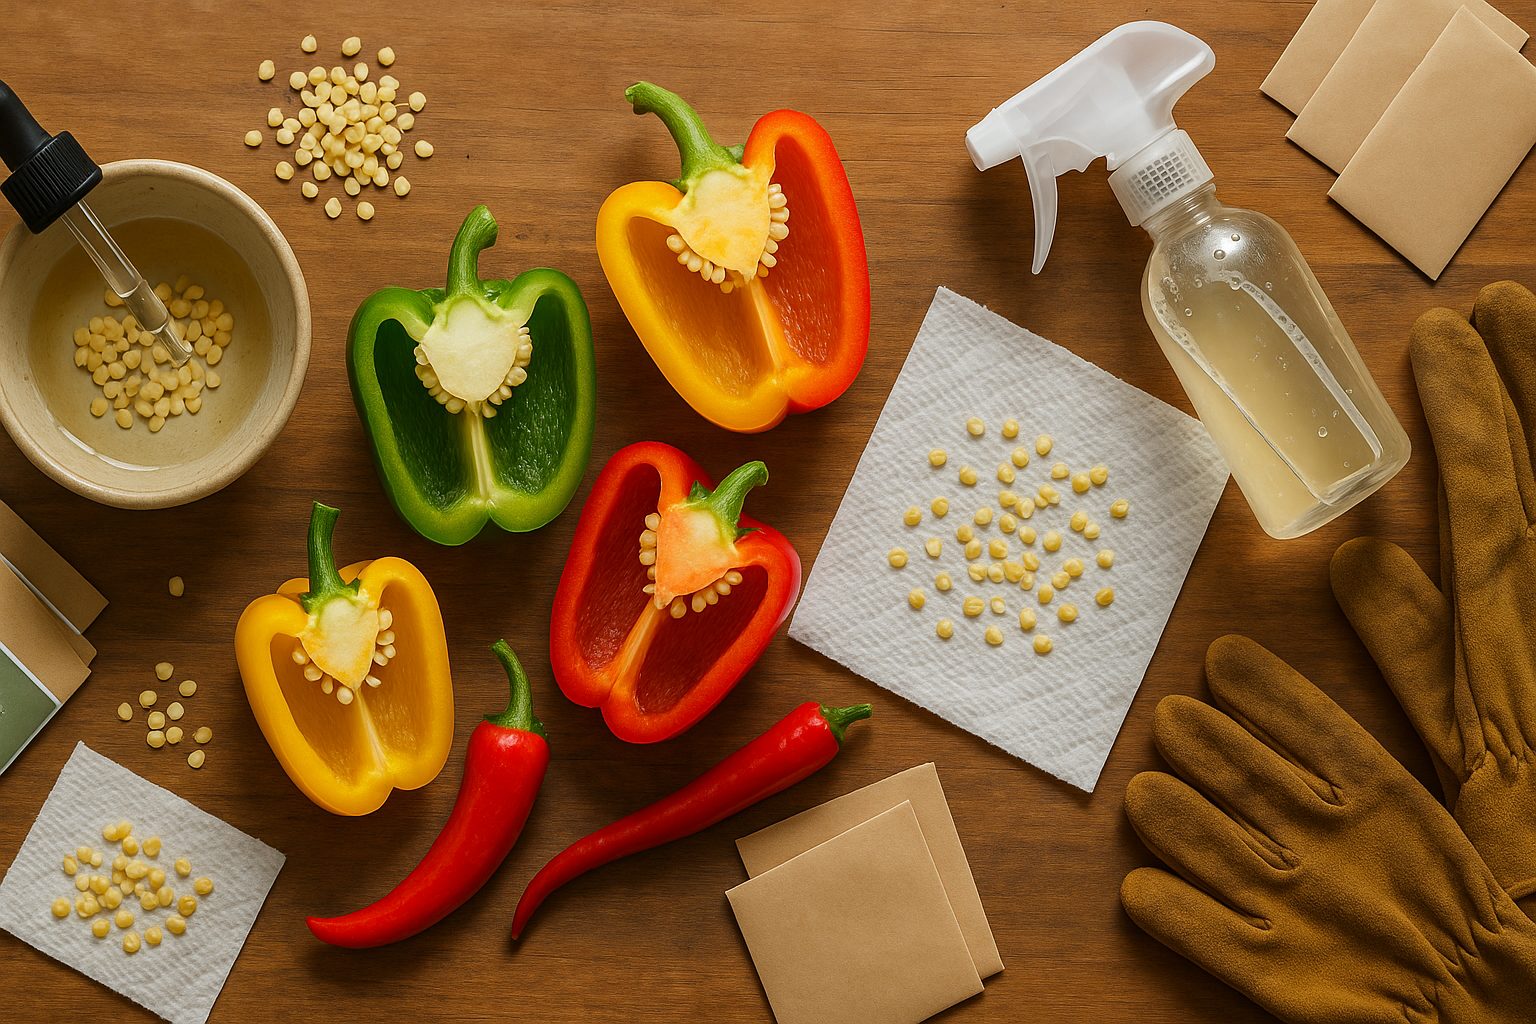
Once you’ve decided on your pepper type, you can obtain seeds in two main ways: purchasing them from a reputable nursery or seed catalog, or extracting them from fresh, ripe peppers you’ve bought or grown yourself.
If extracting seeds at home, select peppers that are fully mature and vibrant in color, as these are more likely to produce healthy seeds. Cut open the pepper, gently scoop out the seeds, and spread them on a paper towel to dry for about a week, away from direct sunlight.
After you have your seeds—whether purchased or saved—it’s helpful to prepare them for planting to boost germination rates. Start by sorting out any damaged or shriveled seeds; healthy seeds should be plump and firm. To increase your chances of success, soak your chosen seeds in warm water for 8–12 hours before sowing. This softens the seed coat and encourages quicker sprouting.
One real-world tip: add a small drop of diluted hydrogen peroxide to the soaking water to help disinfect and prevent seed-borne diseases. With these steps, you’ll be well on your way to starting strong, healthy pepper plants—perfectly suited to both your taste buds and your climate.
Best Practices for Germinating Pepper Seeds
Starting pepper seeds off right makes all the difference for healthy, robust plants later on. Begin by using a fine, sterile seed-starting mix rather than regular garden soil—this improves drainage, reduces disease risk, and helps delicate seedlings establish roots.
Choose shallow containers or seed trays with drainage holes; peat pots or recycled plastic cells both work well. For peppers, which love warmth, a seedling heat mat placed under your tray can boost soil temperatures to the sweet spot of 80–85°F (27–29°C), speeding up sprouting and improving success rates.
Keep the soil consistently moist but not soggy; gently misting the surface or using a humidity dome can help maintain the ideal moisture without washing seeds away. Light isn’t critical until seeds have sprouted, but once you see green, move them to a bright windowsill or provide 14–16 hours of grow light daily to avoid leggy growth.
Peppers can be slow to germinate—most will sprout in 7–14 days, but don’t be surprised if some laggards take up to a month, especially for hotter varieties. If you notice uneven germination, be patient; resist repotting or disturbing the soil too soon.
A good tip is to sow more seeds than you need and to stagger plantings to guarantee enough strong seedlings. If some cells remain empty after three weeks, you can reseed those spots. By controlling warmth, moisture, and lighting from the start, you’ll improve your chances of a healthy pepper harvest.
Planting and Early Seedling Care
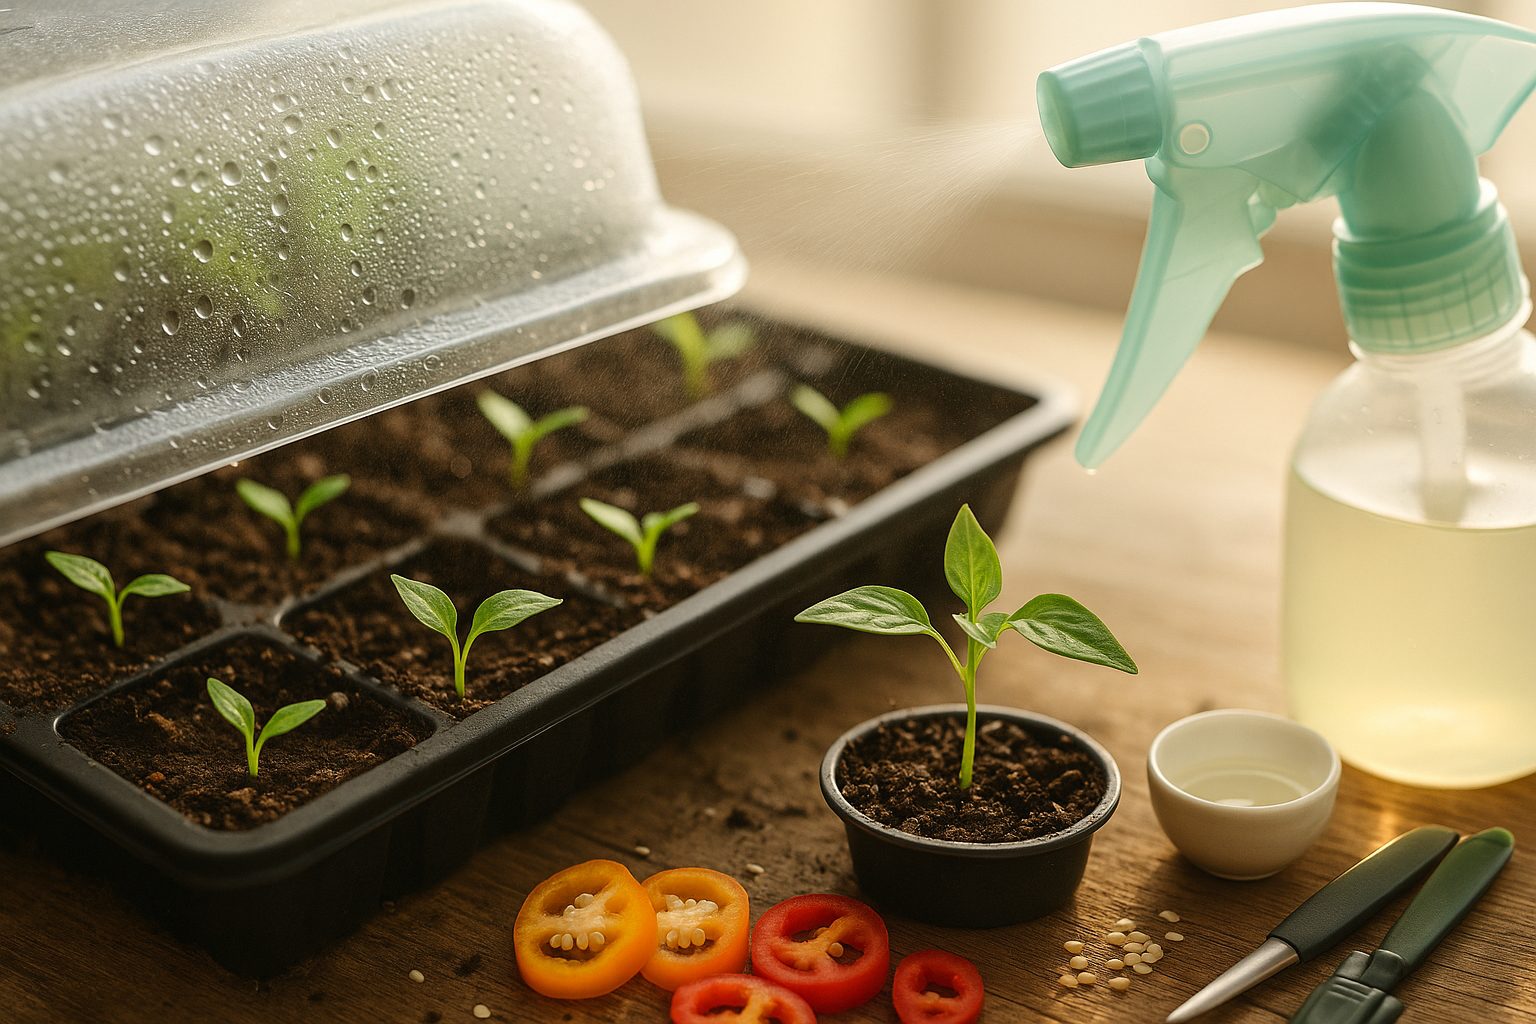
To ensure strong, healthy seedlings, start by filling clean seed trays or small pots with a loose, nutrient-rich potting mix. Gently press the soil surface and check your seed packet for the recommended planting depth, as most vegetable and flower seeds are best sown at a depth of two to three times their width.
Sprinkle the seeds evenly and cover them with the appropriate layer of soil, then mist the surface with a spray bottle to avoid dislodging the seeds. After sowing, water gently until the soil is evenly moist but not waterlogged; placing a clear plastic dome or plastic wrap over trays helps trap humidity, which is vital during germination.
Keep the soil consistently damp (but not soggy) by misting daily, and place trays in a spot with bright, indirect light or under grow lights for 12–16 hours each day. Windowsills can work well, but rotate trays so seedlings grow evenly.
When sprouts emerge and grow their first true leaves, it’s time to thin them out. Gently snip or pinch off all but the strongest seedling in each cell or cluster to give remaining plants room to thrive. Look for seedlings with sturdy stems, vibrant green leaves, and upright growth as signs of good health.
If your seedlings look leggy or pale, they may need more light or less water. By monitoring moisture, humidity, and light, you’ll set your young plants up for robust, resilient growth right from the start.
Transplanting and Growing On
Transplanting seedlings is a milestone in any gardener’s journey, and timing is everything. Indoors, wait until your seedlings have at least two to three true leaves and a strong root system before moving them into larger pots—usually about 3-4 weeks after germination.
For outdoor transplanting, aim for a cloudy day after the last expected frost, when soil temperatures have warmed and nights are consistently above 50°F (10°C). But before planting outdoors, don’t rush the process; hardening off is crucial.
Over 7-10 days, gradually expose your seedlings to outdoor conditions by setting them outside for a few hours each day in a sheltered area, increasing their time and sun exposure bit by bit. This helps toughen them up against wind, sun, and fluctuating temperatures.
After transplanting, keep the soil evenly moist—young roots need consistent moisture but avoid soggy conditions. Water early in the day to minimize disease risk. Begin a diluted, balanced fertilizer regimen about two weeks post-transplant; too much too soon can burn delicate roots.
Pay attention to common growth challenges like leggy stems or yellowing leaves, which often indicate insufficient light, poor drainage, or inconsistent watering. Mulch around your plants to retain moisture and suppress weeds, and inspect regularly for pests or signs of stress.
By easing your seedlings into their new environment and providing steady, attentive care, you set the stage for strong, resilient plants that will thrive through the season.
Harvesting Peppers and Troubleshooting
Knowing when to harvest peppers is key to enjoying their best flavor and texture. Most pepper varieties reach peak ripeness when they’ve achieved their full color—green peppers often turn red, yellow, or orange, depending on the type—and should be firm and glossy. A simple way to check is by gently pressing the fruit; ripe peppers will feel slightly yielding but not soft.
Use a clean, sharp pair of scissors or pruners to cut the stem about half an inch above the fruit. Avoid pulling or twisting, which can damage both the plant and the pepper.
Pest and Disease Management
If your plants are plagued by pests like aphids or spider mites, regularly spraying with water or using insecticidal soap can help keep them at bay. For diseases such as powdery mildew or blossom end rot, ensure proper spacing for air circulation and avoid overwatering.
Encouraging Healthy Growth
If your peppers seem slow to grow, check they’re getting at least six hours of sun and not suffering from compacted soil or nutrient deficiencies—adding a balanced organic fertilizer can give them a needed boost.
Extending Your Harvest
To prolong your harvest, pick peppers regularly, as this encourages the plant to set new fruits. Toward the season’s end, consider overwintering healthy pepper plants indoors or covering them during cool nights to extend production.
Saving Seeds
Saving seeds is simple: let a few mature peppers fully ripen on the plant, then cut them open, remove the seeds, and dry them thoroughly before storing in a cool, dry place. This way, you’ll be set for next season’s planting and can even select seeds from your best-performing plants for even better results.
Conclusion & Quick Tips
Successfully growing peppers from seed is rewarding and easier than you might think if you follow a few key steps. Begin by starting your seeds indoors about 8-10 weeks before your last expected frost—peppers thrive after a warm start! Use a seed-starting mix, keep the soil moist but not soggy, and give your seedlings plenty of bright light.
Once outdoor temperatures are reliably above 60°F, harden off your plants before transplanting them into well-draining soil in a sunny spot. Water consistently, feed with a balanced fertilizer, and support taller plants as they grow.
If you notice yellow leaves, it could be a sign of overwatering or a nutrient deficiency—adjust as needed. Avoid blossom end rot by watering deeply, not just sprinkling the surface, and keep an eye out for pests like aphids; a gentle spray of soapy water can help.
Don’t be afraid to experiment with different pepper varieties, from sweet bells to fiery habaneros, and try mulching to retain moisture and suppress weeds. Gardening is a blend of science and intuition, so take notes each season and tweak your approach. With a little patience and curiosity, you’ll enjoy vibrant, tasty peppers right from your garden!