Introduction
If you’ve ever wondered how to grow fennel from bulbs, you’re not alone—this aromatic herb is a garden favorite for its feathery leaves, crunchy stems, and distinctive anise-like flavor. Fennel is a popular choice in both culinary and ornamental gardens, often starring in Mediterranean dishes or adding flavor to salads and roasts.
While most gardeners are familiar with starting fennel from seed, fewer know that you can actually propagate fennel from bulbs or root cuttings, which can give you a head start and faster results. Unlike seeds, which require patience and careful thinning, using a bulb or root cutting lets you clone a favorite plant, preserve unique flavors, and fill your garden with mature fennel more quickly.
This method is also perfect if you want to use supermarket fennel bulbs that still have roots attached or salvage robust bulbs from last season’s harvest. In this guide, we’ll break down the simple but effective steps to growing fennel from bulbs or root cuttings, along with tips to ensure a thriving crop and tasty harvest.
Even if you’re new to gardening, you’ll be amazed at how simple—and satisfying—growing fennel this way can be!
Understanding Fennel Types and Growing Methods
When you’re thinking about growing fennel, it’s good to know there are two main types: Florence fennel, also called bulb fennel (Foeniculum vulgare var. azoricum), and herb fennel, sometimes called common or leafy fennel (Foeniculum vulgare). Florence fennel is prized for its crisp, swollen bulb that’s delicious raw or roasted, while herb fennel is mainly grown for its feathery leaves and aromatic seeds, which add flavor to salads, sauces, and teas.
For propagation, gardeners usually use seeds, but you can also try growing new fennel from the bulb base or root ends—especially for Florence fennel—if some root is still attached, or from root cuttings. The main benefit of bulb or root propagation is that it produces plants much faster than seeds and creates true genetic clones that copy the parent’s unique flavor or growth traits.
This can be especially useful if you’ve found a particularly tasty or vigorous fennel plant and want more just like it. However, cloning through division or cuttings also carries risks: you might transfer soil-borne diseases or pests from the original plant to new ones, and over time, a lack of genetic diversity can make the crop more vulnerable to diseases or pests.
For home gardens, these risks are low if you start with healthy, disease-free fennel, but you’ll still want to rotate planting sites and keep an eye out for any problems. If you’re just starting out, try both methods—propagating from cut bulbs for a quick start, and sowing seeds for greater resilience in your fennel patch.
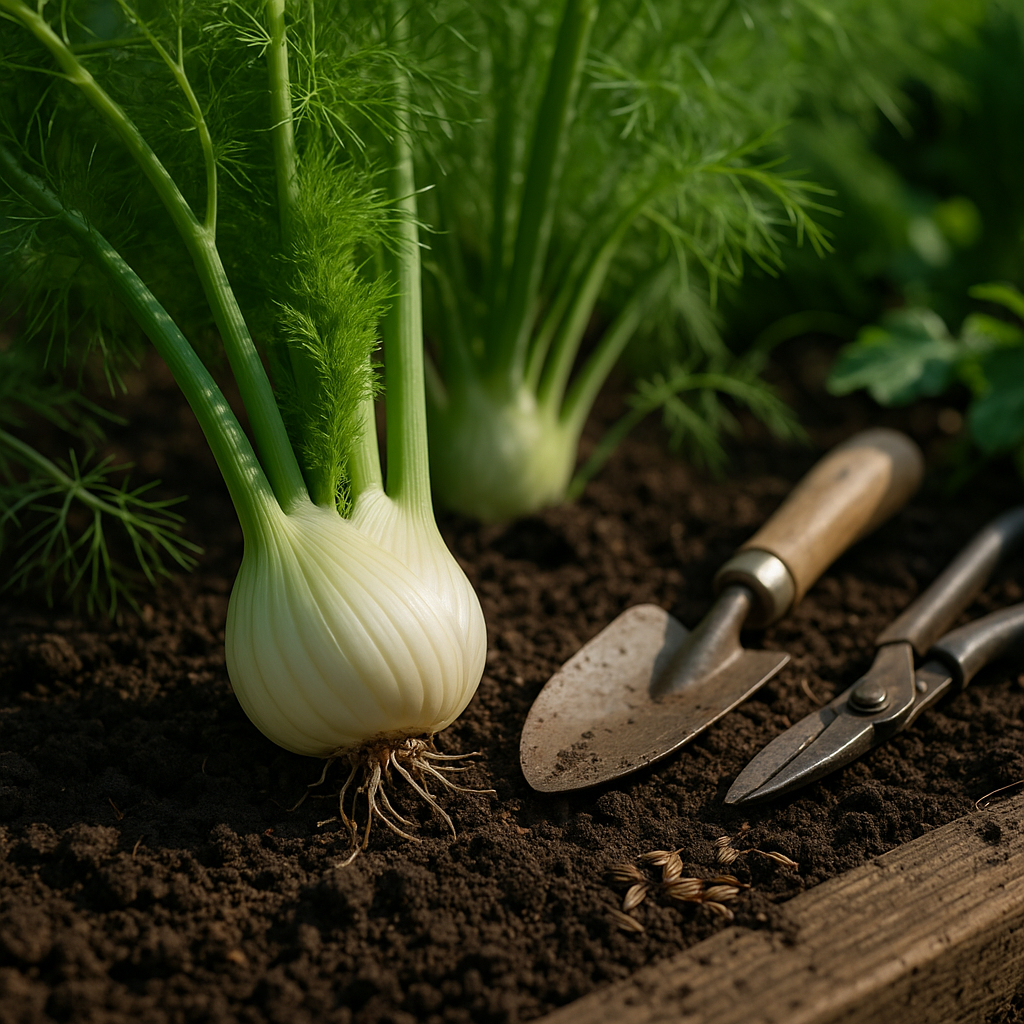
Selecting and Preparing Fennel for Propagation

When selecting fennel for propagation, choose bulbs or cuttings that are fresh, firm, and free from signs of rot or damage. Organic fennel from a grocery store or your garden is a good choice since it’s less likely to have pesticides or growth inhibitors.
Look for bulbs with the root base still intact, as this is essential for regrowing. If using a bulb, trim the stalks about one inch above the root base, leaving about an inch of the bulb attached. Remove any browning or slimy layers, and rinse the base gently under cool water to remove soil and debris.
For root cuttings, select segments with visible rootlets and healthy, white tissue. Trim away any blackened or mushy roots.
Propagation Methods
Propagating fennel in water is ideal for beginners or those with limited space. Simply place the cleaned bulb base in a shallow bowl with enough water to cover the roots, and set it on a sunny windowsill. Change the water every couple of days to prevent mold and speed up growth.
If planting in soil outdoors or in a pot, fill a well-draining container with rich, loose soil, and set the bulb base just below the surface with the roots down. Keep the soil consistently moist but not soggy.
Water propagation helps you monitor root growth, while direct soil planting offers a head start for a fully developed plant. Whichever method you choose, ensuring cleanliness and careful preparation will give your fennel the best start for vigorous regrowth.
Growing Fennel from Bulbs or Cuttings in Water
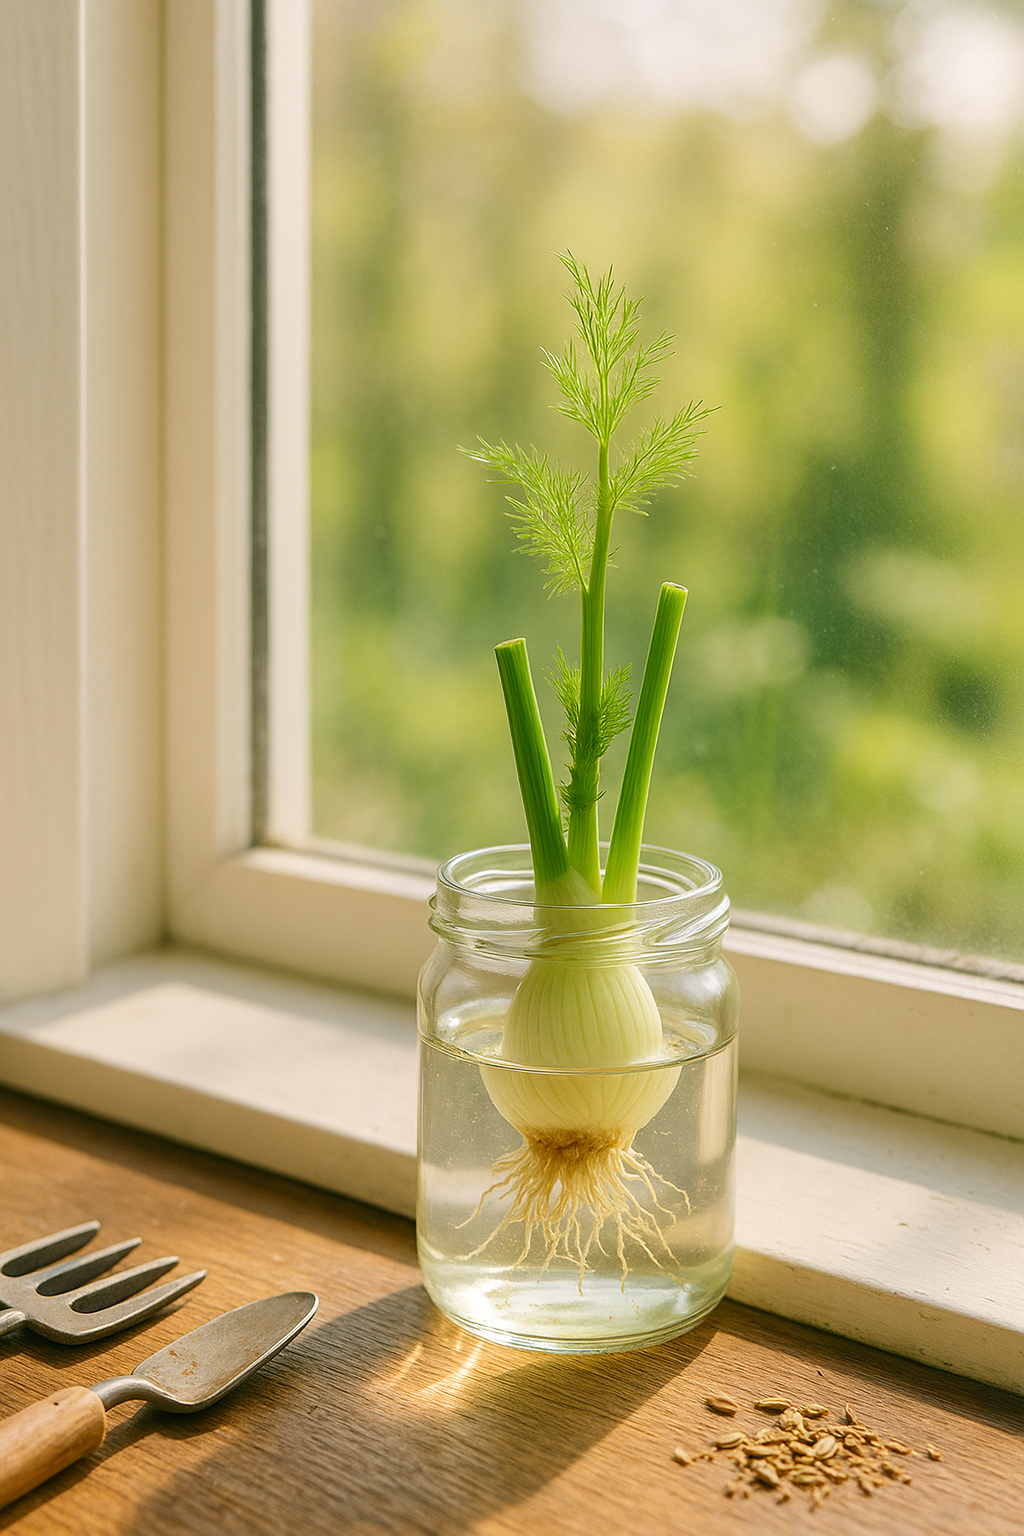
Growing fennel from bulbs or cuttings in water is a simple and rewarding way to start this aromatic herb right in your kitchen. Begin by selecting a fresh, healthy fennel bulb from your grocery store—look for one with some green shoots still attached.
Slice off the bottom inch of the bulb, making sure the root base is intact. Place the bulb base or cuttings in a glass jar or clear container with just enough room-temperature, clean water to cover the roots but not submerge the entire bulb. Use filtered water if possible to avoid chlorine or impurities that might hinder growth.
Set your container on a sunny windowsill where it receives at least 6 hours of indirect sunlight daily. Natural light encourages robust growth, but avoid scorching afternoon sun if possible. Change the water every two days to prevent stagnation and mold, and rinse the bulb or cuttings gently each time.
The ideal temperature for rooting fennel is between 65-75°F (18-24°C), which mimics mild spring conditions. In about 5–7 days, you should notice small white roots forming at the base—this is a great sign your fennel is rooting well.
Allow roots to grow 1–2 inches long before transplanting to soil or a garden bed. A healthy cutting will have crisp green shoots and firm roots; if the bulb becomes mushy or develops a foul odor, discard it and try again.
Once rooted, plant your fennel in rich, well-draining soil, keep it moist, and watch it flourish.
Planting and Growing Fennel in Soil
Transplanting rooted fennel into your garden or containers is easy with the right timing and care. Wait until after the last frost, when daytime temperatures consistently reach at least 50°F (10°C), to reduce transplant shock and give your plants a strong start.
Choose a sunny spot—fennel thrives with full sun exposure for at least 6 hours daily. Well-draining, fertile soil is key; mix in compost or aged manure before planting for extra nutrition and a looser texture. Space seedlings about 12 to 18 inches apart to allow their bulbs and fronds plenty of room to spread comfortably.
When transplanting into containers, select pots at least 12 inches wide and deep, filled with rich, organic potting mix designed for vegetables. Water deeply right after planting, then continue with regular watering to keep the soil moist but not soggy—typically once or twice a week, unless you’re experiencing hot, dry weather.
As your fennel grows, mulch around the plants with straw or chopped leaves to retain moisture and suppress weeds. Feed with a balanced liquid fertilizer every 4 to 6 weeks to support healthy bulbs and foliage.
If your fennel produces several shoots from the base, thin them back to one or two to focus energy on developing larger, tastier bulbs. Watch for early flower stalks (bolting) and pinch them off if you want to harvest bulbs, since flowering redirects energy away from bulb growth.
By following these tips, you’ll enjoy crisp, flavorful fennel—perfect for salads, roasting, and more—all season long.
Caring for Your Fennel Plant
Caring for your fennel plant starts with finding the right balance in watering. Fennel needs consistently moist—but not waterlogged—soil, receiving about an inch of water per week, either from rainfall or by watering deeply every few days. Using mulch like straw or shredded leaves around the base helps retain moisture and keeps the roots cool, which can reduce the risk of bolting (when the plant goes to seed early in hot weather).
To prevent bolting, avoid letting the soil dry out and plant your fennel in a spot that gets morning sun with some afternoon shade, especially in hotter climates. As your fennel grows, its tall stalks and developing bulbs may need gentle support to prevent flopping. You can easily do this by staking the main stems with slender bamboo canes or loosely encircling the plants with garden twine. This not only supports bulb development but also keeps the foliage upright and healthy.
Pest Management
Keep an eye out for fennel’s most common pests, like aphids and caterpillars—especially swallowtail butterfly larvae—which can become problematic quickly. A strong blast of water from a hose will dislodge aphids, and introducing ladybugs or using insecticidal soap provides organic control. For caterpillars, simply pick them off by hand and consider relocating them to another part of your garden if you want to support butterflies.
Disease Prevention
Fennel is relatively disease-resistant, but root rot and fungal leaf spots can occur with excessive moisture or poor air circulation. To avoid this, don’t overcrowd your plants and always water at the soil level rather than overhead. Regularly check for yellowing foliage or soggy bulbs, and remove any affected parts immediately to keep the rest of your fennel healthy.
With a little attention and these practical steps, your fennel will thrive, rewarding you with crisp bulbs and aromatic leaves throughout the growing season.
Harvesting and Using Regrown Fennel
To harvest regrown fennel, timing and technique are key to getting the most from each part of the plant. For bulbs, wait until they reach the size of a tennis ball and feel firm—usually about 12-14 weeks after planting. Use a sharp knife to cut the bulb just above the soil, leaving the root and about an inch of stem; this encourages the plant to regrow for another smaller harvest.
Fennel leaves, or fronds, can be snipped with kitchen scissors anytime they look lush—just avoid taking more than a third at once, so the plant stays strong. When fennel flowers dry and form seeds, snip entire flower heads on a dry day and place them upside down in a paper bag to capture the seeds as they fall.
After harvesting, stimulate regrowth by watering well and occasionally feeding your plant with a diluted liquid fertilizer. Cutting back spent stems also helps direct energy to new shoots.
In the kitchen, sliced fennel bulbs add crunch to salads or sweetness to roasted veggie trays, while the feathery fronds brighten up fish dishes, dips, or even homemade pesto. Toast fennel seeds for a fragrant spice in breads, sausages, or curries. With thoughtful care and creative cooking, every part of your homegrown fennel can shine.
Conclusion & Quick Troubleshooting
Propagating fennel is easier than you might think—start by sowing seeds in well-draining soil, keep them moist but not soggy, and give your plants plenty of sunlight. Patience is key, as healthy bulbs and fragrant fronds take a few months to develop.
If you notice bulb rot, check for overwatering and improve drainage by adding sand or compost to your soil. For weak root growth, ensure your fennel has enough space—thin seedlings so they’re at least 12 inches apart to avoid crowding. Pests like aphids can be managed by spraying plants with a gentle soap solution or inviting natural predators like ladybugs into your garden.
Don’t be discouraged if your first attempt isn’t perfect! Every gardener faces a challenge or two, so learning as you go is part of the fun. Share your fennel-growing tips, troubleshoot your problems, or ask questions in the comments below—chances are, someone else is dealing with the same issue, and we’re here to help each other grow.