Introduction
Learning how to regrow oregano from store-bought cuttings can be a game-changer for anyone who loves having fresh, flavorful herbs at their fingertips. Imagine snipping lush, green oregano leaves right from your kitchen windowsill instead of making another trip to the grocery store or tossing out leftover sprigs.
Regrowing oregano from store-bought cuttings is not only surprisingly straightforward, but it’s also a fantastic way to save money over time and reduce kitchen waste. Rather than letting unused herbs wilt in your fridge, you can give them new life and keep your meals tasting vibrant all year long.
Many people are amazed at how easily oregano cuttings can root in a jar of water or directly in soil with just a bit of sunlight and attention. While the method is simple, it’s important to be patient—roots can take a week or two to develop, and the plant will need occasional misting and care as it gets established.
Before you know it, you’ll have a thriving oregano plant ready to enhance everything from pizza to salads. If you’re craving a low-effort, eco-friendly way to boost your home-cooking game, regrowing oregano is a rewarding place to start.
Choosing & Preparing Store-Bought Oregano
When selecting store-bought oregano for propagation, look for sprigs that are bright green and firm to the touch. Avoid any that appear wilted, yellowing, or spotted, as these may not root well or could carry diseases. Always check that the stems haven’t been sprayed with preservatives or pesticides; organic bunches are usually a safer bet.
Ideally, choose oregano that was delivered or stocked as recently as possible to ensure the stems are still fresh and hydrated. Older sprigs often have a lower success rate when propagating.
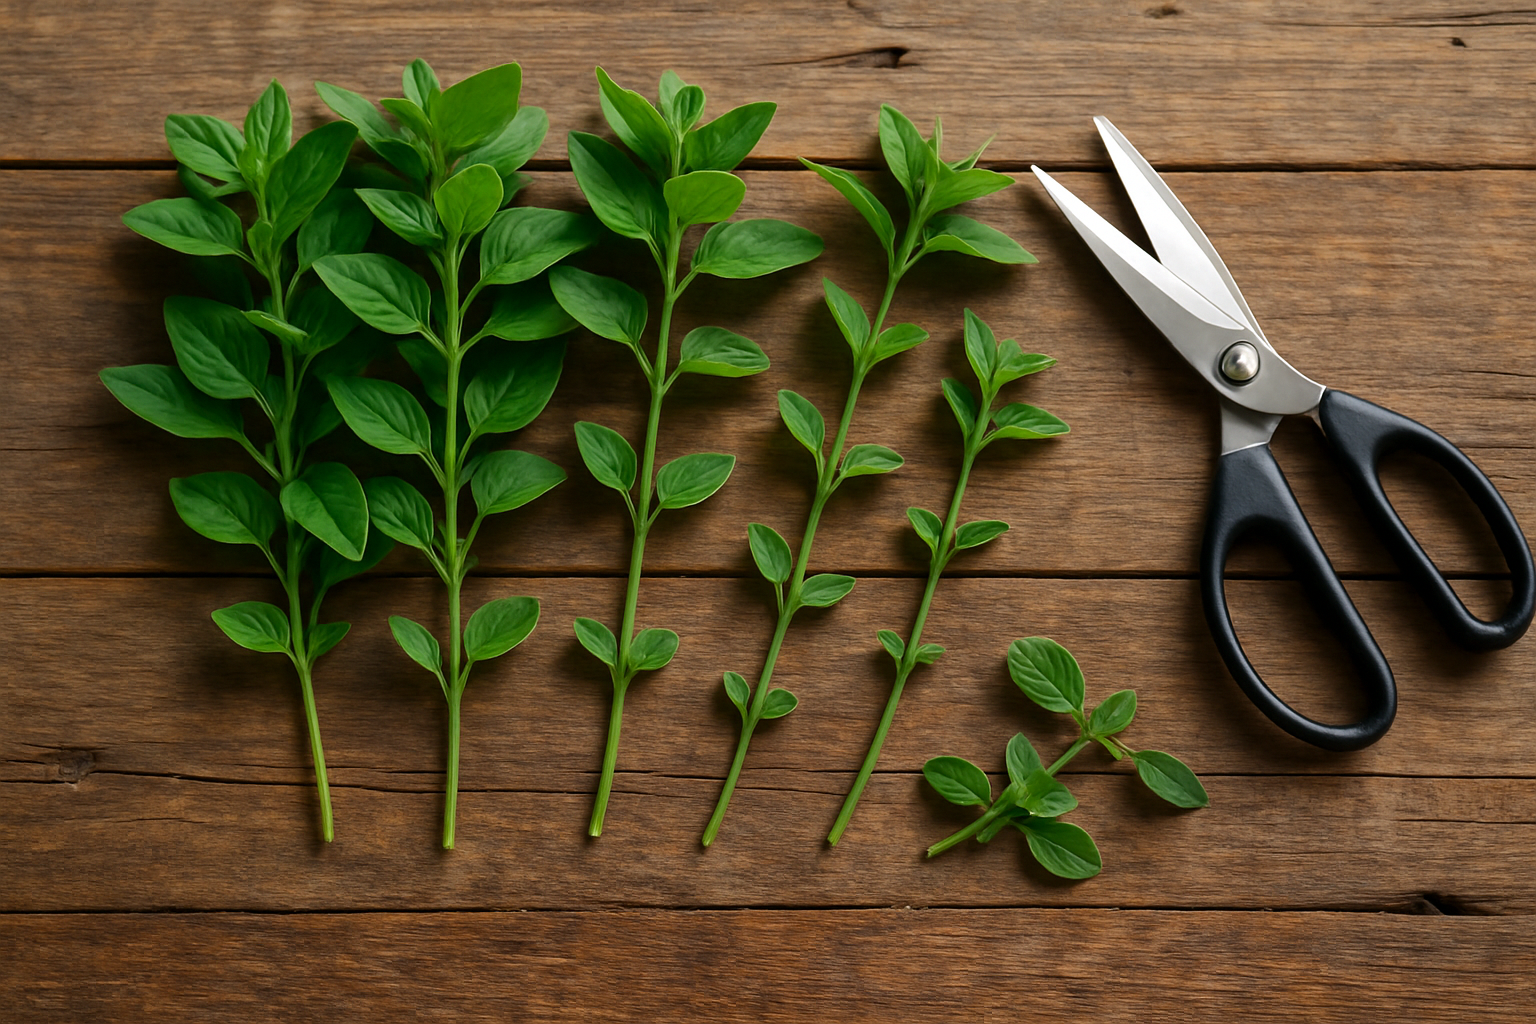
When you’re ready to prepare your cuttings, use clean scissors or garden snips to trim stems that are four to six inches long. Remove all leaves from the bottom half of each stem—this prevents leaves from sitting in water and rotting, and encourages the plant to focus energy on root development. Make a clean cut just below a leaf node (the bump where leaves emerge), as roots are most likely to sprout from this area.
Starting propagation soon after purchase is key; the fresher the oregano, the quicker and more reliably roots will form. For best results, begin within a day or two of bringing the oregano home, and keep your prepared cuttings in clean water or moist soil right away to give them the ideal start for strong, healthy new plants.
How to Root Oregano Sprigs

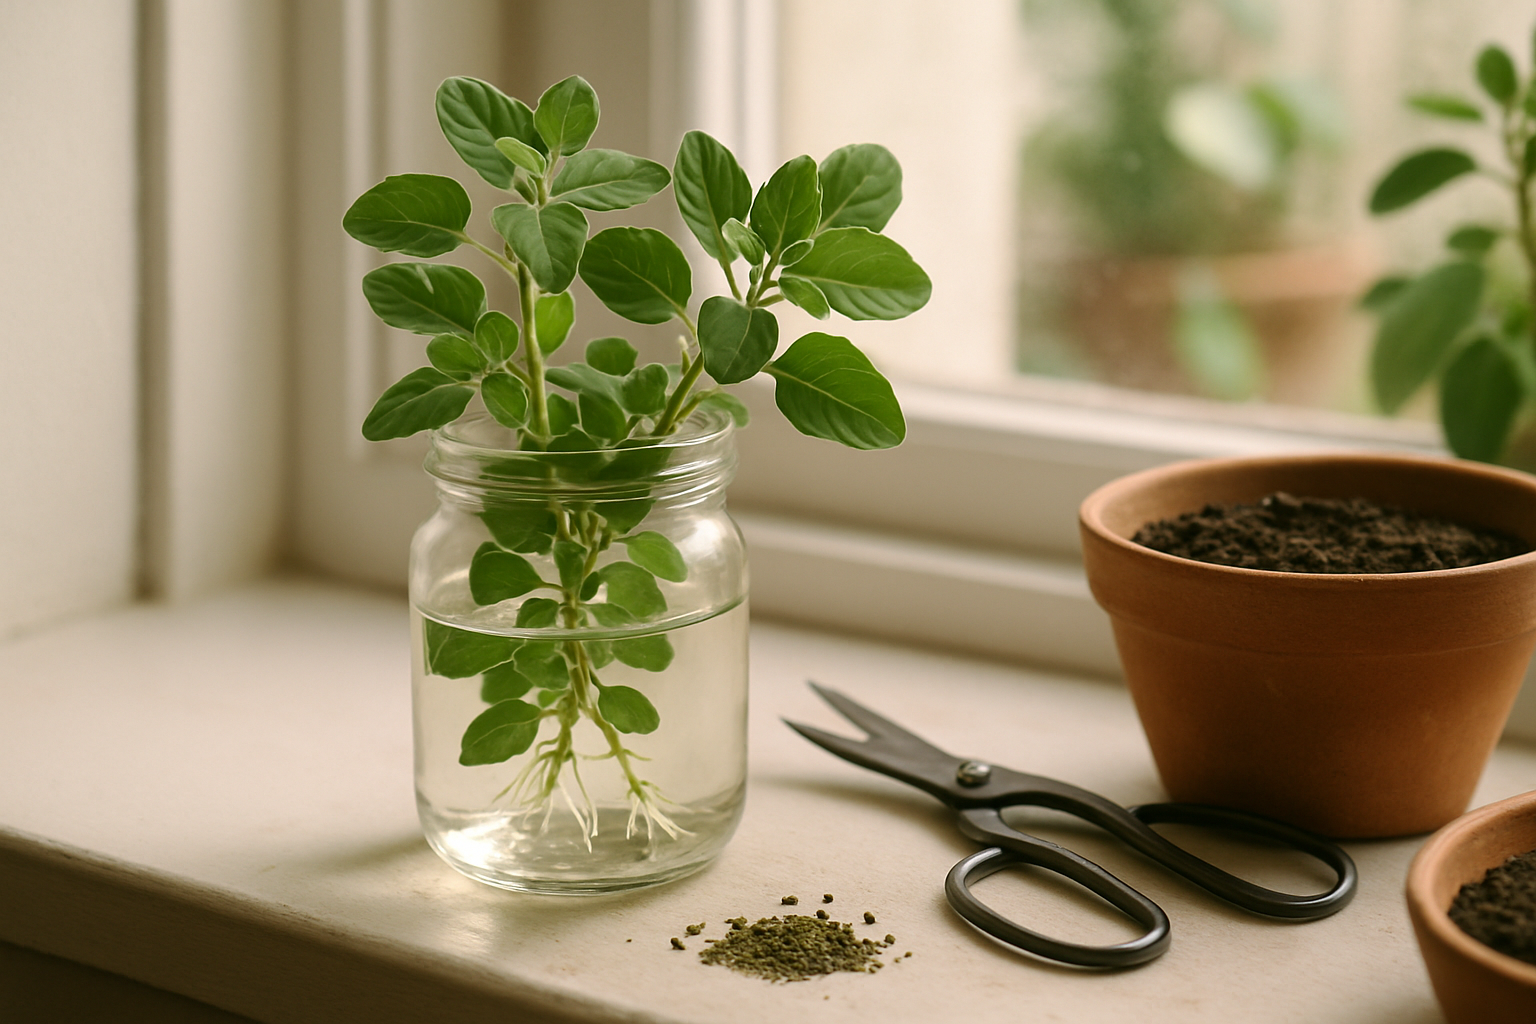
Rooting oregano sprigs is a simple and rewarding way to multiply your herb garden. It all starts with gathering a few basic materials: a clean glass or jar, fresh water, and a few healthy oregano sprigs about 4-6 inches long.
Trim the bottom leaves from each stem, leaving just the top few intact to reduce moisture loss. Place the sprigs in the jar with enough water to cover the leaf nodes (where you removed the leaves), but keep the remaining leaves above the water.
Put the jar in a bright location, like a sunny windowsill, but out of direct, harsh sunlight to avoid scorching the cuttings. Change the water every 3-4 days to prevent bacterial buildup and keep the environment fresh. Within two weeks, you should notice tiny white roots growing from the submerged stems.
Rooting Oregano in Soil
Alternatively, you can root oregano directly in soil:
- Dip the trimmed stem ends in rooting hormone (optional but helpful).
- Insert them into a small pot filled with well-draining potting mix.
- Keep the soil consistently moist but not soggy.
- Provide bright, indirect light.
- If possible, cover the pot loosely with a plastic bag to maintain humidity until roots develop.
Watch for signs that rooting is happening—healthy oregano cuttings remain firm and green, and new leaf growth may appear. In contrast, struggling cuttings may wilt, turn yellow, or develop a slimy base. If you see darkening or mushiness at the stem bottoms, discard those cuttings and try again with fresh water or new soil.
With a little patience, you’ll soon have vigorous, rooted oregano sprigs ready to plant out or enjoy indoors.
Planting Rooted Oregano Cuttings
Transplanting rooted oregano cuttings is a rewarding step that sets the stage for a thriving herb garden. The best time to move your rooted sprigs is in spring or early summer, when nighttime temperatures consistently stay above 50°F (10°C).
Start by choosing a container with drainage holes or a garden spot with well-draining soil—oregano dislikes soggy roots. A light, loamy potting mix enriched with compost works well for containers; for garden beds, blend in some sand or organic matter to promote aeration and healthy roots.
Gently remove the cuttings from their starter medium, being careful not to damage the young roots. Plant each cutting about 12 inches apart if going directly in the ground, or in small pots with at least a 6-inch diameter.
Water thoroughly after planting, but let the top inch of soil dry between waterings to avoid root rot. Gradually expose your new plants to outdoor sun over a few days if they were indoors—start with a few hours of morning sun, increasing exposure daily to prevent shock. Ultimately, oregano thrives in full sun, so aim for at least 6 hours of direct sunlight per day.
By giving your oregano cuttings well-drained soil, the right container, careful watering, and a gentle acclimation to sunlight, you’re setting them up for healthy, flavorful growth that will enrich your kitchen and garden all season long.
Caring for Your New Oregano Plant
Caring for your new oregano plant is simple and rewarding if you follow a few best practices. Oregano thrives in plenty of sunlight, so choose a spot that gets at least six hours of direct light daily; a south-facing windowsill or a sunny corner of your garden works perfectly.
If you’re growing indoors, consider supplementing with a grow light during shorter winter days. When it comes to watering, oregano prefers slightly dry conditions—let the top inch of soil dry out between waterings to avoid root rot, a common problem for beginners. Use a pot with drainage holes or loosen garden soil nearby to prevent sogginess.
Oregano likes warmth and will flourish in temperatures between 65°F and 75°F, but it can tolerate cooler nights. Protect it from frost and sudden cold snaps if you’re gardening outside.
To avoid legginess, which results from your plant stretching for light, make sure it’s getting enough sunshine and pinch back the stems regularly. This simple pinching technique—just use your fingers to snip off the top two inches of each stem—will encourage fuller, bushier growth and more leaves to harvest.
Check your plant for pests like aphids or spider mites, especially if it’s kept indoors; a quick rinse or gentle wipe with soapy water can keep these at bay without resorting to harsh chemicals.
Fertilize oregano sparingly, if at all, since excessive nutrition can weaken flavor and encourage spindly growth.
For the healthiest and most productive oregano, make harvesting a habit: snip leaves or stems often. This not only gives you fresh herbs for cooking but also keeps your plant thriving and compact.
With the right care, your oregano will reward you with aromatic, robust flavor all season long.
Harvesting and Using Your Homegrown Oregano
The best time to harvest homegrown oregano is just before the plant flowers, typically in late spring or early summer, when the leaves are at their most flavorful and packed with oils. To harvest without damaging your oregano, use sharp scissors or garden shears to snip off sprigs just above a pair of leaves—this encourages branching and keeps the plant healthy.
Avoid cutting more than a third of the plant at once, as removing too much can stress it. For continuous harvesting, regularly pinch back the tips every few weeks and remove any flower buds; this helps direct the plant’s energy into producing fresh, tasty leaves instead of seeds.
When you’re ready to use fresh oregano, rinse the sprigs under cool water and pat them dry. Toss the leaves into sauces, pizza, salads, or even bread dough for a burst of herbal flavor.
If you have more oregano than you can use right away, preserving it is simple:
- Tie small bunches together and hang them upside down in a dry, airy place away from sunlight.
- Alternatively, lay the sprigs on a clean kitchen towel until they’re brittle.
Once dried, crumble the leaves, discard the stems, and store the leaves in an airtight jar for several months. You can also freeze whole leaves in ice cube trays with a bit of water or olive oil for quick access to fresh flavor.
No matter how you choose to use or store it, homegrown oregano adds a fresh, aromatic touch to your kitchen all year long.
Troubleshooting Common Issues
It’s normal to encounter a few bumps when propagating and growing plants, but most problems have simple solutions.
Wilting is a frequent issue, often caused by either underwatering or overwatering—stick your finger into the soil to test for moisture before watering again.
Fungal infections, characterized by fuzzy white or gray spots on leaves or stems, usually appear in humid, crowded conditions. To stop the spread, improve air circulation, avoid overhead watering, and remove affected parts.
Root rot, another common challenge, usually results from soggy soil and poor drainage. If roots look brown and mushy, trim away damaged parts, replant in fresh, well-draining soil, and water sparingly until you see new growth.
To prevent these problems:
- Clean your tools before use
- Avoid letting cuttings sit in stagnant water
- Use containers with drainage holes
Remember, even seasoned gardeners deal with setbacks—stay patient and observe your plants closely, as early action is the key to recovery. Every challenge is just a step toward becoming a more confident and successful plant parent.
Conclusion & Encouragement
Regrowing oregano at home is a simple, cost-effective way to enjoy fresh herbs year-round. Plus, it’s surprisingly satisfying to watch your plants thrive. By cutting a healthy stem and placing it in water or soil, you can start a whole new plant with minimal effort.
Once you’ve mastered oregano, why not try similar methods with basil, mint, or thyme? Experimentation is part of the fun and can lead to a thriving herb garden on your windowsill or balcony.
We’d love to hear how it goes—share your successes, challenges, or favorite regrowing hacks in the comments below!