Introduction
Knowing how to harvest thyme can make all the difference in your kitchen and garden. Thyme is a beloved culinary herb, adding earthy, aromatic flavor to soups, meats, sauces, and salads. Whether you plan to use it fresh for tonight’s dinner or dry it for year-round use, harvesting thyme properly ensures maximum flavor and a healthy, productive plant.
In this post, we’ll guide you through the essentials—when to pick thyme for the best taste, step-by-step harvesting techniques, and smart tips for storing your bounty. You’ll also learn simple methods for drying thyme so its fragrant leaves last for months and discover answers to common questions that many herb gardeners have. With these tips, you’ll enjoy homegrown thyme at its freshest and most flavorful, no matter how you choose to use it.
When to Harvest Thyme
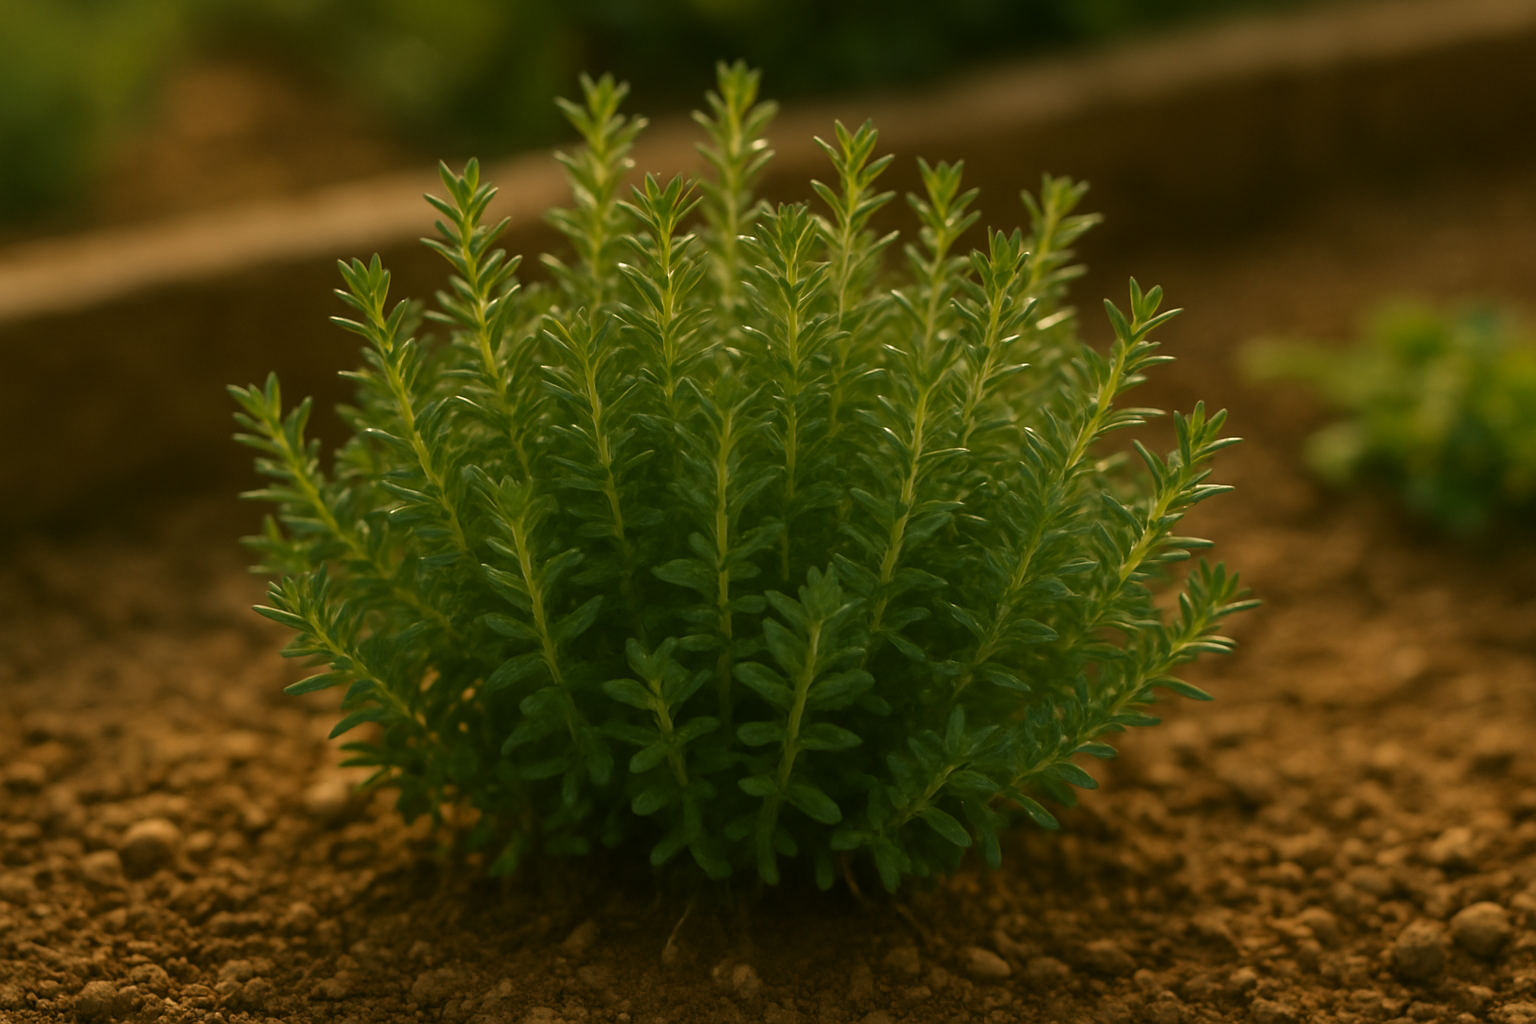
The best time to harvest thyme is right before it starts to flower, usually in late spring or early summer. This is when the leaves have the highest concentration of essential oils, giving you the most flavorful and aromatic harvest.
For daily timing, try to snip thyme in the morning after the dew has evaporated but before the sun gets too hot; this helps preserve the oils in the leaves. Look for visual cues like a bushy plant at least 6 inches tall with sturdy stems and dense foliage. If you notice buds forming or tiny, unopened flowers, that’s your cue to harvest—once thyme blooms, the leaves can lose some flavor intensity.
For ongoing harvests, you can trim up to one-third of the plant at a time, which encourages bushier growth without stressing the thyme. Allow the plant a few weeks to recover between cuttings, and avoid cutting into the woody, brown stems. Always snip above a pair of leaves on the softer, green growth. This gentle approach helps ensure you’ll have healthy, productive thyme all season long, whether you’re drying bunches for winter or grabbing a handful for today’s recipe.
Tools and Preparation for Harvesting
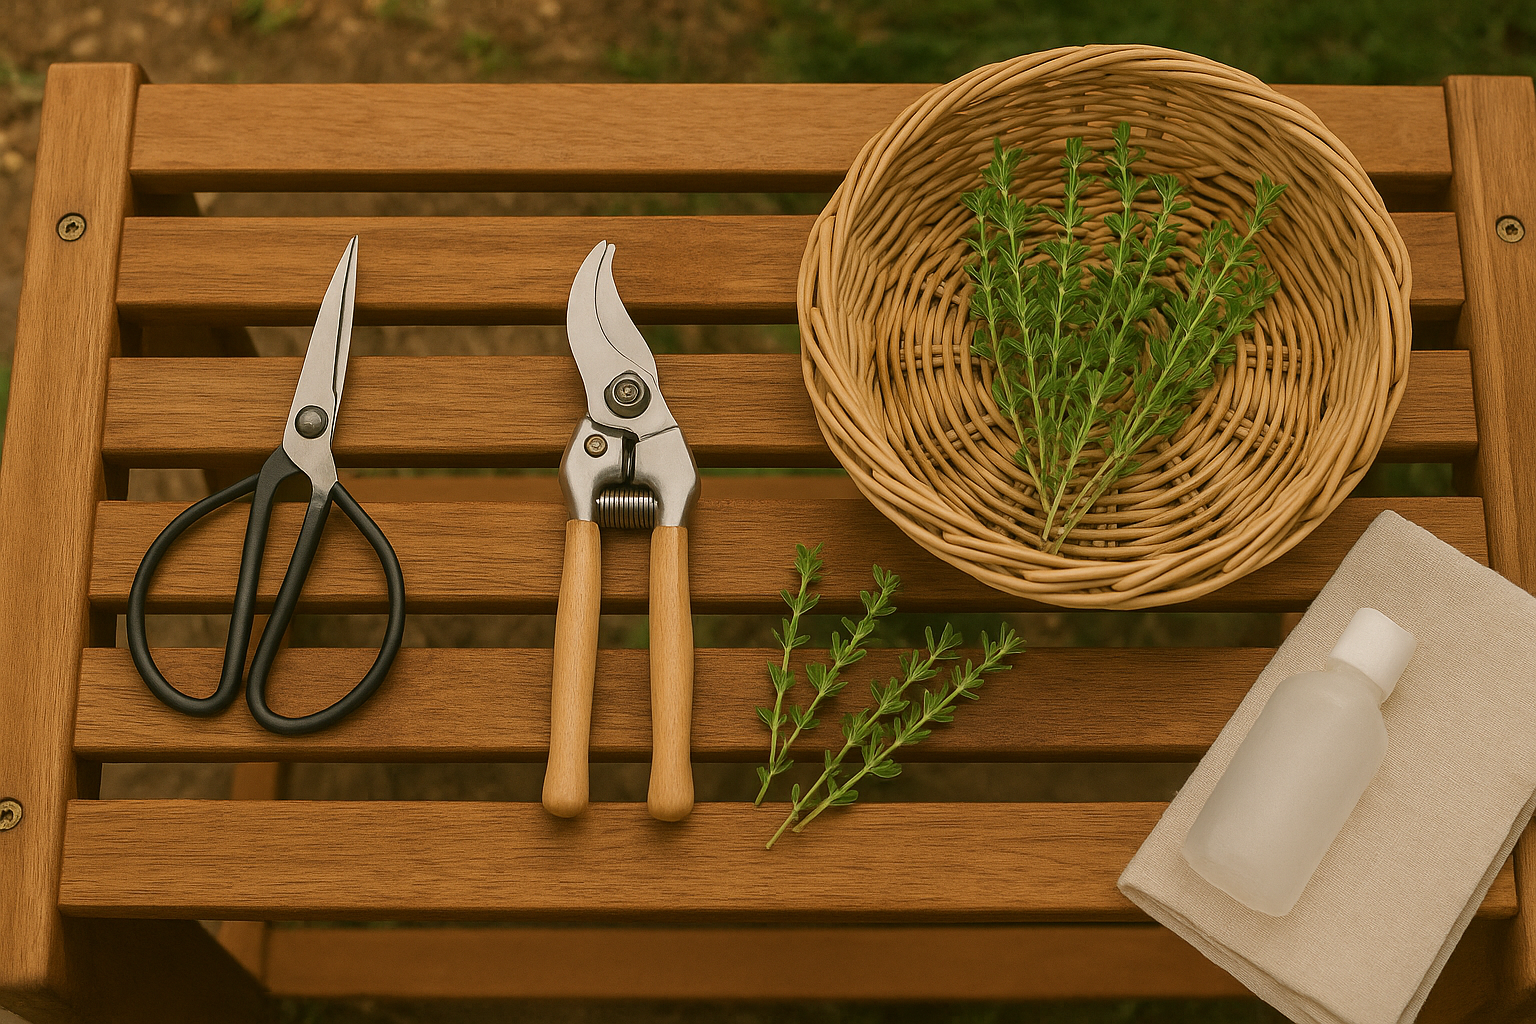
Before you start harvesting, gather the right tools: sharp scissors, bypass pruners, and a clean collection basket or bucket. Keeping tools sanitized—by wiping blades with rubbing alcohol before and after use—helps prevent the spread of diseases between plants, which is especially crucial if you’re handling multiple herbs or vegetables.
Make sure your harvesting gear is sharp; dull blades crush stems and make plants more susceptible to infection. Prepare the area by checking plants for any signs of pests or disease, removing affected parts before harvesting to keep the garden healthy.
Water plants a few hours ahead of time; this keeps stems turgid and less likely to wilt after cutting. When harvesting, choose healthy, green stems and avoid cutting old or woody parts, as these are slower to recover and may not regrow as vigorously.
Aim to snip just above a leaf node or branching point, which encourages new growth and keeps the plant full. Always harvest in the cooler morning hours for the best flavor and least plant stress—your plants, and your harvest basket, will thank you.
Step-by-Step Guide to Harvesting Thyme
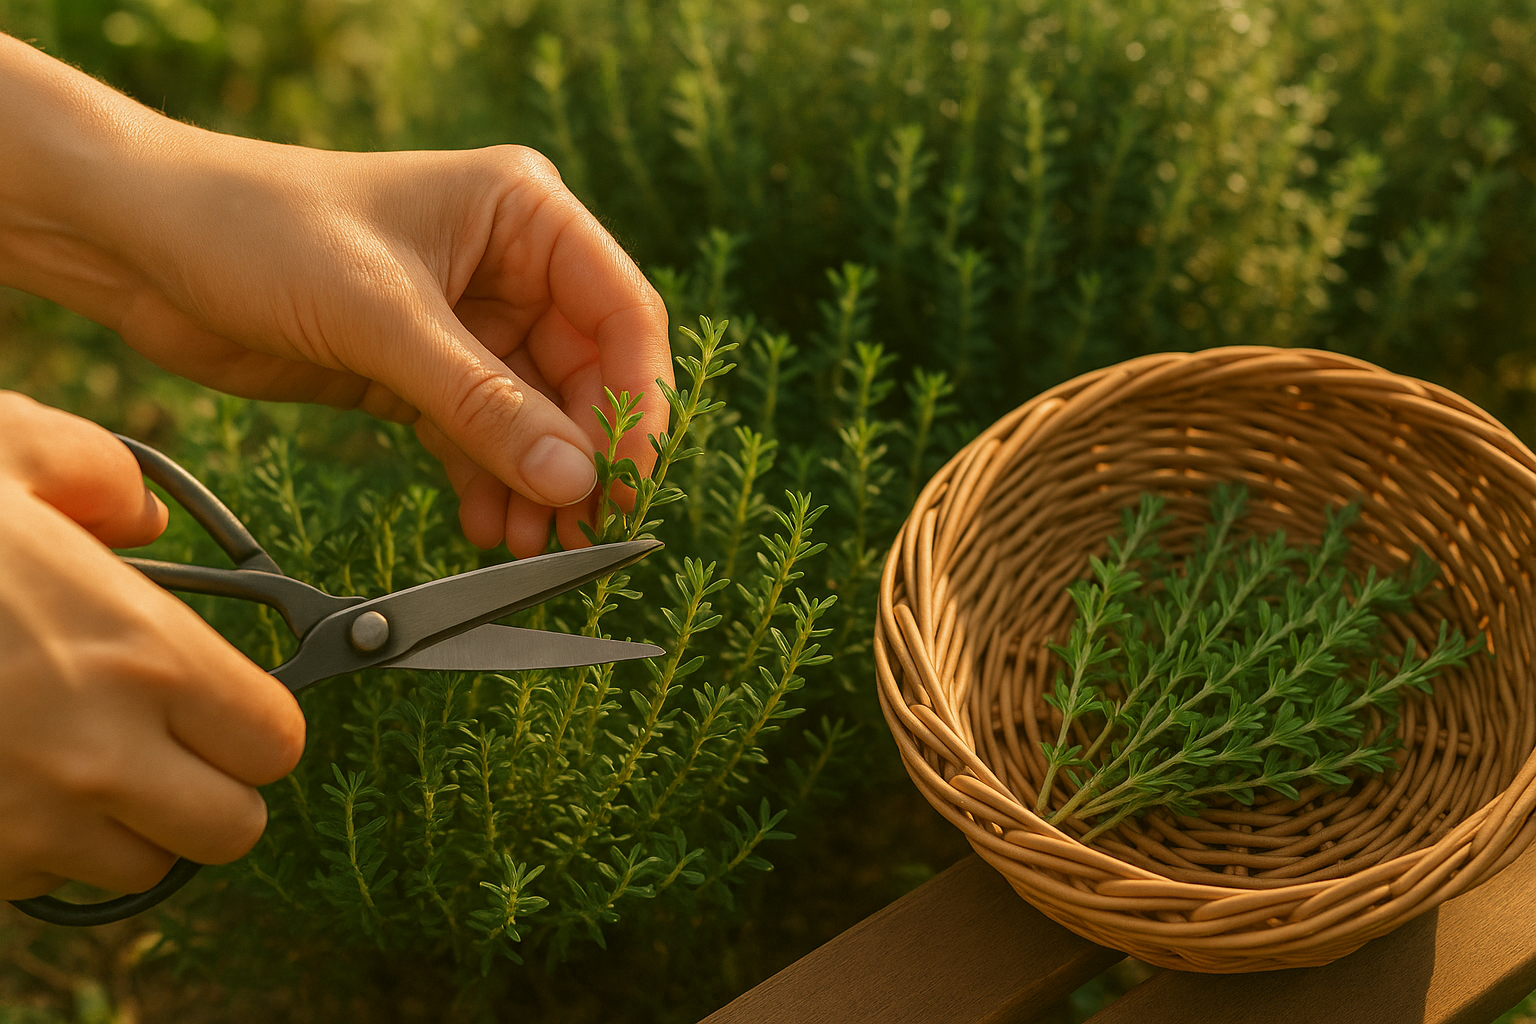
Harvesting thyme is a simple process, but knowing the right techniques can help your plant stay healthy and productive. Start by waiting until your thyme has plenty of leafy growth—usually when stems are at least five inches long.
For young plants, be gentle and only take a few small sprigs at a time. Use clean, sharp scissors or garden shears to snip just above a leaf node (where leaves grow from the stem). This encourages new growth and creates a bushier plant. Aim to leave at least half the stems intact so the plant can keep thriving.
With mature, well-established thyme plants, you can harvest larger quantities. Trim back up to one-third of the plant at a time, again making cuts just above leaf nodes to promote branching. Always avoid cutting into the woody base; stick to green, flexible stems since the older woody growth doesn’t regenerate as well.
Harvest in the morning after the dew dries but before the heat of the day—this is when the essential oils are at their peak for flavor and fragrance. As you work, remove any flower buds to redirect the plant’s energy into leaf production.
After harvesting, give your thyme a little water and monitor for stress; healthy plants will quickly bounce back with lush, vibrant leaves.
Whether you’re snipping just enough for tonight’s dinner or drying bundles for later, following these steps ensures you’ll enjoy a steady supply of fresh, flavorful thyme all season long.
How to Store Fresh Thyme
Storing fresh thyme properly helps you get the most flavor from your herbs and prevents waste. For short-term storage, keep thyme in the refrigerator. Gently rinse and pat it dry, then wrap the sprigs loosely in a damp paper towel and place them inside a resealable plastic bag or airtight container—this keeps moisture in without making the leaves soggy.
Alternatively, stand the thyme in a cup or jar with an inch of water, just like fresh flowers, and loosely cover the tops with a plastic bag to balance moisture and airflow. Remember to change the water every few days to prevent browning.
Always avoid overcrowding or sealing thyme while it’s wet, as this can encourage mold growth. If you spot any wilted stems, remove them to keep the rest fresh.
Use fresh thyme in recipes where its vibrant, herbal notes really shine, such as salad dressings, roasted vegetables, or as a garnish added at the end of cooking. However, if your thyme starts to lose vigor, it’s better to dry it and use it as dried thyme, which is perfect for long-simmering stews or soups. Keep in mind, dried thyme is more concentrated, so use about a third as much as you would fresh.
How to Dry Thyme for Long-Term Storage
Drying thyme at home is easy and lets you enjoy this fragrant herb all year round. The most popular method is air-drying—simply gather a few stems, tie them loosely into a bundle, and hang them upside down in a dry, warm spot away from direct sunlight. Good air circulation is key; a shaded kitchen window or an airy pantry is ideal.
Check your thyme often for signs of mold, especially if the air is humid, and avoid bundling the stems too tightly to speed up drying and prevent spoilage.
If you’re short on time, oven-drying is a great alternative. Spread thyme sprigs in a single layer on a baking sheet and place them in the oven at the lowest temperature (ideally under 180°F/80°C), leaving the door slightly ajar to let moisture escape. Keep a close eye on them and turn the sprigs occasionally to avoid overdrying—thyme’s essential oils give it its aroma and flavor, so overheating can make it bland.
Whether air- or oven-dried, thyme should be crisp and easy to crumble when ready. To strip the leaves, slide your fingers down the stems and discard the woody stalks.
Store the dried thyme in an airtight container away from heat and light—a glass jar in a cupboard works perfectly. Be sure to label it with the date, as dried thyme stays potent for about a year.
Use your homemade dried thyme just like store-bought: sprinkle it into soups, stews, or roasted veggies. Crushing the leaves just before cooking releases even more flavor, making your meals taste fresh and vibrant.
Year-Round Harvesting and FAQs
Harvesting thyme year-round is easier than many think, even when facing cold or adverse weather conditions. In chilly climates, you can extend your harvest by moving thyme pots indoors to a sunny windowsill or under grow lights. This not only keeps the plant thriving but also provides a fresh supply of leaves throughout winter.
Outdoors, protect thyme plants with a layer of mulch or a simple cold frame to guard against frost and harsh winds. Many worry that frequent harvesting might damage the plant, but thyme is surprisingly resilient; regular snipping actually encourages bushier regrowth.
Varieties such as ‘English Thyme’ or ‘Lemon Thyme’ are especially popular for their adaptability and robust flavor.
Some gardeners find storage tricky since thyme can lose its potency if not dried or frozen properly. To store it well, bundle sprigs and hang them in a dry, airy place, or freeze the leaves in olive oil for easy use in cooking.
Above all, don’t hesitate to keep harvesting, even in small amounts—continuous picking keeps the plant healthy and your dishes bursting with flavor, no matter the season.
Conclusion
Harvesting thyme is simple and rewarding—just snip the stems in the morning after the dew has dried, using sharp scissors to preserve the fresh flavor. For dried thyme, hang small bunches in a cool, airy spot and store them once they’re crisp. Remember, frequent harvesting keeps your plants healthy and bushy.
Don’t be afraid to experiment; your garden-grown thyme will taste better than store-bought. Have questions or unique tips? Share your experiences in the comments—we love hearing from fellow herb enthusiasts!
Ready to grow your skills? Dive into our other herb gardening articles for more hands-on advice and inspiration.