
Introduction to Growing Cilantro
If you’ve ever wanted a steady supply of fresh, aromatic herbs in your kitchen, learning how to grow cilantro from seed is a perfect place to start. Cilantro, also known as coriander, is a versatile culinary herb loved worldwide for its bright, zesty leaves that elevate everything from tacos to Thai curries.
Interestingly, it offers a double harvest: while the lacy green leaves are called cilantro, the plant’s seeds are harvested as coriander, adding an earthy, citrusy punch to countless spice blends. With its rapid growth and flavor-packed payoff, cilantro is a must-have for home cooks. However, many gardeners find it tricky to maintain a constant supply because the plant tends to bolt in heat.
The good news? With the right steps, you can successfully grow cilantro from seed both indoors and outdoors, making it possible to enjoy fresh leaves and seeds throughout much of the year—even if you don’t have a traditional garden space.
In this guide, we’ll walk you through every step of indoor and outdoor cilantro cultivation, from germination to harvest, along with pro tips for maximizing both your leafy yields and your batch of flavorful coriander seeds. Whether you’re a kitchen gardener or a windowsill enthusiast, you’ll find practical advice here.
Choosing and Preparing Cilantro Seeds
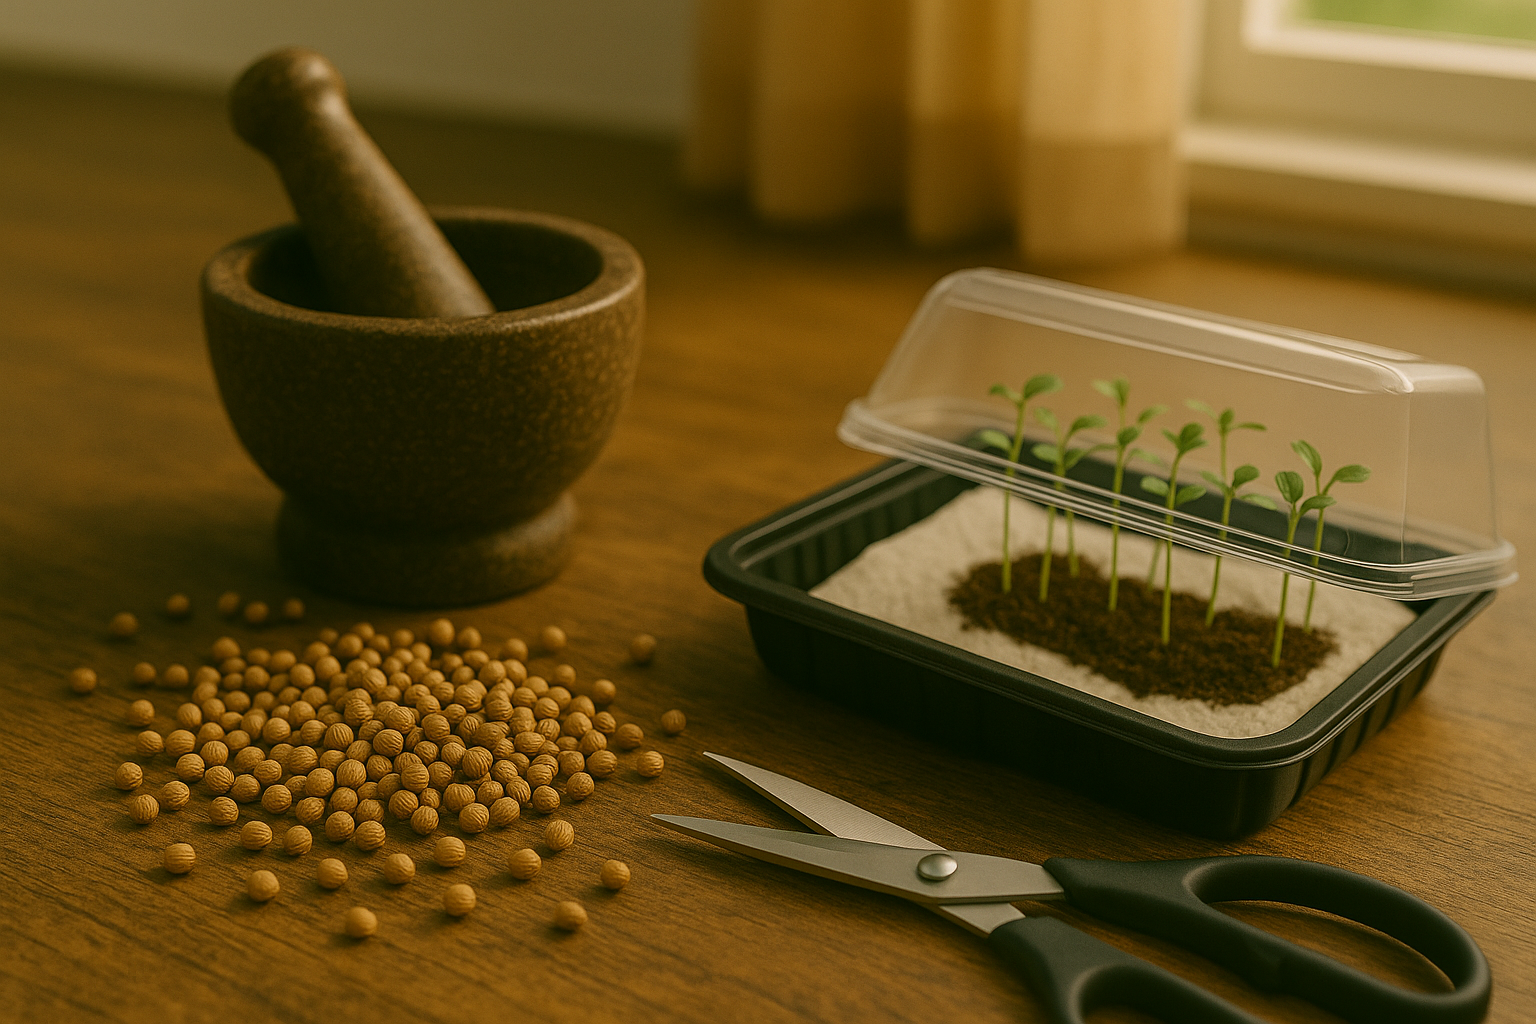
When choosing cilantro seeds, opt for slow-bolt varieties like ‘Santo’ or ‘Calypso’—these resist going to seed quickly and extend your harvest, especially in warmer weather. Fresh cilantro seeds, sometimes sold as whole coriander, can still germinate if handled properly.
Since coriander seeds are naturally two seeds fused together, gently crush them with the flat side of a knife before sowing to increase germination rates. To test seed viability, place a few seeds on a damp paper towel inside a plastic bag; if most sprout after 7–10 days, your seeds are ready to plant.
Always buy seeds from reputable, well-reviewed suppliers or local nurseries to ensure quality and disease-free stock. Store them in a cool, dry, airtight container away from sunlight, which helps maintain freshness for up to three years.
For best results, sow cilantro seeds outdoors in early spring or late summer, as the plant dislikes heat. If you’re starting seeds indoors to get a head start, plant them 3–4 weeks before your last expected frost, using biodegradable pots to reduce transplant shock when moving them outside.
Ideal Conditions for Germination

Getting seeds to sprout successfully starts with creating the right conditions for germination. Most seeds need a warm soil temperature—between 65°F and 75°F (18°C to 24°C) is ideal for many vegetables and flowers. Keeping the seeds moist, but not soggy, is crucial: consistently damp soil encourages seeds to wake up, but too much water can cause rot or fungal issues.
Some seeds, like lettuce, require light to germinate, so simply press them gently on the soil surface; others, such as beans, prefer darkness and should be planted at a depth about two to three times their diameter. Use a light, well-draining seed-starting mix rich in organic matter; garden soil is usually too heavy and can compact, stifling fragile sprouts. Aim for a soil pH around 6.0 to 7.0—slightly acidic to neutral—since most seeds do best here.
Plant seeds in clean trays or pots, and space them according to the packet’s directions to prevent crowding and reduce the risk of disease. Popular germination locations include sunny windowsills, heated greenhouses, or protected garden beds, but remember that seeds started outside may need protection from temperature swings and pests.
Trouble sprouting? Sometimes seeds don’t germinate because the soil dries out; using a clear plastic lid or plastic wrap can help retain humidity (just remove it as soon as seedlings appear to prevent mold). Overwatering, old seeds, cold conditions, and poor drainage are common issues—try bottom watering trays to keep moisture even, check expiration dates on seeds, and always use containers with drainage holes.
With the right balance of warmth, light, and moisture—and a little patience—you’ll be rewarded with healthy, vigorous seedlings ready for transplanting.
Step-by-Step Planting Guide (Indoors and Outdoors)
Starting seeds indoors gives you a head start on the growing season, especially in cooler climates. Choose clean, shallow containers with drainage holes—recycled yogurt cups or seed trays work great. Fill them with seed-starting mix, moisten the soil, and plant seeds at the recommended depth listed on the packet. Most seeds need warmth and steady moisture to sprout; placing containers atop the fridge or using a seedling heat mat helps.
As soon as seeds germinate, move them under bright grow lights or into a sunny south-facing window—seedlings need 12-16 hours of light daily for healthy growth.
Outdoors, direct sowing is best for root crops or fast growers like beans. Check your average last frost date—wait until the soil is workable and overnight frosts are past for most seeds (some hardy crops like peas can go in earlier). Loosen the soil, remove rocks and weeds, and mix in compost to give seedlings a strong start.
If you’re unsure, a soil thermometer is handy—most vegetables sprout well when the soil temperature is at least 50°F (10°C).
Indoor sowing gives you an earlier harvest and protection from unpredictable weather but requires space and regular care for seedlings. Outdoor sowing involves less work and avoids transplant shock but carries more risk if the weather turns bad.
For the longest harvest, try succession planting: sow small batches of seeds every 2-3 weeks instead of all at once. This works well with lettuce, spinach, carrots, and more, ensuring a steady supply rather than one big glut.
By mixing indoor and outdoor sowing and using succession techniques, you can maximize both your yields and your enjoyment in the garden.
Caring for Your Cilantro Plants

Cilantro thrives with consistent moisture, but overwatering is one of the easiest ways to harm it. Water your cilantro whenever the top inch of soil feels dry, aiming for even moisture without letting the roots sit in soggy soil. If you’re growing cilantro in a container, make sure there are drainage holes—this simple check can be a lifesaver.
Keep an eye out for signs of overwatering, such as wilting or yellowing leaves. Underwatering, on the other hand, can be spotted by limp, dry foliage. As your cilantro seedlings sprout, thin them to about 6 inches apart to give each plant proper airflow and space to grow robust leaves.
Feed cilantro with a balanced organic fertilizer once a month during its growing season. Too much nitrogen can actually speed up bolting, so steady and moderate feeding is best. Applying a thin layer of mulch—such as straw or shredded leaves—helps conserve soil moisture and keep the roots cool.
Cilantro tends to bolt, or go to seed, quickly in hot weather or when days get longer, so try planting bolt-resistant varieties like ‘Slow Bolt’. Provide afternoon shade using a shade cloth or strategically plant cilantro near taller veggies for natural protection.
Pests like aphids, leaf miners, and fungal diseases can sometimes cause trouble. Encourage beneficial insects (ladybugs love aphids!), inspect leaves often, and use neem oil sparingly as an organic remedy when needed. Rotate crops each year and avoid crowding to further reduce disease risks.
With a bit of care, your cilantro will stay lush, vibrant, and flavorful for many harvests.
Harvesting and Enjoying Cilantro

Cilantro is ready to harvest when its leafy stems reach about 4–6 inches tall and the foliage looks full and vibrant green—usually within 3–4 weeks of sowing. For a steady supply of fresh leaves, snip outer stems about an inch above the soil, always leaving the center growing point intact to encourage regrowth.
If you’re harvesting coriander seeds, let the plant flower and wait until the seed heads turn brown and dry on the stem. Then, clip entire stems and place them upside down in a paper bag to catch any seeds that drop.
To prolong your cilantro harvest, sow seeds every couple of weeks and pinch off any flower buds you see, as bolting quickly ends leaf production.
For storage, wrap freshly cut cilantro in a damp paper towel and tuck it into a resealable bag in the fridge, or place stems in a jar of water like a bouquet, loosely covered with a plastic bag—either way, use within a week for the best flavor.
Fresh cilantro brightens up salsas, curries, tacos, or salads, while the dried seeds (coriander) add a citrusy depth to spice blends, roasted veggies, and marinades. Don’t be afraid to try both parts of the plant to add punchy, aromatic flair to your favorite dishes!
Troubleshooting and FAQs
Growing cilantro can be easy once you know how to spot and solve common issues. If your plants develop yellow leaves, it’s usually a sign of overwatering or poor drainage—try letting the soil dry out a bit and make sure pots have drainage holes.
Pests like aphids can be controlled by rinsing them off with water or using insecticidal soap. Diseases such as powdery mildew thrive in crowded, damp spots, so thin your plants for better airflow.
Worried about your cilantro suddenly sending up tall stalks and flowers? That’s called bolting, and it happens when it gets too hot or if you plant too late in the season—try sowing seeds in cooler months and harvest often to delay flowering.
Beginners often ask about light—cilantro likes at least four to six hours of sun but appreciates some afternoon shade in very hot climates.
When it comes to pruning, snip the outer leaves first and avoid cutting more than a third at a time to keep plants healthy.
Want to save seeds? Let a few plants flower and dry, then collect the round seeds for replanting or cooking.
With these quick solutions and practical tips, growing cilantro becomes much less intimidating.