Introduction
Starting bell peppers indoors is one of the most rewarding ways to grow your favorite garden vegetable. It gives you a head start on the season and access to vibrant, homegrown peppers you might not find in stores. With so many pepper varieties—from sweet bells to spicy jalapeños—it’s no wonder they’re consistently a top choice among home gardeners.
By sowing seeds inside under grow lights, you unlock a wider selection of unusual colors, sizes, and flavors, while also ensuring stronger, healthier plants ready for transplanting when spring arrives. In this article, we’ll walk you through every stage of starting bell peppers indoors, including choosing seeds, setting up your grow lights, and the best practices for germination.
We’ll cover when and how to safely transition your seedlings outdoors, provide step-by-step care for robust growth, and share real-world tips on what to do if things go wrong—think slow sprouts or leggy seedlings. Whether you’re a new gardener eager for your first harvest or an experienced grower looking to improve your results, our guide will equip you with everything you need for thriving, homegrown bell peppers.
Choosing the Right Pepper Varieties
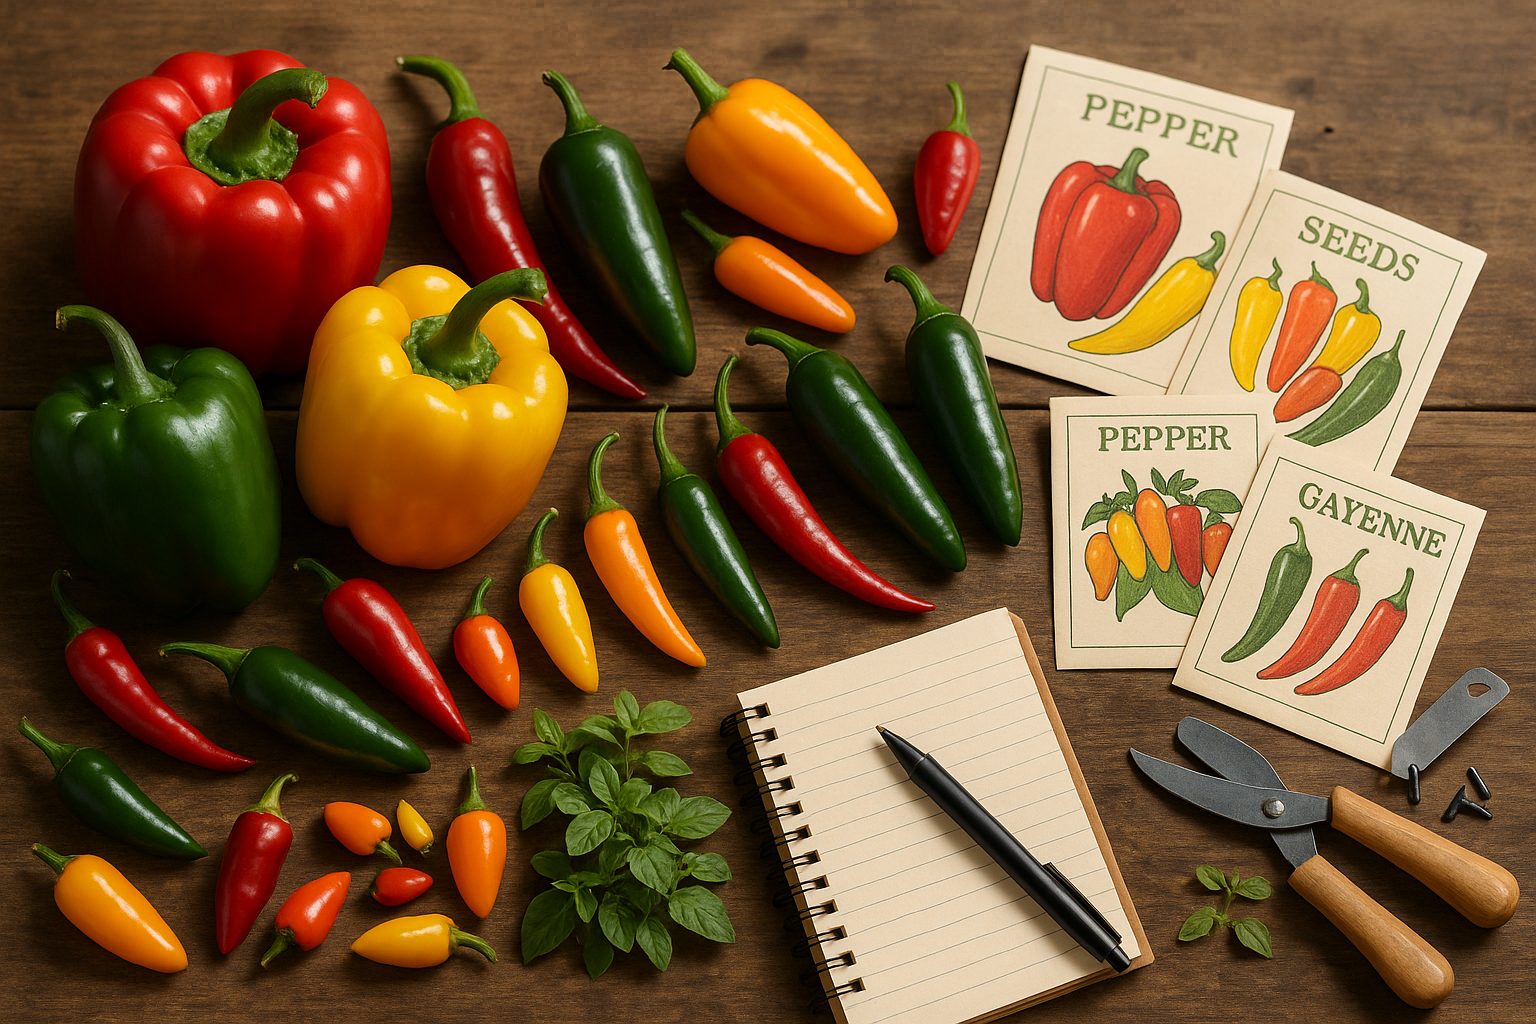
When selecting pepper varieties for your garden, start by deciding whether you want hot or sweet peppers. Hot peppers, like jalapeños, habaneros, and cayenne, are known for their kick and are great for adding heat to dishes, while sweet peppers, such as bell peppers and banana peppers, offer mild flavors and are perfect for salads, grilling, or stuffing.
If you live in a cooler climate, look for quick-maturing varieties like ‘Ace’ bell or ‘Early Jalapeño’ that ripen faster and don’t require as long a warm season. For more heat in chilly areas, ‘Hungarian Hot Wax’ is a reliable choice. In warmer climates, you can grow a wider range of options, from ‘California Wonder’ bell peppers to fiery ‘Scotch Bonnet’ or ‘Thai Dragon’ chilies.
Consider your available growing space as well:
- Compact types like ‘Lunchbox’ mini peppers or ‘Pot-a-Peno’ jalapeños thrive in containers or small patios, making them ideal for balconies or greenhouses.
- If you have larger garden beds, you can get creative by mixing tall and spreading varieties.
Check seed packet details for size, days to maturity, and recommended growing conditions to match your garden setup and climate for the best harvest.
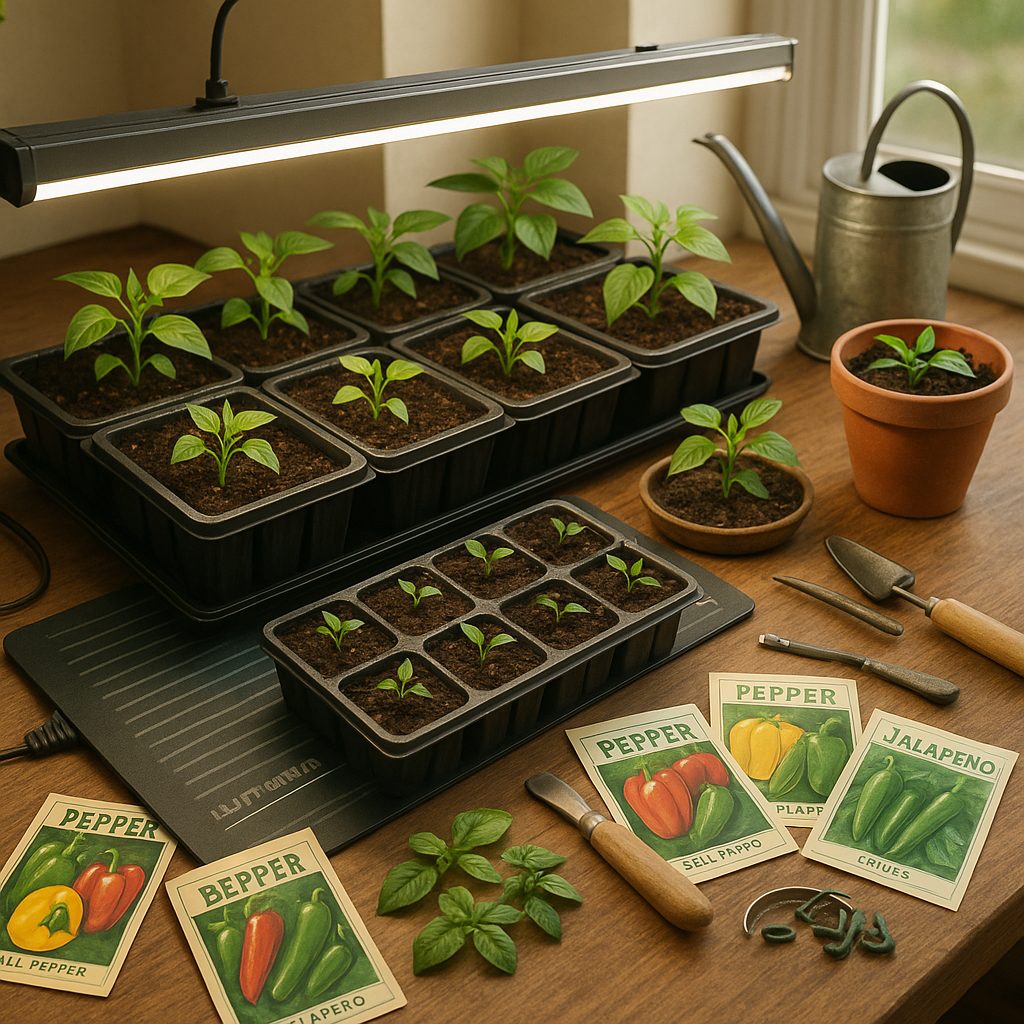
Starting Pepper Seeds Indoors
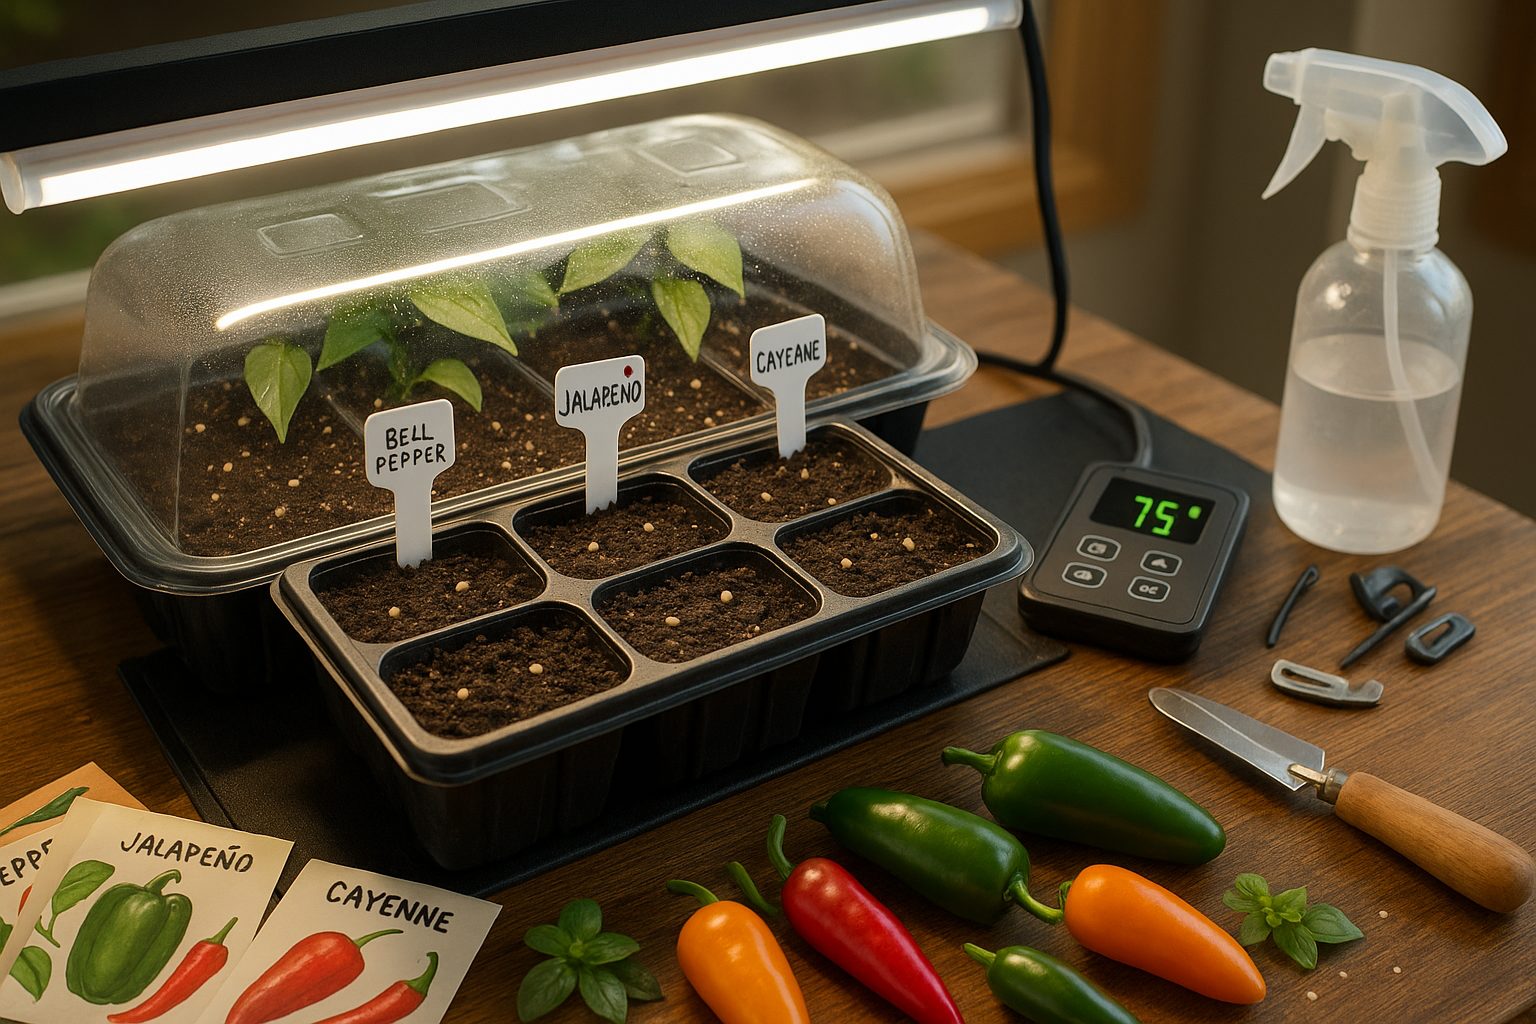
Starting pepper seeds indoors gives you a head start on the growing season and lets you choose from a wider range of varieties. Begin about 8 to 10 weeks before your area’s average last frost date—this timing ensures your seedlings will be robust and ready to transplant.
Gather essential supplies: seed trays or small pots, high-quality seed-starting mix, a heat mat to keep soil warm (pepper seeds germinate best at 75-85°F), and a grow light to mimic strong spring sunlight.
To sow seeds, fill trays with moist seed-starting mix, then plant seeds about 1/4 inch deep, one or two per cell. Use the heat mat to keep the soil warm, and cover trays with a clear lid or plastic wrap to lock in humidity.
Once the seeds sprout—usually in 7 to 14 days—move trays under your grow light, keeping the light just a few inches above the seedlings to prevent legginess. Water gently, ensuring the soil stays damp but not soggy, and remove the cover once most seeds have germinated to improve air flow and prevent mold.
Be sure to label each tray or pot clearly with the pepper variety and sowing date—different peppers can look similar as seedlings, and well-marked trays help you track and care for each type as they grow.
With the right setup and a little daily attention, you’ll have strong, healthy seedlings ready for outdoor planting once frost danger passes.
Nurturing Healthy Pepper Seedlings
Caring for young pepper seedlings starts with mindful watering—aim to keep the soil moist but never soggy, as overwatering can quickly invite diseases like damping off. A good rule of thumb is to water when the surface of the soil feels dry to the touch, using a spray bottle or gentle watering can for even distribution.
Fertilizing is best done once seedlings develop their first set of true leaves; choose a diluted liquid fertilizer (about a quarter of regular strength) and feed the plants every 1-2 weeks.
To avoid common fungal problems, always use clean containers and fresh, sterile seed-starting mix, and avoid overcrowding, which restricts airflow and raises humidity around the seedlings. If you notice seedlings suddenly collapsing at the base, this may be damping off—remove affected plants immediately and let the soil dry a bit before watering again.
For robust and sturdy growth, ensure your peppers receive plenty of light—ideally 14-16 hours under fluorescent or LED grow lights placed just a few inches above the tops of the seedlings. If using a windowsill, rotate trays daily to keep growth even.
Good air circulation is also crucial; set up a small fan on low nearby or gently brush your hand over the seedlings once a day. These simple strategies help prevent disease, promote strong stems, and set your pepper plants up for healthy development.
Hardening Off and Transplanting Peppers
Hardening off is a crucial step for pepper seedlings that helps them adjust from the controlled indoor environment to the unpredictable conditions outdoors. Without this gradual acclimation, your young plants can experience transplant shock, which often leads to stunted growth or loss.
To harden off, start by placing your pepper seedlings outside in a shaded, sheltered spot for just one or two hours on the first day. Gradually increase the amount of sunlight and time outside each day over the course of a week—adding one or two hours daily, and moving them into direct sun when temperatures are above 60°F (16°C). Bring them inside at night, especially if temperatures drop below 55°F (13°C) or a cold snap is forecast. Keep an eye on wind, too, as strong gusts can damage tender stems.
After about a week to ten days, your peppers will be ready for transplanting. For best results, aim to transplant on a cloudy day or in the late afternoon to reduce transplant shock. Make sure all danger of frost has passed and nighttime temperatures reliably stay above 55°F (13°C).
Whether planting in a garden bed or containers, dig holes deep and wide enough to comfortably fit the root ball, spacing plants about 18–24 inches apart. Water seedlings thoroughly after transplanting and consider mulching to help retain moisture.
With a little patience during the hardening off process, your peppers will transition smoothly to their new home, ready to thrive all season long.
Caring for Peppers as They Grow
As your pepper plants grow, consistent care is essential for healthy yields. Water deeply at the base whenever the soil’s top inch feels dry—peppers prefer even moisture but dislike soggy conditions. Applying a 2-3 inch layer of mulch, like straw or shredded leaves, helps keep soil moist and deters weeds.
Feed your plants every few weeks with a balanced fertilizer or a tomato feed; however, too much nitrogen may lead to leafy growth with fewer peppers. To boost airflow, reduce disease, and direct energy into fruit production, pinch off lower leaves and any suckers that form between the main stems.
Supporting taller pepper varieties with stakes or cages keeps plants upright and prevents branches from snapping under heavy fruit.
Common Issues to Watch For
- Aphids and spider mites: Spray them off with water or treat with insecticidal soap.
- Blossom end rot: Sunken brown spots often signal calcium deficiency or uneven watering—adding crushed eggshells to the soil and maintaining steady moisture can help.
- Sunscald: Peppers develop pale, soft spots from too much sun exposure. Ensure plants have enough leaf cover and avoid heavy pruning during extreme heat.
With steady attention to these details, you’ll enjoy strong, productive pepper plants all season long.
Growing Peppers in Different Settings
Growing peppers can be rewarding whether you have a big garden, a small patio, or just a sunny windowsill. Outdoors, peppers thrive in well-draining soil with at least six hours of direct sunlight — just wait until all danger of frost has passed before planting. Mulching helps retain moisture and suppress weeds, but be mindful of unpredictable weather and pests that can affect your harvest.
For container gardening, choose pots at least 12 inches deep and wide, and use high-quality potting mix for maximum growth. Containers are easy to move, so you can chase the sun or shelter your plants from spring chills, but they dry out quickly and need regular watering and feeding.
Greenhouse or indoor growing offers the most control: use grow lights and temperature regulation to mimic ideal conditions, and keep humidity in check. While this method protects your plants from weather and most pests, setup costs are higher, and good ventilation is essential to avoid fungal diseases.
Whichever method you choose, remember that peppers love consistent warmth, sunlight, and moisture — so tailor your care to your space, and enjoy fresh, homegrown flavors all season long.
Conclusion & Troubleshooting Tips
Growing peppers from seed can be a rewarding journey if you pay attention to their unique needs. Start by using fresh seeds, warm temperatures, and consistent moisture for successful germination—think of placing your seed tray on a sunny windowsill or using a heat mat to speed things up.
Once seedlings appear, ensure plenty of light and avoid overwatering to prevent damping off. Transplant outdoors only when night temperatures are consistently above 55°F to avoid cold shock.
If your plants develop yellow leaves, it’s often a sign of overwatering or nutrient deficiency—try letting the soil dry slightly between waterings and add a balanced fertilizer. Curling leaves may point to aphids or spider mites; blast them off with water or use insecticidal soap.
Poor fruiting? Peppers love heat, so wait until summer settles in before expecting a big harvest, and make sure they’re getting at least six hours of direct sunlight.
Don’t be afraid to experiment with different pepper varieties, from mild bells to spicy habaneros, and try methods like container planting or mulching for better results.
Every garden and grower is different, so keep notes, have fun, and enjoy discovering what works best for your pepper patch.