
Introduction
Dreaming of crisp, homegrown lettuce in the middle of winter? With a mini greenhouse for lettuce, you can enjoy fresh greens from your garden year-round—no matter the weather outside. Lettuce thrives in cooler months, but unpredictable frosts or scorching heat can wipe out even the hardiest crops.
A mini greenhouse solves this by offering a controlled environment that shields your plants from harsh temperatures, gusty winds, and pests. By creating a cozy, protective microclimate, you’re not just extending your growing season—you’re ensuring a steady supply of salad-worthy leaves any time of year.
In this post, we’ll walk you through the many benefits of growing lettuce at home, especially how keeping a regular harvest can save money and reduce trips to the grocery store. You’ll discover why a mini greenhouse for lettuce is the perfect solution for continuous cultivation, even in tight outdoor spaces or urban gardens.
We’ll cover everything you need to build your own, from choosing materials and the right location to expert tips on ventilation, irrigation, and pest management. Get ready to transform your growing space into a leafy paradise—let’s dive into how you can harvest tender, tasty lettuce all year long!
Choosing the Right Location and Materials
Finding the perfect spot for your mini greenhouse is essential for a thriving garden. Start by looking for an area in your yard that gets at least 6 hours of unobstructed sunlight each day, especially in the morning and early afternoon when light is strongest. Avoid locations prone to deep shade or those under large trees, as overhanging branches can block sunlight and drop debris on your greenhouse.
Protection from strong winds is another key factor; a fence, hedge, or even the sheltered side of a building can shield your greenhouse and help regulate the internal temperature. Don’t forget accessibility—make sure the site is easy to reach for regular watering, harvesting, or maintenance, and has level ground for stable installation.
When choosing your mini greenhouse type, consider your budget and DIY skills. Prefab kits offer convenience and usually have weather-resistant features built-in, while DIY options allow more customization using materials you might already have.
For frames, aluminum and galvanized steel are lightweight, rust-resistant, and sturdy against the elements. PVC pipe is another budget-friendly option, though it’s less durable in extreme weather. For covers, opt for UV-resistant polycarbonate panels or high-quality polyethylene film—both retain heat well and diffuse harsh sunlight to protect seedlings. Glass offers a classic look but is heavier, more expensive, and can break during storms.
To maximize longevity, secure your greenhouse with anchors or heavy stakes, and regularly check for small tears or damage in the covering. Seal any gaps or seams with weatherproof tape or silicone as needed, and consider using shade cloth in summer to prevent plants from overheating.
By carefully selecting your location and construction materials, you’ll create a sturdy, lasting mini greenhouse that can weather the seasons and keep your plants thriving.
Building Your Mini Greenhouse
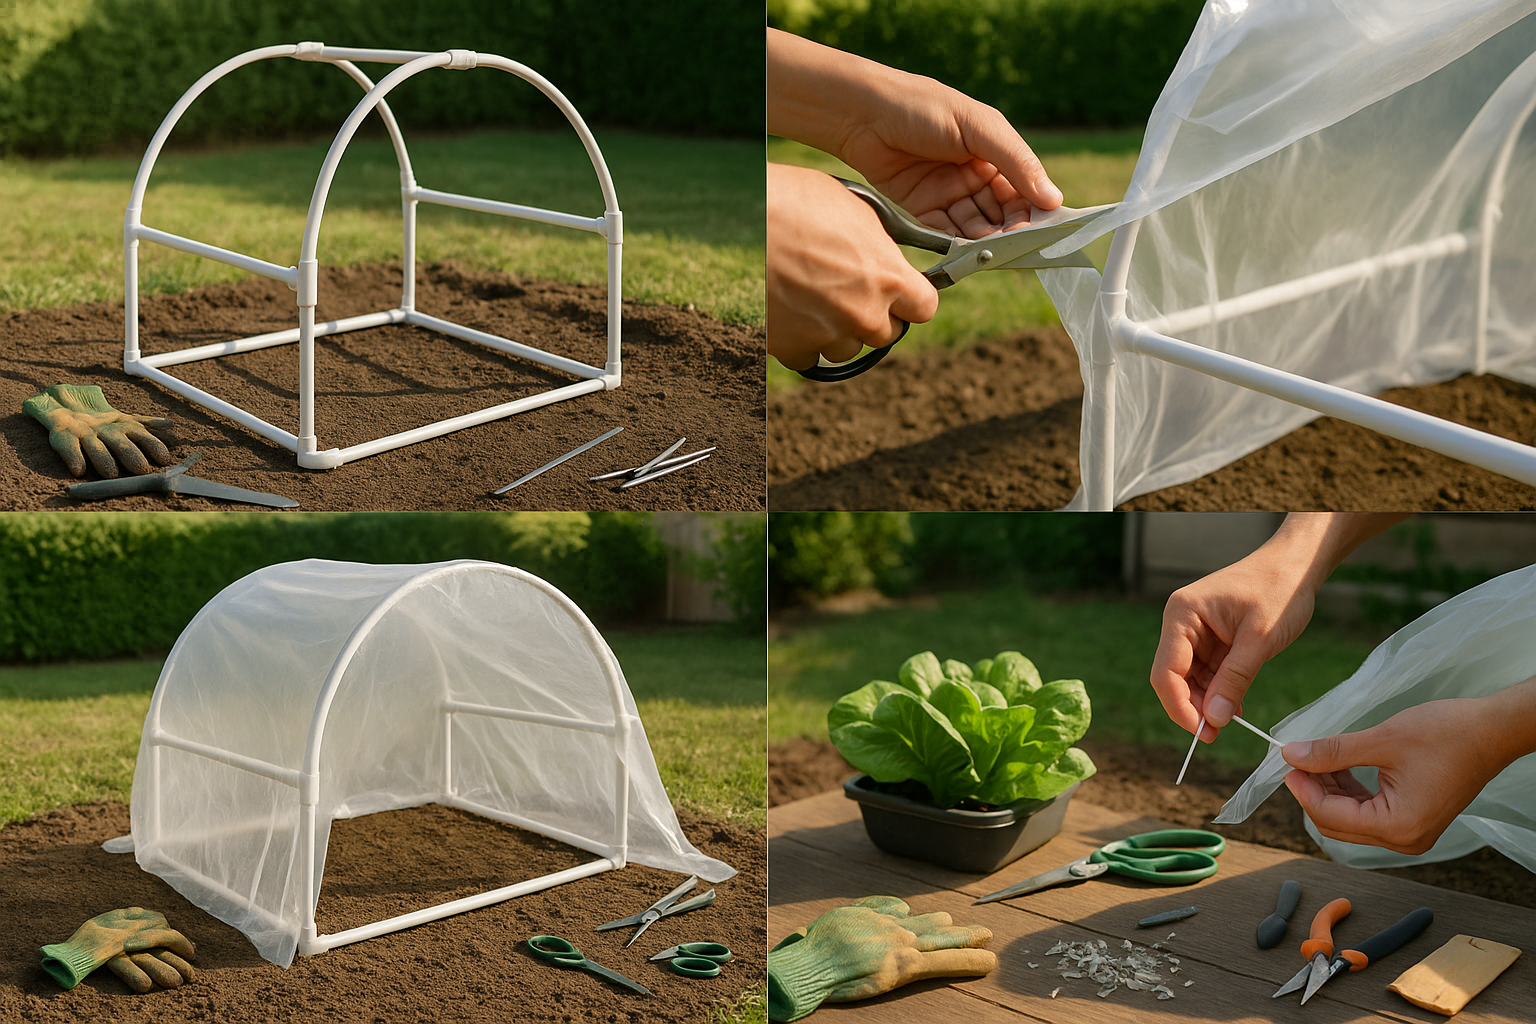
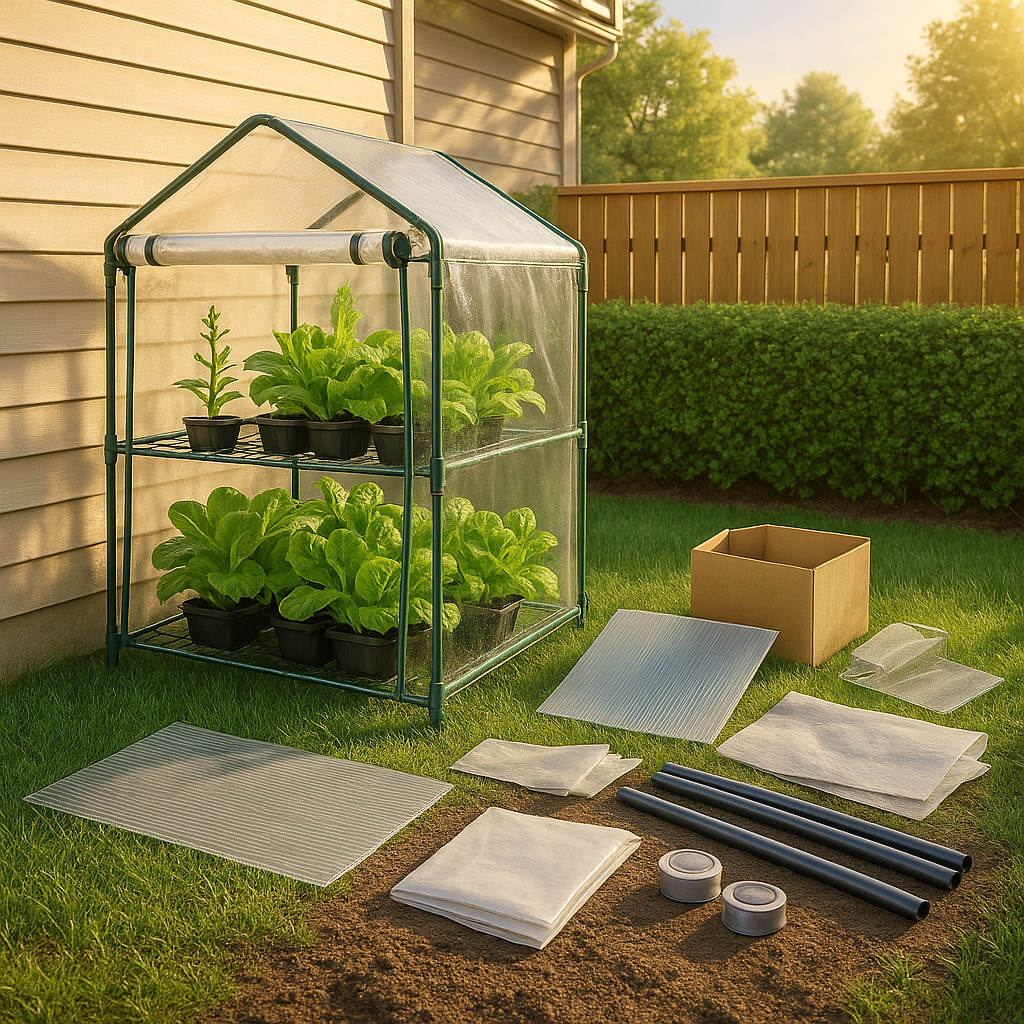
To build a simple, effective mini greenhouse, start by gathering your materials: PVC pipes or wooden stakes for the frame, a plastic sheet or clear polyethylene for covering, zip ties or clamps, a tape measure, handsaw (if using wood), scissors, and a hammer or mallet. You’ll also need some weights or garden stakes to anchor your greenhouse, plus gloves and protective eyewear for safety.
Begin by selecting a sunny, level spot in your yard. Lay out your frame’s base using PVC or wood, typically four to six feet long and two to three feet wide. Securely join the corners using connectors or by screwing wooden pieces together.
Next, create arches for the roof by bending PVC pipes and anchoring both ends into the ground alongside the frame, or build a peaked roof with wood. Once the frame is assembled, drape your plastic covering over the structure, making sure it’s taut but not overstretched. Use zip ties, clamps, or staples to attach the cover, trimming excess material as needed.
Anchor the base with garden stakes, bricks, or sandbags to keep the greenhouse in place during windy conditions. For ventilation, prop open one side slightly during the day using a brick or small stick, or add a simple flap to the covering for airflow—this prevents overheating and disease.
Always check that the structure is stable before use, and inspect it regularly for tears or loose fittings. Clean the cover with mild soap and water every few weeks to ensure sunlight gets through and to prevent mold. With careful setup, routine checks, and easy upkeep, your mini greenhouse will help you grow healthy plants even in changing weather.
Preparing for Lettuce Planting
Starting your lettuce crop begins with choosing the right growing environment. For small spaces or patios, containers at least 6 inches deep work great, allowing roots to spread while controlling soil quality and drainage. Raised beds are ideal for yard gardens, especially if you want better soil fertility control and less bending over.
If you’re interested in a soilless approach, hydroponic systems like nutrient film technique (NFT) channels or deep water culture totes can produce lettuce quickly and cleanly. However, they require a bit more setup and monitoring.
Whichever method you choose, lettuce thrives in moist, loose, well-draining soil. In containers or beds, use a premium potting mix rich in compost, with a touch of perlite or vermiculite to boost drainage. Your soil or growing medium should have a nearly neutral pH—aim for 6.0 to 7.0—and be packed with organic matter to keep nutrients available.
For hydroponics, a quality lettuce nutrient solution is essential, balanced with major nutrients like nitrogen, phosphorus, and potassium, as well as minor nutrients.
When it comes to sowing, starting seeds directly where they’ll grow is simple and effective for most gardeners; sow them shallowly since lettuce seeds need light to germinate. Alternatively, you can start seeds indoors in plug trays 3-4 weeks before transplanting, which ensures sturdier young plants and an earlier harvest. Water gently to keep the soil moist, and thin seedlings to avoid overcrowding.
By laying this foundation, you’ll set your lettuce up for rapid, healthy growth.
Maintaining Ideal Conditions Year-Round
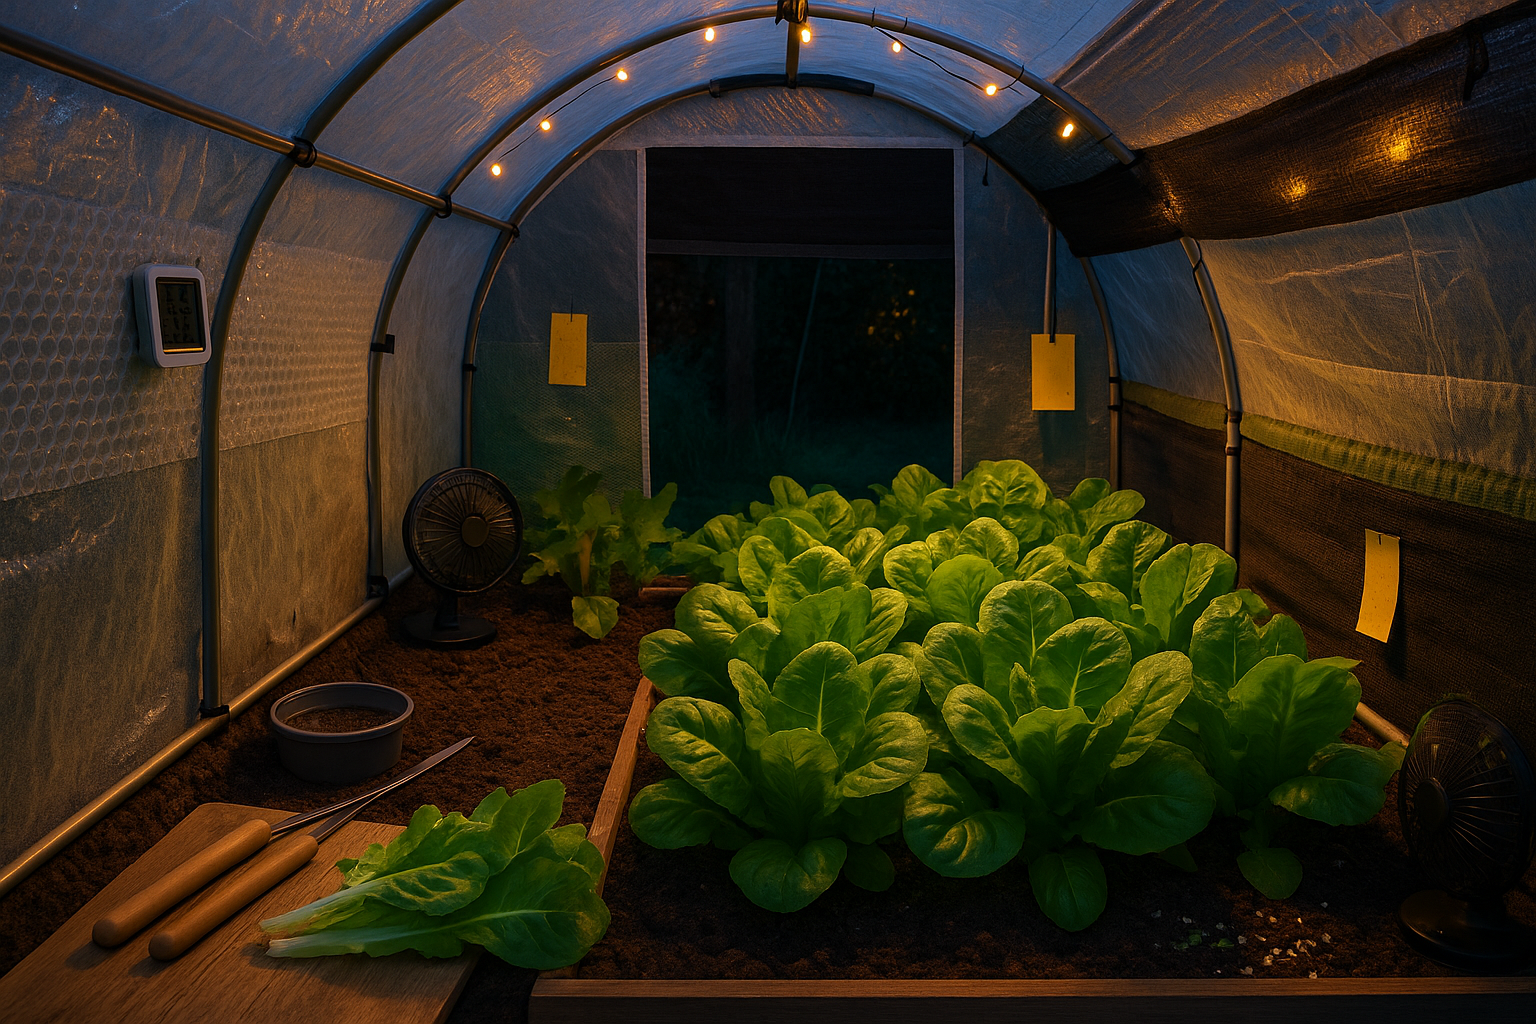
Keeping your mini greenhouse running smoothly all year starts with managing temperature, humidity, and airflow. For temperature control, use a simple thermometer and aim to keep things between 60-70°F for lettuce. In winter, bubble wrap or horticultural fleece can insulate the structure, trapping warmth while letting in essential sunlight. On chilly nights, even a string of LED holiday lights can provide a gentle heat boost.
Summer heat, on the other hand, can stress your plants—use shade cloth, open vents, or prop open the door to help excess warmth escape. Humidity should hover around 50-70%; mist the soil if it’s dry or crack windows if condensation builds up.
Good air circulation is key, so add a small fan if your greenhouse feels stuffy—this deters fungal diseases and keeps mold at bay. Adapt as the seasons change: in spring and fall, monitor temperatures closely, as wild swings can damage young lettuce.
For pest prevention, check leaves weekly and remove any aphids or slugs by hand; sticky traps are also handy for catching flying pests. To avoid fungal problems common in greenhouse lettuce, always water at the base (never on the leaves) and let soil dry slightly between watering.
Rotate your crops every few months and clear out any dead plant material that might harbor disease. If you spot yellowed, wilting lettuce, it could be root rot—improve drainage and lighten up on watering. Regularly cleaning tools and surfaces helps keep bacteria and viruses away.
With these hands-on steps, your mini greenhouse can deliver crisp, healthy lettuce in every season, no matter the weather outside.
Harvesting and Succession Planting
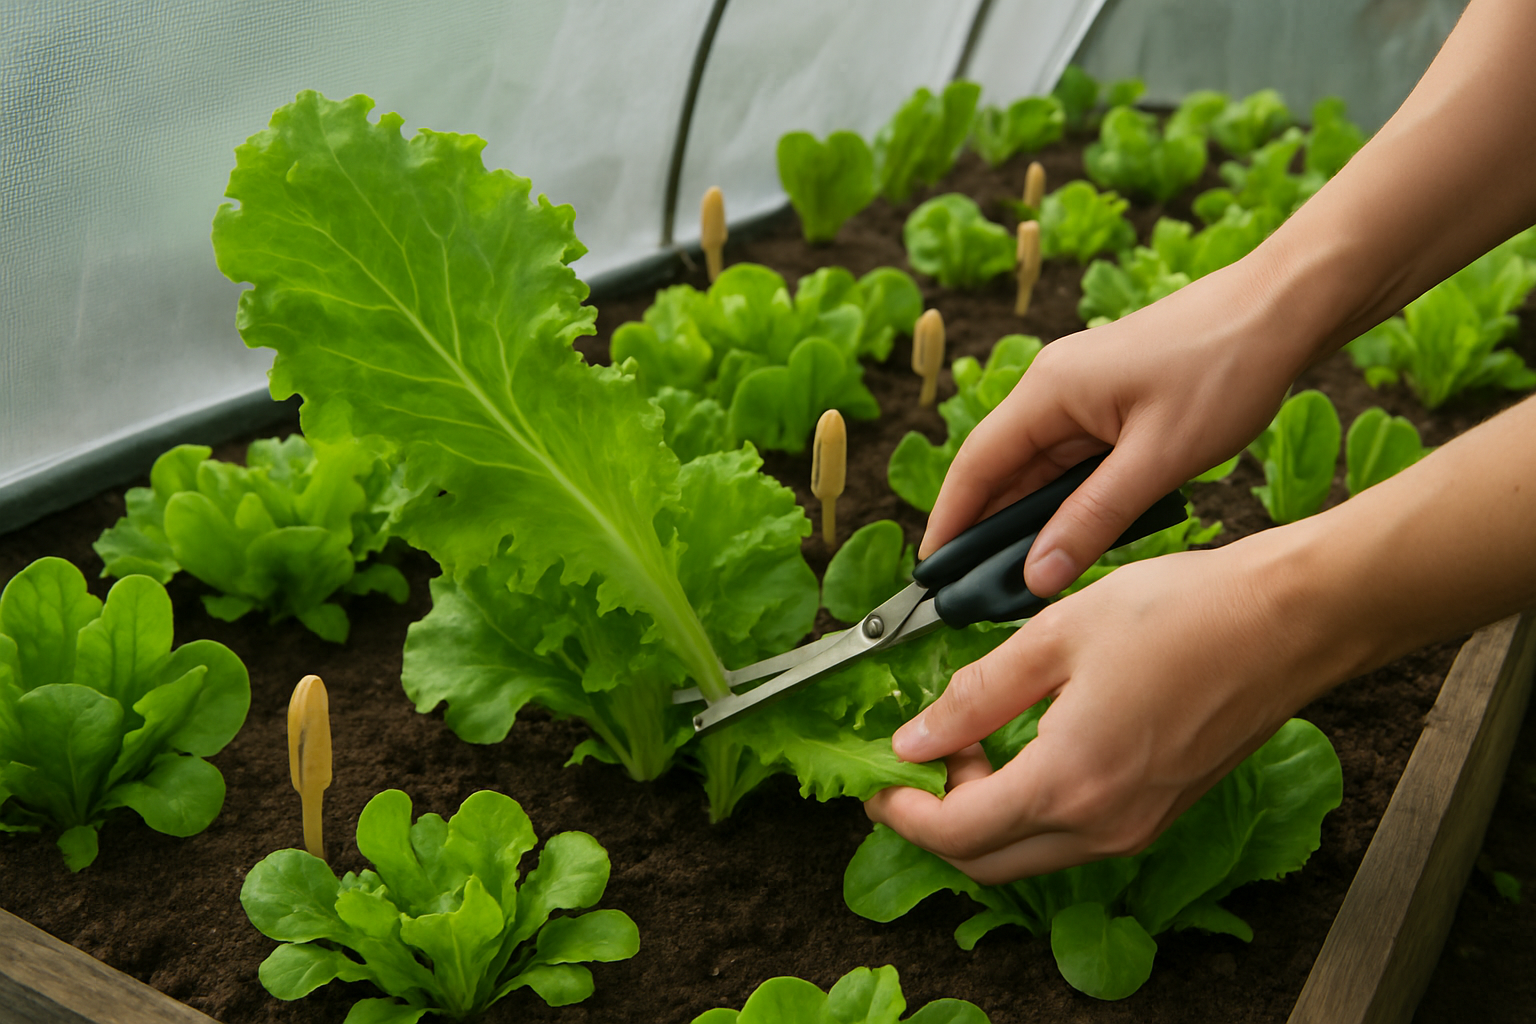
Knowing when to harvest lettuce is key to enjoying crisp, flavorful leaves. For leaf lettuce, start picking the outer leaves when they’re about 4 to 6 inches long—don’t wait too long, as older leaves become bitter and tough. If you’re growing head lettuce like romaine or butterhead, harvest when the heads feel firm and well-formed, usually six to eight weeks after planting.
To avoid damaging the plant, use a sharp knife or scissors, cutting leaves cleanly about an inch above the soil to encourage regrowth for a second harvest.
To keep your salad bowl full all season, practice successive planting: sow a small section of seeds every two weeks instead of planting your whole packet at once. This staggered approach ensures you always have fresh, young lettuce ready for picking, rather than a glut all at once.
In warm weather, choose heat-tolerant varieties and provide shade to slow bolting. After harvesting, handle leaves gently—rinse them under cool water, then dry thoroughly with a salad spinner or by patting them with a towel.
Store your lettuce in a breathable produce bag or a container lined with paper towels in the refrigerator’s crisper drawer. This keeps leaves fresher, reduces moisture, and prevents wilting, so you can enjoy tender lettuce for up to a week or even longer.
With a little planning and the right techniques, you’ll have a thriving, continuous crop—and always a salad ready to go.
Troubleshooting and Extra Tips
Running into problems with your mini greenhouse can be frustrating, but most issues are easy to fix with a few simple adjustments. If you spot mold on your soil or plants, it’s usually caused by excess moisture. Try airing out your greenhouse by opening vents or removing the lid for a few hours each day, and water less frequently.
Overcrowded seedlings compete for light and nutrients, so thin them out as soon as they sprout. Transfer extra seedlings to larger containers if needed. Keeping plants spaced apart will also help prevent diseases.
When unexpected cold snaps threaten, drape your greenhouse with an old blanket overnight or use bubble wrap for extra insulation. Both are quick, low-cost solutions that protect tender plants.
For continued success, check out online forums like the r/gardening subreddit or local Facebook gardening groups where you can get real-time advice from seasoned growers. Resources such as the RHS website and YouTube channels like Epic Gardening offer free guides and visual tutorials tailored to beginners.
Try free gardening apps like Gardenate or Happy Plant to help with planting schedules and reminders. Connecting with community gardens or local horticultural societies can also provide a network of support and hands-on tips.