Introduction to Hydroponic Lettuce
Hydroponic lettuce is transforming how people grow fresh greens, no matter where they live. In a hydroponic system, plants like lettuce thrive without soil, absorbing nutrients directly from water. Lettuce is especially well-suited to this method because of its shallow root system and fast growth cycle, making it one of the most popular crops for hydroponic gardeners worldwide.
The advantages are hard to ignore: hydroponic setups typically use about 90% less water than traditional gardening, allow you to grow more produce in less space, and protect crops from common soil-borne pests and diseases. Lettuce grown hydroponically tends to be cleaner, crisper, and often faster to harvest than soil-grown varieties—sometimes ready in just a few weeks.
Whether you’re a home gardener wanting to grow salad greens year-round on a sunny windowsill, an urban farmer maximizing limited apartment or rooftop space, or a commercial producer seeking higher yields and consistent quality, hydroponic lettuce offers a practical, scalable solution. With just a little setup, you’ll be amazed at how easy it is to produce a steady supply of healthy, delicious lettuce from seed to plate.
Choosing the Best Lettuce Varieties for Hydroponics
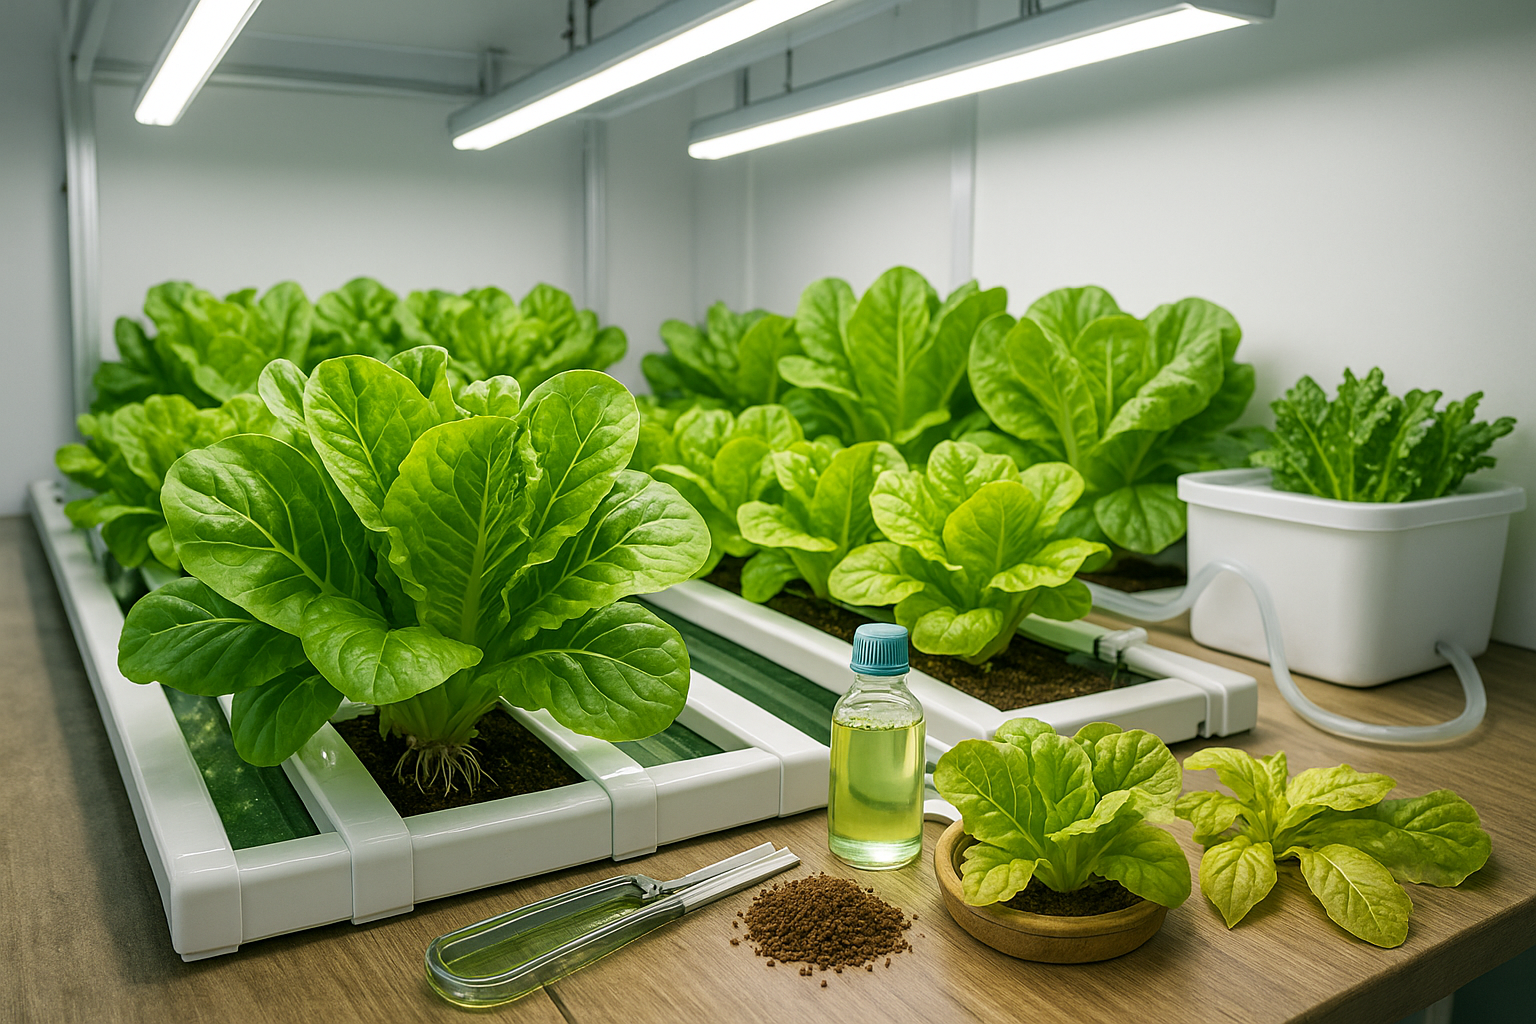
When selecting lettuce varieties for hydroponic systems, prioritize those that naturally thrive in controlled, soilless environments. Butterhead lettuces, like Bibb and Boston, are popular due to their compact growth and tender, mild leaves—ideal for sandwiches and wraps.
Romaine is another favorite, valued for its crisp texture, tall heads, and resistance to tip burn, making it perfect for Caesar salads. Loose-leaf types, such as Salad Bowl or Red Sails, excel because they grow quickly, don’t form tight heads, and can be harvested leaf by leaf for ongoing yield.
Start with seeds from reputable suppliers that specifically label their products for hydroponics or indoor growing; these are bred for uniformity and faster germination. Avoid varieties advertised as slow growing or prone to bolting—bolting causes bitterness and poor leaf texture, especially in warm or fluctuating temperatures often found in hydroponic setups.
Flavor and texture matter too: buttery leaves suit delicate dishes, romaine’s crunch adds a satisfying bite to hearty salads, and colorful loose-leafs bring vibrancy and mild flavor to mixed greens. Think about your favorite recipes and choose varieties that align with your culinary goals, whether that’s tender lettuce wraps, refreshing salad bowls, or vibrant garnish mixes.
Setting Up Your Hydroponic System
When setting up your first hydroponic system, choosing the right method is key. The most common beginner-friendly systems are Nutrient Film Technique (NFT), Deep Water Culture (DWC), and the Kratky method.
NFT uses a shallow stream of nutrient solution that flows through sloped channels, where plant roots absorb nutrients as they pass by. This setup is great if you have a bit more space and want fast growth.
DWC is simpler: plant roots dangle in oxygen-rich, continuously aerated water. This method is ideal for small spaces like closets or shelves and only requires a container, air pump, and air stone.
The Kratky method is the easiest—no pumps required. Just suspend your plants above a nutrient solution in a covered container and let the roots grow down.
For any of these methods, it’s important to start with the right equipment. You’ll need sturdy containers or tanks for the water, net pots to hold your plants, a submersible pump (for NFT and DWC), an aquarium air pump and air stone (for DWC), grow lights if you’re gardening indoors, hydroponic nutrients, a pH meter and solution to balance water acidity, and plant supports if you’re growing heavier produce.
A Basic Checklist:
- Water-tight tubs or buckets
- Net pots
- Water or air pump (unless using Kratky)
- High-quality grow lights
- Nutrient solution
- pH meter/test kit
- pH adjusters
- Starter plugs or cubes
- Optional: timer for automating lights and pumps
Start small, follow this checklist, and you’ll find hydroponics can be easy—and incredibly rewarding.
Planting and Germinating Lettuce Seeds
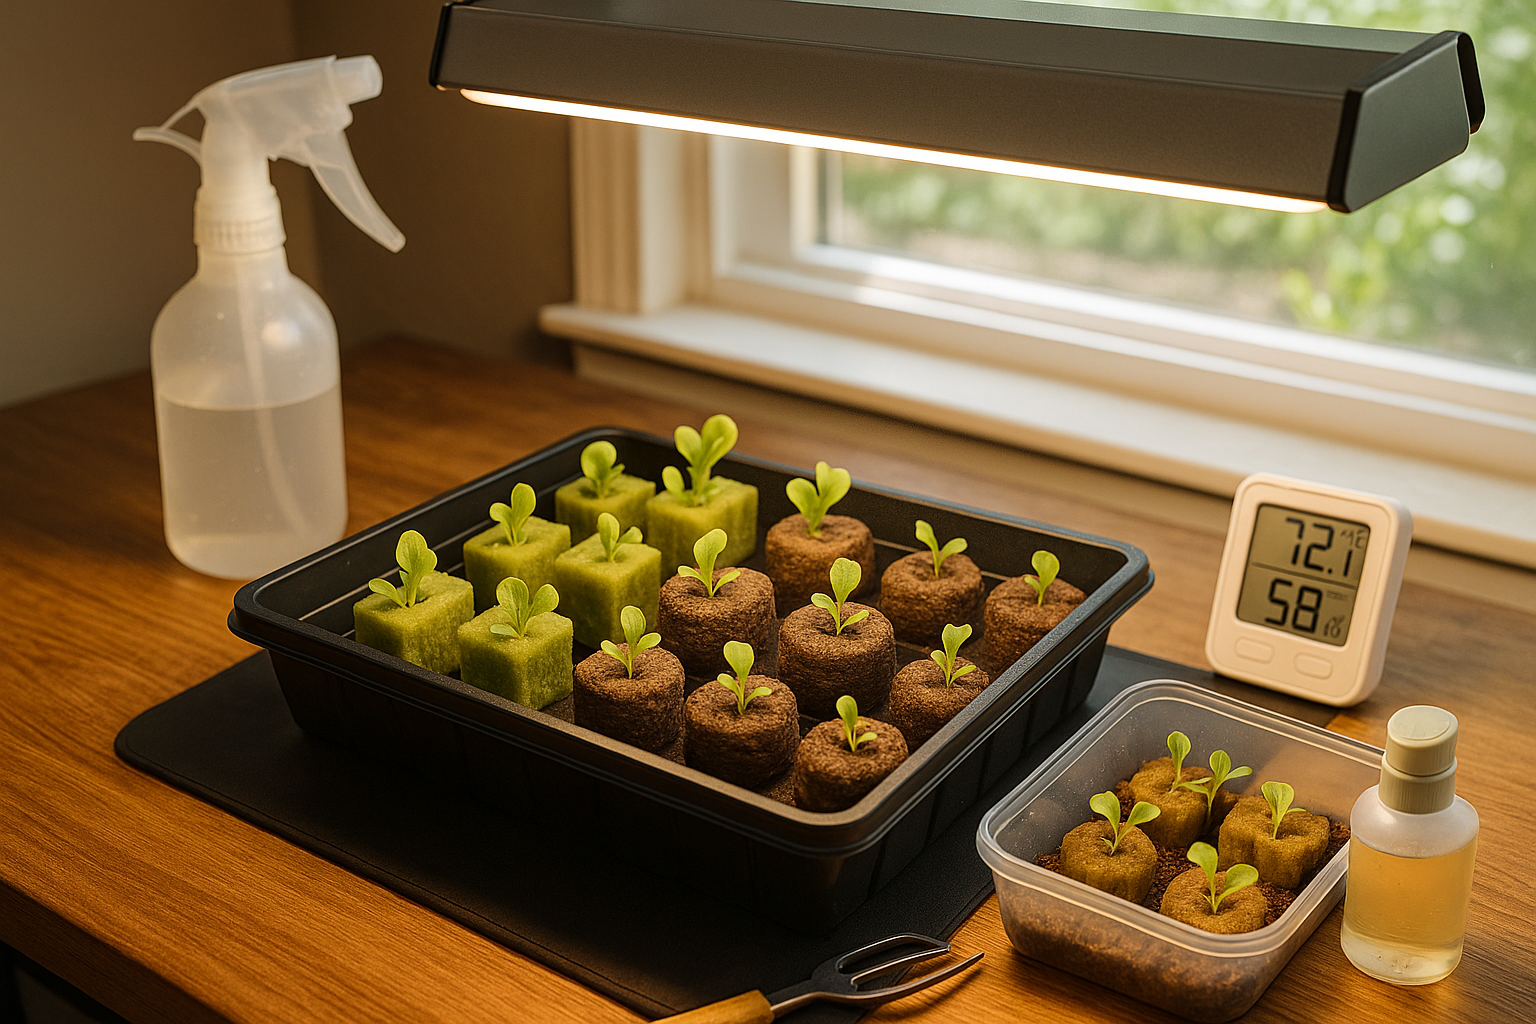
Starting lettuce from seed is both simple and rewarding, especially when you follow a few proven guidelines. Begin by choosing a germination tray or small starter containers filled with your preferred growing medium—rockwool cubes, coco coir pellets, and hydroponic sponges all work well and provide a stable, moist environment for seeds to sprout.
Dampen the medium before sowing, then place two or three seeds per cell about a quarter-inch deep. Lettuce seeds thrive at temperatures between 65-75°F (18-24°C), so keep your tray in a spot with stable warmth—on top of a refrigerator or near a gentle heat mat works great.
Unlike some other plants, lettuce seeds require light for healthy germination, so avoid burying them too deeply. Provide indirect sunlight or use a fluorescent grow light on a 16-hour schedule. Mist the surface to keep it moist but not soggy. You’ll see tiny sprouts within 2 to 3 days.
Once seedlings develop two true leaves, usually after 10-14 days, it’s time to transplant. Gently lift seedlings—rockwool or sponge plugs can go straight into your hydroponic system, while coco coir seedlings may need extra care to avoid disturbing roots.
Space each transplant 4-6 inches apart in your hydroponic bed to give them ample room to grow into crisp, healthy heads.
Daily Care, Nutrients, and Environment Control
To grow healthy lettuce, maintaining the right environment is crucial. Lettuce thrives under moderate light, typically requiring 12–16 hours of daily exposure at 200–250 µmol/m²/s if you’re using LED grow lights. Keep temperatures between 60–70°F (16–21°C); warmer conditions often cause bitter leaves and slower growth, while temperatures below 55°F (13°C) may stunt development.
Aim for a relative humidity between 50–70%, as higher humidity can encourage fungi or leaf rot, but low humidity may dry out leaves. Lettuce is a light feeder: use a balanced, hydroponic nutrient solution with a ratio close to 8-15-36 (N-P-K). Mix your nutrients separately in water according to the manufacturer’s guidelines, then combine—this prevents nutrients from precipitating out and becoming unavailable to plants.
Steady monitoring of pH and EC is essential; keep pH between 5.5 and 6.5 for optimal nutrient uptake, and maintain EC around 1.2–1.8 mS/cm. Test pH and EC at least every other day using a reliable meter, adjusting with pH up/down solutions as needed. Good water quality is vital—use filtered or reverse osmosis water if your tap water is hard or contains chlorine.
Change your nutrient solution every 7–14 days to prevent imbalances and buildup of unwanted compounds. To reduce algae and pests, block light from reaching the nutrient reservoir by covering containers and using opaque tubing. Regularly inspect leaves and stems for pests such as aphids; utilizing sticky traps and keeping your growing area tidy goes a long way in prevention.
With these daily care habits, your lettuce will have the best chance to flourish.
Harvesting and Storing Hydroponic Lettuce
Knowing exactly when to harvest your hydroponic lettuce ensures you enjoy the freshest, most flavorful greens. Look for signs like mature leaves that reach 4–6 inches in length, vibrant green coloring, and a full, open rosette shape. Most leafy varieties are ready to pick 30–45 days after transplanting, though this can vary by cultivar and growing conditions.
For a continual harvest, use the “cut-and-come-again” technique: snip the outermost leaves about an inch above the crown and leave the core intact, encouraging new growth for future yields. If you want to harvest the whole head at once, use clean scissors or a sharp knife to sever the plant just above the roots.
Immediately after harvesting, gently rinse the lettuce in cool, clean water to remove debris and reduce field heat, then pat dry with paper towels or use a salad spinner. Store the leaves in a breathable container or perforated bag in the refrigerator’s crisper drawer. Avoid overcrowding, as this can lead to excess moisture buildup and spoilage.
Using these tips, your hydroponic lettuce can stay crisp and appealing for up to 10 days, offering maximum freshness from garden to plate.
Troubleshooting Common Hydroponic Lettuce Problems
Growing hydroponic lettuce is rewarding, but even seasoned growers face challenges like wilting, tipburn, slow growth, and yellowing leaves. Here’s how to tackle these common issues.
Wilting Lettuce
If your lettuce looks wilted, first check the water flow and root health. Roots should be white and well-hydrated, so be sure to clean out any algae or debris from your system.
Tipburn
Tipburn, where leaf edges brown and curl, often indicates low calcium levels or poor air movement. To fix this, boost your calcium supplement and add a small fan to gently circulate air around your plants.
Slow Growth
For slow-growing lettuce, check if the nutrient solution strength is too low or if the water temperature is too cold. Aim for 65–70°F and adjust nutrients following the manufacturer’s hydroponic guidelines.
Yellowing Leaves
Yellow leaves typically signal nutrient imbalances or pH problems. Test your solution regularly and keep the pH between 5.5 and 6.5 for optimal nutrient absorption.
Pests
Pests like aphids can sneak into indoor systems. Inspect leaves regularly and spray with neem oil if needed.
General Tips
- Always use clean, filtered water.
- Sterilize equipment between crop cycles to prevent disease.
- If problems persist and plants fail to recover, don’t hesitate to restart your crop with fresh seedlings.
Every setback offers valuable insights—keep notes on what went wrong and refine your approach for next time. Turn each hiccup into a step toward a thriving hydroponic garden.
Conclusion & Next Steps
Growing lettuce hydroponically offers fresh, tasty greens year-round with less mess and space than traditional gardening. It’s surprisingly simple to start—a small countertop setup or a basic DIY system can yield impressive results at home.
For beginners, starting small helps you troubleshoot easily and build confidence before expanding your system.
To keep learning, check out online tutorials, local hydroponics stores, or forums like Reddit’s r/hydroponics, where growers share tips and troubleshoot together. Joining these communities can make your journey easier and more enjoyable, helping you level up your hydroponic skills as you go.