Introduction to Deep Water Culture Lettuce Growing
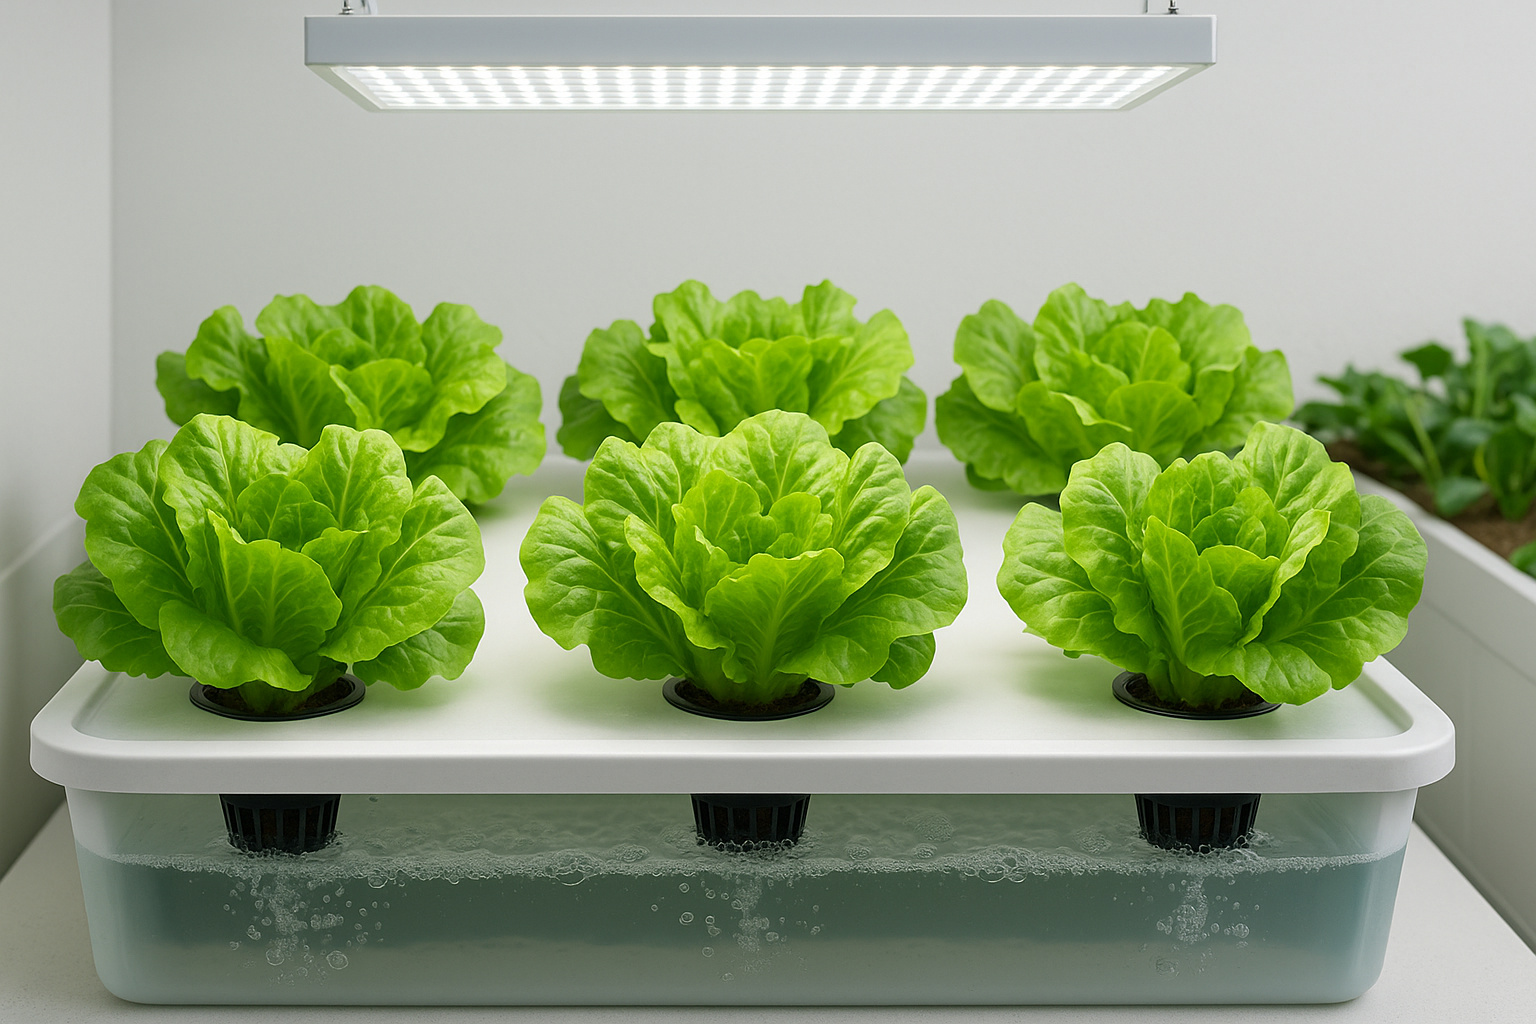
If you’re eager to grow fresh greens at home or want to scale up your commercial production, mastering DWC lettuce can be a game-changer. Deep Water Culture (DWC) is a hydroponic method where plant roots float in an oxygen-rich, nutrient solution instead of soil. This direct access to water and nutrients helps lettuce thrive, making the process fast, efficient, and surprisingly simple—even for beginners.
Lettuce is especially well-suited for DWC due to its shallow root system and quick growth cycle, meaning you could harvest crisp, healthy leaves in just a few weeks. Plus, growing with DWC can help sidestep common soil-borne pests and diseases, resulting in cleaner crops with less pesticide use. It’s also an excellent fit for those with limited space. You can set up DWC lettuce indoors, in a greenhouse, or even on a balcony or vertical rack, maximizing every square foot.
In this comprehensive guide, we’ll walk you through setting up your own DWC lettuce system from scratch, including choosing the right equipment, maintaining nutrient balance, and keeping your plants healthy. We’ll cover essential tips on lighting, water quality, and air circulation to help prevent common issues. There will be troubleshooting advice for overcoming hurdles like root rot or stunted growth, as well as suggestions for expanding your setup for higher yields. Whether you’re a hobby grower or aiming for a steady supply of homegrown salads, this step-by-step walkthrough will set you up for DWC lettuce success.
Essential Equipment and Supplies for DWC Lettuce
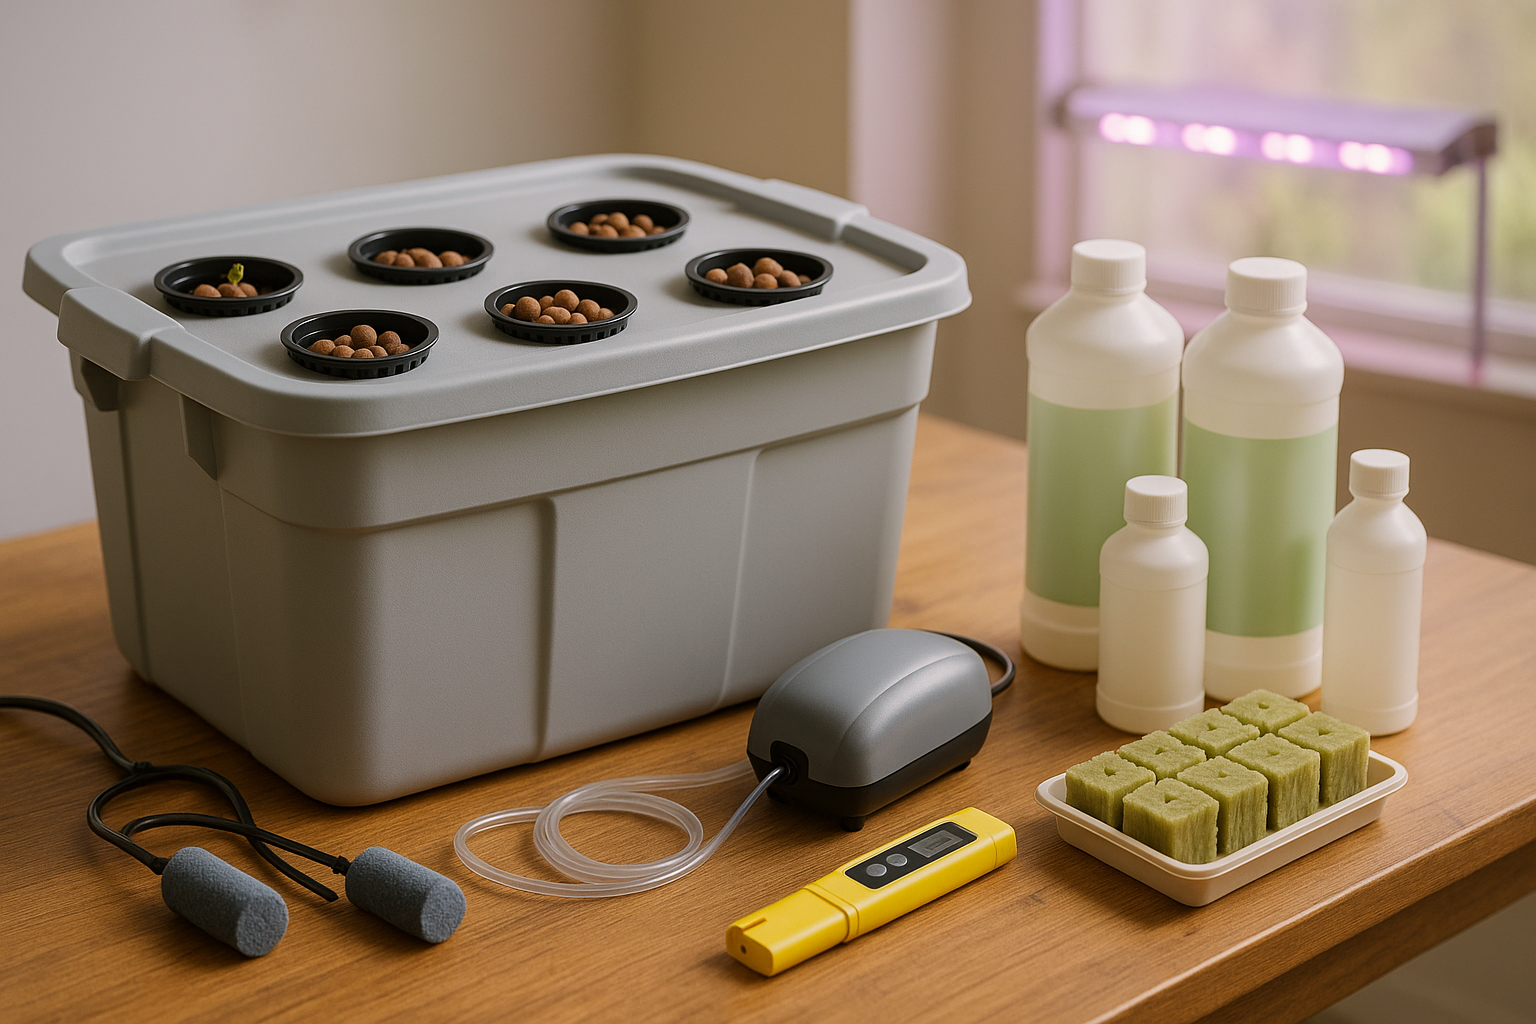
Setting up a Deep Water Culture (DWC) system for growing lettuce requires a few key components that work together to create the perfect environment for fast, healthy growth. Start with a sturdy, food-safe reservoir or tub to hold your nutrient solution. These come in various sizes, but for home growers, a container that holds 10-20 gallons is usually sufficient for several heads of lettuce.
Make sure the tub is opaque to prevent algae growth and durable enough to support your setup. Oxygen is vital for root health, so an aquarium air pump paired with air stones will keep the water well-aerated. Larger setups may benefit from more powerful pumps or multiple stones to ensure even oxygen distribution.
Net pots hold your lettuce plants above the water. Choose pots that fit snugly into the holes you drill in your reservoir lid, and look for high-quality plastics that can withstand moisture over time. Fill the pots with a hydroponic growing medium like clay pellets, coco coir, or rockwool—these provide good support and allow roots to grow freely.
You’ll also need water (ideally filtered or dechlorinated) plus a hydroponic nutrient solution specially formulated for leafy greens. Monitoring tools are important; a reliable pH testing kit will help maintain the ideal range of 5.5 to 6.5, which is perfect for lettuce.
Consider useful extras like water chillers if you’re in a hot climate (lettuce prefers cooler root zones) and LED grow lights if natural daylight is limited. Full-spectrum LEDs mimic sunlight and promote stronger growth indoors.
As you scale up your DWC operation—from a single lettuce plant to a dozen—adapt the size of your reservoir, upgrade air pumps, and invest in higher-quality supplies to ensure consistent, hassle-free harvests.
Setting Up Your DWC System Properly
Setting up your Deep Water Culture (DWC) system correctly from the start ensures healthy root growth and maximizes plant yields. Begin by selecting a sturdy, light-proof reservoir—this prevents algae growth and keeps the roots in darkness. Clean the reservoir thoroughly with a mild bleach solution and rinse it well to remove any contaminants.
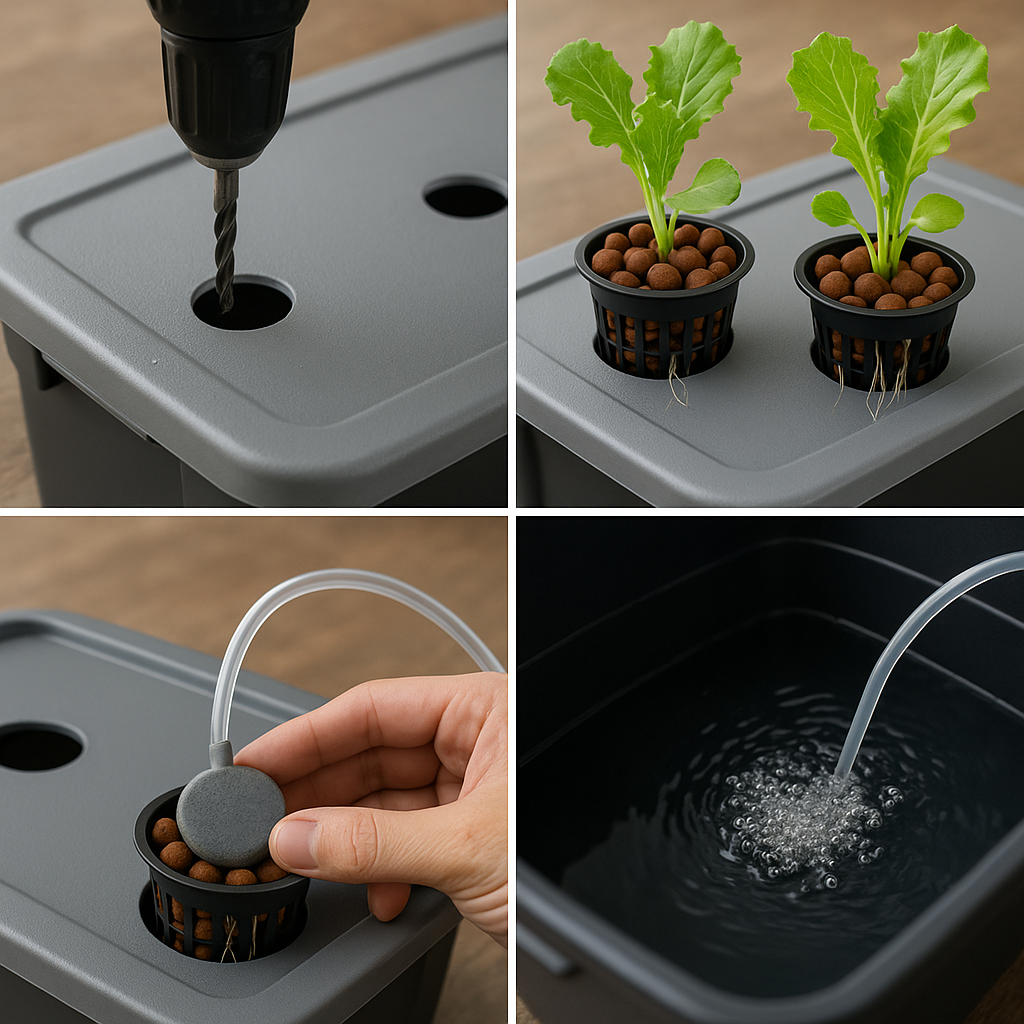
Fill the tank with dechlorinated water to about an inch below where the net pots will sit; this allows roots to access both moisture and air. Next, position your air stone at the base of the reservoir, ideally centered to distribute bubbles evenly. Connect the air stone to an air pump using aquarium tubing, and place the pump higher than the water level to prevent backflow.
Test your system: once the air pump is running, you should see a steady stream of bubbles rising from the air stone—this is key for keeping oxygen levels high and roots healthy.
For the net pot setup, fill each pot with hydroton clay pebbles or a similar inert medium, then gently insert your seedlings. Make sure roots dangle freely through the basket openings. Place the net pots into the reservoir’s lid and check that the bottom inch of each pot sits just above the waterline. As roots grow, lower water levels slightly to encourage roots to seek out oxygen, but never let them dry out.
To promote effective water circulation, avoid letting water sit stagnant—periodically stir the reservoir or add a small submersible water pump for larger systems. Check water levels daily, topping off as needed to maintain consistency, and monitor temperature to keep it between 65–75°F.
These steps will start your DWC system off strong and help you maintain the balance needed for rapid, healthy plant growth.
Selecting and Starting Lettuce Seeds
When choosing lettuce varieties for Deep Water Culture (DWC) systems, look for types that thrive in hydroponics and mature quickly, such as Butterhead, Romaine, Bibb, and Green Leaf. These varieties are popular because they grow compactly, have crisp, tender leaves, and adapt well to nutrient-rich water environments. Try varieties like “Buttercrunch,” “Parris Island Cos,” or “Oakleaf” for reliable results.
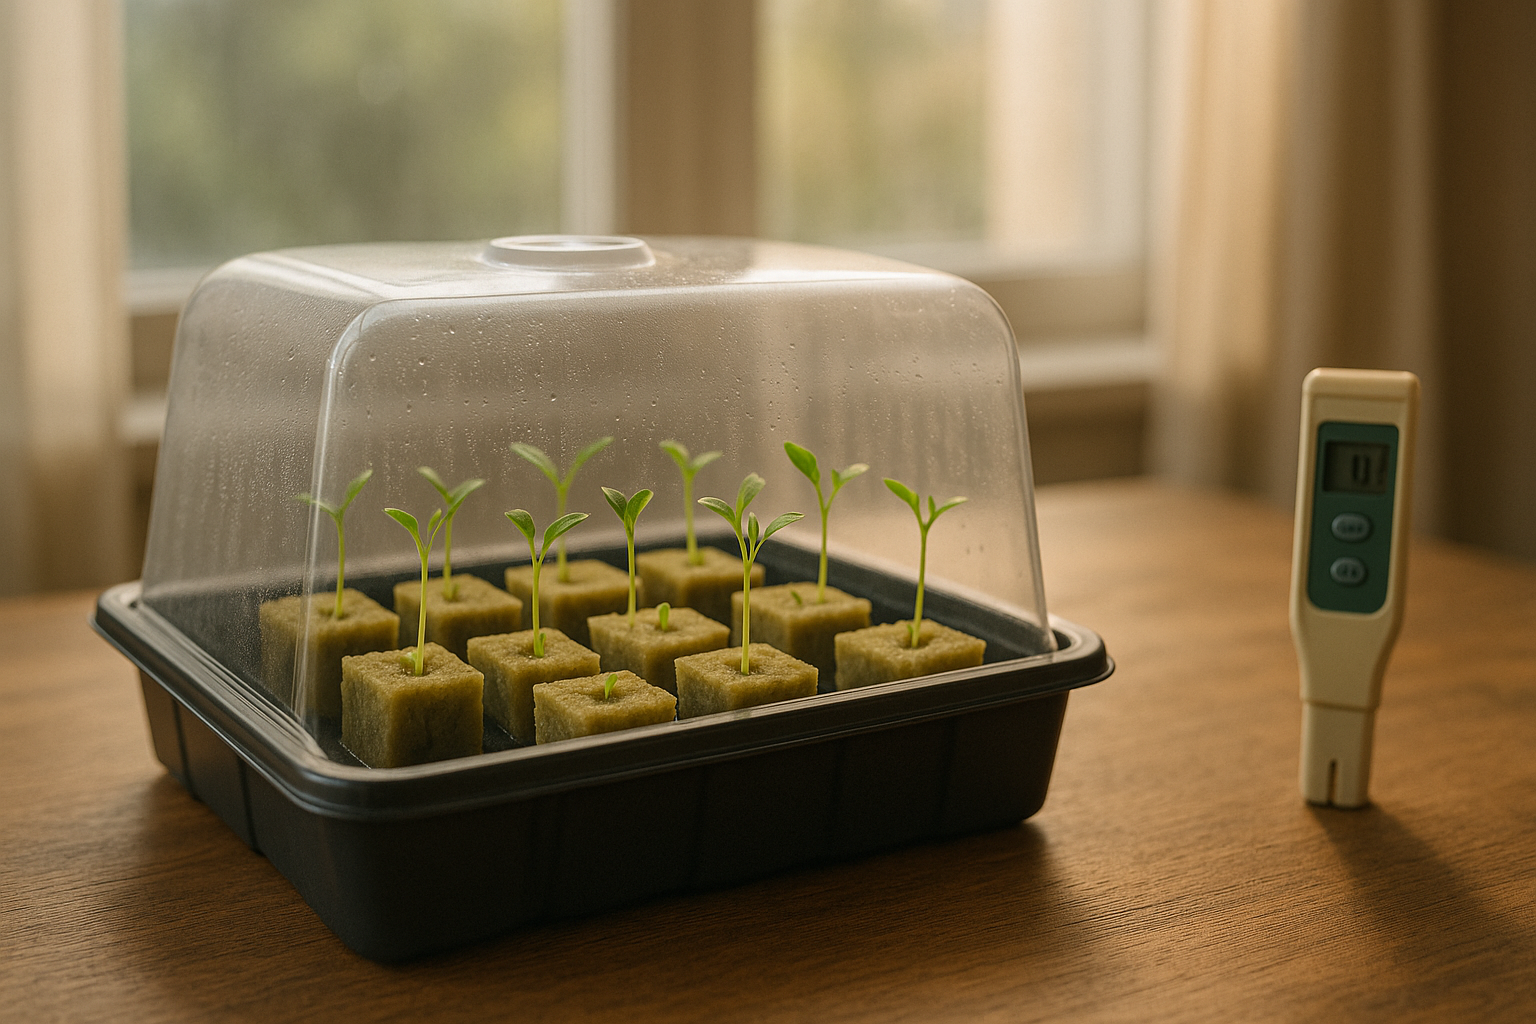
To start your seeds, use rockwool cubes or hydroponic starter plugs. Simply moisten them with clean, pH-balanced water (around 5.5–6.0), plant 1–2 seeds per cube, and gently press them down. Place the seeded cubes in a warm spot (65–75°F is ideal) and keep them moist but not soaked. A humidity dome or plastic wrap helps maintain moisture during germination, which usually takes 2–5 days.
Once your lettuce seedlings develop their first true leaves and roots begin to emerge from the bottom of the cubes—typically within 10–14 days—they’re ready to move to their final DWC home. Gently insert the cubes (with the seedlings inside) into net pots, ensuring the roots make good contact with the water or nutrient mist. For the smoothest transplant, avoid disturbing the roots and never let the cubes dry out during the move.
This process ensures a healthy transition, reducing stress and giving your lettuce seedlings the best start for vigorous, rapid hydroponic growth.
Managing Water, Nutrients, and pH
To grow healthy, vibrant lettuce, proper water management is essential. Lettuce thrives in water temperatures between 18°C and 22°C (65°F to 72°F). If the water is too cold, growth slows; if it’s too warm, you risk root diseases or wilting. Use clean, filtered water or let tap water sit for 24 hours before using to allow chlorine to dissipate.
Nutrient solutions provide essential minerals like nitrogen, phosphorus, and potassium. To prepare a solution, follow the manufacturer’s instructions: start with water, mix thoroughly, and use a digital EC (electrical conductivity) meter to check the strength. Check and top off your reservoir every few days, and fully change the solution every one to two weeks to prevent imbalances or buildup.
Watch your lettuce leaves for early warnings: pale leaves indicate nitrogen deficiency, while brown leaf edges suggest potassium problems. Always dissolve dry nutrients first in a bucket before adding them to your reservoir to prevent clumping.
pH plays a critical role in nutrient uptake—lettuce prefers a pH between 5.8 and 6.2. Test daily with pH strips or a digital meter. If the pH is too high (alkaline), add small amounts of pH down (typically phosphoric acid). If it’s too low (acidic), use pH up (potassium hydroxide). Adjust slowly—small changes make a big difference.
Common troubleshooting tips:
- If pH drifts upward, it may indicate root problems or hard water—perform a partial water change and clean the roots.
- If pH drops quickly after adding nutrients, you might have overdosage—dilute with fresh water.
Keep a log of your readings to spot patterns. With consistent monitoring and careful adjustments, you’ll create an environment where your lettuce can flourish, yielding crisp, flavorful greens every harvest.
Caring for Lettuce Throughout the Growth Cycle
Caring for lettuce throughout its growth cycle means staying attentive to its daily and weekly needs, starting with regular watering. Lettuce likes consistent moisture but hates soggy roots, so check the soil’s dampness every morning; water gently if the top inch feels dry.
For hydroponic setups, top off water reservoirs each day and check the system’s water level to avoid exposing roots to air. Weekly, gently lift a few plants to inspect the roots—healthy roots are white and firm, while brown or slimy roots signal early root rot. If rot appears, trim off damaged roots and improve drainage; in hydroponics, change the nutrient solution and clean the container.
Nutrient deficiencies show up quickly in lettuce, often as pale or yellow leaves. Use a balanced liquid fertilizer (for soil) or adjust hydroponic nutrients based on the label’s guidance. Scout for pests like aphids and slugs every few days—remove them by hand or use organic sprays if they become persistent.
As lettuce heads mature, avoid overcrowding by thinning out weak seedlings and leaving at least 8–10 inches between plants, depending on the variety. Regularly snip off outer, damaged, or yellowing leaves to promote airflow and help the center head develop fully.
By keeping up with these simple routines—consistent watering, root checks, nutrient adjustments, pest control, and proper spacing—you’ll help your lettuce thrive from seedling to harvest, enjoying crisp, healthy leaves every time.
Harvesting and Post-Harvest Tips

Knowing when to harvest your DWC lettuce is key to enjoying its crisp texture and vibrant taste. Your lettuce is ready to pick when the leaves reach a good size—typically 4-6 inches long—or when the plant forms a full, loose head. Don’t wait too long; lettuce that bolts (starts flowering) becomes bitter and tough.
For leaf varieties, use clean scissors to snip the outer leaves just above the crown, leaving the center untouched so it keeps growing. For head lettuce, use a sharp knife to cut the entire head at the base.
Right after harvesting, rinse the leaves gently in cold water to remove any debris or algae. Shake off excess water or use a salad spinner to dry the leaves thoroughly, as excess moisture shortens shelf life.
To keep your lettuce fresh, wrap it loosely in a paper towel and place it in a plastic bag or an airtight container in the refrigerator. Avoid packing it too tightly—good airflow helps prevent wilting and decay.
Ideally, lettuce from your DWC setup should be enjoyed within a week, but storing it properly can extend its crispness and flavor, giving you the best taste from your homegrown harvest.