
Introduction
Shaping bay laurel isn’t just about looks—it’s about helping your plant thrive. The bay laurel tree, cherished for its aromatic leaves used in cooking, is native to the Mediterranean and now graces gardens and pots worldwide. It’s often chosen for its elegant, evergreen foliage and its versatility as a decorative hedge or stylish topiary.
However, without proper care, a bay laurel can become leggy or unruly, making shaping essential for keeping it healthy and attractive. Pruning and shaping encourage fuller, lusher growth and help prevent disease by improving air circulation. In this post, you’ll learn when and how to prune, the right tools to use, and common mistakes to avoid. Whether you’re aiming for a tidy sphere, a lush hedge, or a custom topiary, following the right steps will keep your bay laurel looking its best for years to come.
Choosing the Best Time and Tools for Shaping
The best time to shape or prune your Bay Laurel is late winter to early spring, just before new growth begins. This timing helps the plant recover quickly as the days lengthen and temperatures rise, encouraging healthy regrowth. Pruning outside this window, especially during late summer or fall, can leave cuts vulnerable to disease or frost damage.
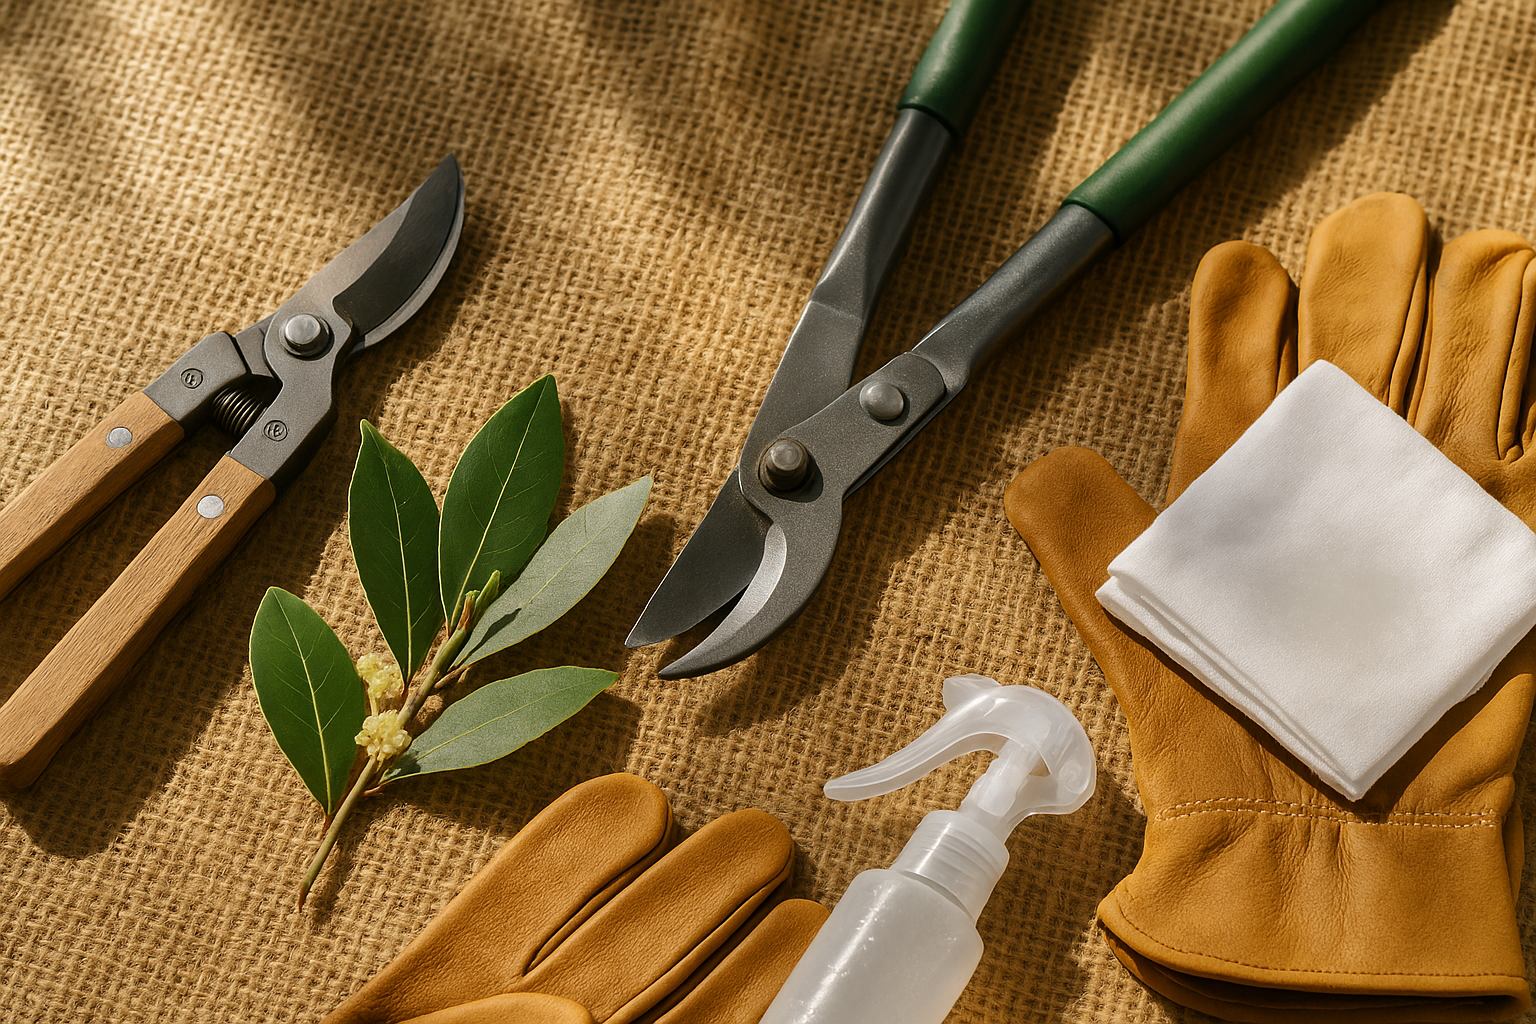
When it’s time to shape, keep your toolkit simple but effective:
- Sharp bypass pruning shears are perfect for precise cuts on smaller stems.
- Sturdy loppers help tackle thicker branches without crushing them.
Always wear protective gloves to shield your hands from woody stems and accidental nicks. For safety, ensure all cutting tools are sharp and clean, which reduces strain and lowers the risk of spreading plant diseases. After each use, wipe blades with an alcohol-soaked cloth to kill lingering bacteria. Store tools dry and occasionally oil the pivots to keep everything moving smoothly.
Taking these simple precautions ensures not only a tidy, lively Bay Laurel but also a safe and enjoyable gardening experience.
Understanding Bay Laurel Growth Habits
Bay Laurel (Laurus nobilis) is a versatile evergreen shrub or small tree, known for its glossy, aromatic leaves and neat growth habit. It grows at a slow to moderate rate, typically adding around a foot of new growth per year, making it easy to maintain but requiring patience when shaping.
Bay Laurel tends to develop a dense, branching structure, with new shoots forming from the main stems and lower trunk. This natural bushiness allows gardeners to prune it into classic topiary shapes, hedges, or even small standards. However, shaping works best if you start early and maintain it regularly.
Key growth traits to consider include its strong apical dominance—the tendency for the main stem to grow more than side branches—which affects how readily it fills out after pruning. You should also check for common issues before shaping, such as legginess from insufficient light, which leads to sparse, stretched-out growth, or dieback from poor drainage or root rot.
Additionally, watch for pests like scale insects or bay sucker, which can weaken branches. Addressing these problems early ensures that shaping efforts are effective and the plant stays healthy, resulting in the lush, sculpted look that makes Bay Laurel such a garden favorite.
Basic Shaping Techniques for Beginners
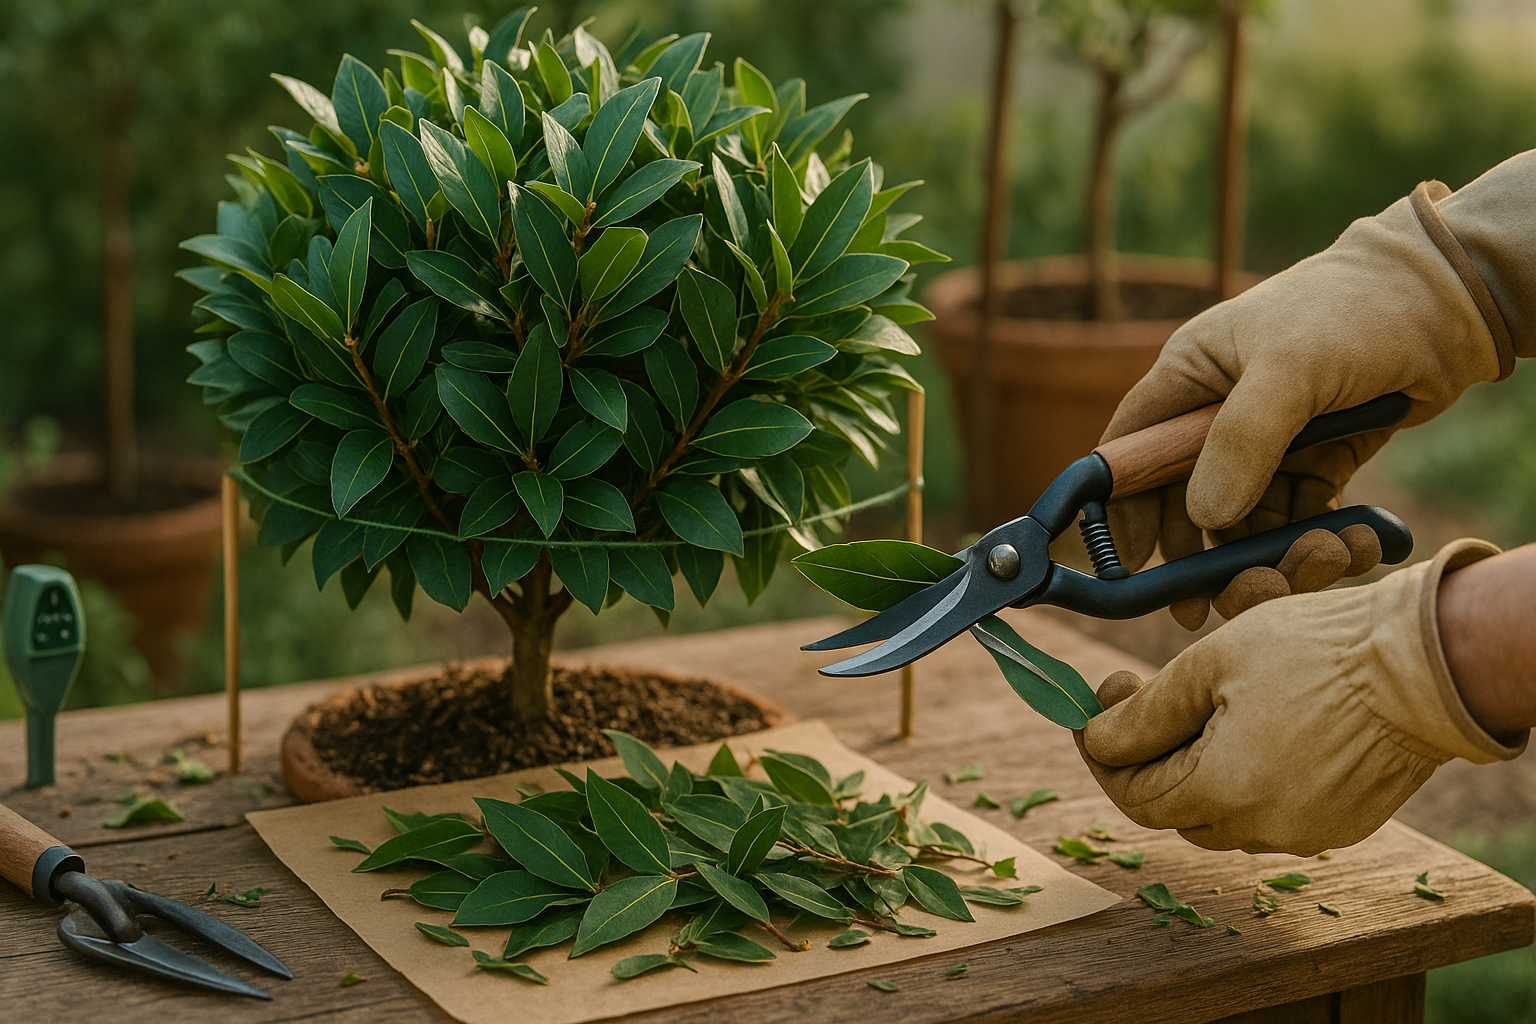
Shaping plants doesn’t have to be intimidating—start with basic forms like balls, cones, spirals, and the classic “lollipop” (a rounded crown atop a clear stem). To form a ball, first visualize or lightly mark the outline with string or small stakes. Using sharp, clean shears, begin trimming from the top, working your way down with small, even snips. Be sure to regularly step back and check the symmetry.
For a cone shape, picture a Christmas tree—define a broad base that tapers evenly as you move up, maintaining consistent angles on all sides. Spirals and lollipop shapes usually start with tall, straight plants like boxwood or privet. For a lollipop, trim away lower leaves and side growth to expose a clean stem; for a spiral, gradually guide your shears around the plant to create a twisting effect.
Always make your first cuts shallow, as deeper cuts are harder to fix and you want to encourage dense regrowth. When correcting uneven growth or past mistakes, focus on balancing the overall silhouette by removing stray or leggy shoots and using pruning to redirect energy into sparse areas.
Don’t hesitate to step back often and view your work from different angles. It’s best to trim a little, pause, and assess rather than cutting too much at once. For plants with major unevenness, shape them gradually over multiple seasons—patience yields the best results and keeps your plants healthy.
Lastly, always sanitize your tools between cuts, especially when working on damaged branches, to prevent spreading diseases.
Advanced Pruning and Topiary Tips
Creating intricate topiary designs starts with selecting the right plant—evergreens like boxwood, privet, or yew are popular choices due to their dense foliage and ability to regrow after shaping. For training young plants, begin with simple wire frames or wooden guides to gently direct growth into your desired shape. Regularly pinch and trim new shoots to encourage bushiness and fill gaps, but avoid heavy pruning until the plant has developed a solid structure.
When working with mature topiaries, the focus shifts to careful maintenance. Thin overcrowded branches by cutting them at their base rather than shearing the outer layer, which helps light reach the interior and keeps plants healthy. To reduce size without sacrificing the design’s character, prune back gradually over multiple seasons, always following the natural shape rather than making drastic cuts.
For denser growth, cut just above leaf nodes to encourage side shoots, and shape during the plant’s active growing season for the quickest recovery. Realistically, patience is key—complex forms like spirals or animal shapes may take several years to perfect. Don’t hesitate to step back often and view your work from all angles, making incremental changes rather than rushing. If possible, keep reference photos of your desired shape on hand.
Lastly, sharp, clean tools and regular feeding ensure tighter, healthier foliage, making intricate topiary designs a long-term but deeply rewarding garden art.
Common Mistakes and How to Avoid Them
One of the biggest mistakes gardeners make with Bay Laurel is over-pruning, which removes too much foliage and weakens the plant. If you find yourself clipping away more than a third of the canopy at once, stop and allow the plant time to recover—over-pruned Bay Laurel often looks thin, loses its lushness, and grows back unevenly.
Another common error is pruning at the wrong time: heavy cuts during late fall or winter can leave plants more susceptible to frost damage and slow spring recovery. Always aim to prune in late spring or early summer when the plant is actively growing.
Additionally, using dull or dirty tools can create ragged wounds that invite disease. Keep your shears sharp and sanitized for smooth, clean cuts.
Warning signs that your Bay Laurel is stressed from poor pruning include wilted or browning leaves, dieback on the stems, or sucker growth from the base. If you notice these symptoms, pause all pruning, keep the soil consistently moist (not soggy), and apply a balanced fertilizer to encourage recovery.
For shaping mistakes, avoid trying to fix everything at once. Instead, selectively cut back only the worst branches each season, allowing new healthy growth to fill in naturally over time.
Ongoing Care After Shaping
After shaping your plants, ongoing care is essential to promote healthy regrowth and long-term vitality. Watering should be consistent—keep the soil slightly moist, especially during active growth periods and after pruning, since plants need extra hydration to heal pruning wounds. However, avoid soggy soil, which can encourage root rot.
Feeding the plant with a balanced, slow-release fertilizer every 4-6 weeks during the growing season provides nutrients crucial for recovery and new growth. Mulching with organic matter such as compost, bark chips, or straw helps retain soil moisture, deter weeds, and protect roots. Be sure to keep mulch a few inches away from the stems to prevent rot and pests.
Freshly pruned plants can be more susceptible to pests and disease, so routinely inspect wounds for signs of infection, discoloration, or insect activity. Acting quickly if you spot anything unusual can prevent bigger problems later.
As for ongoing shaping, most plants benefit from light touch-ups once or twice a year, ideally in late winter or early spring before active growth begins. Use clean, sharp tools and focus on maintaining the desired form without over-pruning, which can stress the plant.
By following these routines, you’ll encourage strong, beautiful growth season after season.
Closing Thoughts and Bay Laurel Care Quick Facts
Shaping your Bay Laurel isn’t just about keeping it neat—it’s essential for the plant’s health and encourages lush, new growth. Regular pruning helps prevent overcrowding, reduces the risk of disease, and allows you to shape your laurel into topiary, hedges, or compact container plants.
When choosing your Bay Laurel, consider popular varieties like ‘Saratoga’ for compact gardens or the classic Laurus nobilis for versatile landscaping and culinary uses. Bay Laurel thrives as a fragrant hedge, patio specimen, or even indoors with bright light and good drainage, rewarding you with aromatic leaves perfect for roasts or stews.
Plus, its dense foliage provides shelter for garden wildlife and acts as a natural pest deterrent. Remember to water deeply but infrequently, mulch appropriately, and monitor for pests or dull leaves—a sign it needs more light. Make it a habit to observe your plant’s growth, prune thoughtfully, and adjust care as needed for a thriving, beautiful Bay Laurel year-round.