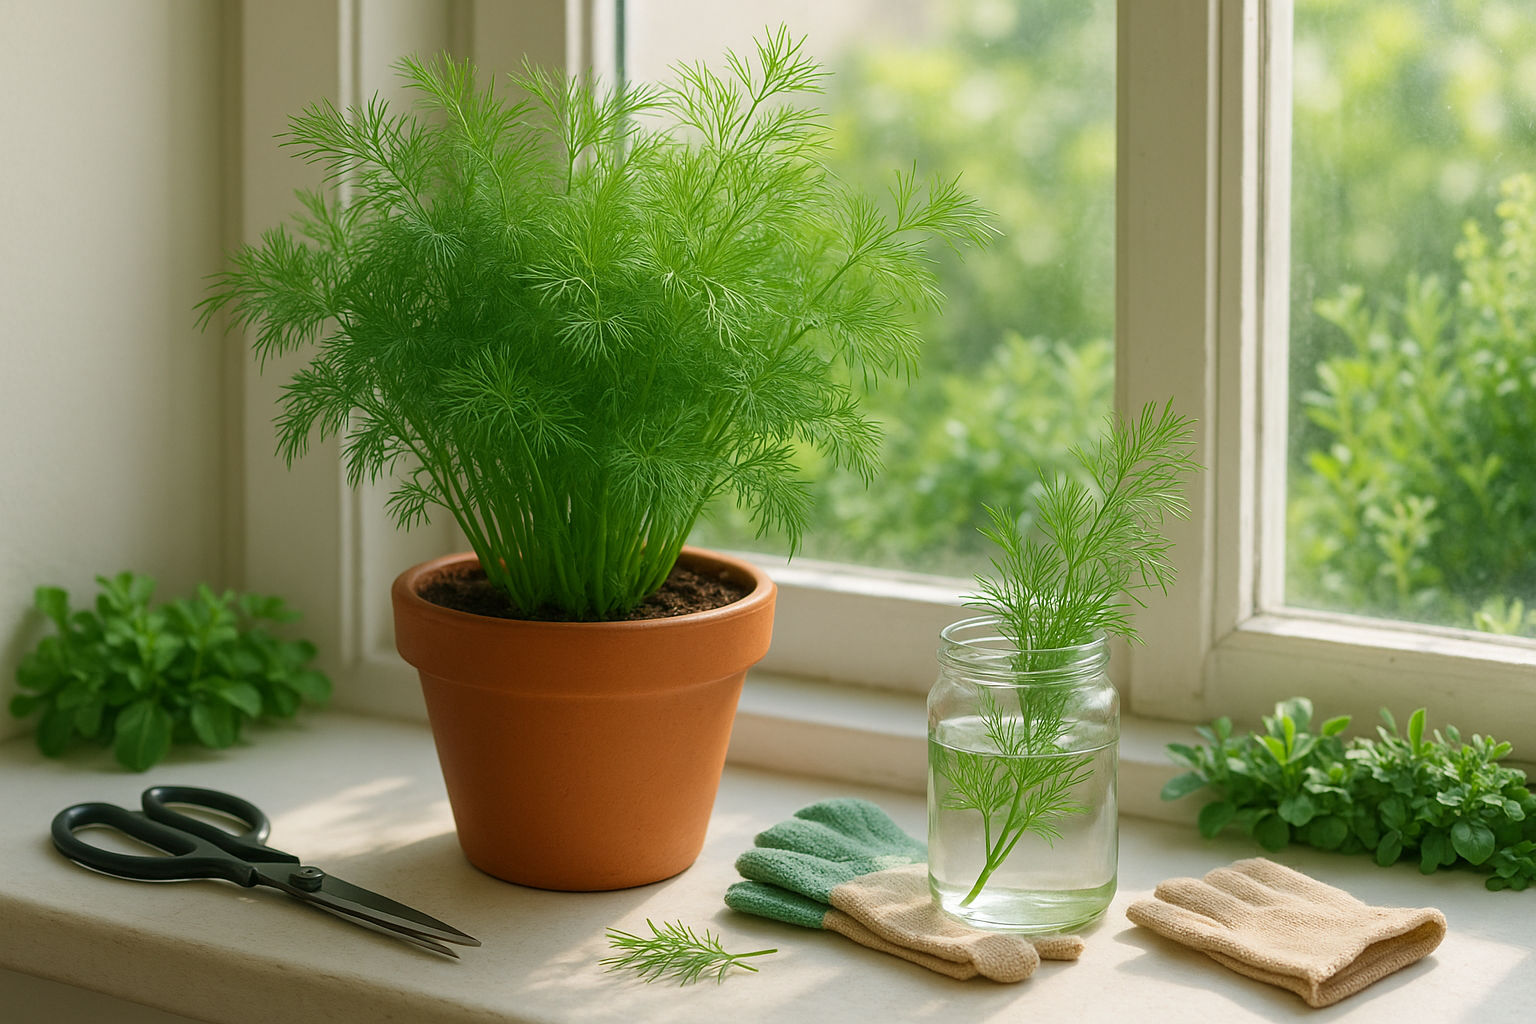
What is Dill and Why Regrow It?
Dill is a fragrant herb cherished in kitchens worldwide for its fresh, slightly tangy flavor, which combines notes of anise and lemon. It’s a staple in dishes like pickles, potato salads, fish, and creamy sauces, adding a bright, herby burst that elevates everyday meals.
Its popularity comes from its unique taste and versatility: you can snip a few feathery fronds into yogurt dips, sprinkle it over roasted vegetables, or stir it into soups for an instant flavor boost.
One major reason home cooks love dill is the advantage of growing it themselves. Store-bought dill wilts quickly and can taste bland or stale compared to fresh sprigs snipped directly from your garden or windowsill.
By growing dill at home, you not only save money—no need to buy expensive herb packets each time you cook—but you also ensure fresher, more flavorful herbs whenever inspiration strikes. Plus, growing dill is practically fuss-free. Even if space is limited, a sunny kitchen windowsill or balcony is enough to nurture a thriving pot of dill.
Best of all, dill can regrow after cutting—just leave a few inches of stem, water it regularly, and you’ll see new shoots in a few weeks. This regenerative quality makes dill especially appealing to home gardeners, since one planting provides multiple harvests, ensuring a steady supply of this delicious herb for all your savory creations.
Can You Regrow Dill from Store-Bought Bunches?
Regrowing dill from store-bought bunches can be a fun, cost-effective way to enjoy fresh herbs, but success depends on a few key factors. First, take a close look at your dill: most grocery store bunches are simply cut stems without roots, and these won’t reliably regrow.
However, if you’re lucky enough to find bunches with some roots attached—a rare find at farmers’ markets or specialty stores—you can trim the stems and plant them directly in moist soil or water.
For cut stems with no roots, try placing the freshest, greenest ones in a jar of water. Change the water daily and keep it in a bright spot. If the stems are still healthy and not too woody, you might see tiny roots develop from the nodes after a week or two, though results are hit-or-miss. Stems that are limp, browned, or dried out will not root successfully.
Even with ideal conditions, dill is less willing to root from cuttings compared to more robust herbs like basil or mint. In contrast, starting dill from seed is much more reliable—simply sow the seeds in moist potting mix, keep them warm and sunny, and you’ll see sprouts within a week or so.
Ultimately, while it’s worth experimenting with fresh leftover stems, growing dill from seed is the best bet for a healthy, thriving plant. If you do get store-bought stems to root, treat them gently and transplant them to soil as soon as possible—but don’t be discouraged if it doesn’t work every time.
Step-by-Step Guide to Rooting Dill Cuttings
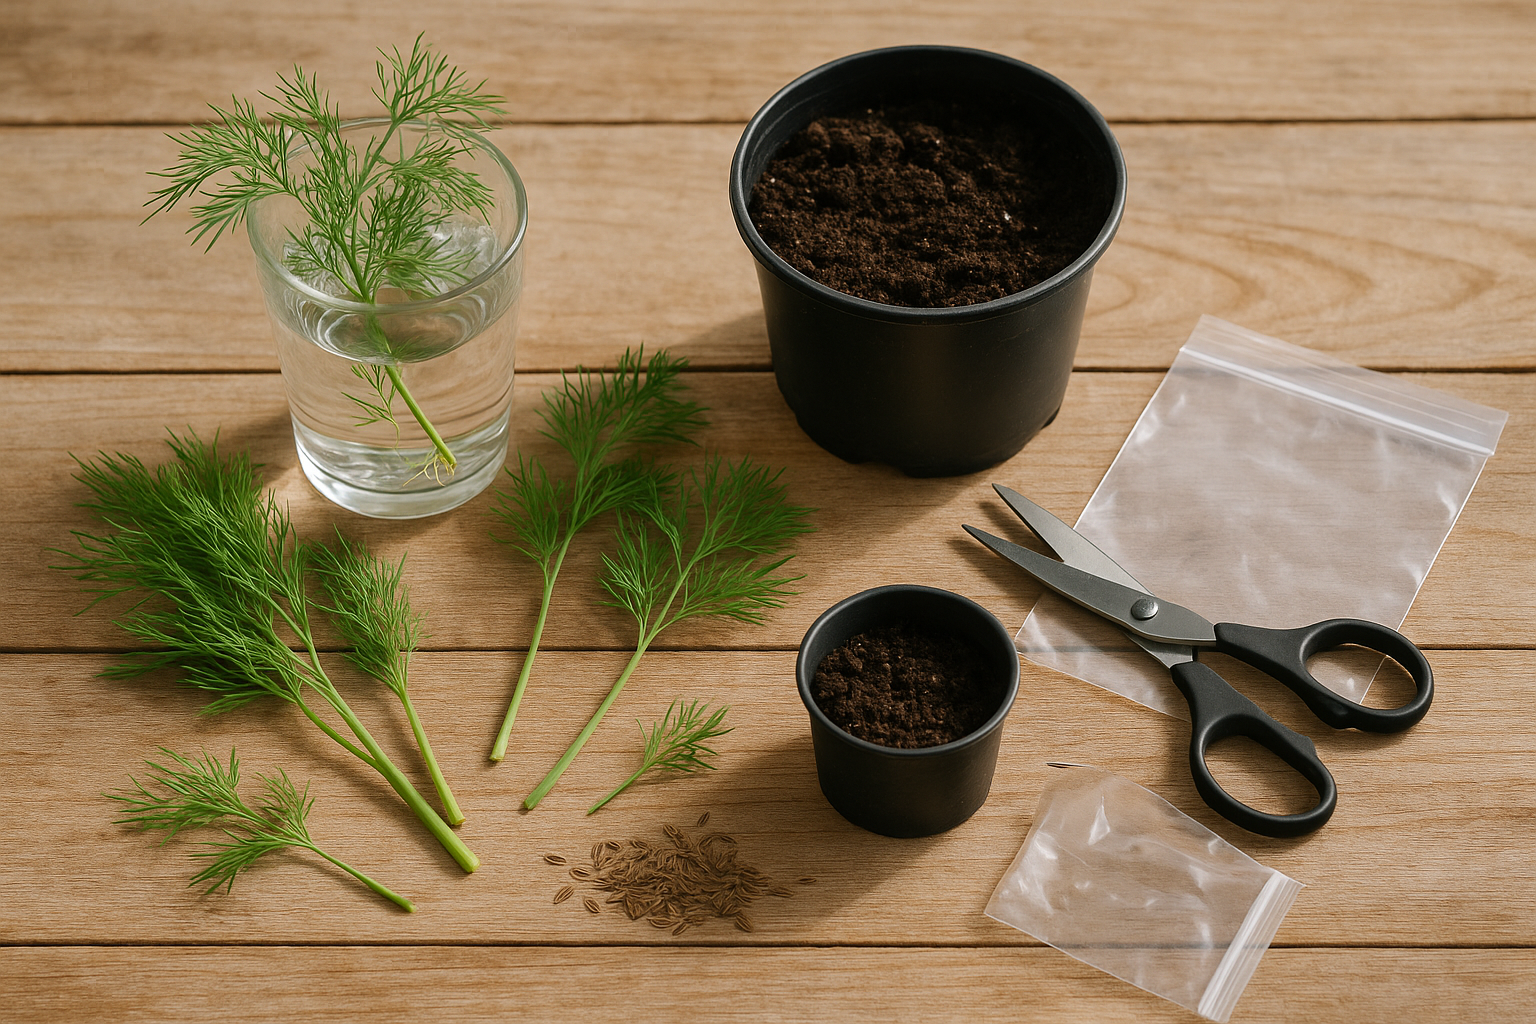
When rooting dill cuttings, start by choosing strong, healthy stems that are about 4–6 inches long. Look for a vibrant green color and avoid any stems with wilted or yellowing leaves. Freshness is key, so snip your cuttings from a mature plant early in the day when the stems are most hydrated.
Once you’ve selected your cuttings, use clean scissors to make a straight cut just below a leaf node. Next, gently remove the leaves from the lower half of each cutting; this helps prevent rotting and encourages the stem to focus its energy on growing roots.
For water propagation, place your prepared cuttings in a glass of clean, room-temperature water, making sure only the stem (not any leaves) is submerged. Position the glass in bright, indirect sunlight and change the water every three days to keep bacteria at bay.
If you prefer instant soil planting, fill a small pot with moist, well-draining potting mix and poke a hole with your finger. Insert the lower half of the cuttings into the soil, gently firming it around the stem. Keep the soil consistently damp but not soggy, and cover loosely with a plastic bag to create a mini greenhouse effect. This helps maintain humidity and speeds up rooting.
In both methods, be patient—tiny white roots should start to appear in about 10–14 days. Healthy root development is shown by firm, bright roots at least an inch long. At this point, water-propagated cuttings can be transplanted to soil.
Remember, droopy or blackened stems signal rot, so remove any failing cuttings promptly to protect the rest. With these steps, you’ll boost your success rate and soon enjoy fresh, homegrown dill.
Transplanting and Caring for Regrown Dill
Transplanting your regrown dill at the right time gives it the best chance for strong growth. Wait until each rooted stem has several robust leaves and roots that are at least 2 inches long—usually about 2–3 weeks after starting regrowth in water or starter soil.
Choose an overcast day or late afternoon for transplanting to reduce stress from sun or harsh conditions. Whether you’re using garden beds or pots, pick a location that gets at least six hours of direct sun per day. Dill loves warmth and light but appreciates some afternoon shade in hot climates.
Prepare light, well-draining soil enhanced with compost for nutrients—heavy, compacted soil will cause weak growth and droopy stems. Space your dill plants about 12 inches apart so they have plenty of room to develop without competing for light and air.
Water gently after planting to settle the soil, then keep the soil consistently moist but not soggy. Check by feeling the top inch with your finger, and water when it just starts to dry out.
To keep your dill bushy and prevent legginess, pinch off the top set of leaves once the plant reaches about 6–8 inches tall; this encourages branching rather than tall, spindly growth. If you see stems stretching with few leaves, move the plant to brighter light and continue pinching.
Dill is prone to aphids and powdery mildew, so inspect frequently and remove pests by hand or use insecticidal soap if needed. Always water at the soil level, not from above, to prevent leaf disease. Mulch around the base to retain moisture and suppress weeds.
With these simple tips, transplanted dill will reward you with lush, flavorful foliage perfect for recipes all summer long.
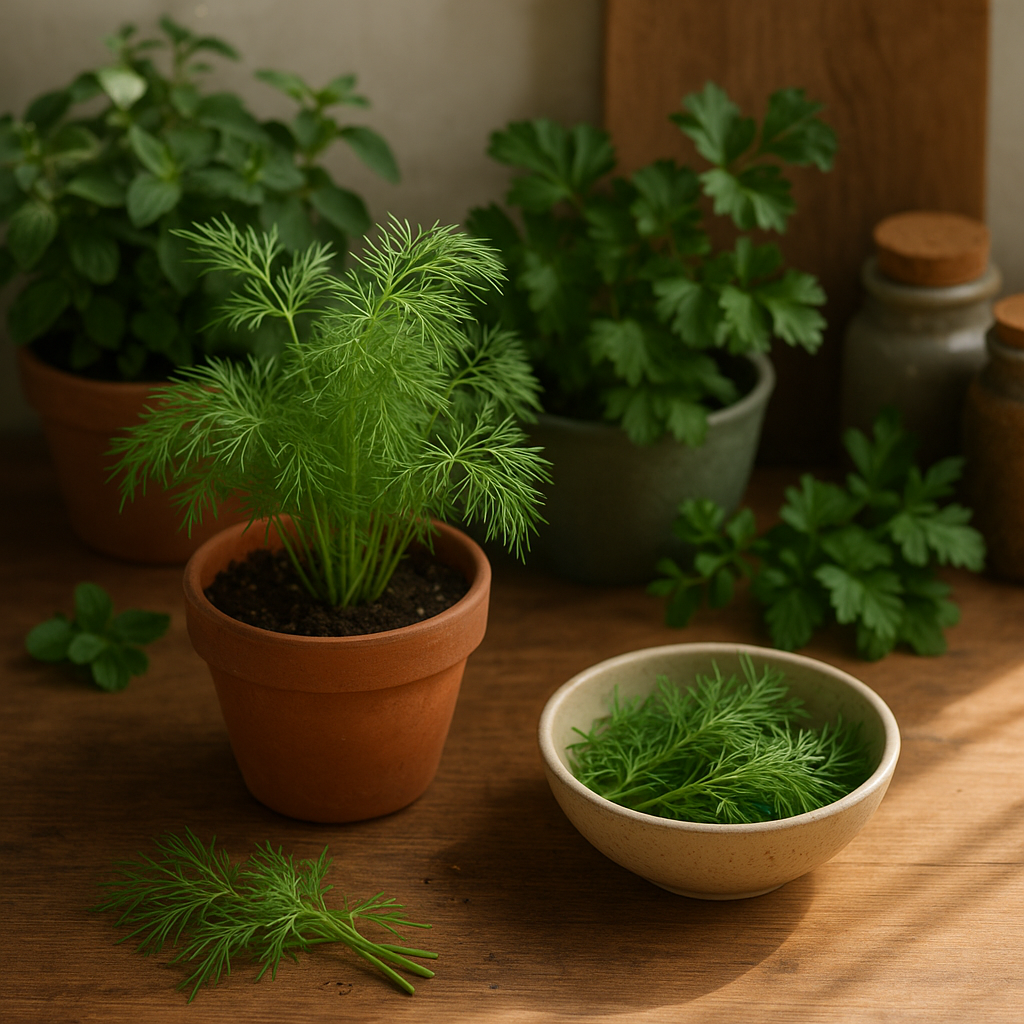
Harvesting and Using Homegrown Dill
Knowing when to harvest dill is key to making the most of this fragrant herb in your kitchen. For the best flavor, snip fresh dill leaves (often called “dill weed”) when the plant reaches about six to eight inches tall, before it flowers—usually about 6-8 weeks after sowing.
If you want to harvest dill seeds, wait until the yellow flower heads bloom and begin to brown. Then, snip the heads and hang them upside down in a paper bag to dry; the seeds will fall right in for easy collection.
To keep your dill plants thriving all season, use a continuous harvesting approach: pinch or snip off outer leaves regularly, always leaving about half the plant so it can regenerate. Avoid cutting the main stem, as this helps prevent the plant from going to seed too early and extends your harvest window.
Freshly picked dill is incredibly versatile:
- Add chopped leaves to yogurt sauces, potato salads, or homemade pickles.
- Sprinkle over grilled fish and vegetables for a burst of fresh, aromatic flavor.
- Toss dill into softened butter or cream cheese for an herby spread.
- Stir it into scrambled eggs for a quick, gourmet touch.
With a little attention to when and how you harvest, your homegrown dill can supply your kitchen with bright, tangy notes all season long.
Troubleshooting Common Problems
When regrowing plants at home, it’s common to encounter issues like wilting, lack of root growth, or unwanted pests.
Dealing with Wilting
Wilting leaves often mean your plant isn’t getting enough water or light, or that the container doesn’t have proper drainage. If you notice limp stems or yellowing, try moving your plant to a brighter spot and make sure water can flow freely through the pot.
Rooting Challenges
Failure to root is another frequent problem. This usually happens when cuttings are too large, too old, or left in soggy water. For better results:
- Always use fresh, young cuttings.
- Refresh the water every few days.
- If roots don’t appear after a few weeks, try changing your cutting source or use a root growth hormone for a boost.
Managing Pests
Pests such as gnats or aphids can sneak in, especially if you’re regrowing outdoors or using soil. Watch for sticky residue, webbing, or tiny bugs. To tackle pests:
- Clean affected areas with a gentle spray of soapy water.
- Consider moving your regrowth indoors until the problem clears.
Keep notes on what works and what doesn’t for each plant type, so your future regrowing attempts become more successful over time.
Final Tips and Resources for Regrowing Herbs
To successfully regrow dill from store-bought herbs, start by snipping healthy stems and placing them in a glass of water on a sunny windowsill. Change the water every few days to prevent rot and encourage root development. Once roots are at least two inches long, transplant the cuttings into potting soil, and keep the plant in a bright, airy spot.
Dill loves consistent moisture, but avoid soggy soil to prevent root rot. These same methods work well for herbs like basil, mint, and oregano, making it easy and cost-effective to expand your kitchen garden.
For further tips and troubleshooting, check out the Royal Horticultural Society’s website or the book The Complete Gardener by Monty Don—both offer practical advice for beginners and enthusiasts alike. With a little patience, you’ll enjoy fresh, homegrown herbs year-round and discover just how rewarding regrowing can be!