Introduction to Growing Marjoram in Raised Beds
If you’re looking to add flavor and fragrance to your garden, growing marjoram in raised beds is one of the best choices you can make. Marjoram is a delicate, aromatic herb celebrated for its sweet, citrusy notes that elevate everything from soups to roasted vegetables.
Not only does it bring culinary magic to your kitchen, but it also attracts pollinators and naturally repels certain pests, making it a fantastic ally in any garden. Raised beds offer the perfect growing environment for marjoram—they warm up faster in spring, provide excellent drainage, and allow you to easily amend the soil for optimal herb health.
Whether you’re a seasoned gardener or just starting out, you’ll find that marjoram thrives in these conditions and requires less weeding and fewer concerns about compacted soil. In this post, we’ll guide you step-by-step through everything you need to know: from choosing the right varieties and prepping your raised beds to ongoing care and harvesting tips.
By the end, you’ll be ready to enjoy a lush supply of marjoram all season long—and perhaps even discover a new essential in both your garden and kitchen routines.
Choosing the Best Location and Preparing Your Raised Bed
When growing marjoram, picking the right spot makes all the difference. This Mediterranean herb loves full sun, so aim for a location that gets at least six hours of direct sunlight daily. If you’re in a hot climate, a bit of afternoon shade can help prevent leaf scorch.
For soil, marjoram prefers a light, well-draining mix—think sandy loam rather than heavy clay or compacted earth. Poor drainage is a common pitfall, so if water tends to pool after rain, choose another area or raise your bed higher.
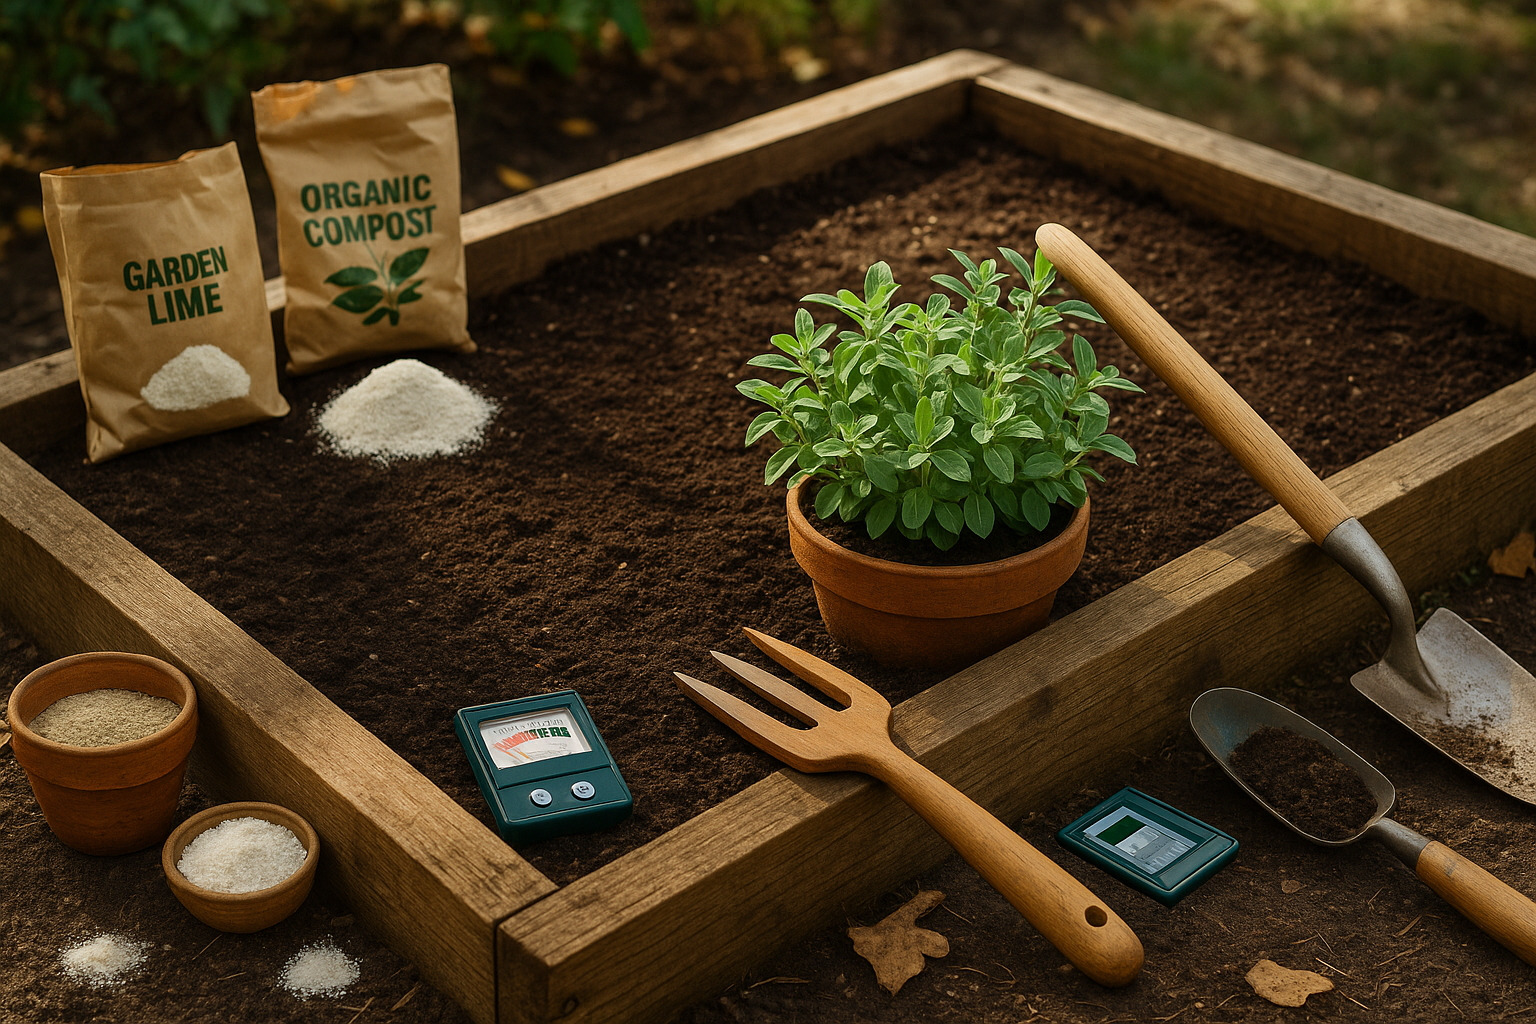
To get started, build your raised bed at least 8–12 inches deep and fill it with a blend of high-quality garden soil and compost (about a 2:1 ratio). Amend with a few handfuls of coarse sand or perlite to improve drainage further, and test the soil pH. Marjoram thrives in slightly alkaline to neutral soil (pH 6.5–7.5). If your soil is too acidic, a sprinkle of garden lime can help.
Avoid using manure or overly rich compost, as this can make marjoram leafy but less flavorful. Skip chemical fertilizers, which can damage delicate herb roots, and never use garden soil that hasn’t been weeded or sterilized, as this introduces pests and diseases.
By taking the time to prepare your raised bed carefully—and giving marjoram the sunlight, soil, and drainage it craves—you’ll set the stage for a lush and aromatic harvest.
Sowing and Planting Marjoram
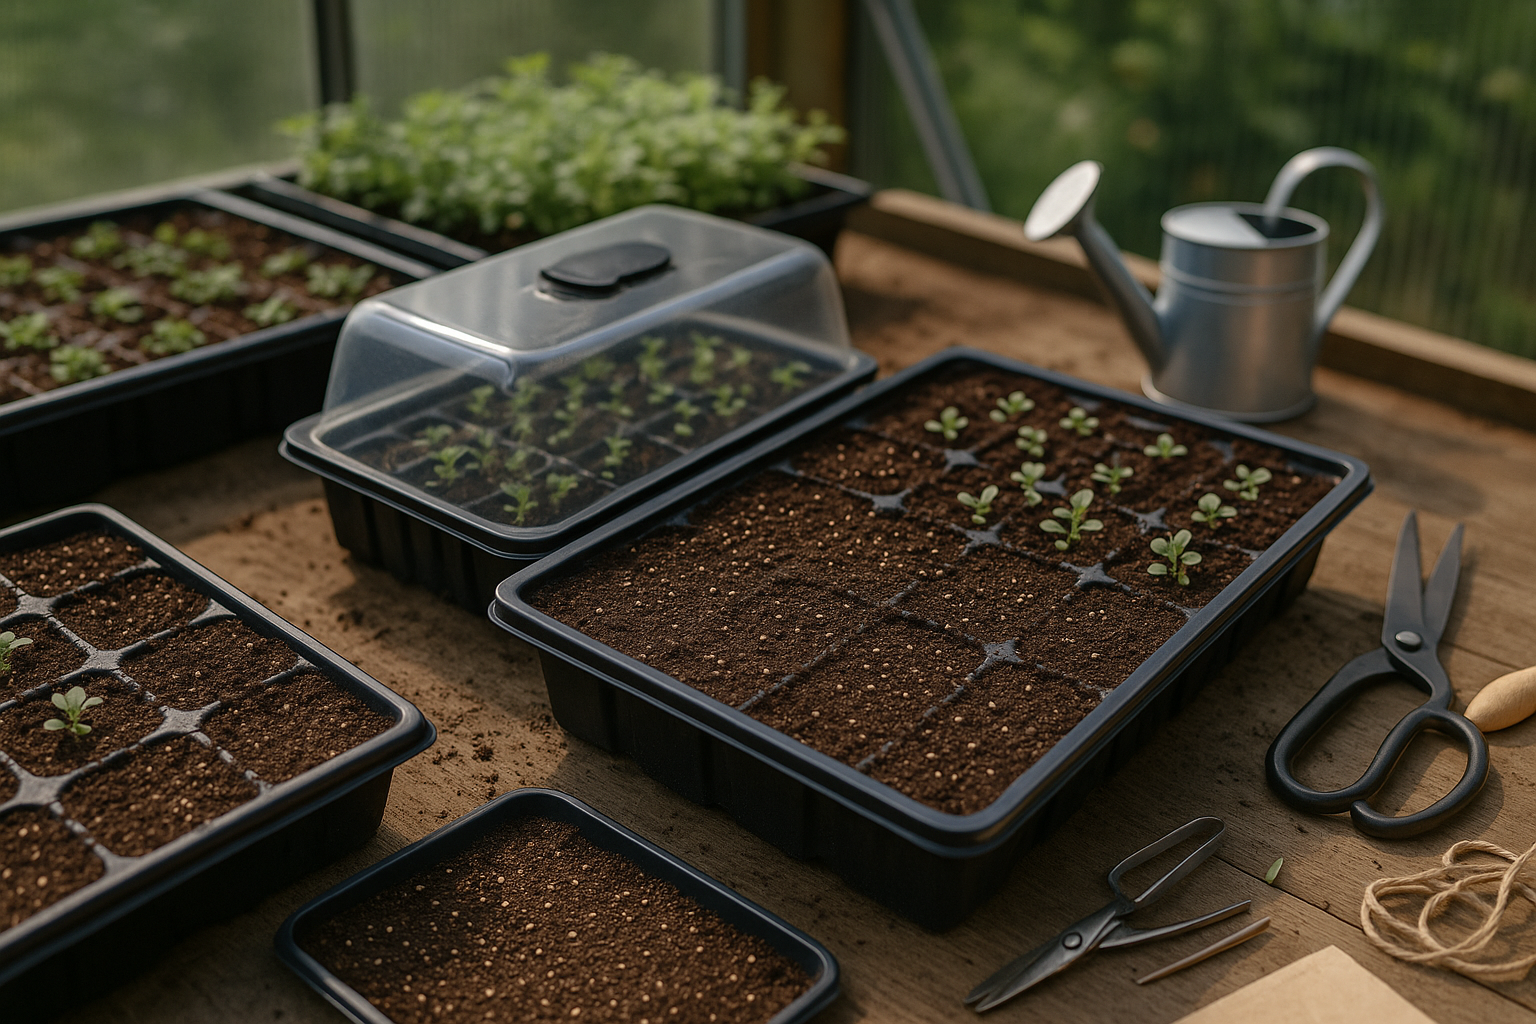
When growing marjoram, you can start seeds indoors or sow them directly outdoors—each method has its pros and cons. Sowing marjoram seeds outdoors is easiest for beginners. Just wait until the soil has warmed to at least 70°F and any danger of frost has passed, usually in late spring. Sprinkle the tiny seeds thinly on well-drained soil, gently pressing them into the surface without burying them, as marjoram seeds need light to germinate. Keep rows about 12 inches apart and thin seedlings to 8 inches once they’re established.
Starting indoors, on the other hand, gives you a head start, especially in cooler climates. About 6 weeks before your last expected frost, sow seeds in trays using seed-starting mix, again pressing seeds lightly on top of damp soil. Cover trays with clear plastic or a humidity dome until seeds sprout, usually within two weeks. When seedlings have developed two to three sets of true leaves and nights are consistently above 50°F, begin hardening them off—a process of gradually introducing them to outdoor sunlight and temperatures over a week.
When transplanting marjoram seedlings into raised beds, choose a sunny location with well-draining soil. Space plants 8–12 inches apart and plant them at the same depth as in their tray to avoid stem rot. Water gently after transplanting and consider mulching to help the soil retain moisture while discouraging weeds. With these steps, marjoram will settle in well and reward you with fragrant, flavorful growth all season long.
Companion Planting with Marjoram
Marjoram is a friendly herb in the garden, thriving alongside a variety of vegetables and flowers. Some of the best companion plants for marjoram include tomatoes, peppers, eggplant, carrots, onions, and beans.
Marjoram attracts beneficial insects like bees and predatory wasps, which help pollinate flowers and keep pests such as aphids at bay. It’s also known to enhance the flavor and growth of neighboring crops, especially tomatoes and peppers.
Herbs like oregano, basil, and sage make great companions as well, since they share similar growing conditions. You can also plant marjoram near lettuce and radishes to help deter pests and improve yields.
However, avoid planting marjoram near members of the mint family (such as peppermint or spearmint), as mints are aggressive spreaders that can overwhelm marjoram and compete for nutrients and space. Also, steer clear of planting marjoram with cucumbers, which tend not to benefit as much from marjoram’s presence and may suffer from reduced vigor.
Companion planting with marjoram makes your garden more resilient and productive by promoting healthy growth, enriching flavors, and naturally reducing the need for chemical pest control. Try interplanting marjoram among your veggies for a healthier and more vibrant garden.
Caring for Marjoram in Raised Beds
When growing marjoram in raised beds, it’s important to tailor your care routine for the best results. Since raised beds tend to drain faster than traditional gardens, check soil moisture every couple of days and water deeply when the top inch feels dry. This is usually about twice a week in mild weather, and more often during hot spells.
Marjoram prefers lean soils, so avoid heavy feeding. Mix a modest amount of balanced, organic fertilizer into the soil at planting, then supplement with a light application once or twice during the growing season. Mulch with straw, leaf mold, or fine bark to retain moisture, suppress weeds, and keep roots cool. Just be sure to avoid piling mulch against plant stems to prevent rot.
For bushier plants with richer flavor, pinch back the stem tips regularly, especially when plants are young. Simply use your fingers or small scissors to snip the top set of leaves—this encourages side shoots to develop and prevents legginess. As flower buds form, pinch them off to keep the energy focused on leaf production.
In mixed plantings, marjoram does well as a low-growing neighbor to taller herbs and veggies. Give it space to spread, but use small stakes or twine to gently support floppy stems if needed. With these simple techniques, you’ll enjoy a lush harvest and flavorful marjoram throughout the season.
Common Problems & Solutions
Marjoram grown in raised beds can face issues like aphids, spider mites, and fungal diseases such as powdery mildew. Aphids and spider mites suck sap from leaves, causing them to yellow or curl. To combat these pests naturally, encourage beneficial insects like ladybugs or spray plants with a gentle soap and water solution.
For fungal problems, ensure your raised bed isn’t overcrowded, allowing better air circulation, and water the base of plants rather than their leaves to keep foliage dry. If powdery mildew appears, remove affected leaves and consider a homemade spray of one tablespoon baking soda mixed with a gallon of water.
Marjoram can also suffer from root rot if the soil is too wet, so make sure your raised bed has well-draining soil and avoid overwatering. Regularly check for pests or disease, and promptly remove any damaged plant parts.
Mulching with straw can help prevent soil-borne diseases and retain even moisture. Rotating marjoram with non-related herbs each season can also minimize disease buildup. By using these methods and keeping your beds tidy, you’ll reduce future problems and keep your marjoram healthy and thriving.
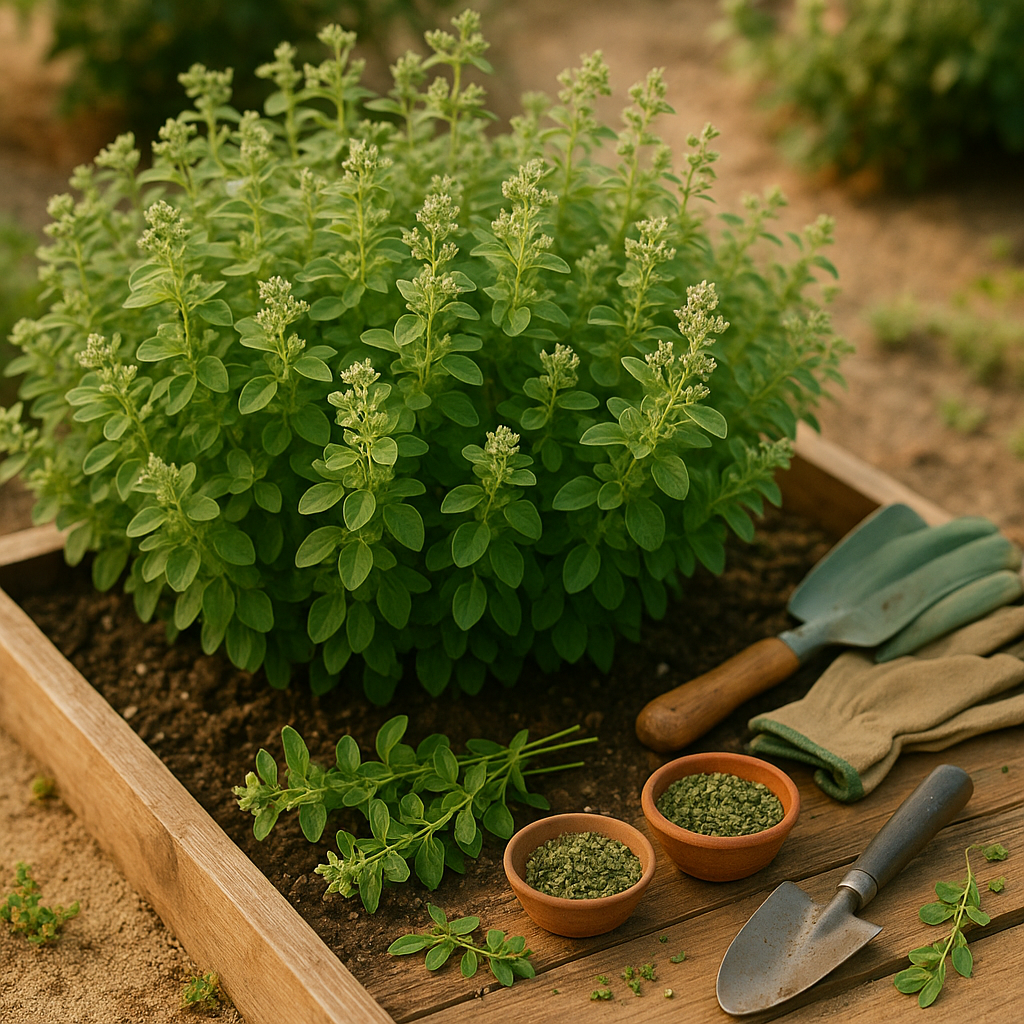
Harvesting and Using Marjoram
For the best flavor, harvest marjoram leaves just before the plant begins to flower, typically in the late morning after the dew has dried. Use clean scissors to snip off stems above a leaf pair, which encourages bushier growth and more future harvests.
To store fresh marjoram:
- Place the stems in a glass of water on your kitchen counter, or
- Wrap them in a damp paper towel and store in a sealed bag in the refrigerator—this keeps the leaves fresh for up to a week.
For longer storage, dry marjoram by hanging bunches upside down in a dark, well-ventilated area until the leaves crumble easily. Then, store them in an airtight jar away from sunlight.
To maximize your harvest throughout the season, regularly trim the tops to prevent flowering and promote new leaf growth. Harvesting every few weeks ensures a steady supply and healthier, more productive plants.