Introduction to Lemon Balm & Its Appeal
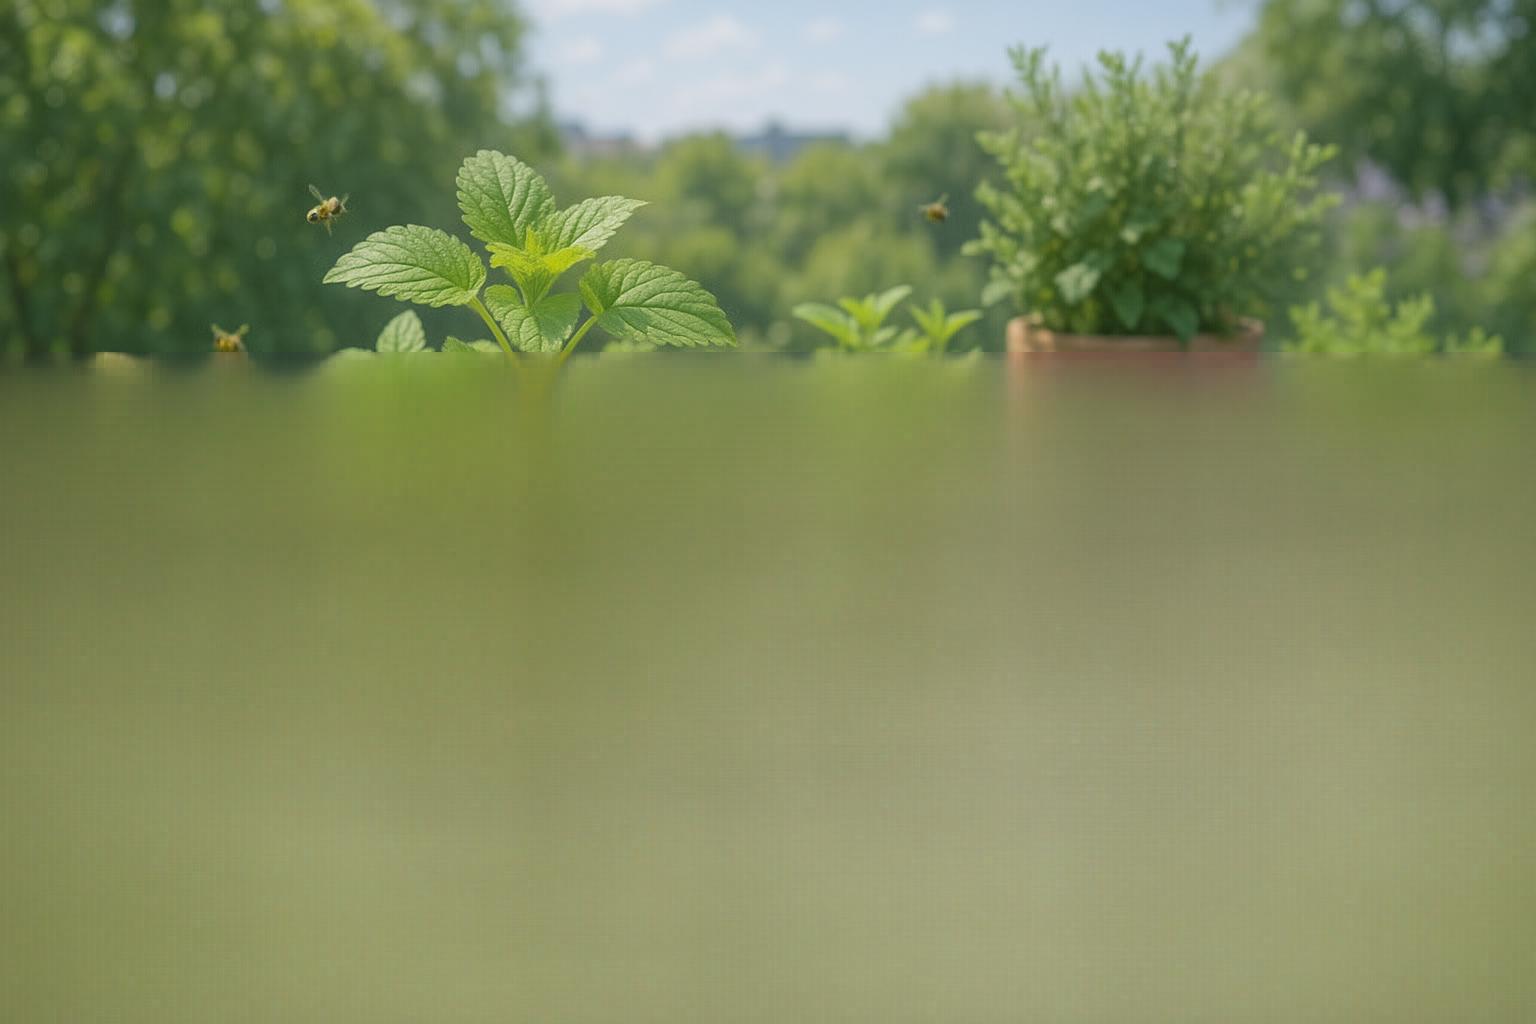
If you’ve ever wondered about the joys of growing lemon balm on balcony spaces, you’re in for a treat. Lemon balm (Melissa officinalis) is an aromatic herb prized for its refreshing citrus scent—just brush your hand across its vibrant leaves, and you’ll be captivated by the perfume. This ancient herb isn’t just about aroma; it’s wonderfully versatile, lending zesty undertones to teas, salads, and desserts, while also attracting bees and butterflies, making your outdoor space livelier.
Lemon balm truly shines when grown in compact areas, such as balconies and patios. Its manageable size means you won’t need large planters or sprawling beds; just a medium-sized container near your railing or a sunny window is enough. Hardy by nature, lemon balm tolerates occasional neglect, bouncing back from windy corners and unpredictable urban weather. Its lush, heart-shaped leaves also add a pop of vibrant green that enlivens any small nook.
Some popular varieties like ‘Quedlinburger Niederliegende’ and ‘Lemonella’ are bred to thrive in pots or window boxes, making them perfect for urban gardeners. With easy-going needs and cheerful growth, lemon balm in balcony gardens brings culinary delight, beauty, and ecological benefits to even the smallest outdoor spots.
Choosing Containers, Soil & Location
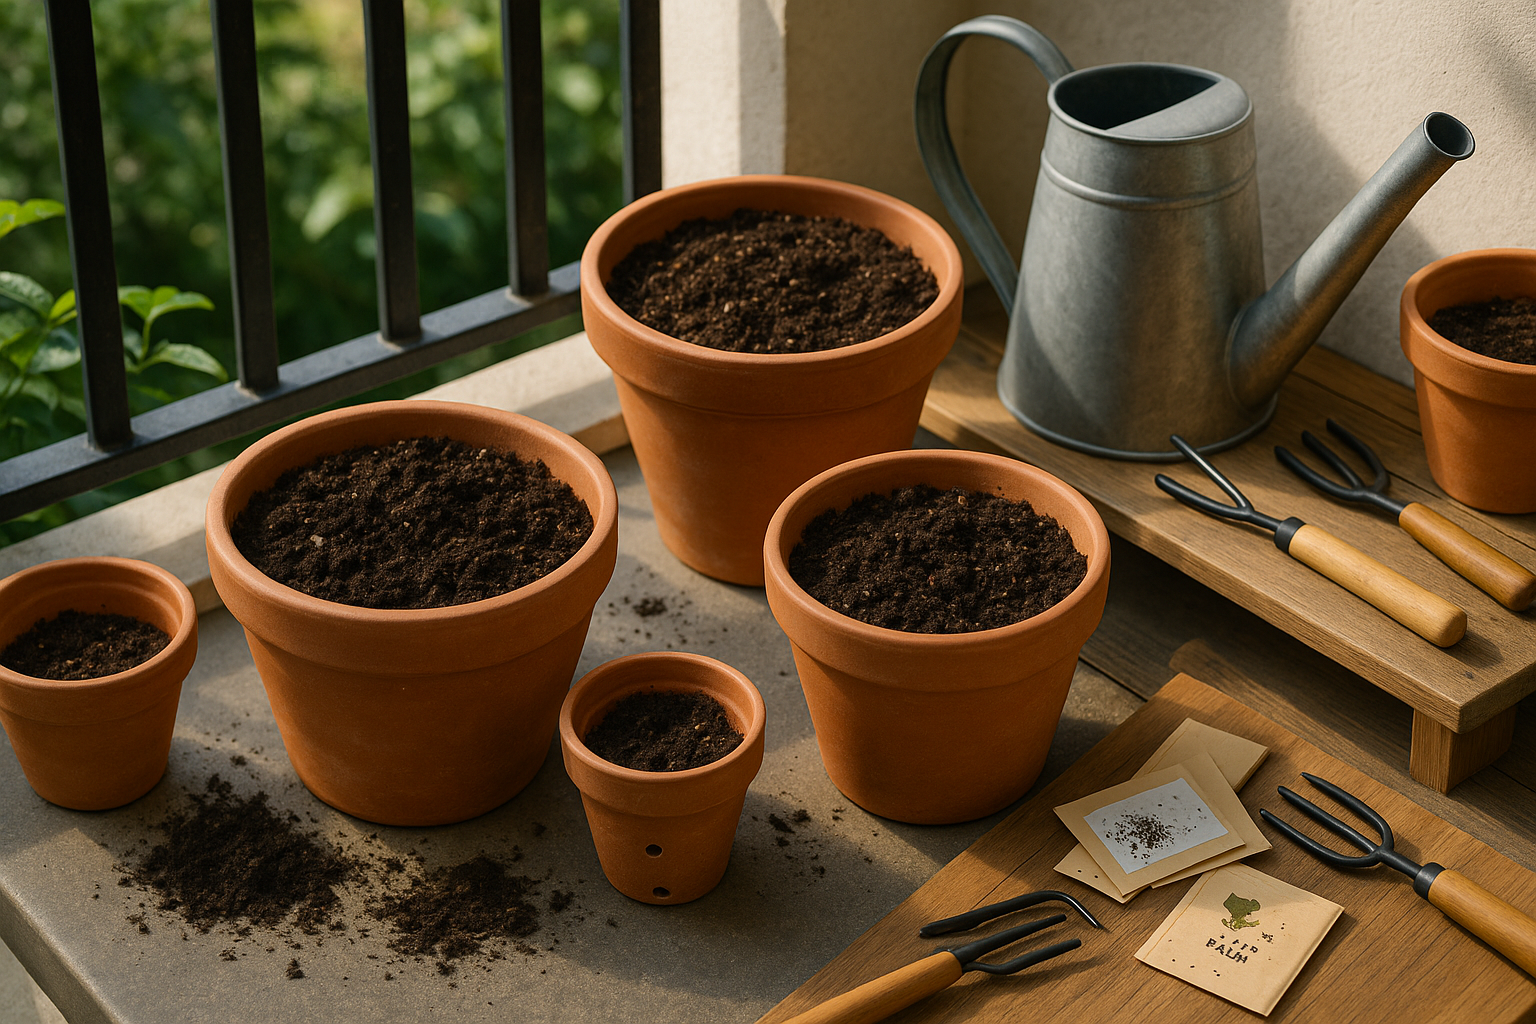
Selecting the right containers for lemon balm is key to enjoying vibrant, healthy plants on your balcony or patio. Choose pots that are at least 8 to 10 inches deep to accommodate the plant’s root system, and opt for containers with drainage holes to prevent soggy roots—a common cause of disease. Terracotta pots are breathable and help regulate soil moisture, but plastic or lightweight resin pots can be easier to move if your space changes with the seasons.
For the growing medium, pick a high-quality, organic potting mix with added compost. Lemon balm thrives in well-draining soil rich in organics, so avoid heavy garden soil that can compact and suffocate roots.
Location matters too: place containers where the plants will receive at least 4 to 6 hours of sun daily, like a south-facing railing or brightly lit patio spot. If your area is breezy, tuck pots closer to the building or use a windbreak to prevent leaves from drying out.
Watering should be easy, so set up your containers where you can reach them with a watering can or hose—consistency is vital, especially in smaller pots that dry quickly.
To maximize space, try vertical gardening by stacking planters or using railing boxes designed for small herbs. Hanging baskets or tiered plant stands can also help you grow more in less square footage, ensuring a bounty of lemon balm even in compact city settings.
Planting & Starting Lemon Balm
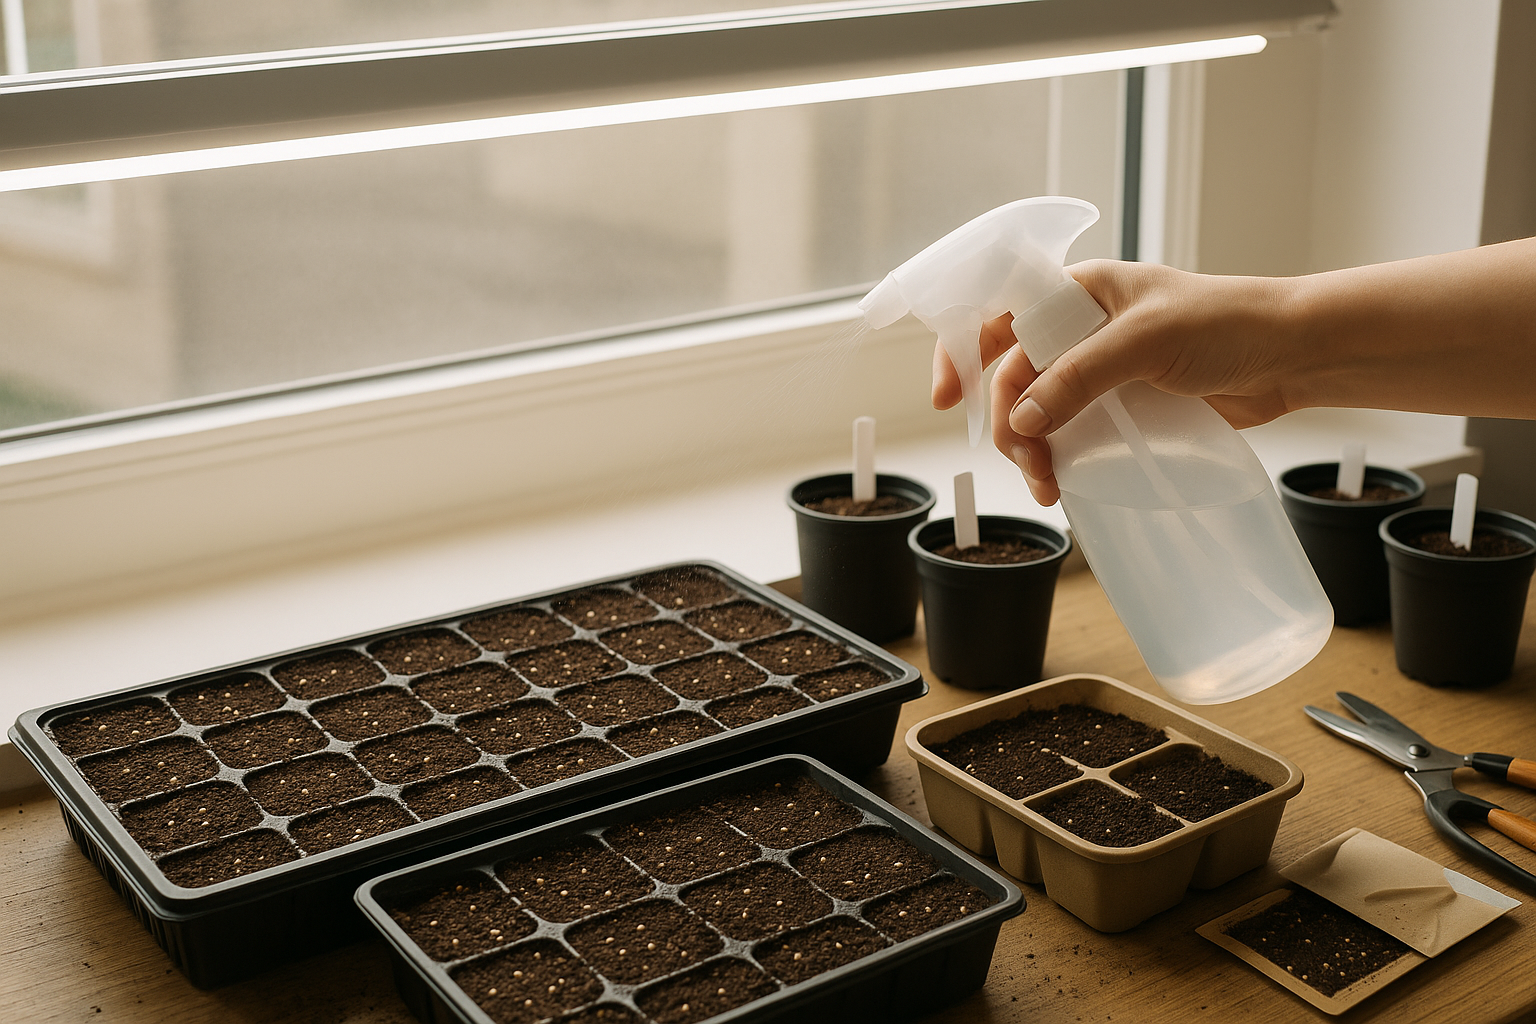
When deciding whether to grow lemon balm from seeds or purchase young plants, it’s helpful to weigh the pros and cons of each method. Starting from seed is cost-effective and gives you more control over the growing process, but it requires patience—lemon balm seeds can be slow to germinate and may take several weeks to sprout.
Purchasing transplants, on the other hand, offers a head start and faster gratification, which is ideal if you want a quick harvest or have a short growing season. However, buying young plants is typically more expensive and might limit your variety choices.
For those interested in starting from seed, begin indoors about 6 to 8 weeks before the last expected frost. Fill small pots or trays with a light, seed-starting mix, moisten the soil, and sprinkle seeds on the surface—lemon balm seeds need light to germinate, so don’t cover them with more than a dusting of soil. Keep the soil consistently moist and provide warmth (around 70°F/21°C) and bright light.
When seedlings have several true leaves and outdoor temperatures are reliably above 50°F (10°C), they’re ready to be transplanted. Whether using homegrown seedlings or purchased transplants, space plants about 12 to 18 inches apart in containers with at least 8 inches of depth, using quality potting mix.
Essential Supplies
- Seeds or young plants
- Seed-starting trays
- A spray bottle for gentle watering
- Quality potting soil
- Suitable containers with drainage
- Grow lights or a sunny windowsill
Starting lemon balm can be simple with these tips—just remember to water regularly and trim back young plants to encourage bushy growth.
Everyday Balcony Lemon Balm Care
Caring for lemon balm on your balcony is simple, but it does have a few specific needs to thrive in containers. Container-grown lemon balm prefers consistently moist, but not soggy, soil—water your plants whenever the top inch of soil feels dry, which could be every two to four days in warm weather. During the hottest months, check daily and water in the early morning or evening to minimize evaporation.
For feeding, use a balanced, water-soluble fertilizer (like a 10-10-10 NPK ratio) every four to six weeks during the growing season. Avoid over-fertilizing, as too much can lead to leggy plants with less flavor.
At the start of each spring, refresh your lemon balm’s soil by replacing the top few inches with new potting mix or repotting entirely for optimal drainage and nutrient content.
Pruning is essential—regularly pinch or snip back stems just above leaf pairs to promote bushier growth. Harvesting leaves frequently actually encourages the plant to produce more.
Keep an eye out for pests like aphids or spider mites, which can be rinsed off with a gentle shower or treated with insecticidal soap. Watch for powdery mildew in humid conditions, removing affected leaves promptly.
As seasons change, lemon balm appreciates a little extra care:
- In extreme heat, provide some afternoon shade and mulch the soil surface to retain moisture.
- In colder weather, move containers closer to sheltered walls or indoors, and cut back dead growth to keep your lemon balm healthy year-round.
Harvesting, Using & Storing Lemon Balm
The best time to harvest lemon balm is in the morning, after the dew has dried but before the sun gets too strong, as this is when the leaves are most aromatic. Trim stems just above a set of leaves using clean scissors, taking about one-third of the plant at a time; this encourages bushier, continuous growth throughout the season.
For fresh uses, lemon balm’s gentle citrus-mint flavor enhances teas, lemonades, salads, or fruit desserts. A few bruised leaves also make a refreshing addition to water or cocktails. Beyond the kitchen, crushed lemon balm leaves are known to soothe minor skin irritations or serve as a calming herbal tea before bed.
To preserve lemon balm for later, air-dry small bunches upside down in a dark, ventilated space until crisp. Then, store the leaves in airtight jars away from light. Alternatively, chop fresh leaves and freeze them in ice cube trays with a splash of water—perfect for tossing into hot teas, soups, or sauces straight from the freezer.
With these easy tips, you can enjoy both the fresh and preserved flavors of lemon balm year-round, making the most of your garden harvest.
Overwintering and Troubleshooting for Patios & Balconies
Lemon balm is surprisingly cold-hardy, able to survive down to USDA zone 4 when planted in the ground. However, container-grown plants are more vulnerable since their roots have less protection from freezing. To overwinter lemon balm on patios and balconies, consider moving the containers into an unheated garage, shed, or a bright indoor space before the first frost, especially in colder climates.
If indoor space is limited, cluster pots together in a sheltered spot and insulate them with layers of burlap, bubble wrap, or mulch. This helps retain warmth and keeps roots from freezing. Mulch the soil with straw or leaves, and reduce watering during winter—lemon balm doesn’t like soggy roots, so wait until the top inch of soil is dry before watering.
Watch for container-specific issues like pests (spider mites are common indoors), root crowding that stunts growth, or overwatering, which can lead to root rot. Combat pests by rinsing leaves or using gentle insecticidal soap. Divide overcrowded plants in early spring or repot if roots begin circling the pot.
Always use containers with drainage holes to prevent excess moisture, and consider elevating pots on bricks or pot feet to avoid waterlogging during wet spells. This combination of protective measures and attentive care will keep your lemon balm healthy year-round.
Propagating & Expanding Your Balcony Lemon Balm
Propagating lemon balm on your balcony is easy and lets you multiply your plants for free. The simplest method is division—just dig up a mature clump in early spring or fall, gently split the roots, and replant them in fresh pots or boxes.
You can also take healthy stem cuttings in late spring or early summer. Snip 4-inch stems, remove the lower leaves, dip them in rooting hormone (optional), and nestle the cuttings in moist potting mix.
For a hands-off approach, let your plant flower and drop seeds, or collect the seeds for sowing in early spring.
Propagation helps refresh tired, woody plants and lets you fill spare corners or share lemon balm with friends.
Watch out for issues like rot caused by overwatering cuttings or poor root development—make sure pots drain well and use clean scissors. If divisions wilt, keep them shaded and moist until they bounce back.
With a little care, your balcony will soon be bursting with fragrant lemon balm.