Introduction to Growing Rosemary from Seed
Deciding to grow rosemary from seed is both an exciting and ambitious project for any gardening enthusiast. While this fragrant Mediterranean herb is often propagated by cuttings, starting from seed offers a unique satisfaction. You get to watch every stage of growth, from tiny green shoots to lush, aromatic sprigs that brighten a kitchen windowsill and infuse meals with flavor. However, the journey isn’t without challenges—rosemary seeds are famously slow and sometimes fussy germinators, requiring patience and a bit of attention to detail. That extra effort makes harvesting your first homegrown sprigs all the more rewarding.
Rosemary is beloved for its versatility in the kitchen, shining in dishes from roast potatoes to fresh-baked bread and even creative cocktails. Growing your own ensures a constant, fresh supply, free from pesticides and packaged plastics. In this guide, you’ll learn step by step how to successfully grow rosemary from seed, including selecting quality seeds, ideal soil mixes, tips for proper watering, lighting requirements, troubleshooting common problems, and caring for seedlings as they mature. Whether you’re a beginner gardener or looking to try something new this season, you’ll find practical advice and encouragement to help you grow robust, flavorful rosemary starting from scratch.
When and Where to Start Rosemary Seeds
Starting rosemary seeds takes a bit of patience, but getting the timing and location right makes all the difference. For most climates, it’s best to sow rosemary seeds indoors 8 to 10 weeks before your last expected spring frost—typically late winter or very early spring—so the seedlings are strong enough to handle outdoor conditions once the risk of frost has passed.
If you live in a warmer USDA zone (8-10) with mild winters, you can also sow seeds outdoors in spring after all danger of frost is gone, choosing a spot where the soil warms up quickly.
For indoor starting, place your seed trays in a bright location, like a south-facing windowsill or under a grow light, since rosemary loves consistent, direct sunlight—at least 6-8 hours daily is ideal. If you have a greenhouse, it can offer even temperatures and abundant light, which speeds up germination.
Outdoors, pick a sunny, well-draining garden bed; rosemary doesn’t like soggy soil or shade. The ideal temperature for germinating seeds is between 65°F and 72°F (18°C to 22°C)—staying within this range gives seeds the best shot at sprouting.
In cooler climates or USDA zones below 7, always start seeds indoors for the best results, as chilly conditions slow or prevent germination.
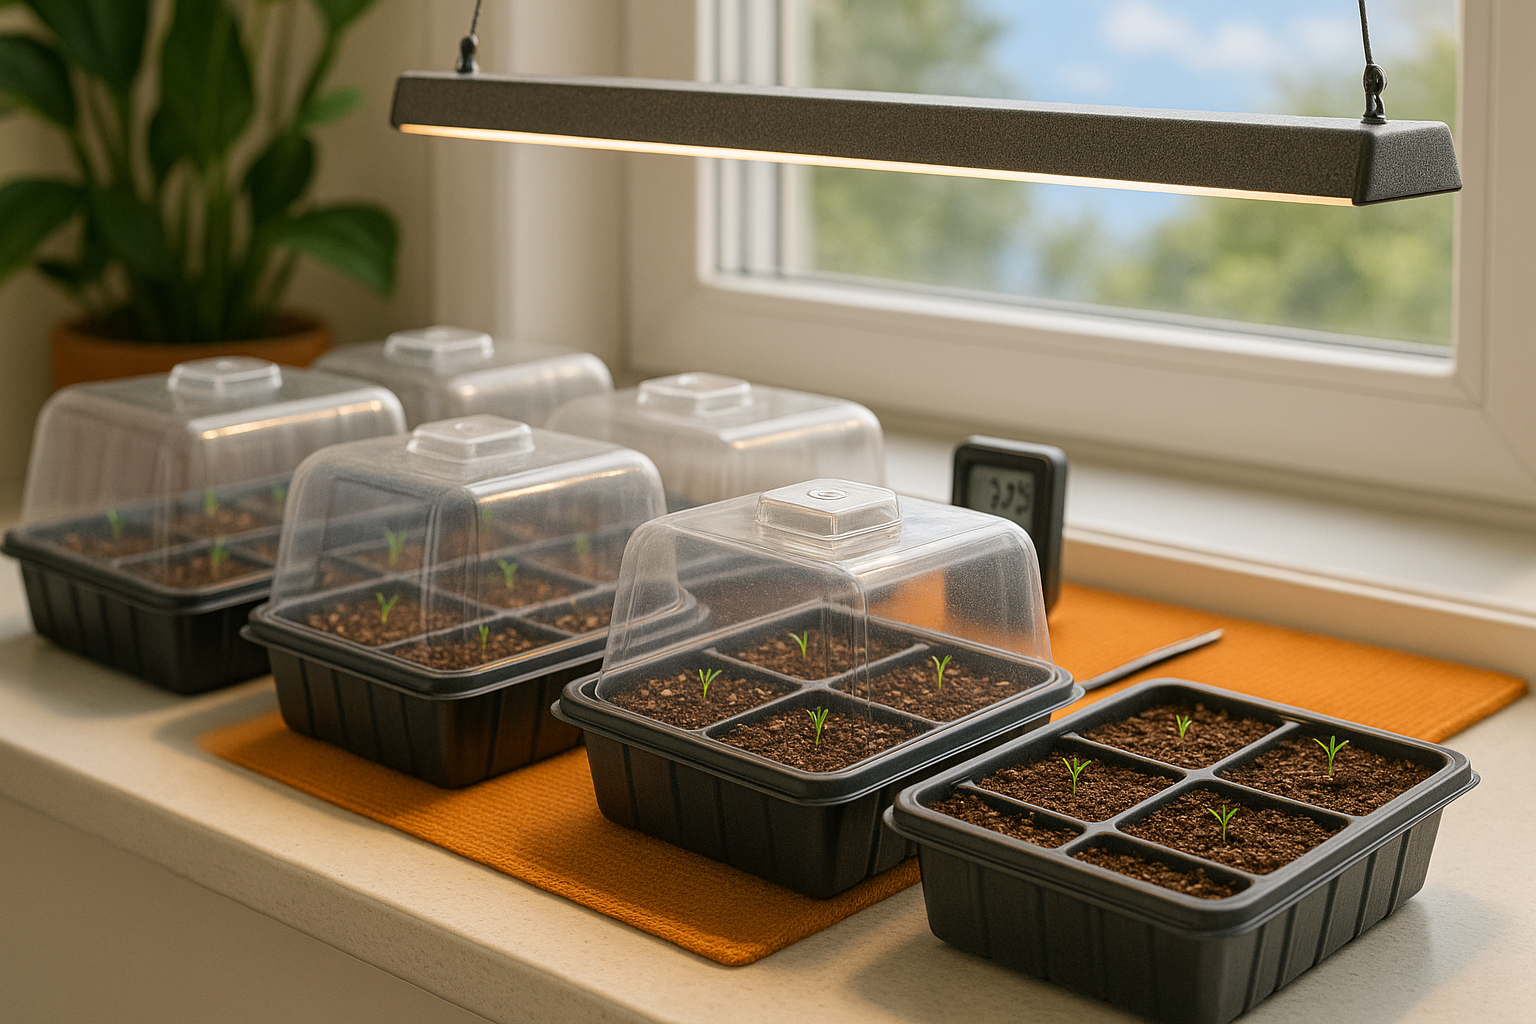
A good tip: cover seed trays with a clear plastic dome to keep humidity high and temperatures steady until seedlings appear. Give your rosemary the best possible start, and you’ll be rewarded with thriving, aromatic plants.
Preparing Seeds and Materials
Getting your seeds and materials ready is the first step to successful germination. Start by checking if your seeds need any special preparation. Some seeds, especially those with hard coats, benefit from pre-soaking in warm water for 12–24 hours to soften the shell and speed up sprouting. Others may require cold stratification—placing seeds in a moist paper towel inside the fridge for a few weeks—to mimic winter conditions and break dormancy. Always check the seed packet or supplier recommendations for specific instructions.
Next, gather essential materials:
- Seed trays or small pots for sowing
- A high-quality seed-starting mix (lighter and finer than regular potting soil)
- Humidity covers to maintain moisture
If you’re growing indoors or in low-light areas, consider adding grow lights to ensure seedlings get the bright, consistent light they need to thrive.
Pay attention to soil requirements: most seeds do best in a potting mix with a slightly acidic to neutral pH range of 6.0–7.0, excellent drainage to prevent root rot, and a balance of nutrients. Avoid using heavy garden soil, as it can compact and limit air movement around the roots.
Pre-moisten your potting mix before filling trays to create the ideal, evenly damp environment for seeds. A simple, recommended mix might include equal parts peat moss (or coco coir for an eco-friendly option), perlite, and vermiculite. Investing a little time in these preparations will set your seeds up for strong, healthy growth right from the start.
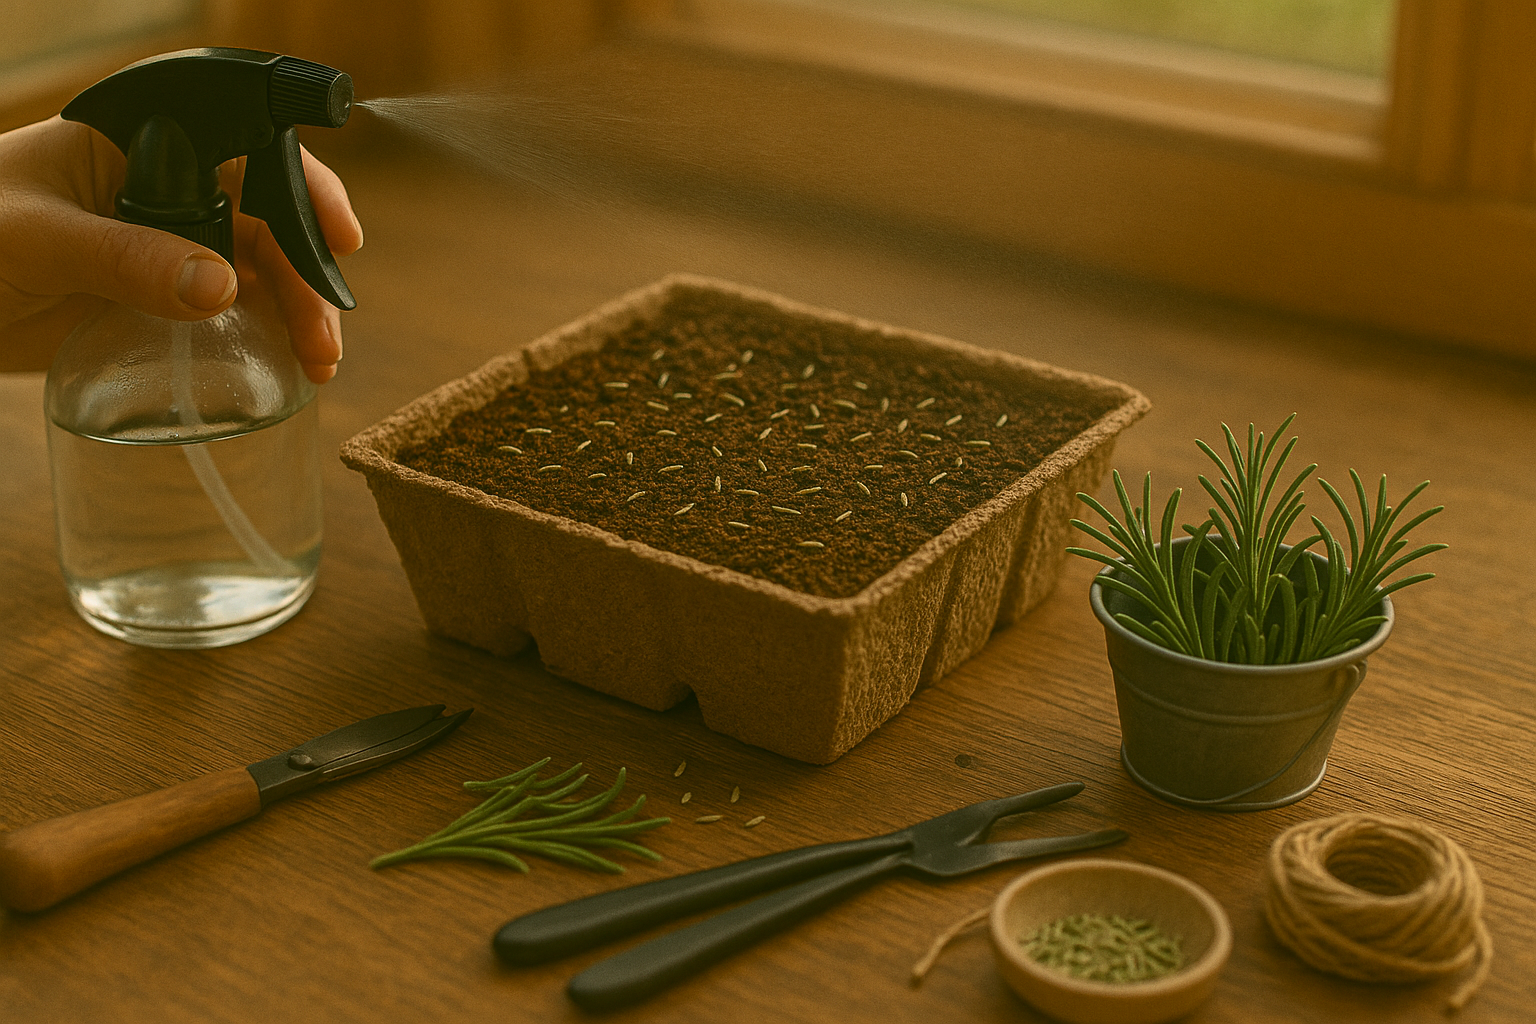
Sowing Rosemary Seeds Step-by-Step
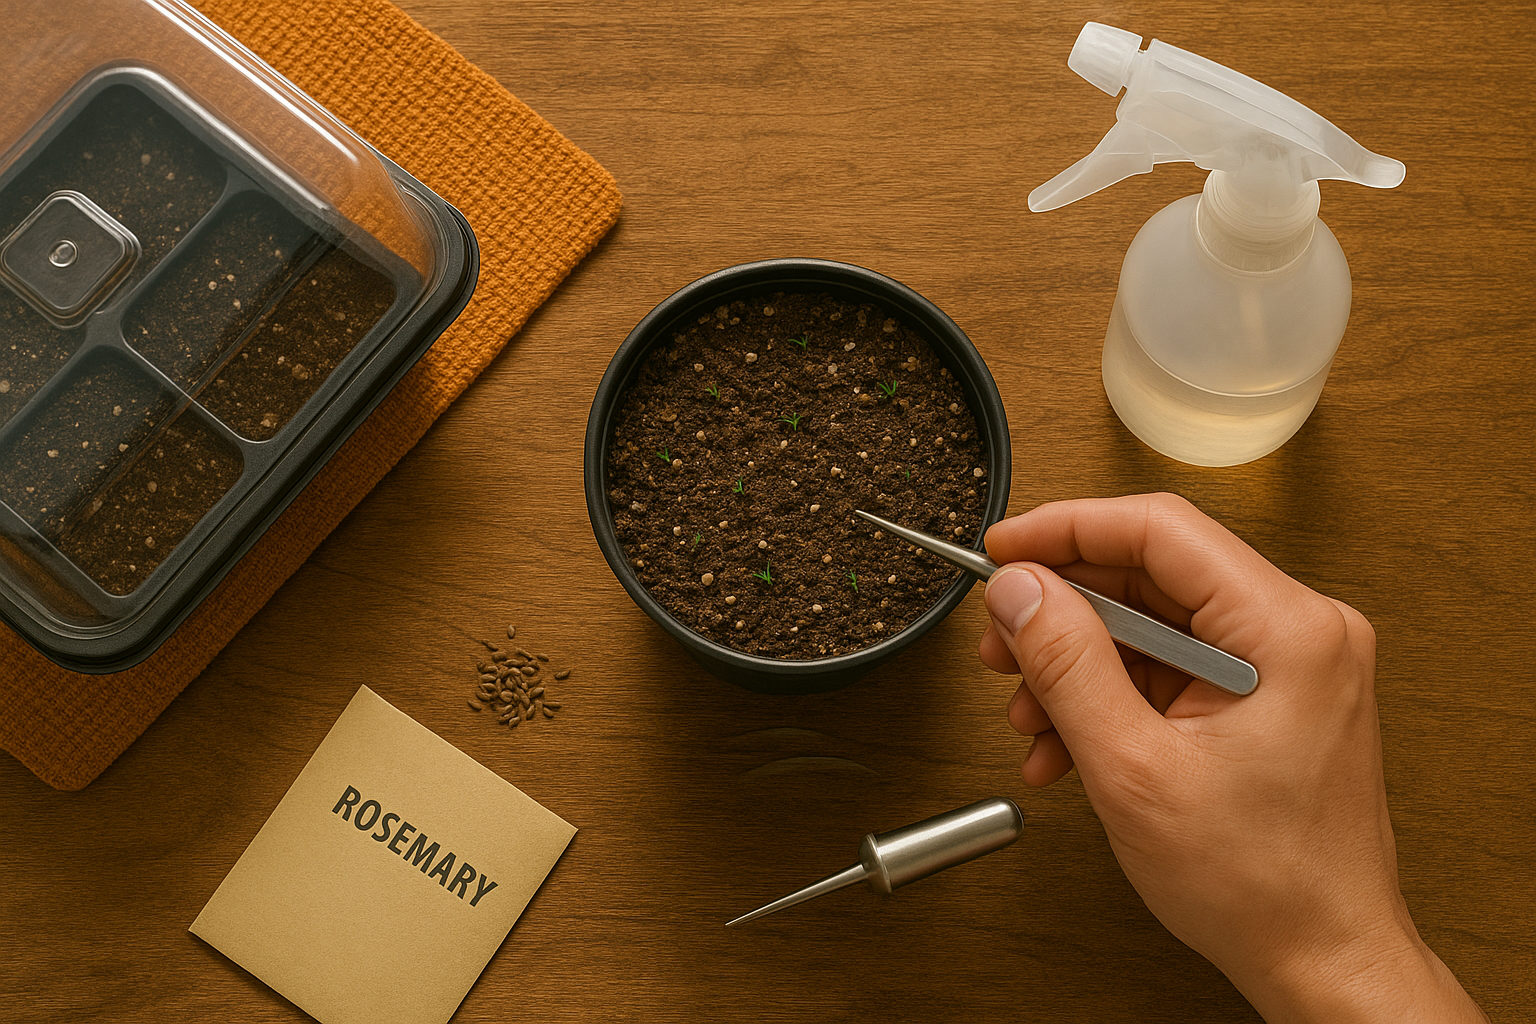
Start by filling a seed tray or small pots with a well-draining, sterile seed-starting mix, and lightly moisten the soil before sowing. Rosemary seeds are tiny and only need to be sown about 1/8 inch deep—simply sprinkle the seeds on the surface and press them gently into the soil, then cover with a very thin layer of mix or vermiculite. Space the seeds about an inch apart to give each one room to sprout and grow.
Use a fine spray bottle or a watering can with a rose attachment to gently mist the soil so you don’t wash away the seeds. Rosemary seeds can be stubborn and slow to germinate, often taking 2 to 4 weeks or even longer, so patience is key.
They prefer warmth—aim for a consistent soil temperature of 70-75°F (21-24°C). Placing the tray on a heat mat or in a warm spot near a sunny window can help. You’ll want to maintain even moisture, keeping the surface damp but never soggy. Covering the tray with a clear plastic lid or plastic wrap will help retain humidity, but remember to lift it daily to let in fresh air and prevent mold.
Rosemary seeds need light to germinate, so don’t bury them deeply or place them in total darkness—bright, indirect sunlight is ideal. If you notice slow or patchy germination, don’t worry; this is common with rosemary. Re-moisten dry soil, provide more light, and maintain steady warmth.
Sometimes only half the seeds might sprout, so it’s perfectly fine to sow more seeds into the gaps after two to three weeks if nothing appears. With a little patience and careful attention to moisture and warmth, you’ll soon see fine, delicate rosemary seedlings ready for the next stage of growth.
Caring for Seedlings and Transplanting
Nurturing your seedlings is all about giving them the right balance of space, air, and gentle care. One of the first steps is thinning, which means gently removing weaker seedlings so your healthiest plants have room to grow. Snip extras at the soil level instead of pulling them to avoid disturbing roots.
Maintaining proper humidity is important; seedlings need moisture, but soggy conditions can lead to mildew or “damping off” disease. Use a humidity dome or clear plastic cover in the early days, but remove it once seeds sprout. Make sure there’s good airflow by using a small fan on a low setting or periodically opening windows.
If your seedlings outgrow their starter trays before it’s warm enough to plant outside, “potting up” helps give them more space. Carefully transplant your seedlings into slightly larger pots, handling them by their leaves (not the stems) to prevent damage.
Before moving seedlings outdoors for good, “harden off” by gradually introducing them to outdoor conditions. Start with a few hours of shade and light wind, then slowly increase sun and exposure over a week.
When it’s time to transplant, spacing is key. Check seed packet guidelines or look up ideal distances for each crop (for example, tomatoes often need 18–24 inches, lettuce just 6–12 inches). Whether planting in garden beds, raised beds, or containers, keep airflow in mind and avoid crowding plants together. This helps prevent disease and ensures every seedling gets enough sunlight and nutrition to thrive.
General Rosemary Growth & Care Tips
Rosemary is a hardy herb, but it thrives best when you mimic its native Mediterranean conditions. This means using well-draining soil and watering only when the top inch of soil feels dry—overwatering is a common cause of root rot, so always let excess water drain away.
Place your rosemary in a spot that receives at least six hours of direct sunlight daily. Outdoors, this could be a sunny patio or garden bed; indoors, a south-facing window is ideal. Feed rosemary monthly during the growing season with a balanced, diluted liquid fertilizer, but avoid overfeeding, as this can cause leggy growth.
Watch for yellowing leaves, which usually signal overwatering or poor drainage—adjust your watering habits and make sure pots have drainage holes. Spindly stems often result from insufficient sunlight; move your plant to a brighter spot or supplement with a grow light indoors.
Damping off, a fungal issue affecting seedlings, is best prevented by using sterile soil and watering carefully. For robust growth indoors, use a terra-cotta pot to prevent soggy roots, and if possible, move your plant outside in warmer months.
Outdoors, rosemary appreciates a sheltered spot protected from cold winds and winter wet. With these tips, you can enjoy healthy rosemary year-round.
Harvesting and Using Homegrown Rosemary
Harvesting rosemary at the right time ensures you get the most flavor while keeping your plant healthy. The best time to pick rosemary is in the morning after the dew has dried but before the heat of the day, as this is when the essential oils are at their peak.
Use sharp scissors or gardening shears to snip off a few inches of the tender, non-woody stems. Avoid cutting into the old, woody branches, as this can damage the plant and slow its growth. Always take less than a third of the plant at a time to allow it to recover and continue thriving. For healthy regrowth, trim just above a leaf node where new shoots can sprout.
Once harvested, you can use fresh rosemary right away in recipes like roasted vegetables or infused oils. To dry rosemary, tie small bundles and hang them upside down in a cool, dry, and well-ventilated place for about two weeks. Once dry, strip the leaves from the stems and store them in an airtight jar away from sunlight—this helps keep the flavor and scent locked in.
Fresh or dried, a little rosemary goes a long way in soups, stews, breads, and marinades, bringing your homegrown herbs right to your table.
Conclusion
Growing rosemary from seed is a rewarding journey that tests your patience and green thumb, but watching those tiny seedlings thrive is worth every moment. Now that you’ve mastered the basics, keep nurturing your rosemary with regular sunlight, well-drained soil, and careful watering.
Don’t be afraid to experiment—try propagating new plants from healthy cuttings or explore creative ways to incorporate rosemary into your cooking and garden design. Remember, every gardener faces challenges, so keep learning and adapting your care as your plant grows.
We’d love to hear about your rosemary-growing experiences—share your stories or questions in the comments below!
Ready to take your herb garden even further? Check out our beginner guides on herb propagation techniques, companion planting, and organic pest management to expand your skills and confidence. Happy gardening!