Introduction to Growing Mint from Grocery Store Cuttings
If you’ve ever wondered whether you can grow mint from grocery store cuttings, you’re not alone. The appeal of trying to grow mint from cuttings bought at your local store is clear: it’s affordable, convenient, and often just a spur-of-the-moment decision while prepping a meal. There’s no need to hunt for seeds or start from scratch—just a bunch of fresh mint and a little patience can soon yield a thriving container of fragrant leaves at home. This method is also ideal for beginners; mint is famously hardy and forgiving, making it the perfect candidate for a “first try” at plant propagation.
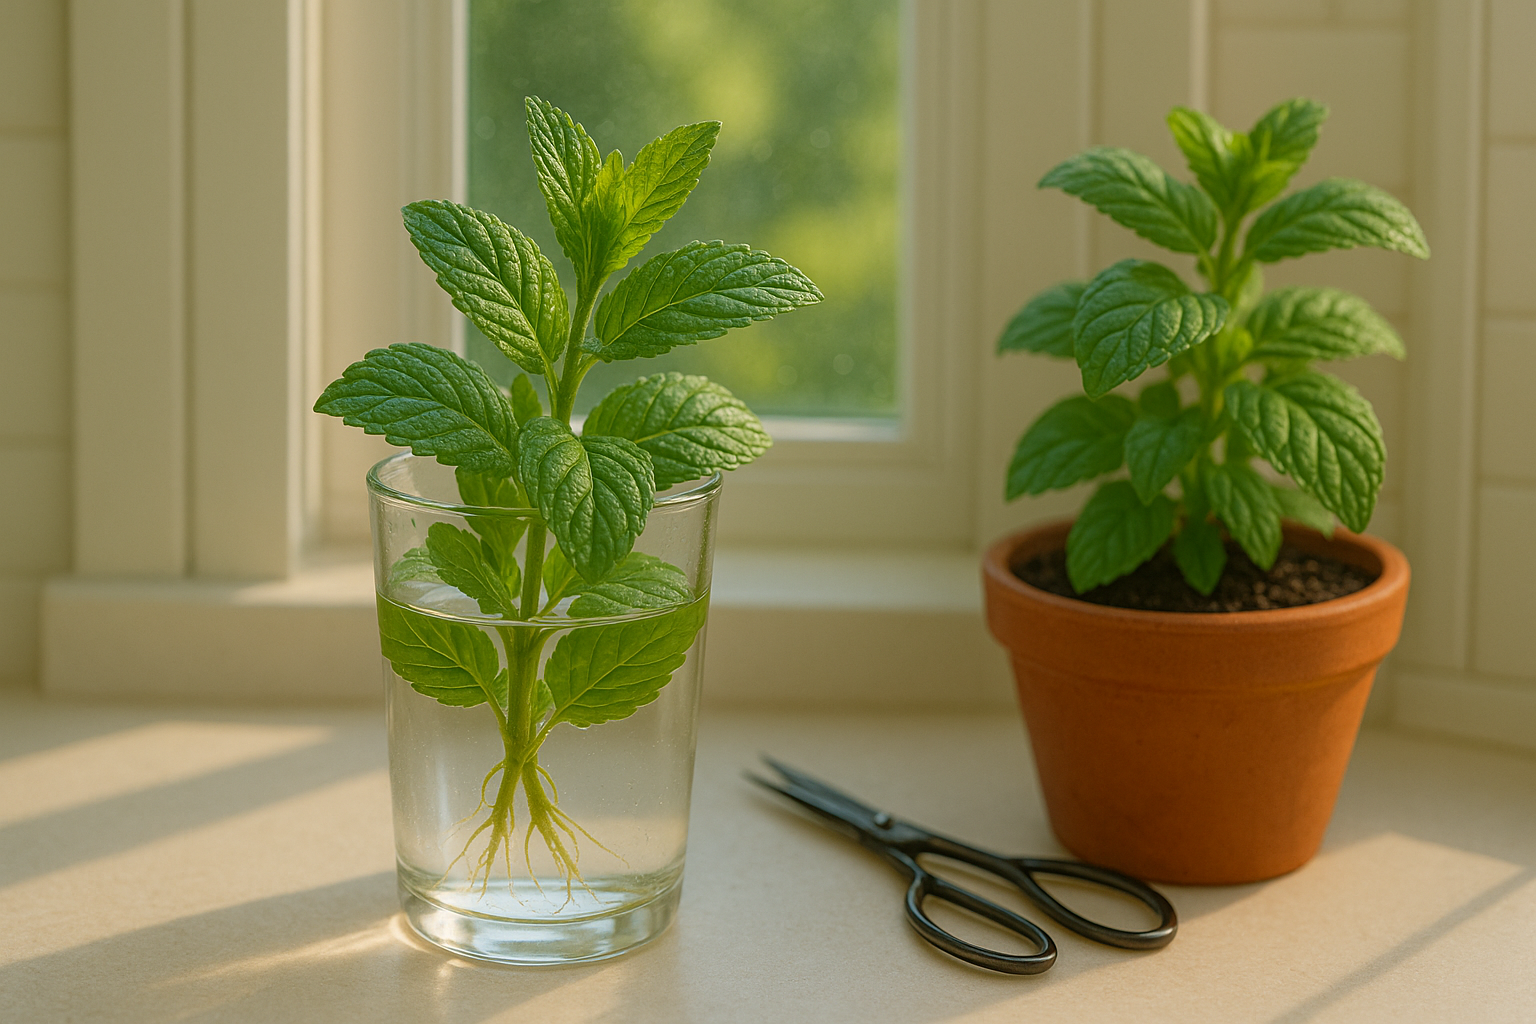
So, can you really grow mint from cuttings plucked straight from the grocery store’s herb section? Absolutely. The key to your success starts with the right cuttings. Look for stems that are green, healthy, and free from wilting or discoloration. The fresher, the better—those recently cut are more likely to root quickly. Strip off the lower leaves, pop the stems in a glass of water by a sunny window, and watch as roots develop within days. All mint really needs is decent light, consistent moisture, and a little care. In no time, you’ll have a lush supply for recipes, teas, and garnishes—all from what began as a humble store-bought sprig.
Selecting and Preparing Grocery Store Mint Cuttings

When selecting mint sprigs at the grocery store, look for bundles that are crisp, rich green, and free from any yellowing or brown spots—these signs indicate a healthy plant that will root more easily. Avoid any mint that appears wilted or has slimy stems.
Once home, give your cuttings a good rinse under cool water to wash away any potential pesticide residues. This not only protects your health but also helps prevent fungal issues during rooting.
To prepare your mint for propagation, use sharp, clean scissors to snip stems about 4–6 inches long, making the cut just below a leaf node (the bumpy part where leaves emerge). Remove leaves from the bottom of the stem gently, leaving only the top two or three sets of leaves intact. This helps the cutting focus its energy on growing roots instead of maintaining extra foliage.
For best results, try rooting several cuttings at once—some may not take, but with a handful, you’re likely to succeed. Many gardeners have also found that lightly scraping the bottom inch of the stem helps stimulate root growth.
Whether you plan to start your mint in water or soil, preparing healthy cuttings sets the stage for quick rooting and leads to a stronger, more productive plant down the road.
Rooting Mint Cuttings – Water vs. Soil Methods
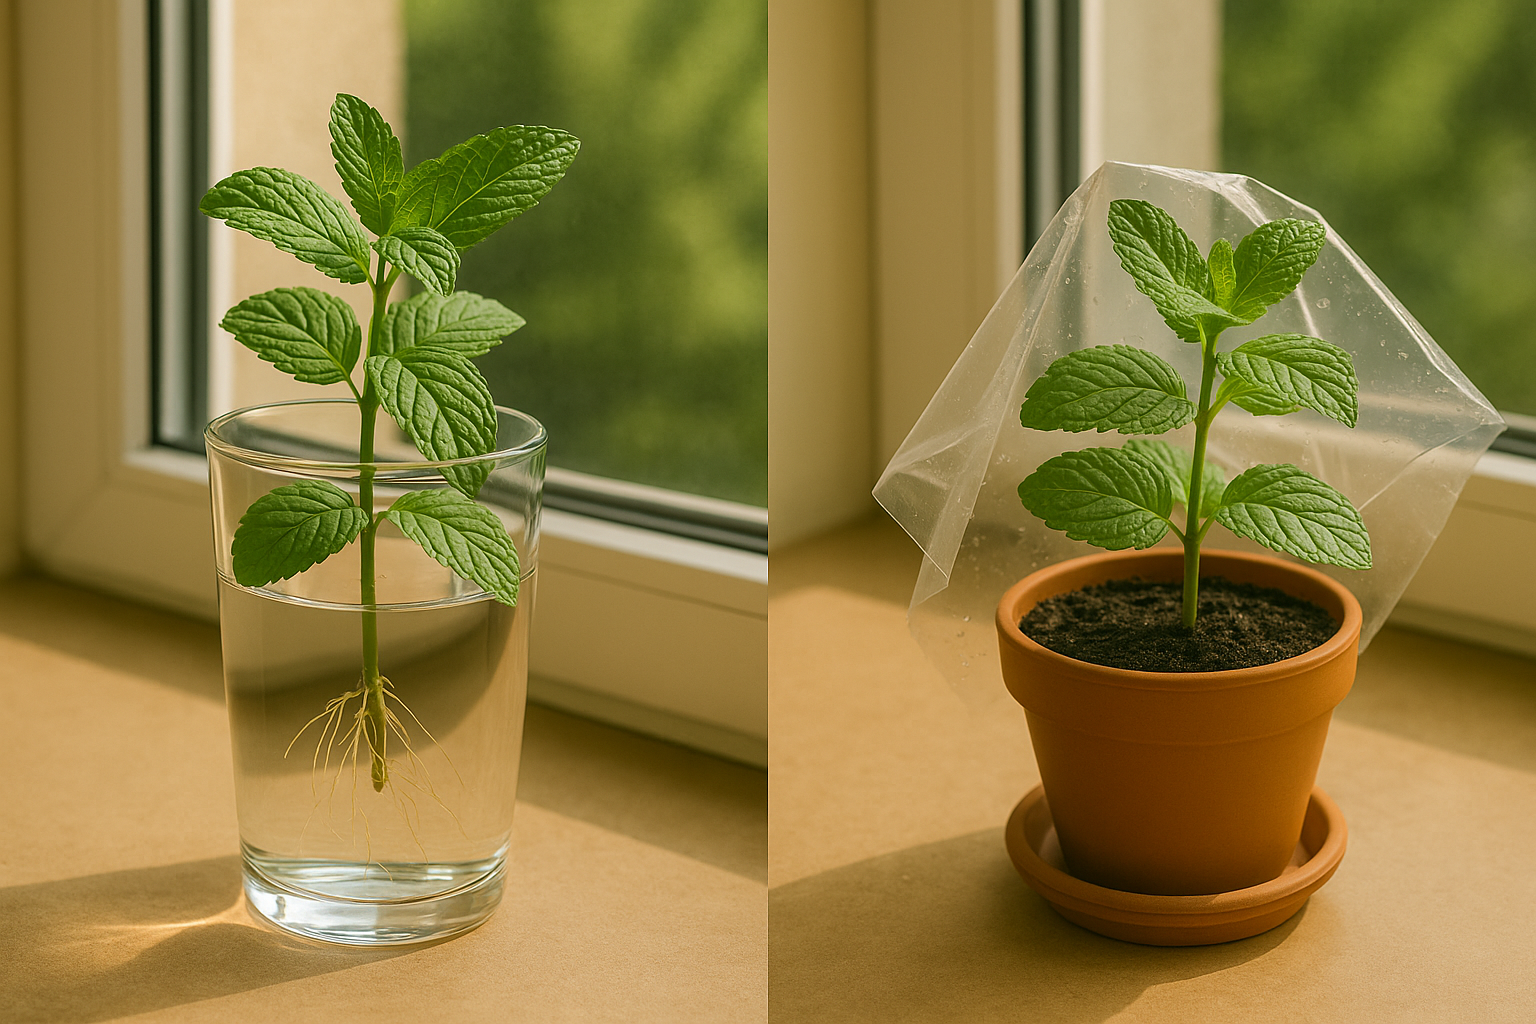
Rooting mint cuttings is a simple way to multiply your plant, and you can do it using either water or potting soil. For the water method, snip healthy mint stems just below a node (where leaves grow), strip off the lower leaves, and place the stems into a glass of clean, room-temperature water. Make sure the nodes are submerged but the leaves stay dry. Put the glass on a sunny windowsill, avoiding direct midday sun. Change the water every two to three days to prevent bacteria growth. In about a week, you’ll see tiny white roots emerging from the submerged nodes—wait until the roots are a couple of inches long before transplanting to soil, usually within two weeks.
With the soil method, fill a small container with well-draining potting mix and moisten it. Use a pencil to poke a hole, then insert the prepared mint cutting and gently firm the soil around it. Cover the pot loosely with a clear plastic bag to maintain humidity, but ventilate it daily to avoid mold. Keep the soil damp but not soggy, and place the container where it receives bright, indirect light. Roots develop in 2–4 weeks; you can check progress by gently tugging the cutting—resistance means roots are forming.
The water method offers fast, visible results and is great for beginners, but soil-grown roots tend to be more robust, making the transition to garden beds or bigger pots less stressful for the plant. Water-rooted cuttings may need more time to adjust after transplanting. Soil propagation takes a little longer and requires patience to monitor moisture but generally produces stronger, transplant-ready roots. Both methods are easy and low-cost, so choose whichever fits your timeframe and preference.
Planting Rooted Mint and Best Growing Conditions
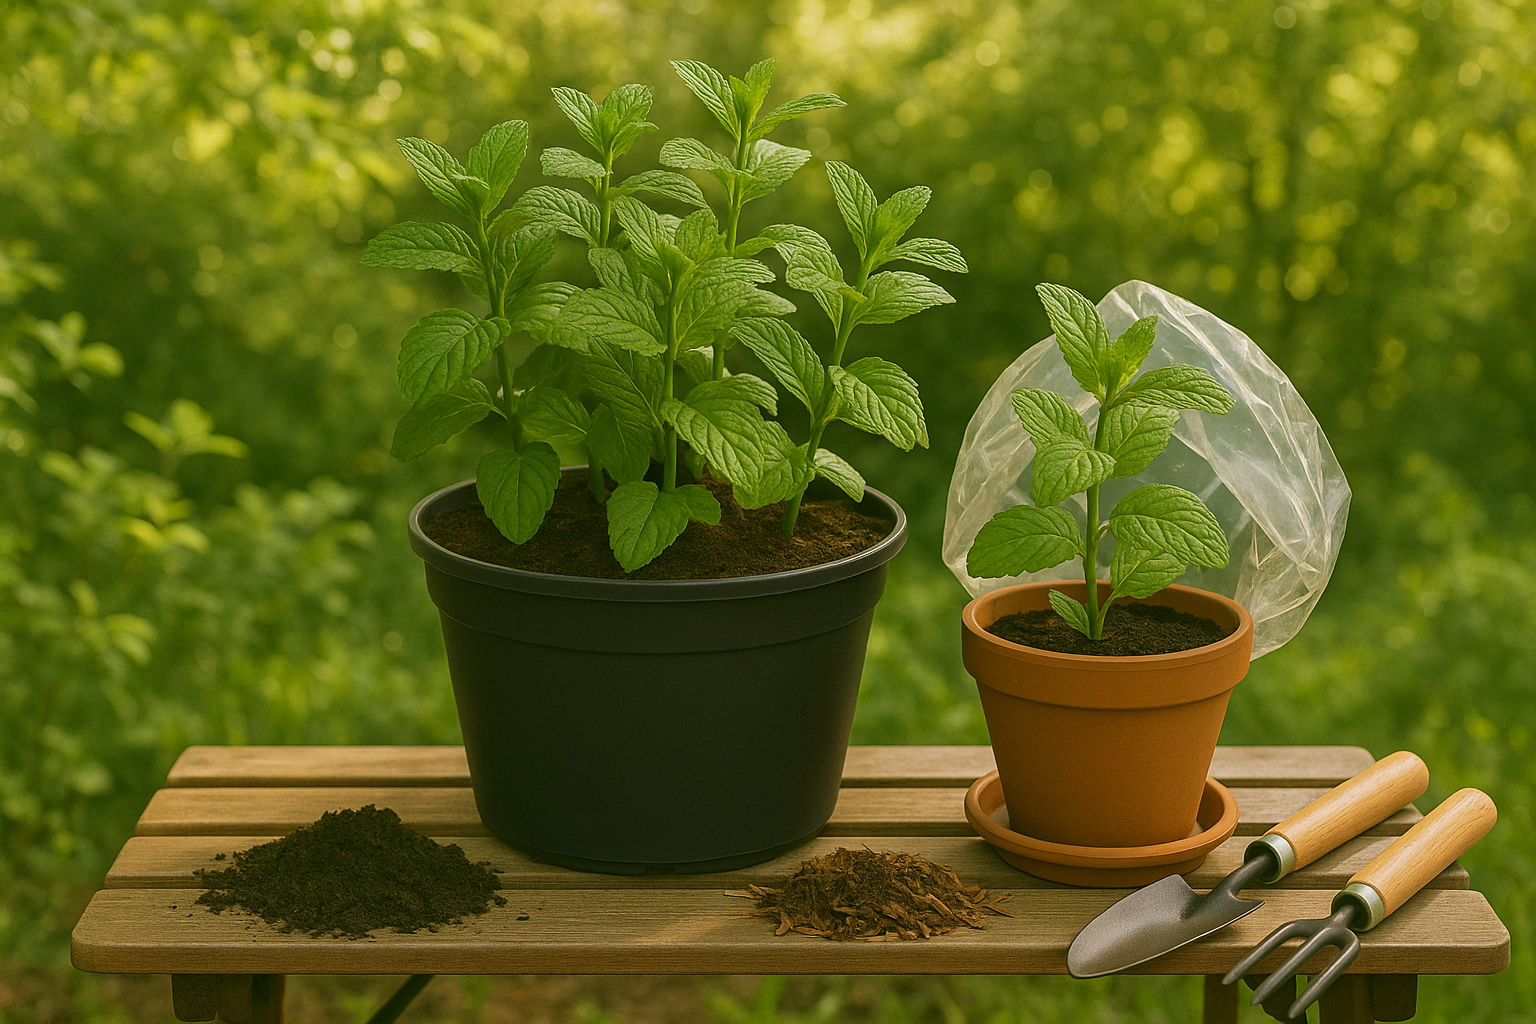
Transplanting rooted mint cuttings is a simple process that sets your plants up for vigorous growth. Once your cuttings show strong roots—about 2 inches long—they’re ready to move from water or a starter soil mix to a larger pot or directly into your garden bed. The best time for transplanting is in spring or early summer when the weather is mild.
For pots, choose containers at least 8 to 12 inches wide and deep, giving the sprawling mint room to expand. Use rich, well-draining soil amended with compost; mint hates soggy roots but loves moist conditions, so regular watering is key, especially during hot spells.
Mint thrives in partial to full sun—morning sunlight with afternoon shade is ideal—but it can handle a wide range of light. In garden beds, consider growing mint in containers sunk into the ground to control its spread, as it can quickly take over.
Fertilize once at planting with a balanced, slow-release product, then feed monthly if growing in pots; garden mint often doesn’t need extra feeding if your soil is fertile. To encourage bushy growth, pinch back the growing tips regularly.
With the right care—ample water, a bit of food, and enough sunlight—your mint will flourish, giving you a steady supply of fragrant leaves for tea, salads, and more all season long.
Care and Maintenance for Healthy Mint Plants
To keep your mint plants healthy and thriving, regular care and attention are key. Start by pruning your mint often—every two to three weeks, pinch off the tips just above a leaf pair to encourage bushier growth. Don’t be afraid to harvest vigorously; mint thrives when trimmed back, so cut the stems regularly for use in your kitchen or to dry for later. Always use clean, sharp scissors to avoid damaging the plant.
When it comes to pests, watch for aphids and spider mites, which can gather on the undersides of leaves. Simply spray your plant with a gentle mix of water and a few drops of dish soap, or introduce ladybugs to the garden for natural pest control. Mint is also prone to fungal diseases like powdery mildew; prevent this by watering at the base—not overhead—and ensuring good air circulation by thinning crowded stems.
If your mint becomes leggy with long, sparse stems, move it to a sunnier spot or prune back hard to stimulate new, fuller growth. Root rot and wilting are often results of overwatering and poor drainage—always check that your pot or garden bed allows water to flow freely, and let the top inch of soil dry out before watering again.
For added protection, rotate mint to new spots each year if planting in the ground, and remove any yellow or spotted leaves promptly to keep your plants robust and flavorful.
FAQs and Troubleshooting Common Issues
Mint is usually easy to grow, but even the hardiest cuttings can sometimes struggle. If your mint is slow to root, make sure you’re using fresh, healthy stems and change the water every few days to prevent rot. When planting in soil, keep it moist but never soggy—good drainage is key.
Yellowing leaves often indicate overwatering or low light. In this case, move your plant to a brighter spot and let the top inch of soil dry out before watering again. If replanting isn’t successful, handle the roots gently and avoid disturbing them too much. You can also try dipping cut stems in rooting hormone to encourage growth.
If your cuttings are struggling, trim away any blackened leaves and place the glass in a spot with bright, indirect light. For grocery store mint that looks limp, trim it back by a third, replant it in fresh potting mix, and keep it lightly moist. Using a pebble tray or humidity dome can help if your indoor air is dry.
Outdoors, mint thrives in partial shade with consistent moisture. Mulching around the base helps retain water and keeps roots cool. With a little patience and mindful care, even store-bought mint can flourish for months, providing you with fresh herbs all season long.
Conclusion and Next Steps
Growing mint from grocery store cuttings is an easy, budget-friendly way to start your own herb garden, even if you’re short on space or experience. Once your mint thrives, the benefits are endless—you can snip fresh leaves to brighten up salads, toss them into drinks for a refreshing twist, or brew soothing homemade mint tea.
Mint’s vibrant flavor also makes it a perfect garnish for desserts and savory dishes alike. If you’ve enjoyed the mint experiment, try propagating other herbs like basil, rosemary, or cilantro using the same simple water method.
Not only does home propagation save money, but it also reduces waste, supporting a more sustainable kitchen. Start with one or two herbs and watch your indoor garden grow—you’ll be amazed at how quickly fresh, homegrown flavors can become a daily part of your meals.
Give it a try and see how easy sustainable gardening can be!