Introduction to Growing Dill in Hot or Dry Regions
Growing dill in hot weather can be a real challenge, especially if you live in a region known for long, scorching summers or persistent drought. Dill, with its feathery leaves and distinctive aroma, is a staple herb in many kitchens, beloved for brightening up pickles, salads, and fish dishes. Naturally, it prefers cooler, milder climates where the soil stays moist and temperatures aren’t extreme.
But what if your garden is more desert than meadow and shade is hard to come by? Even in these tough conditions, it’s absolutely possible to enjoy a thriving dill harvest—you just need to adapt your approach. In this article, you’ll discover the practical tricks seasoned gardeners use to keep dill healthy and productive despite relentless heat.
We’ll cover smart watering techniques, soil preparation tailored for dryness, and even which varieties handle the heat best. You’ll also learn how to use shade cloth, mulch, and strategic planting times to outsmart the hottest months. Whether you’re dealing with blazing sun, sandy soil, or unpredictable rain, these tips will help you grow flavorful, lush dill in hot and dry regions—so you never have to miss out on the zesty taste of homegrown herbs.
Choosing the Right Dill Variety for Hot Climates
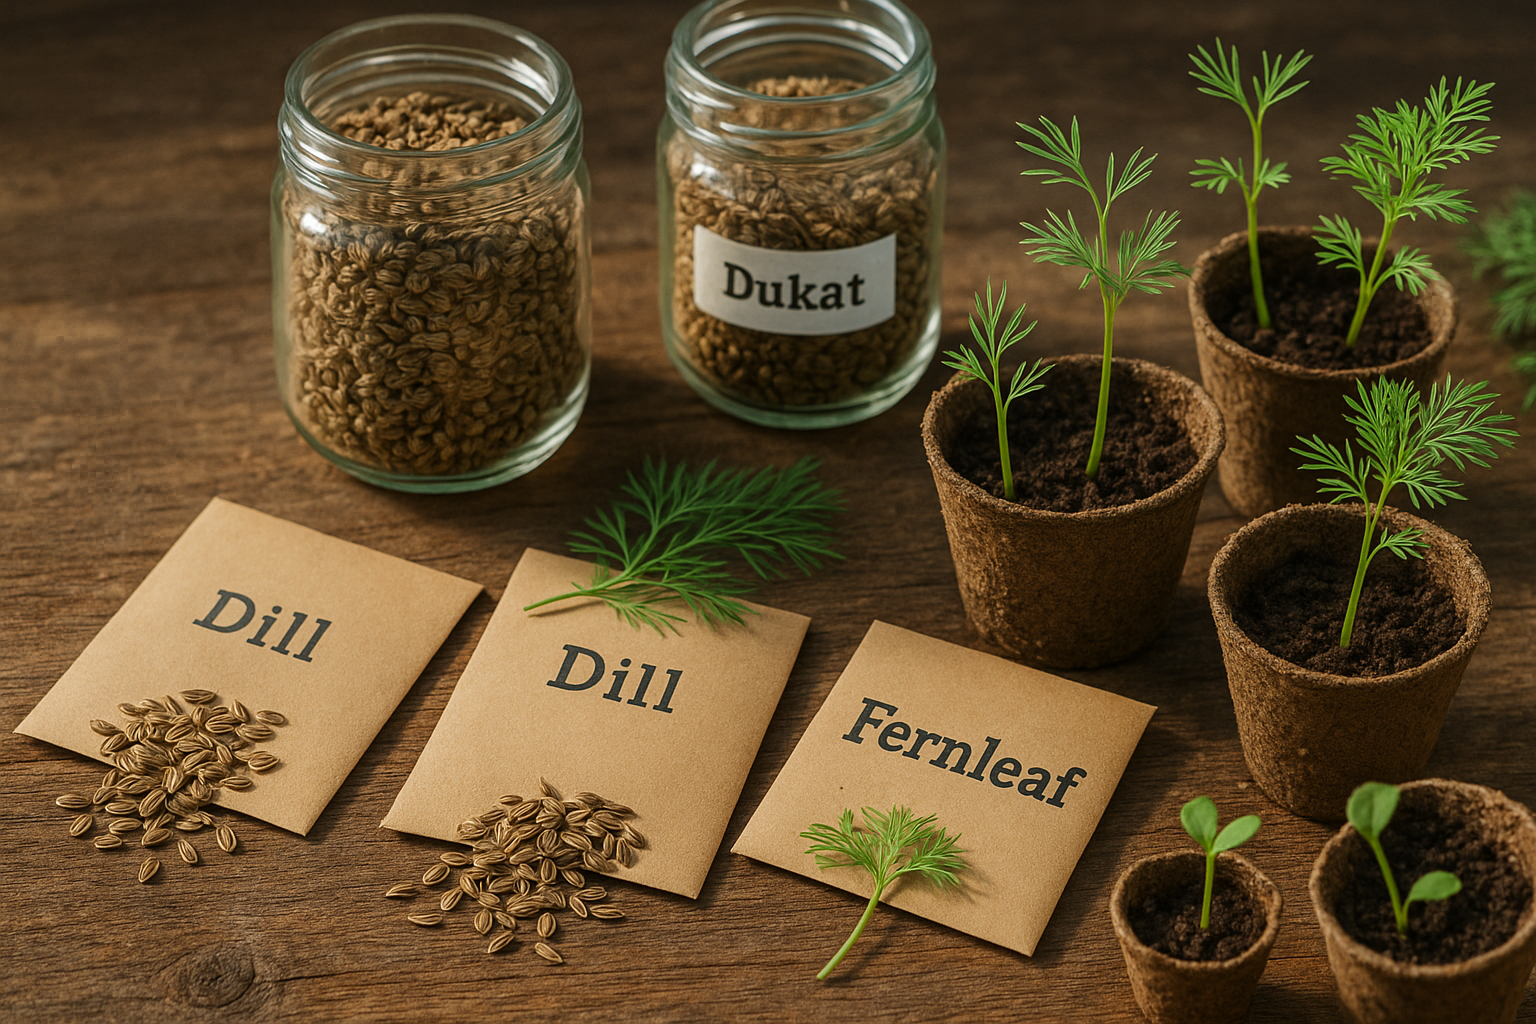
When gardening in hot climates, selecting the right dill variety makes all the difference for a lush, productive harvest. Opt for varieties known for their heat and drought tolerance, such as ‘Bouquet’, ‘Dukat’, or ‘Fernleaf’ dill. These can better withstand the stress of high temperatures while maintaining steady growth.
Look for seeds labeled specifically as bolt-resistant—these plants are less likely to flower prematurely during heat waves, allowing you to enjoy a longer season of fresh, aromatic leaves. Prioritize varieties advertised for abundant leaf yield, especially if you plan to use dill primarily as a seasoning.
When sourcing seeds, buy from reputable suppliers who test for vigor and climate resilience. Websites like Johnny’s Selected Seeds or Baker Creek Heirloom Seeds offer detailed descriptions of each variety’s strengths. Don’t forget to check reviews or gardening forums for firsthand advice about which strains perform best in your local area.
By selecting the right dill and reliable seeds, and focusing on traits like bolt resistance and leafy growth, you’ll give your herbs the best chance to thrive even as summer temperatures soar.
Planting Dill
In hot or dry regions, the best time to plant dill is in early spring or late summer, when temperatures are cooler and the risk of harsh sun is lower. Sow seeds once nighttime temperatures consistently stay above 50°F (10°C), but avoid the peak summer heat, as it can cause spotty germination and make young plants bolt.
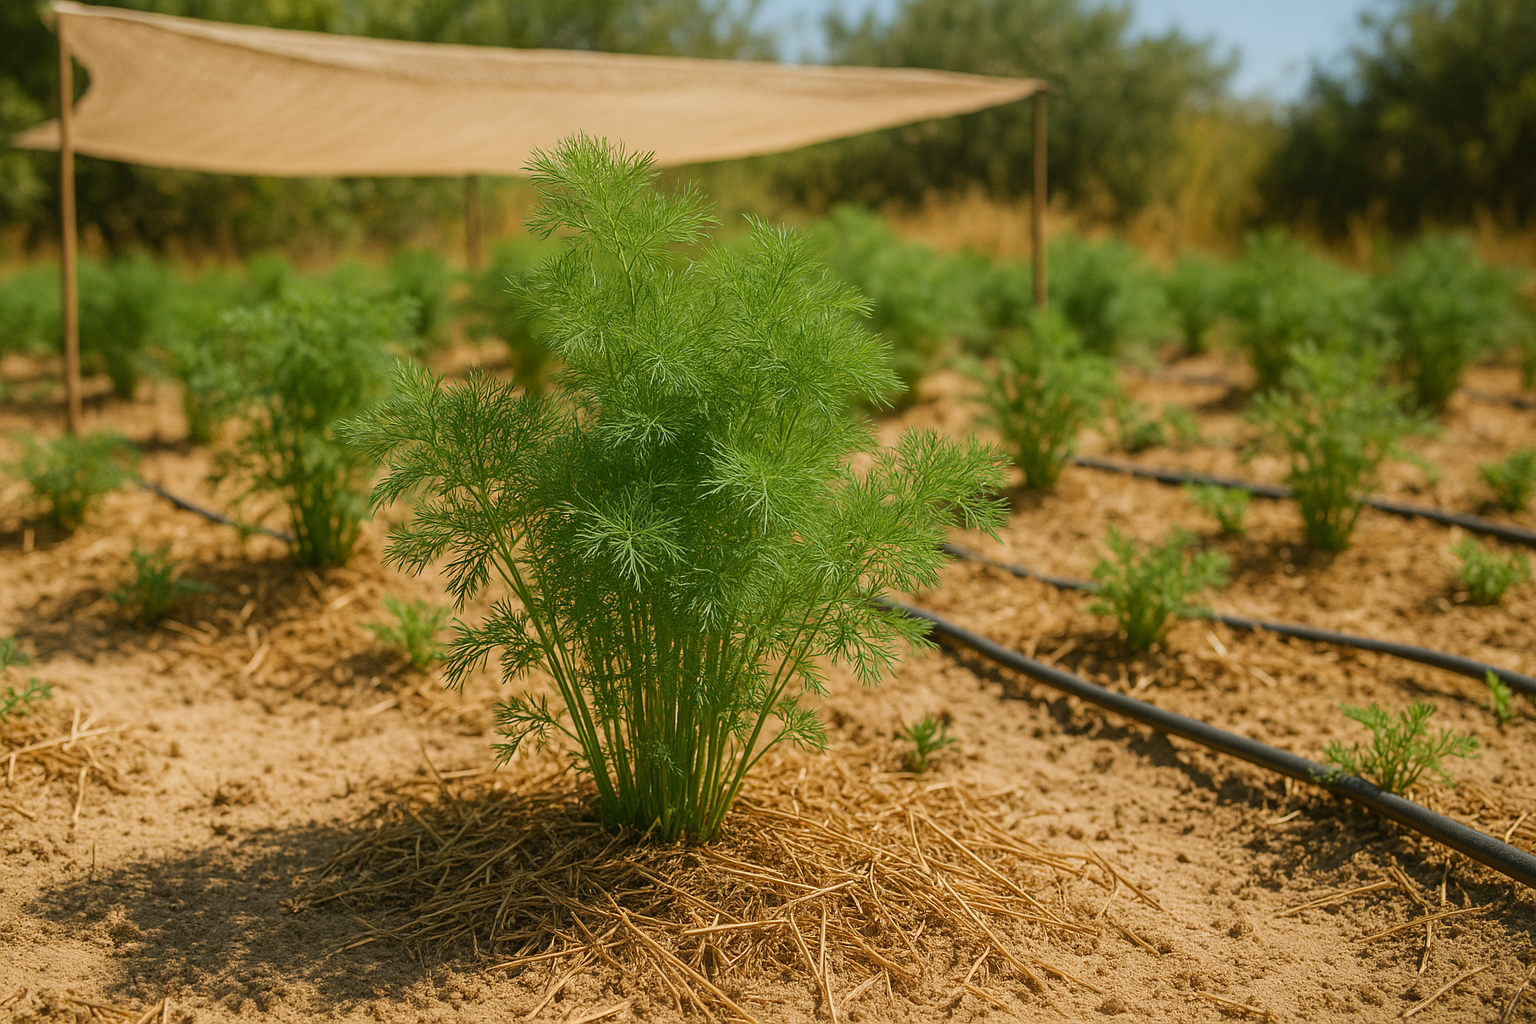
When choosing a planting site, look for a spot that receives at least six hours of sunlight daily—dill thrives in full sun. However, in climates with scorching afternoon sun, a location with light afternoon shade can help protect your plants from heat stress.
Wind can be tough on dill’s delicate stems, so try to plant near a fence, hedge, or sturdy companion plants to create a natural windbreak.
Proper soil preparation is key for success. Dill prefers loose, well-drained soil but struggles if it dries out too quickly. Before planting, mix plenty of compost or well-rotted manure into the top 4–6 inches of soil to improve moisture retention and nutrient content.
After sowing, apply a 2-inch layer of mulch, such as straw or shredded bark, to keep the soil cool and reduce water evaporation. Be sure to check soil drainage—soggy soil can rot seeds, while overly sandy soil dries out too fast. Adding organic matter is essential to balance these extremes.
With the right timing, site selection, and soil care, your dill crop will get the best possible start, even in challenging conditions.
Watering and Humidity Management
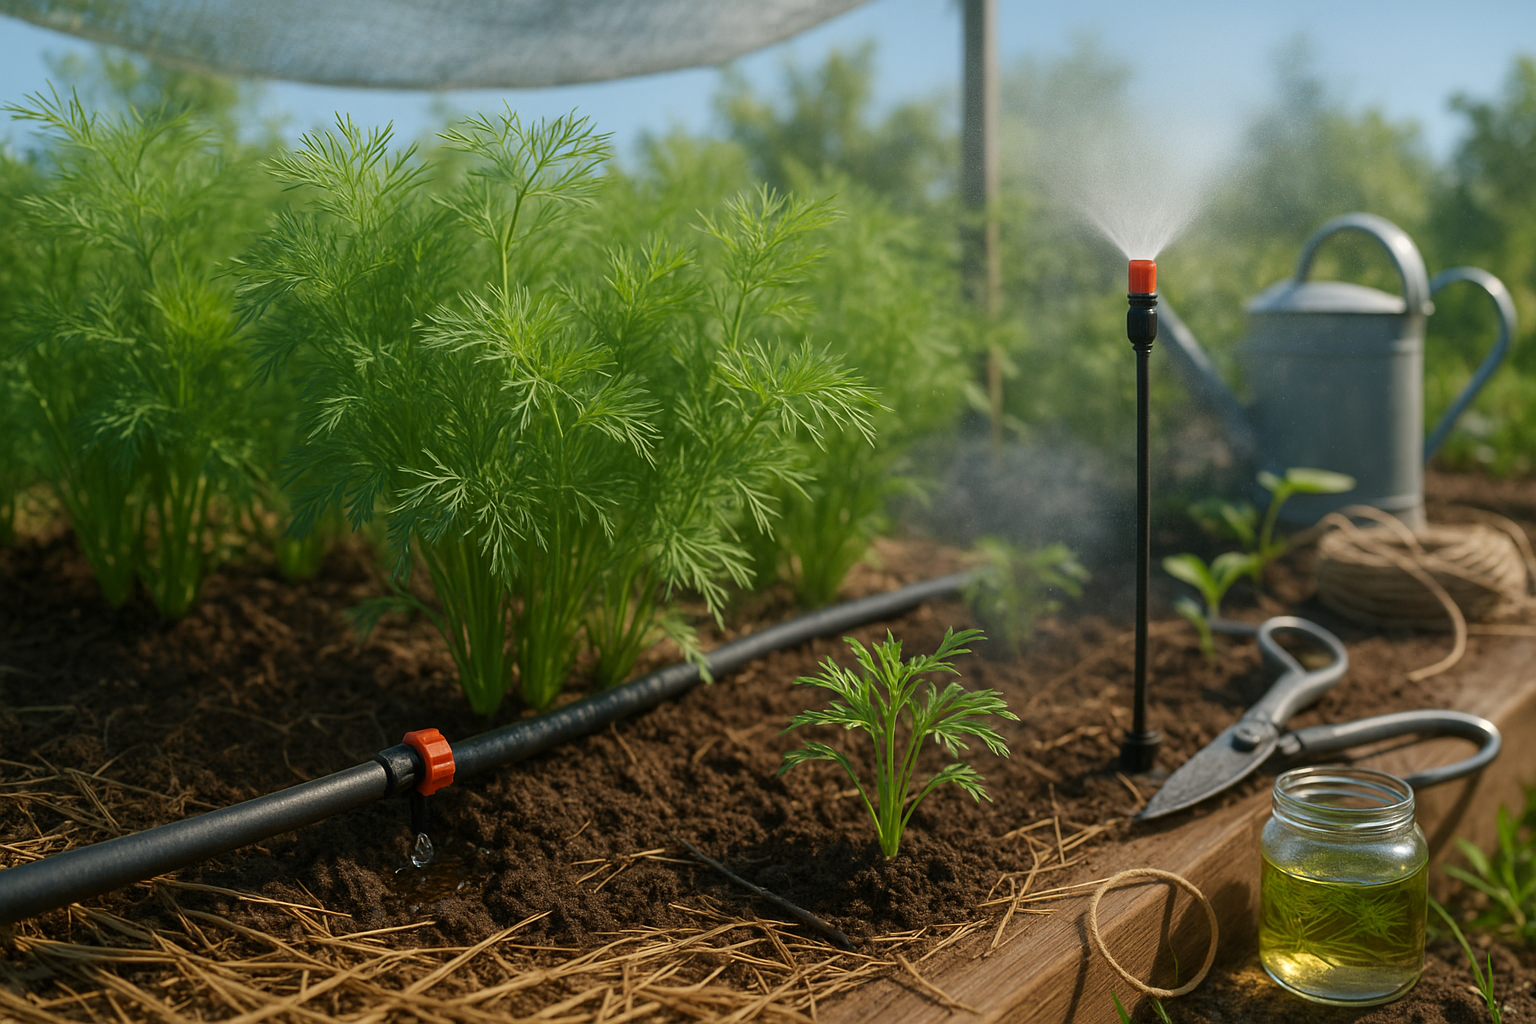
In arid, high-temperature environments, dill’s watering needs increase significantly. Plan to water deeply two to three times per week rather than lightly every day. Each session should provide enough moisture to penetrate at least 6–8 inches into the soil, ensuring the roots receive water where they need it most. Always allow the soil to dry slightly between waterings to prevent root rot.
Using drip irrigation is highly efficient in these settings, as it delivers water right to the plant’s base, minimizing evaporation and runoff. You can boost moisture retention by spreading a two-inch layer of organic mulch, such as straw or shredded bark, around your dill plants. This not only keeps the soil cooler but also reduces water loss.
In extremely dry air, dill can suffer from heat-related stress—look for curling leaves or a droopy appearance as warning signs. To help manage low humidity, group your dill with other herbs to create a more humid microclimate. Consider using shade cloths during the hottest part of the day to protect delicate foliage. Misting the air around your plants—not the leaves directly—during peak heat can also provide temporary relief.
By combining targeted watering, mulch, and humidity-conscious care, you’ll keep your dill thriving even during scorching, dry spells.
Protecting Dill from Heat Stress and Extreme Conditions
Dill is especially sensitive to heat stress, which can quickly show up as wilting leaves, sudden yellowing or browning (leaf discoloration), and premature flowering or “bolting.” If you notice your dill looking limp or the stems shooting up to produce flowers sooner than usual, it’s a clear sign the plant is stressed by heat.
Protecting dill starts with shading; simple row covers or lightweight shade cloths can make a big difference by blocking out harsh midday sun while still allowing rain and air to pass through. You can also try companion planting: tall or bushy neighbors like tomatoes or sunflowers can provide natural shade and reduce temperature swings around your dill.
In especially hot regions, consider installing temporary garden umbrellas, small hoop tunnels, or old bedsheets draped over stakes—anything that creates a cooler, filtered-light environment during the hottest part of the day. Mulching around the base of your dill with straw or leaf litter helps keep soil temperatures down and moisture stable, which further prevents stress.
For windy or stormy conditions, install windbreaks—these can be simple screening fences or repurposed pallets placed strategically to deflect hot winds. For container-grown dill, move pots to cooler spots or dappled shade during heatwaves.
Overall, watching for those early signs of heat stress and taking proactive measures with these straightforward techniques will help keep your dill lush, productive, and flavorful, even during tough summers.
Ongoing Care and Common Problems in Dry Climates
Gardening in hot, dry climates brings unique challenges that require ongoing care and vigilance. Pests such as spider mites and aphids thrive in arid conditions and can quickly infest stressed plants. Fungal diseases like powdery mildew may also appear, especially when nights cool down after hot days. To catch these early, check leaves regularly for sticky residue, webs, or discolored spots.
Encourage natural predators like ladybugs and use horticultural oils if needed—just avoid spraying during the hottest part of the day to prevent leaf burn. Maintaining soil fertility is crucial, as nutrients deplete faster in these climates. Mulching with compost or straw keeps soil cool and moist while slowly feeding your crops. Consider side-dressing plants with organic fertilizer every few weeks to support steady growth.
Watch for signs of common issues like bolting, where leafy greens like lettuce and spinach suddenly send up flower stalks due to heat or inconsistent watering. Slow growth or leaf scorch often points to high temperatures, insufficient moisture, or salt buildup in the soil. Water deeply but infrequently, use shade cloth during extreme heat, and flush soil with plain water occasionally to avoid salt accumulation.
With regular checks and a few simple adjustments, you can keep your garden healthy and productive all season long.
Harvesting and Storing Dill for Maximum Freshness
For the best flavor, harvest dill leaves early in the morning, just as the flower buds form but before they bloom—this is when their essential oils are most concentrated. Snip the uppermost, tender leaves with clean scissors, leaving enough foliage so the plant can continue to photosynthesize and grow.
If plants are stressed by heat or drought, harvest more conservatively; take only a few stems from each plant rather than cutting down whole branches. This allows the dill to recover and produce new growth.
For seeds, wait until the flower heads turn brown and the seeds easily separate when rubbed between your fingers. Then, cut the heads and place them in paper bags to finish drying.
To store fresh dill, wrap sprigs in a damp paper towel and place them in a resealable bag in the refrigerator. It should stay fresh for about a week.
In especially dry climates, drying dill is very effective: tie dill in small bundles and hang them upside down in a cool, airy spot. Once the leaves are crisp, crumble them into airtight containers.
Alternatively, freeze chopped dill in ice cube trays with a splash of water or oil—perfect for adding directly to soups or stews. This way, you capture maximum flavor and freshness, no matter the season.
Conclusion and Expert Tips for Success
Growing dill in hot or dry regions can be challenging, as high temperatures and low moisture often cause plants to bolt quickly or struggle. To succeed, try planting dill in partial shade, using mulch to keep the soil cool, and watering consistently—ideally early in the morning.
Don’t be afraid to experiment with planting dates or different varieties to see what works best in your microclimate. Keep a gardening journal to record what helps, and consider connecting with local gardening groups or university extension programs for tailored advice.
For more tips, resources like the Old Farmer’s Almanac or local master gardener networks are invaluable.