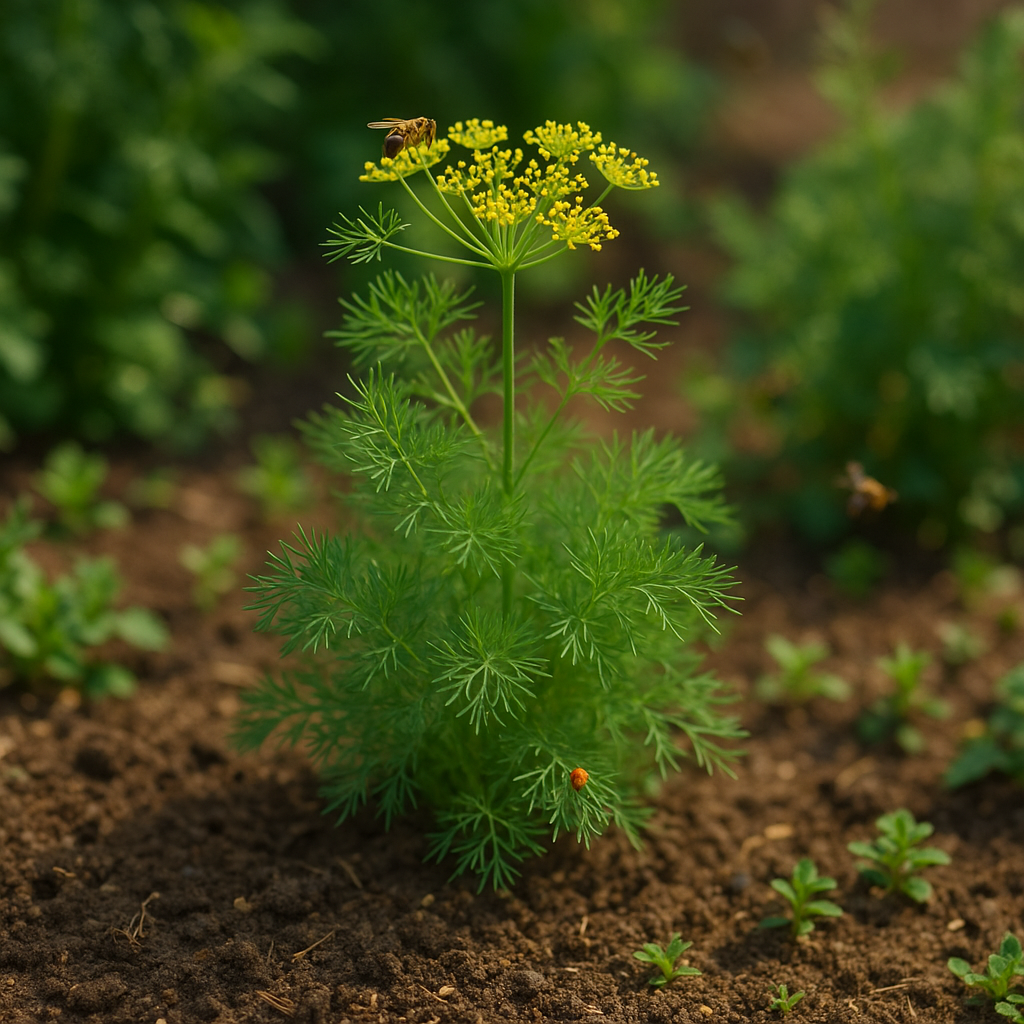
Dill is a popular herb that brings a fresh, tangy flavor to everything from pickles and salads to seafood dishes.
It’s also a top choice for home gardeners, thanks to its fast-growing nature and ability to thrive in a variety of settings, whether in garden beds or containers. Beyond its culinary uses, dill’s feathery leaves and delicate yellow flowers attract beneficial insects like bees and ladybugs, making it a friend to both your kitchen and your garden’s ecosystem.
However, if you want your dill to flourish and produce the best possible flavor, the type of soil you use matters more than you might think. The right soil provides essential nutrients, supports healthy root development, and prevents common issues like wilting or poor growth.
In this article, we’ll walk you through how to select the best soil for dill, as well as easy-to-follow care tips to keep your herb healthy throughout the growing season. Whether you’re a seasoned gardener or just starting out, understanding these basics will set you up for a bountiful, aromatic dill harvest that you’ll be proud to share or enjoy in your favorite recipes.
Dill Thrives Best in Loose, Well-Drained Soils
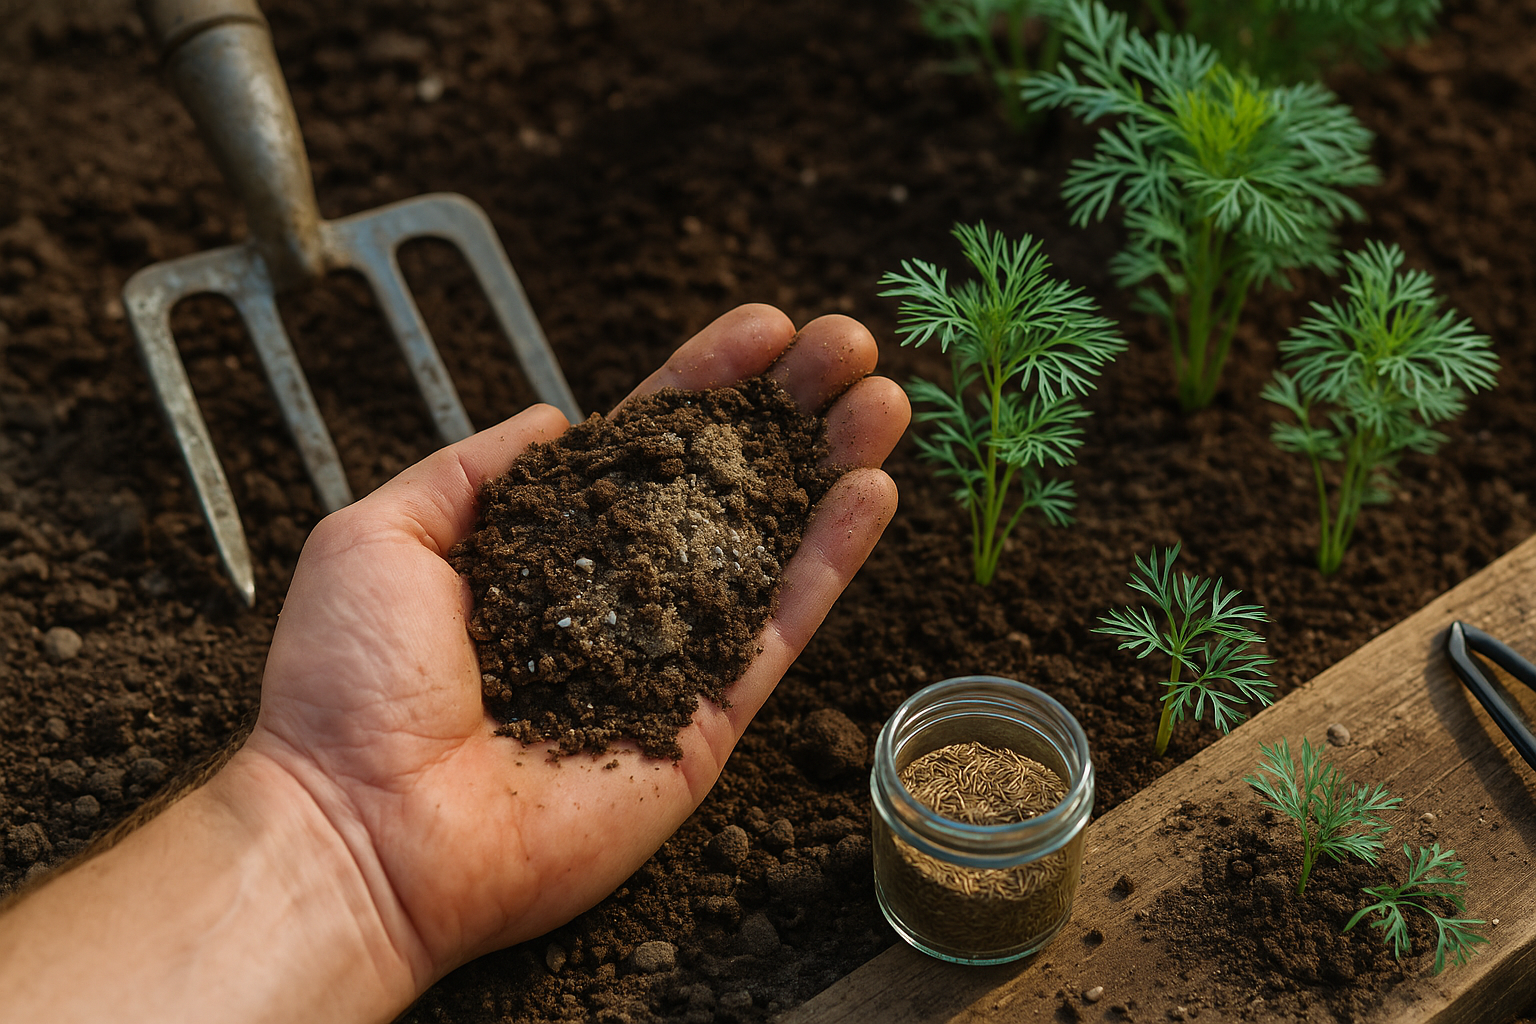
Dill grows best in loose, well-drained soils rich in organic matter, so soil preparation is key for a bountiful harvest. Aim for a light, crumbly texture—soil that easily falls apart in your hand, not dense or clay-like. Good drainage is essential because dill’s delicate roots can struggle or even rot in waterlogged ground.
Mixing in compost or well-rotted manure boosts nutrients and improves soil structure, creating an environment where dill can develop strong, healthy roots. The ideal soil pH for dill is between 6.0 and 7.5, which is slightly acidic to neutral. Within this range, nutrients remain available to the plant, resulting in robust stems and fragrant leaves.
If the soil is too acidic or too basic, dill’s growth may be stunted, leaves could yellow, and plants may become weak and spindly. Watch for signs of poor soil conditions like slow growth, wilting despite regular watering, or standing water after rain—these usually indicate compacted or poorly draining soil.
To fix this, loosen the earth with a garden fork and consider creating raised beds if your yard has heavy clay soil. Testing your soil before planting gives you the best starting point and lets you make adjustments early, ensuring your dill patch gets exactly what it needs to thrive.
To Grow Healthy, Flavorful Dill, Start with the Right Soil Mix
The foundation for growing healthy, flavorful dill is a well-balanced soil mix designed for both nutrition and structure. Begin with loamy soil as your base—this type of soil holds moisture but drains efficiently, ideal for dill’s sensitive roots.
Mix in plenty of organic matter, like compost, to enrich the soil with slow-release nutrients and beneficial microbes that support strong plant growth. Adding aged manure is another smart choice, as it provides a natural fertilizer boost without the harshness of fresh manure.
For improved drainage, sprinkle in some coarse sand; dill dislikes soggy roots, so good drainage is crucial to prevent rot or mold. You can also mix in vermiculite, which increases moisture retention without compacting the soil. This helps keep the texture loose and crumbly, which is key—dill roots expand more easily and absorb nutrients much better in loose soil, resulting in stronger stems and lusher leaves.
Here’s a practical tip: try the “squeeze test.” Grab a handful of your soil mix; it should hold its shape when pressed but fall apart with a light poke. If it sticks together like clay, add more sand or vermiculite. If it falls apart too easily, add a bit more compost.
With this approach, you’ll create the perfect environment for dill to thrive—whether you’re growing it in garden beds or containers on a sunny patio.
Before Planting Dill
Start by testing your garden soil to understand its pH, texture, and nutrient content—simple home test kits or local extension services can help. Dill thrives best in slightly acidic to neutral soil (pH 5.5–7.0), so if your soil is too acidic, mix in a handful of garden lime. If it’s too alkaline, work in some peat moss or elemental sulfur.
Good drainage is essential since standing water can rot dill roots. To improve clay-heavy or compacted soil, blend in coarse sand, perlite, or well-rotted compost. For sandy soils that drain too quickly, regular additions of organic matter help retain moisture.
Boost soil fertility by incorporating compost or aged manure a few weeks ahead of sowing seeds, but avoid over-fertilizing—dill prefers modest nutrient levels and is sensitive to excess nitrogen, which can cause floppy growth.
To maintain healthy soil sustainably, rotate your crops each year, avoid synthetic chemicals, and top-dress beds with organic mulch or compost annually to rebuild nutrients and encourage earthworms.
As you prepare the soil, remove stones and break up clumps by hand or with a rake; this creates a fine, crumbly seedbed ideal for dill’s small seeds. These steps not only help your dill plants thrive but also build long-term soil health for all your garden crops.
When Growing Dill in Pots, Choosing the Right Potting Mix Is Crucial
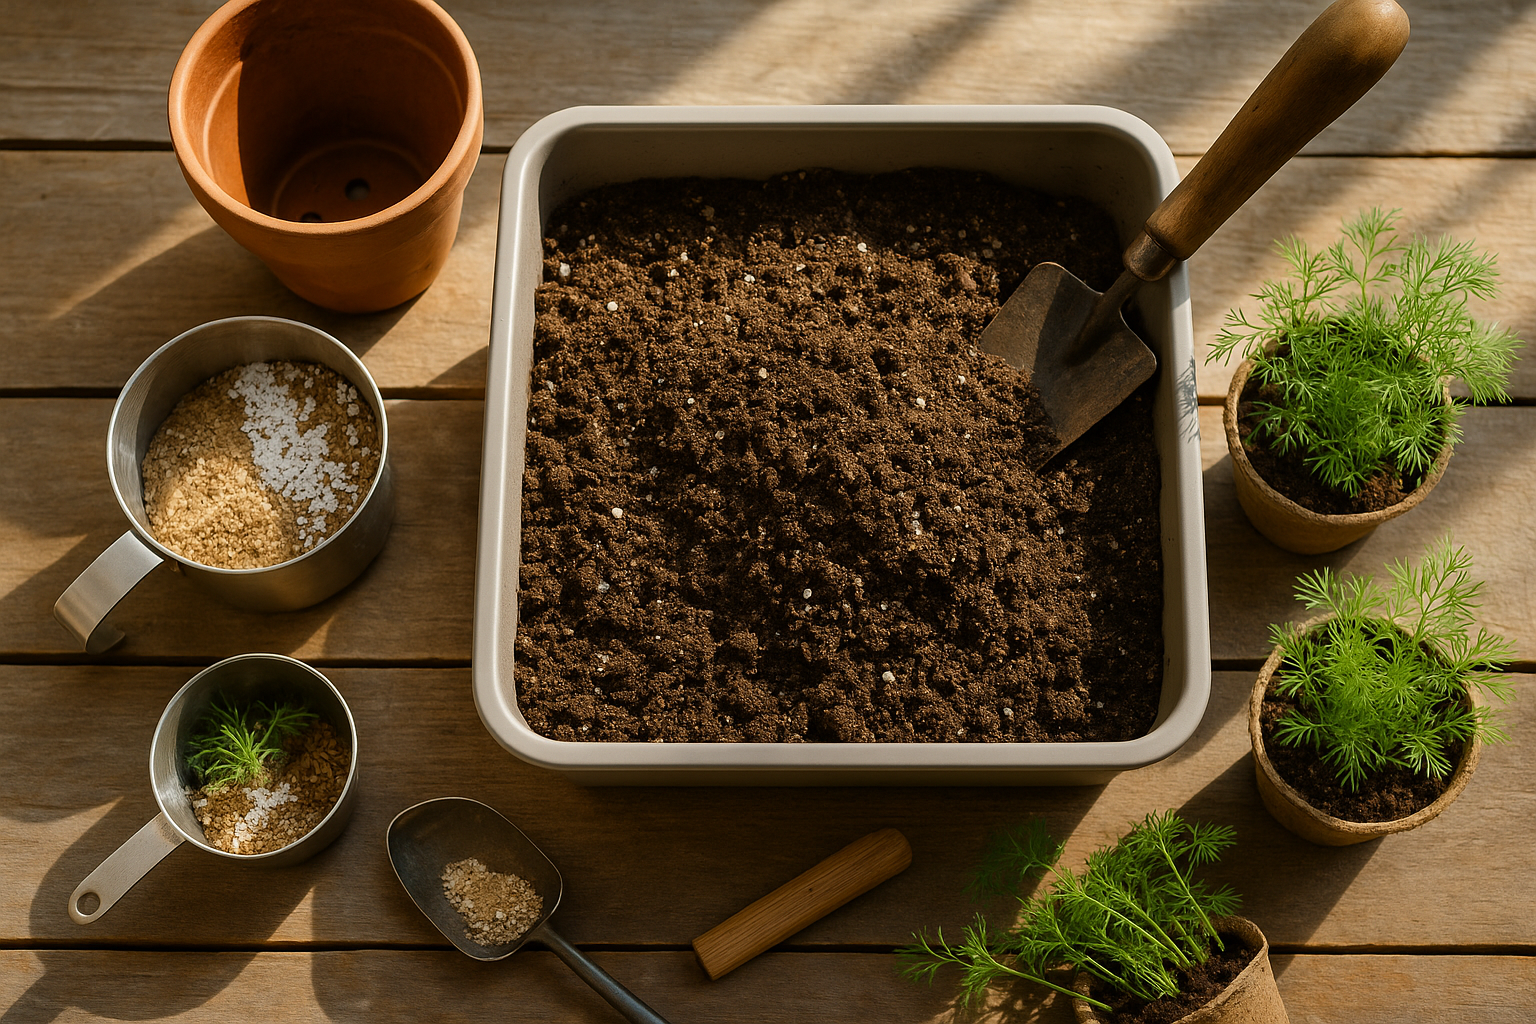
For healthy, flavorful dill plants, opt for a light, fast-draining commercial mix labeled for herbs or vegetables—these typically contain a balanced blend of peat moss or coco coir, perlite, and compost. Avoid heavy garden soil, which can suffocate dill roots and cause rot.
If you’d prefer to mix your own, combine equal parts high-quality potting soil (free from garden pests), perlite or coarse sand for drainage, and finished compost for nutrients. For example, start with 2 cups potting soil, 2 cups compost, and 2 cups perlite; blend well and moisten before filling your container.
Choose a pot that’s at least 10–12 inches deep, as dill develops a long taproot. Make sure your pot has drainage holes—standing water is dill’s enemy!
Place pots where they’ll get at least 6 hours of sun daily; a southeast-facing balcony, sunny porch, or bright windowsill will work. Rotate your container every week so all sides of the plant receive even sunlight.
If you’re growing more than one dill plant, keep them a few inches apart to allow airflow and reduce disease risk.
Remember to water consistently, letting the top inch of soil dry out before each drink, and feed monthly with a half-strength liquid fertilizer—over-fertilizing can make dill leggy.
With the right potting mix and a sunny spot, your containers will be bursting with fresh dill all season long.
Growing Healthy Dill
Growing healthy dill starts with understanding common soil problems and knowing how to tackle them early. Compacted soil is a frequent issue—if water pools on top or roots struggle to spread, your soil may need aeration. Try loosening the area gently with a garden fork and mixing in some organic compost to boost drainage.
Overwatering is another common culprit, often signaled by yellowing leaves and soggy roots. Avoid watering on a set schedule; instead, check the moisture a few inches below the surface before adding more. If the soil remains wet for days, improve drainage with sand or aged manure.
Nutrient deficiencies, especially in nitrogen or potassium, can stunt your dill’s growth and fade its vibrant green color. Test your soil once a season with an at-home kit, and amend as needed with balanced organic fertilizers or compost tea.
Establish a simple monitoring routine: walk your garden weekly, check leaves for early warning signs, and feel the soil for moisture and structure. Making these quick habits part of your routine keeps your dill thriving and helps catch small problems before they become big headaches, ensuring a bumper crop of fresh, fragrant herbs.
Keeping Your Dill Plants Healthy
Keeping your dill plants healthy starts with the soil—they thrive in well-drained, slightly acidic to neutral ground. Before planting, work in some compost to boost nutrient levels, which encourages lush, flavorful growth.
Water your dill consistently, aiming for moist but not soggy soil, as overwatering can cause root problems. A layer of organic mulch, like straw or shredded leaves, helps lock in moisture, regulate soil temperature, and control weeds, making care easier through hot spells.
Fertilize lightly with an all-purpose organic fertilizer once or twice during the growing season; too much nitrogen can produce lots of stems but fewer flavorful leaves.
When it comes to harvesting, timing is everything. Snip the fresh leaves early in the morning when their oils—and thus their flavors—are at their peak. For the best taste, harvest the leaves before the plant starts flowering; once bloom begins, the leaves can turn bitter.
Collect dill seeds after the flower heads brown and dry—just snip the heads and place them upside down in a paper bag to collect falling seeds.
Healthy, rich soil boosts both leaf yield and intensity of flavor, so a little extra care at the soil level pays off in tastier, more bountiful harvests.