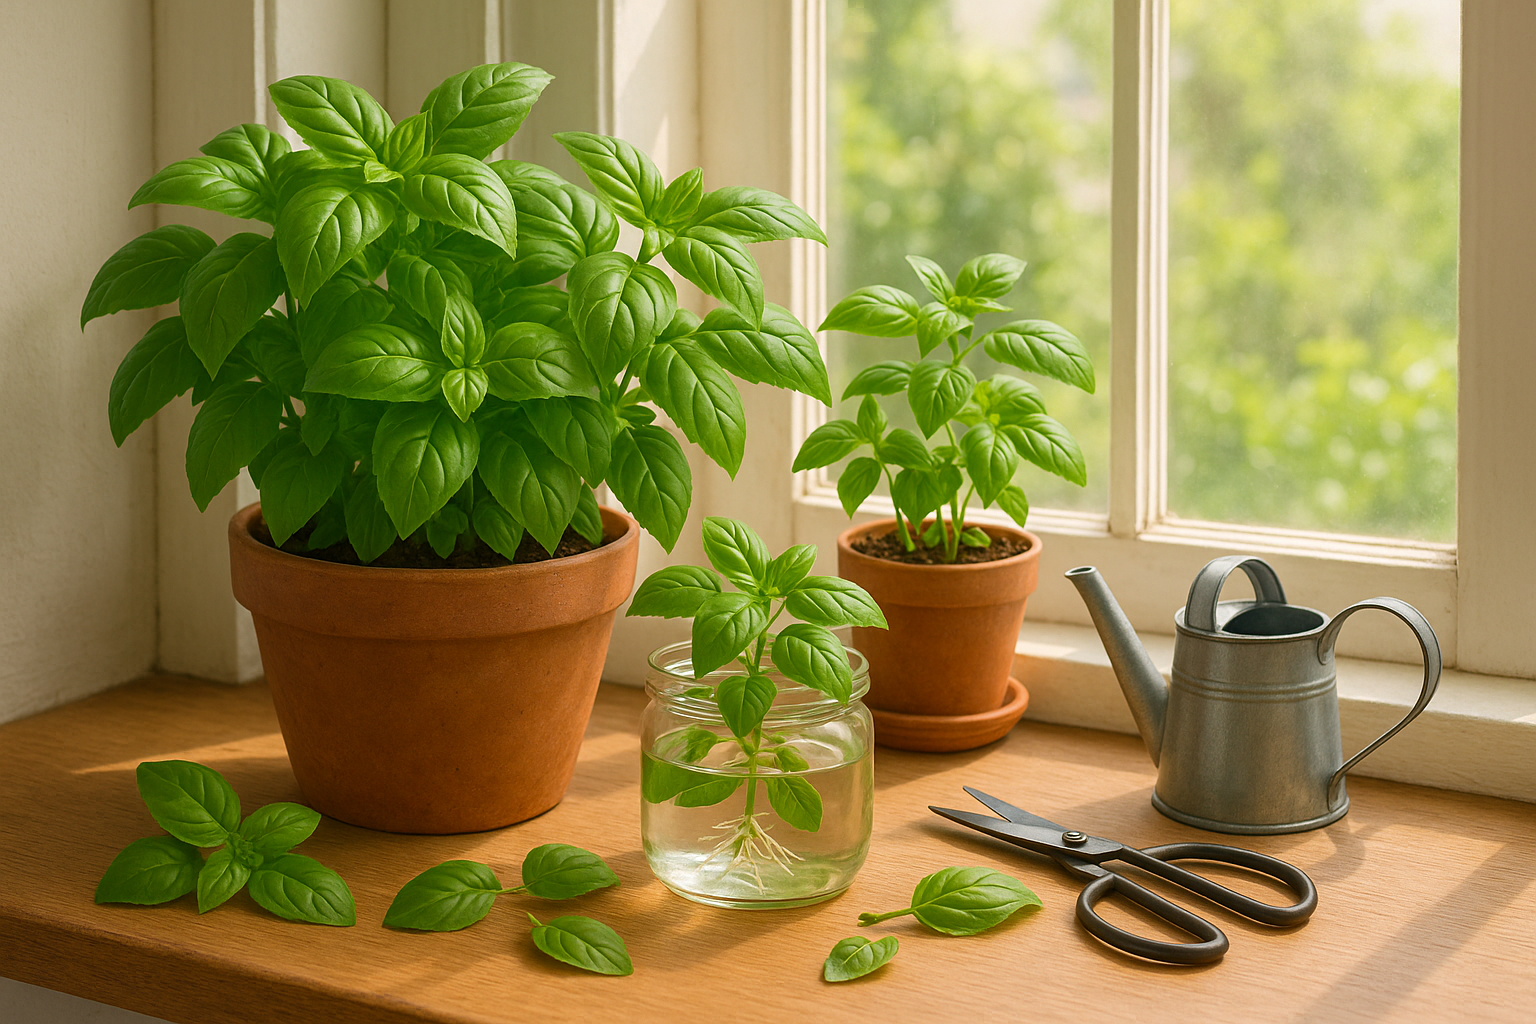
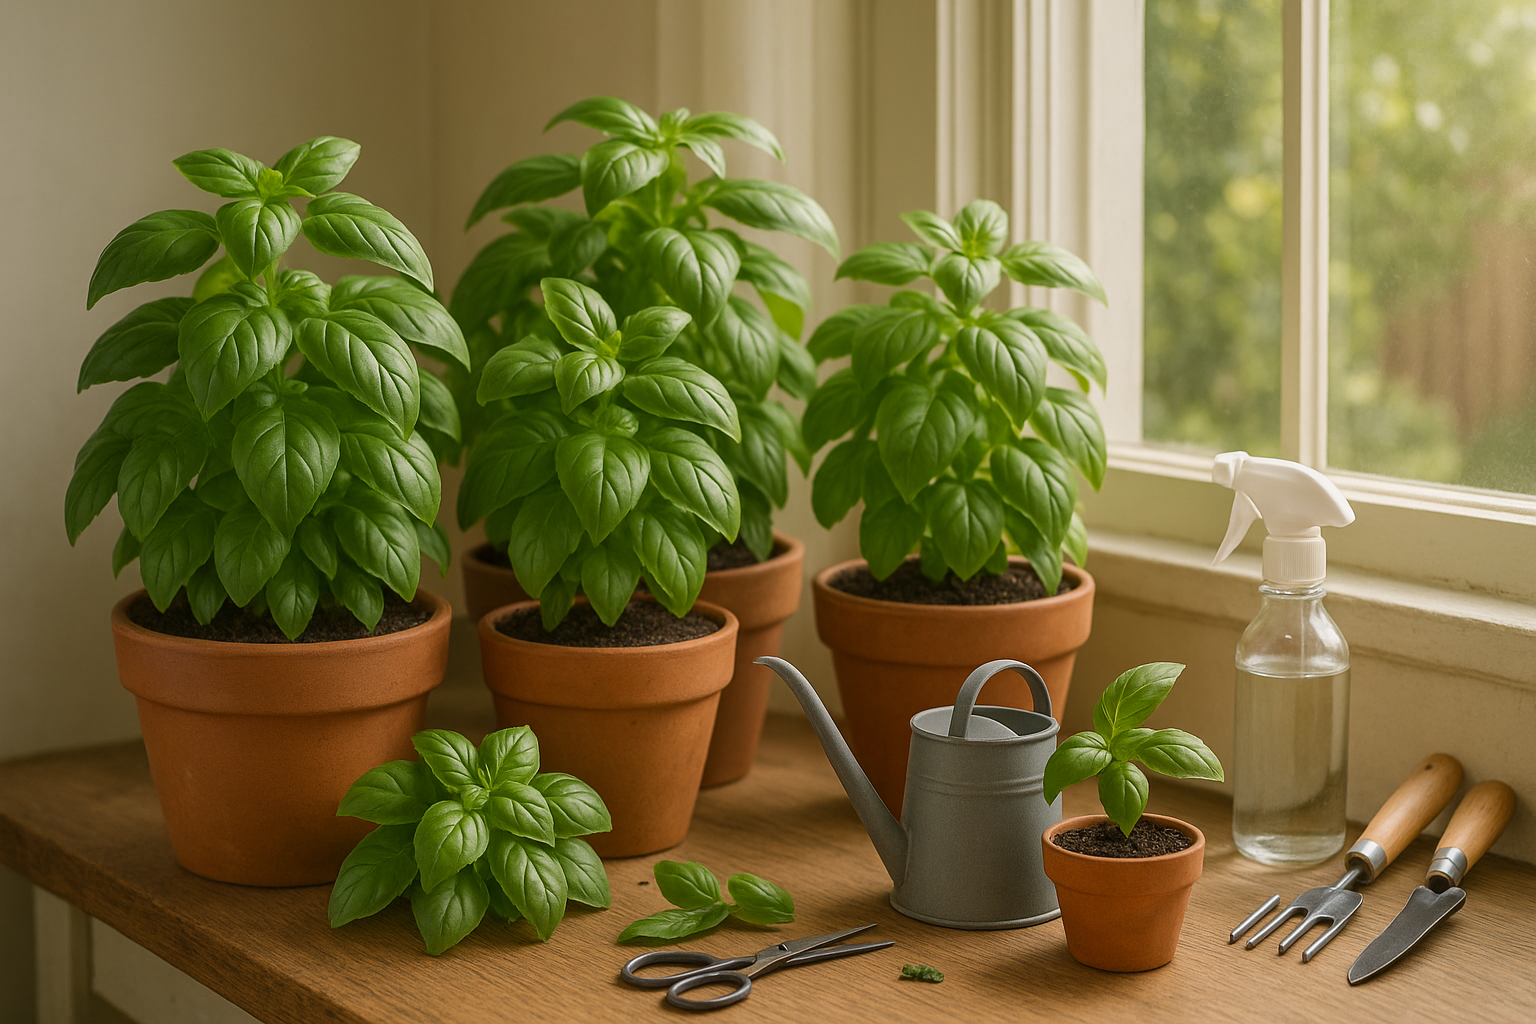
Why Propagate Basil from Cuttings
Propagation is the process of creating new plants from existing ones, and basil is especially well-suited for this method, particularly when using stem cuttings. Unlike starting from seeds—which often takes longer and can yield varied results—propagating basil from cuttings produces an exact genetic copy of the parent plant. This means you preserve the flavor, aroma, and even disease resistance of a basil variety you love.
Basil plants grown from cuttings root quickly, often within a week or two in water, allowing you to have new, harvest-ready plants much faster than waiting for seeds to germinate and mature. This speed is a big advantage for home cooks or gardeners who want a steady supply of fresh leaves for their favorite recipes.
It’s also a fantastic way to fill out garden beds or windowsill pots, since each healthy cutting produces a robust new plant. If you have a thriving basil plant in midsummer, you can snip several cuttings and double your harvest potential by rooting and planting them. This keeps your kitchen stocked with fresh basil throughout the growing season and beyond, as potted cuttings can be brought indoors when the weather turns cold.
In short, propagating basil by cuttings is a simple, reliable method that saves time, guarantees consistent quality, and ensures you’ll rarely run out of this versatile herb for your culinary or gardening needs.
Choosing and Preparing Basil Cuttings
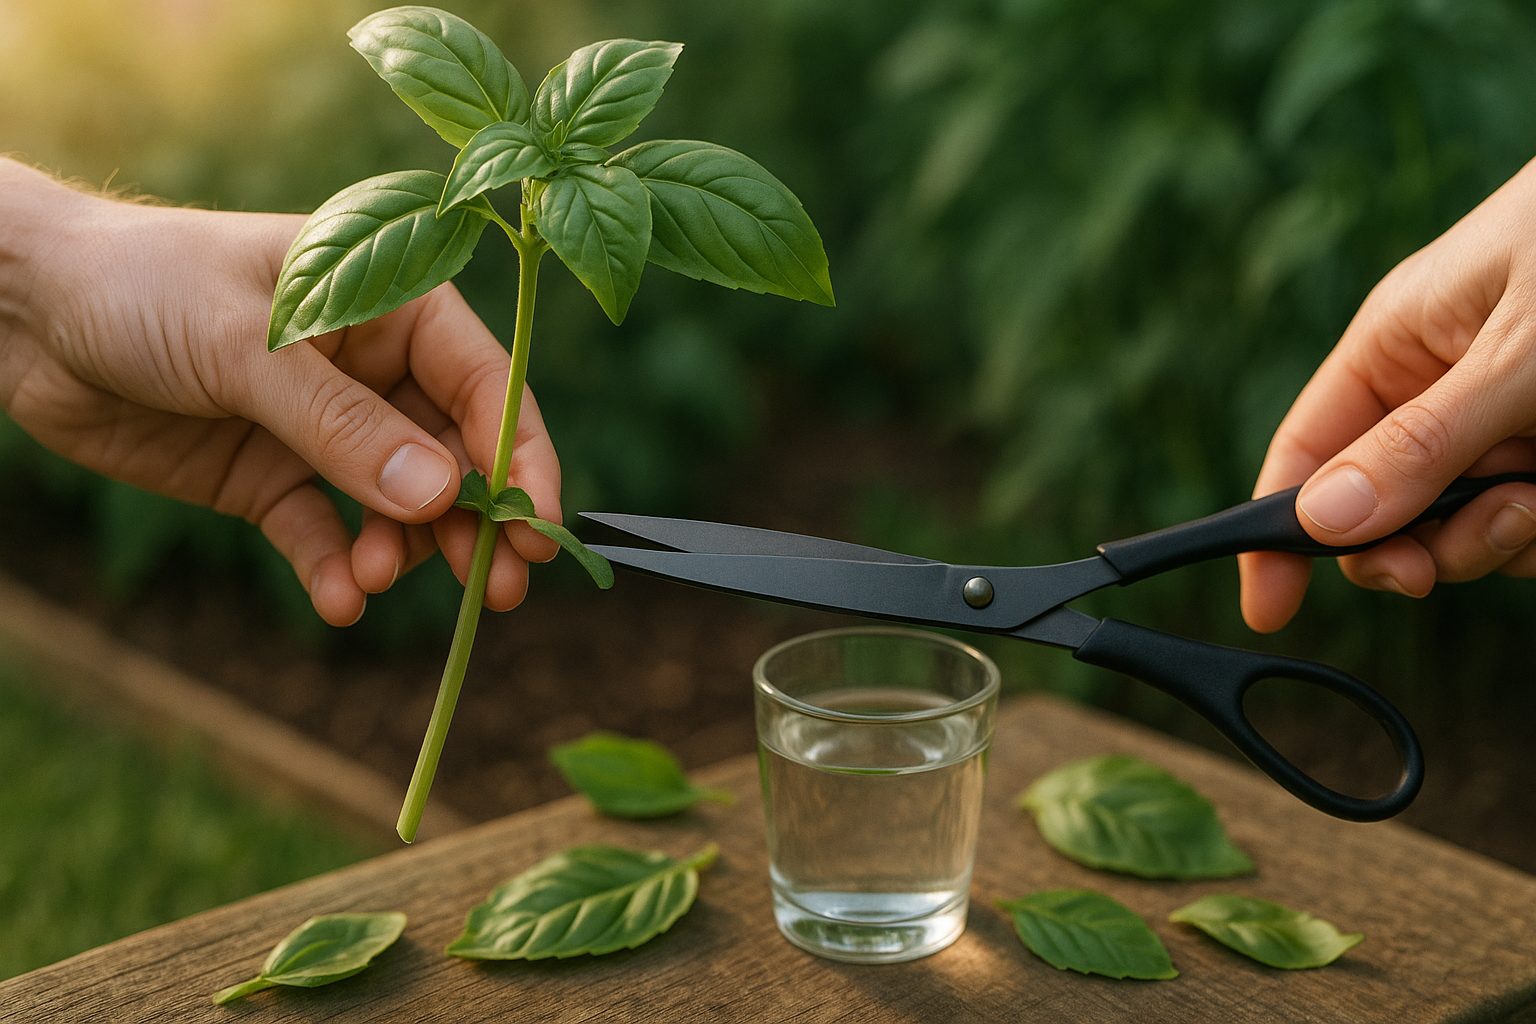
To give your basil cuttings the best start, begin by selecting strong, healthy stems from a mature basil plant. Look for deep green stems free of yellowing, spots, or signs of disease. Avoid any that show wilting or browning, as unhealthy stems are less likely to root well.
It’s best to choose stems that are not flowering; flowering means the plant’s energy is focused on reproduction rather than growth, making those stems less likely to root successfully. Early morning is the optimal time for taking cuttings, as the plant is well-hydrated and temperatures are cooler, reducing stress on both the parent plant and the cutting.
Using clean, sharp scissors or pruners, cut a 4- to 6-inch section just below a leaf node (the spot where leaves emerge from the stem), where roots will develop most readily. Immediately after cutting, remove the leaves from the bottom third to half of the stem—leaving two or three sets of leaves at the top. Removing the lower leaves prevents them from sitting in water or soil, which can cause rot, and directs the cutting’s energy toward rooting instead of maintaining extra foliage.
You can further help your cuttings by gently pinching off any tiny side shoots or flower buds to funnel all energy into root development. Place the prepared cuttings in clean water or damp, sterile potting mix, and position them in bright, indirect light.
If rooting in water, change it daily to keep bacteria from building up. With careful selection and preparation, your basil cuttings should start developing roots within one to two weeks, giving you a vibrant new plant in no time.
Rooting Basil Cuttings in Water
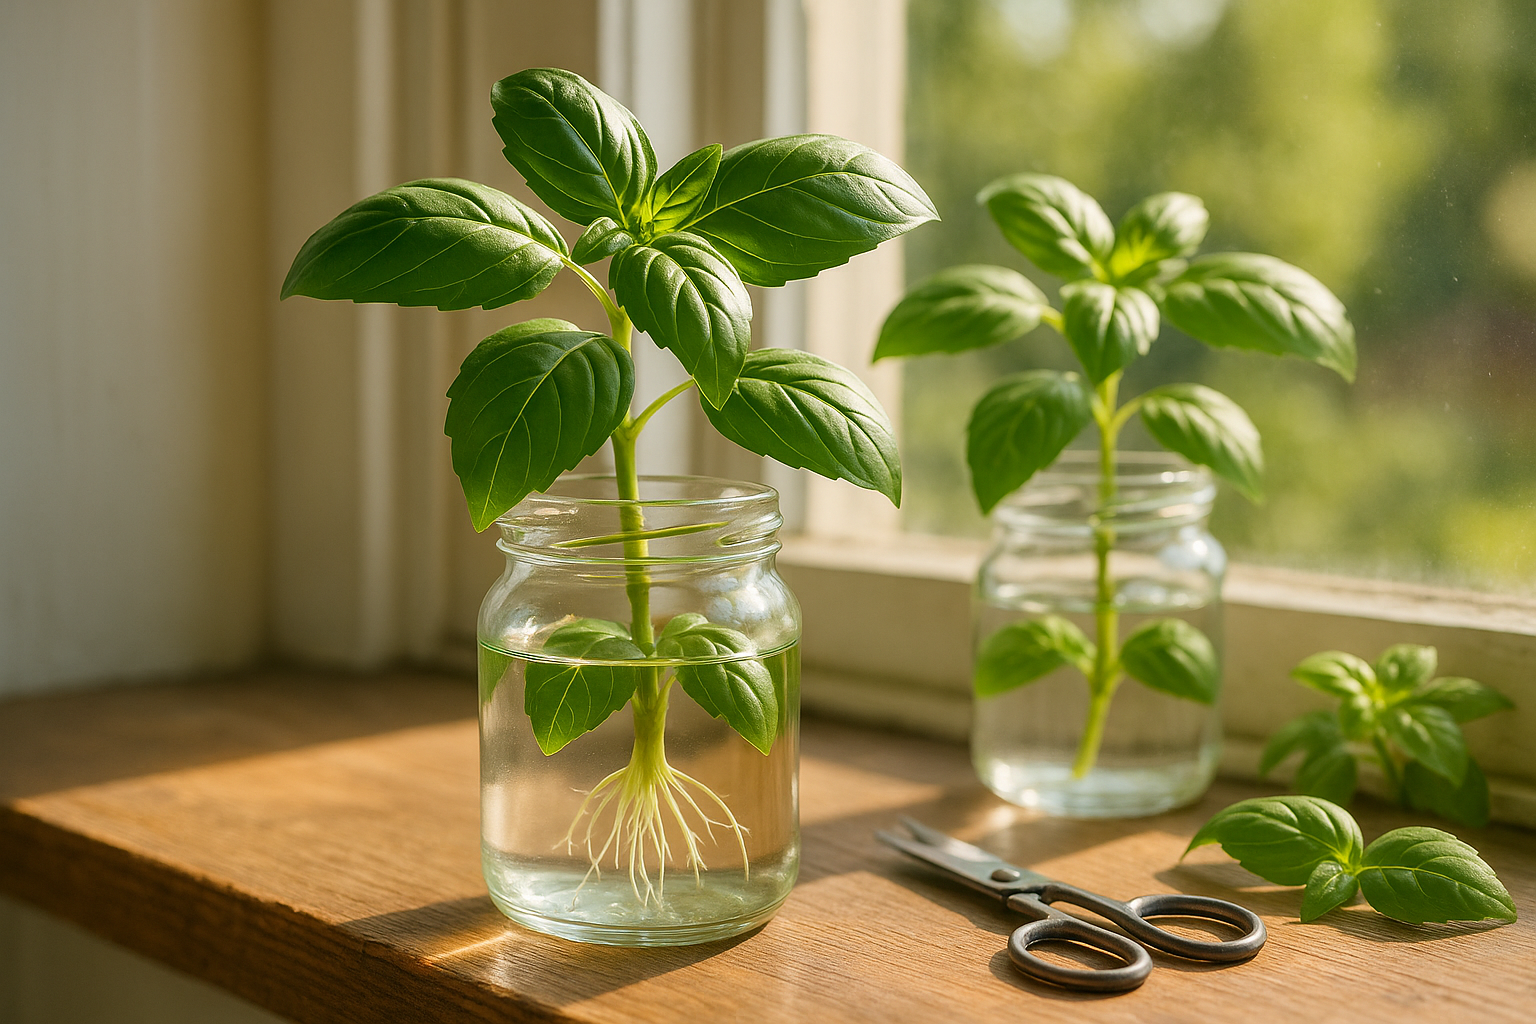
To root basil cuttings in water, start by snipping a healthy, non-flowering stem just below a leaf node and removing any leaves that would sit underwater. Choose a clear glass or jar—this lets you easily monitor root development and encourages healthy growth.
Fill your container with enough room-temperature, filtered, or tap water to submerge only the bottom third of the cutting, making sure no leaves touch the water, as this can cause rot.
Place the container on a sunny windowsill with bright, indirect light; direct sunlight can overheat and stress the cuttings, while too little light will slow root formation. Aim for a spot where temperatures stay between 65–75°F (18–24°C), since basil thrives in warmth.
Change the water every two to three days to prevent bacterial buildup and provide oxygen, gently rinsing the stems if you notice any slime or cloudiness. Within 7–14 days, you should see fine white roots sprouting from the nodes. Healthy cuttings will stay perky and bright green.
Allow roots to grow to about two inches long before transplanting into soil, as longer roots establish more quickly. If you notice leaves turning black or stems becoming mushy, discard the affected cutting—these are signs of rot.
Regularly trim yellowing leaves and monitor for strong, white root growth to help ensure success. With a little patience and these simple steps, you can easily multiply your basil plants for a thriving windowsill herb garden.
Rooting Basil Cuttings in Soil
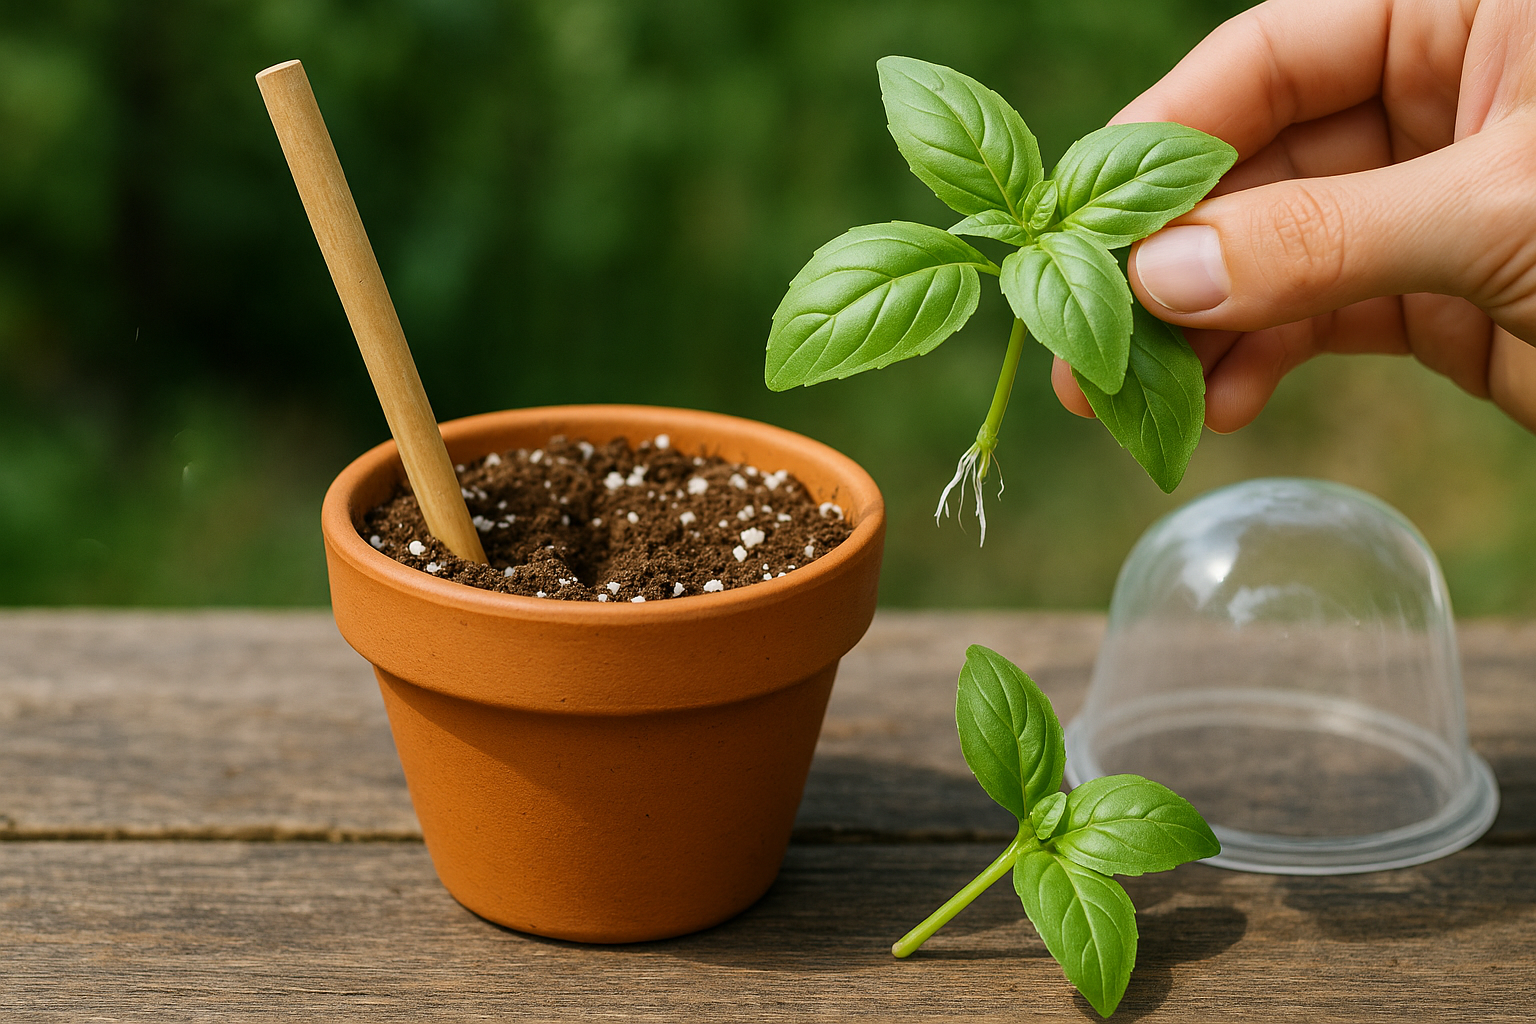
Rooting basil cuttings directly in soil is a straightforward and efficient way to multiply your plants, often resulting in stronger, garden-ready basil with minimal fuss.
Start by preparing a small pot—4 to 6 inches in diameter—filled with a well-draining potting mix. Ideally, use a mix that’s light, fluffy, and rich in organic matter. A good herb or seed-starting mix works well; avoid heavy soils that hold excess water.
Use a sharp pair of scissors or pruning shears to snip a 4 to 6-inch healthy basil stem just below a leaf node, and strip off any leaves from the bottom half. With a pencil or stick, poke a hole in the center of the soil, insert the cutting about halfway, and gently firm the soil around it. Water well so the soil is moist but not soggy.
To maintain humidity—which is critical for rooting—cover the pot loosely with a clear plastic bag or a dome, making sure it doesn’t touch the leaves. Place the pot in a warm spot with bright, indirect light; avoid harsh midday sun.
Check daily to ensure the soil stays mildly damp. Water lightly as needed, and remove the cover once new growth appears, signaling root development.
Soil Rooting vs. Water Rooting
Compared to water rooting, soil propagation fosters sturdier roots and reduces transplant shock, but it can take a bit longer to confirm rooting success. Water rooting, by contrast, is satisfying because the root growth is visible, though water roots are often more fragile and need careful handling during transplantation.
Choose your method based on your goals, space, and patience, but know that soil propagation yields robust, ready-to-grow basil with just a bit of care.
Caring for New Basil Plants After Rooting
Once your basil cuttings have developed healthy roots—usually about 2 inches long—they’re ready to be transplanted into their new homes. Choose a well-draining pot or garden spot with rich, loamy soil. Gently plant each cutting, making sure the roots are lightly spread out and covered with soil.
Right after transplanting, water your basil thoroughly so the soil settles and the roots stay hydrated, but be careful to avoid waterlogging. Basil loves sun, so place your pots in a spot that gets at least six hours of sunlight daily, or position garden beds in sunny locations. If you live in a hot climate, a bit of afternoon shade can help prevent wilting.
Water your basil whenever the top inch of soil feels dry—usually a deep soaking every 2–3 days, or more often in hot or windy weather. Keep an eye out for pests like aphids or slugs; you can spray them with diluted soapy water or remove them by hand if needed.
To promote bushy growth, pinch off the top set of leaves once your plants are 6–8 inches tall and continue harvesting leaves regularly. Avoid letting the plant flower by trimming off buds as they appear, since flowering can slow leaf production.
Every few weeks, feed your basil with a balanced, water-soluble fertilizer to keep it healthy and producing fresh leaves. With a little care, your basil will reward you with fragrant, flavorful leaves all season long.
Troubleshooting Common Problems
Rooting basil cuttings can be hugely rewarding, but a few common hiccups might come up along the way. Wilting is often the first sign that something’s off—usually caused by insufficient hydration or low humidity. To fix this, mist the basil leaves daily and keep cuttings in a warm, well-lit spot out of direct sunlight.
If you notice your cuttings developing roots very slowly or not at all, check the water quality. Tap water with a lot of chlorine or that’s extremely cold can inhibit root growth. Using filtered or room-temperature water, and changing it every couple of days, helps keep conditions optimal.
Rot is another frequent issue, showing up as blackened stems or a funky smell. This usually means the water isn’t being changed often enough, or the cuttings are sitting too deep and deprived of oxygen. Always remove any leaves submerged in water to prevent bacterial buildup, and keep just the stem submerged.
If rooting in soil, use a light, well-draining mix and avoid overwatering—let the soil dry out just slightly between waterings.
Remember, most problems are easily fixed with quick adjustments and a little patience. Even experienced gardeners lose a cutting now and then, so don’t get discouraged. With careful attention and these simple troubleshooting tips, you’ll see new roots in no time.