Introduction
Thinking about starting a DIY carrot planter? You’re not alone—growing carrots in containers is a smart solution for anyone short on garden space or looking for a more manageable gardening experience. Whether you have a sunny balcony, a cozy patio, or just a small patch in your backyard, container gardening lets you cultivate crisp, sweet carrots almost anywhere.
With a DIY carrot planter, you’re in full control of your soil quality, providing the deep, loose conditions carrots love while reducing exposure to common pests and soil-borne diseases. Plus, it’s easier to keep weeds at bay and give each plant the attention it deserves.
In this guide, we’ll walk you through everything you need to know to succeed—starting with how to choose the right containers and soil mix for optimal root growth. We’ll share clever container hacks for those working with tight spaces or budgets, plus essential watering, fertilizing, and thinning tips that ensure a bountiful harvest. You’ll learn how to troubleshoot common issues and get creative with upcycled materials for a truly unique DIY carrot planter project. No matter your gardening experience, you’ll see just how easy and rewarding container-grown carrots can be.
Choosing the Right Container and Location
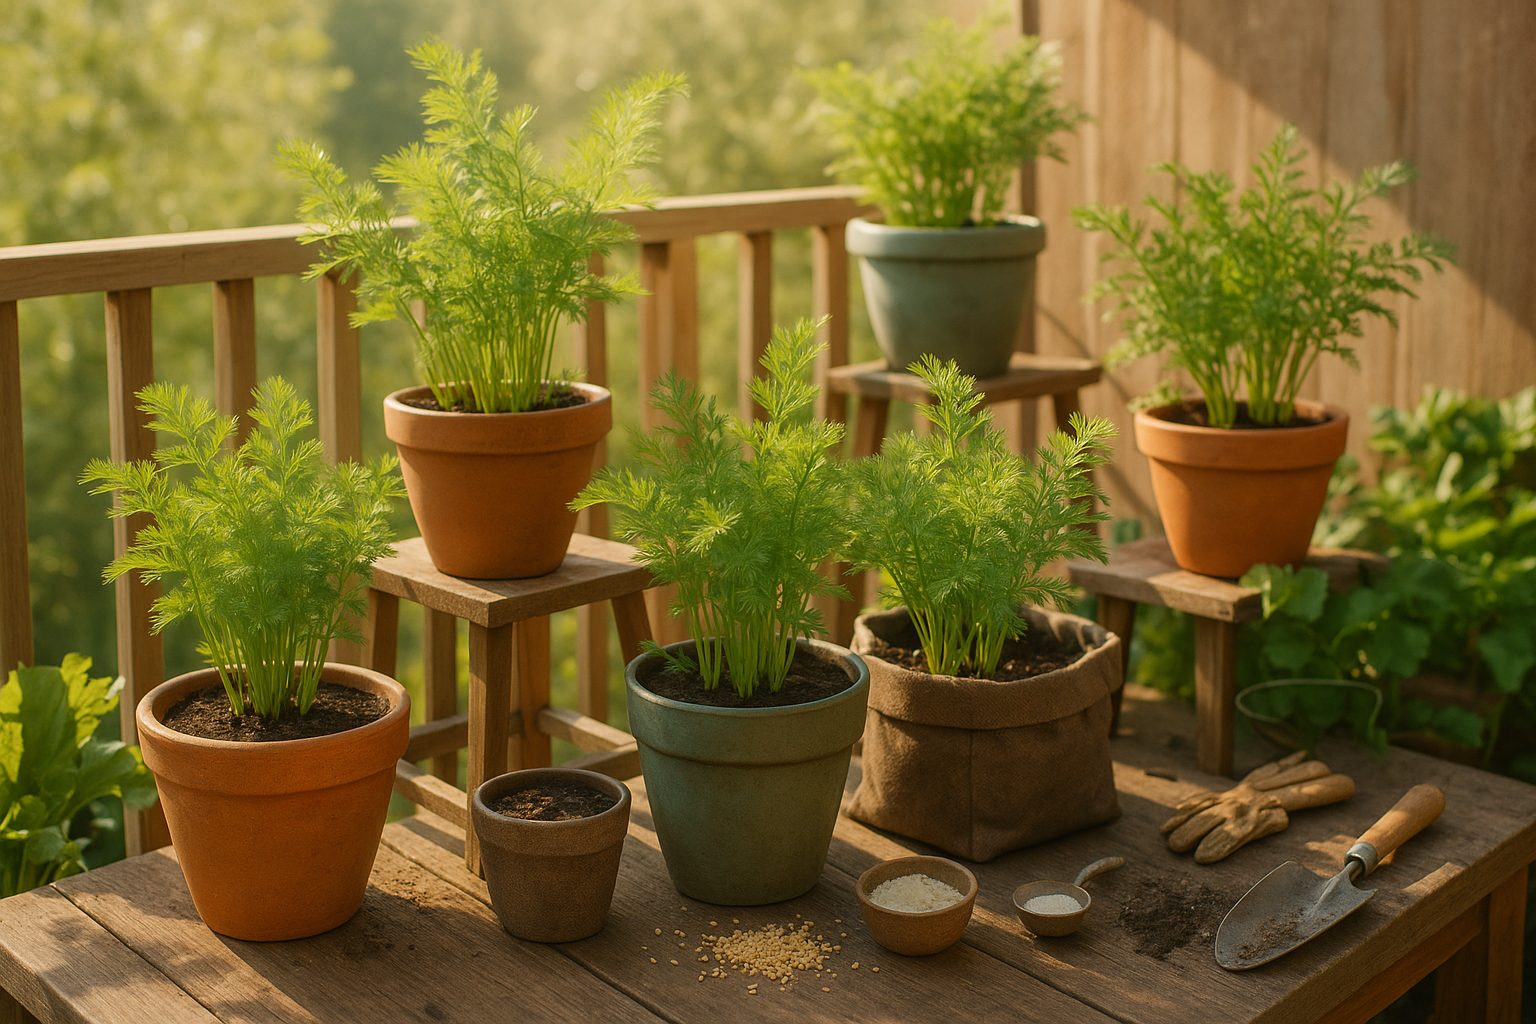
Selecting the right container and location is crucial for healthy plant growth and successful gardening. When it comes to container size, aim for a minimum depth of 12 inches and a width that comfortably fits your plant’s root system. Larger containers help reduce how quickly soil dries out and give roots room to spread.
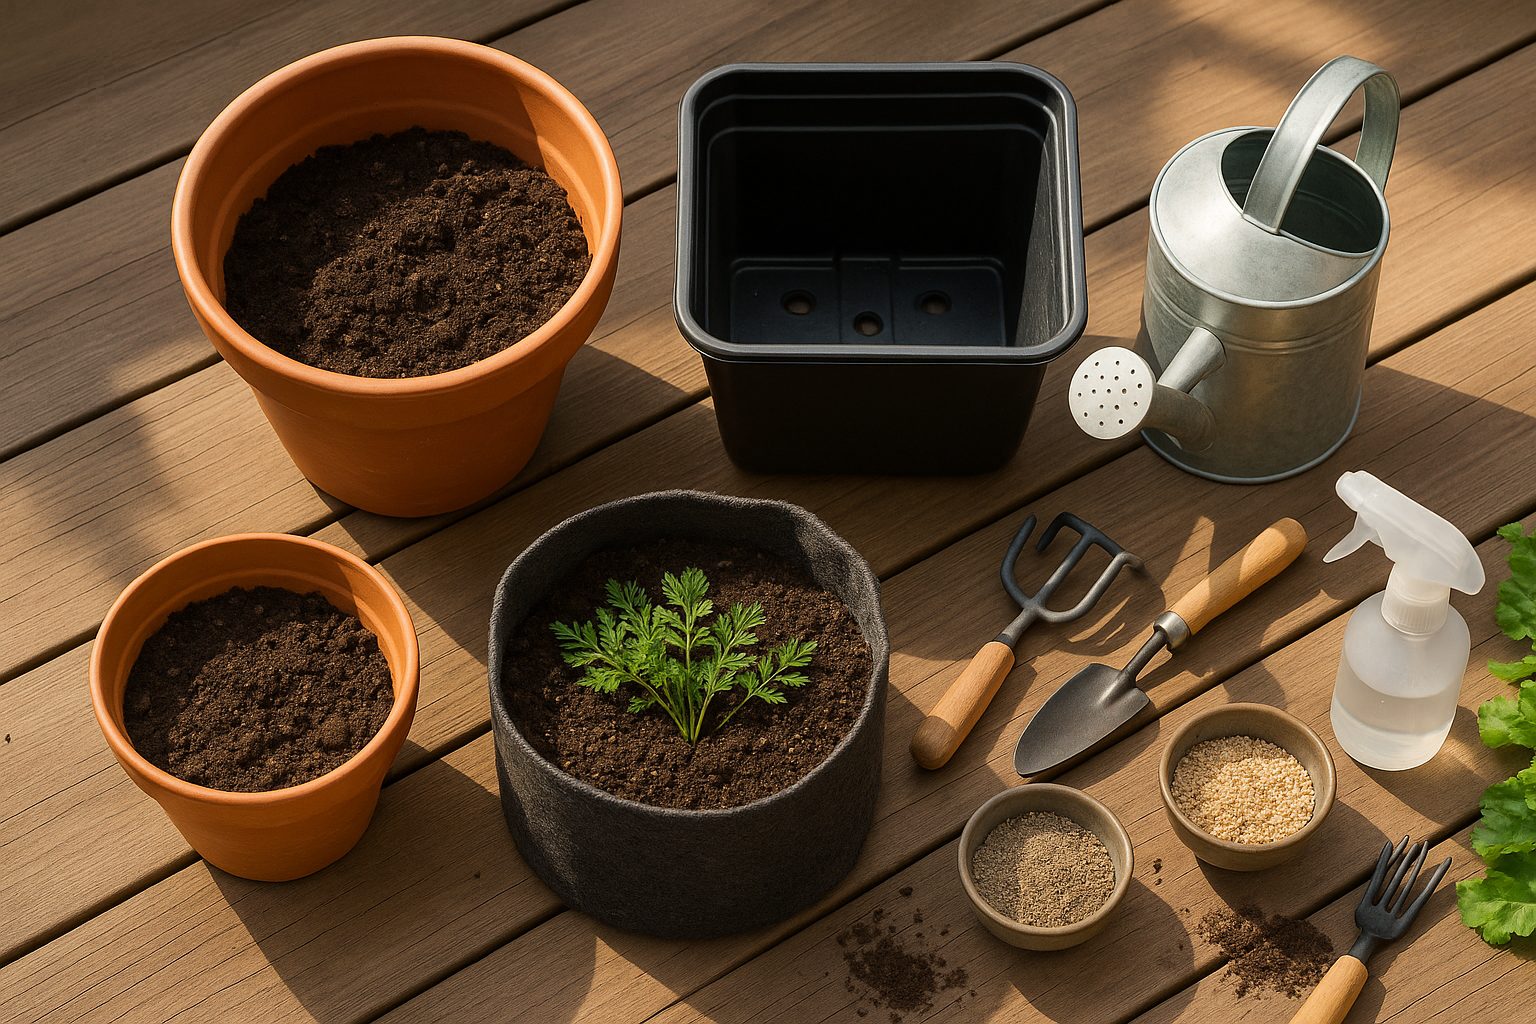
Choose containers made of durable materials like terra cotta, ceramic, plastic, or even fabric grow bags. Just make sure there are drainage holes at the bottom to prevent soggy soil and root rot.
Ideally, position your containers where they receive at least 6 hours of direct sunlight per day. For most veggies and flowers, full sun is essential for strong growth. Try to shield your containers from strong winds by placing them near a wall, fence, or balcony railing, which can reduce stress and moisture loss in your plants.
In smaller spaces, maximize available light by using plant stands to elevate pots closer to sunlight, or opt for containers with wheels so you can easily move them to the sunniest spots throughout the day. If space is very limited, consider vertical shelving near windows or hanging baskets to capture more daylight. These small steps ensure your plants get the best chance to thrive, no matter where you grow.
Selecting Carrot Varieties Suited for Containers
When it comes to growing carrots in containers, short and round varieties are your best bet. These types, such as Thumbelina or Paris Market, naturally develop compact roots that don’t require much depth, making them perfect for pots, window boxes, or small grow bags.
Standard long carrots often struggle or become misshapen in shallow or compacted soil, but these round varieties thrive even if your container is only 8 to 10 inches deep. As you shop for seeds, reliable sources like Johnny’s Selected Seeds, Baker Creek Heirloom Seeds, or your local garden center often list specific traits on the packet—look for descriptions like “ideal for containers” or “compact root growth.”
These tips can help ensure you’re picking a carrot that suits your space and setup. Don’t be afraid to try something a bit out of the ordinary, either—unique heirloom varieties such as Purple Dragon or yellow Amarillo carrots offer vibrant colors and excellent flavor, bringing novelty and nutrition to your harvest.
Mixing and matching different shapes and colors in your container garden doesn’t just look pretty—it can make gardening more fun, keep your table interesting, and even entice kids to snack on freshly harvested veggies straight from the pot.
Preparing the Ideal Potting Mix
When preparing potting mix for your container plants, it’s important to start with a loose, well-draining blend rather than ordinary garden soil. Garden soil tends to compact in pots, trapping water and suffocating roots, which can lead to root rot and stunted growth.
Instead, opt for a specialized potting mix or create your own by combining ingredients like peat moss or coconut coir for moisture retention, perlite or coarse sand for aeration, and some finished compost for nutrients.
For a simple homemade recipe, mix:
- Two parts peat moss or coir
- One part perlite or vermiculite
- One part compost
Before you fill your pots, sift the mix to remove any rocks, sticks, or large clumps that could hinder root spread or drainage.
While commercial potting mixes are widely available—and often contain a balanced blend for most plants—it’s still wise to break up any packed chunks when opening a new bag. Adding compost enriches your mix with slow-release nutrients, supporting strong, healthy growth without synthetic chemicals.
However, be cautious not to add too much; excessive fertility can burn young roots or encourage weak, leggy growth. Only a small portion of compost is needed—typically no more than one-third of the mix.
By paying attention to these foundational steps, you set your container plants up for vibrant, resilient growth throughout the season.
Planting Carrot Seeds the Right Way
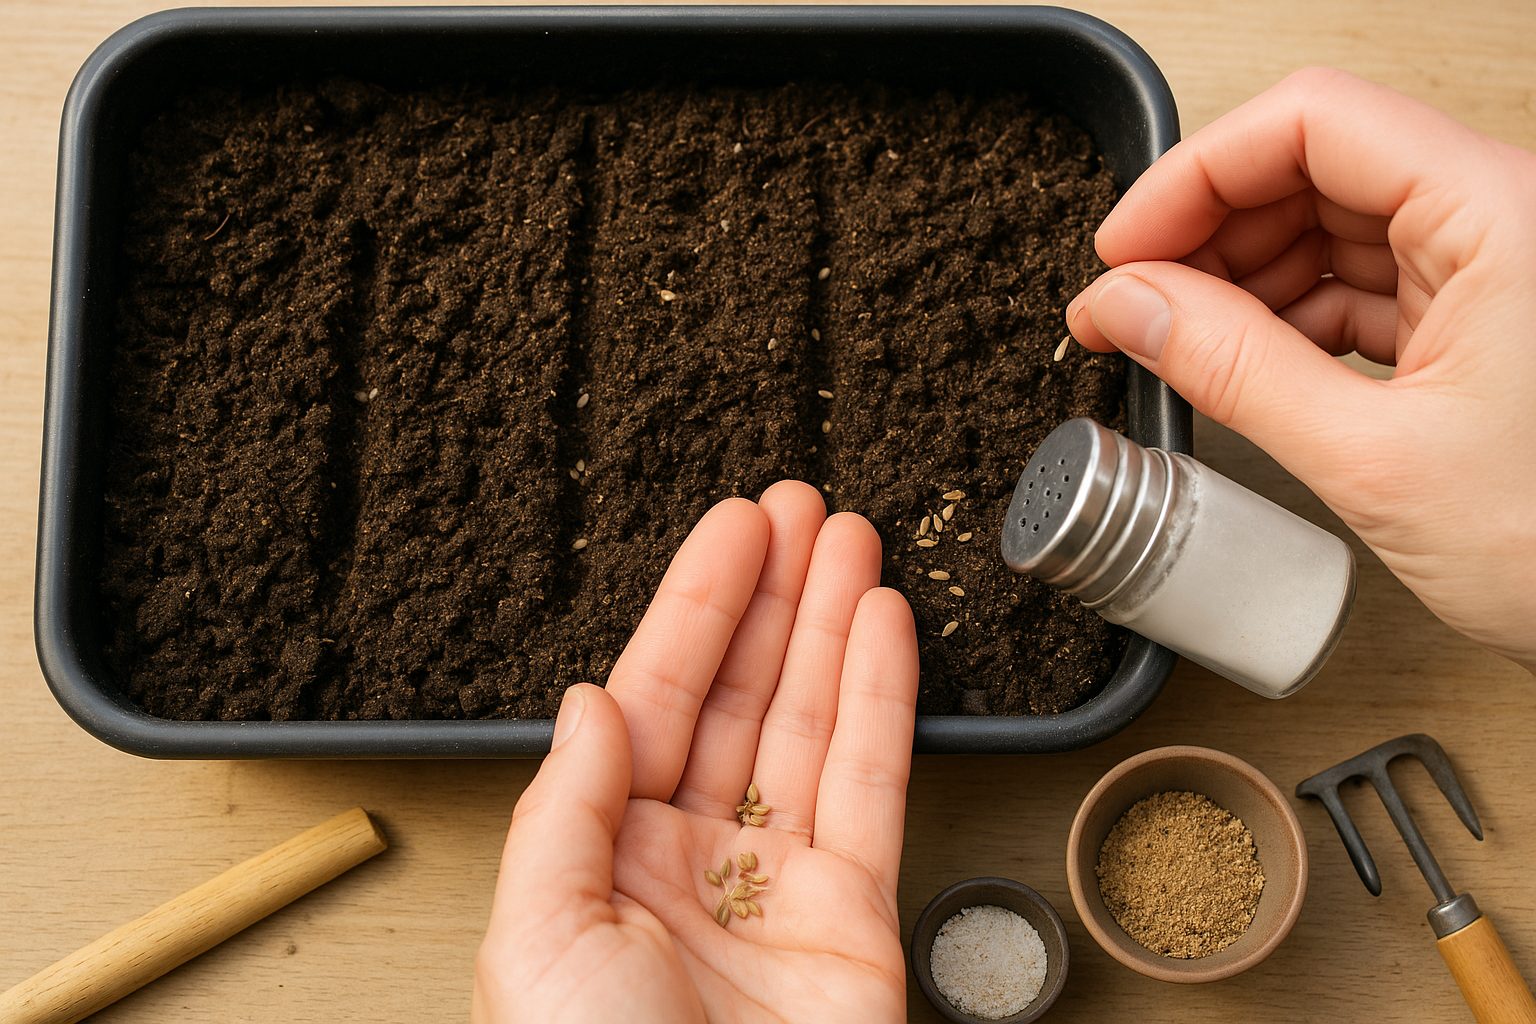
When planting carrot seeds, getting the basics right from the start helps ensure a healthy harvest. Begin by preparing loose, fine soil so the tiny seeds can establish easily—carrots need soil free of clumps and stones for smooth growth.
Sow the seeds about 1/4 inch deep, spacing them a couple of inches apart in rows that are 12 to 18 inches apart. To help avoid overcrowding (which can cause crooked or tiny carrots), try mixing your seeds with dry sand in a 1:5 ratio before sowing; this spreads them more evenly in the row.
Another helpful trick is making a simple seed dispenser from a salt shaker or a small bottle with holes in the lid, letting you gently tap seeds out instead of dumping them all at once.
After covering the seeds with a light layer of soil, gently pat it down and water—but don’t overdo it. Heavy watering or sun-baked soil can create a crust that makes it tough for delicate sprouts to break through. To prevent this, keep the soil moist but not soggy, and mulch lightly with straw or grass clippings.
Carrots thrive in cooler weather, so plant them as soon as the soil can be worked in early spring if you’re in a temperate area. In warmer climates, sow seeds in late summer or early fall, allowing them to mature in the cool weather they love.
Take your time setting the stage now, and you’ll be rewarded with straight, flavorful carrots later on.
Caring for Carrots in Containers: Water, Thin, and Feed
Growing carrots in containers is a smart way to enjoy fresh produce, but they do require a bit more attention compared to planting in the ground. Container soil dries out faster, so check moisture daily and water whenever the top inch feels dry. Carrots thrive on consistent moisture, and letting the soil dry out can cause misshapen roots or poor growth.
Once your seedlings reach about two inches tall, thin them carefully by snipping or gently removing extras. Space the remaining plants about two inches apart to give each carrot enough room to grow straight and strong, preventing them from becoming stunted or twisted.
Since nutrients get used up more quickly in pots, feed your carrots every few weeks with a half-strength, balanced liquid fertilizer. Look for one with equal parts nitrogen, phosphorus, and potassium—such as a 10-10-10 formula. Be cautious not to over-fertilize, especially with products high in nitrogen, as this can lead to leafy tops but small, underdeveloped roots.
A light hand with feeding and careful daily watering are the keys to sweet, healthy carrots from your container garden.
Harvesting and Troubleshooting Common Issues
Knowing when your carrots are ready to harvest is key to getting the sweetest, crunchiest roots. Mature carrots typically have brightly colored shoulders about half an inch across poking above the soil line, and the tops may begin to flop over.
Gently loosen the surrounding dirt with a hand fork before pulling, grabbing the greenery close to the root to avoid breaking the carrot.
Sometimes, issues arise—if your carrots look stunted or forked, it may be due to compacted or rocky soil. Try planting in loose, well-tilled beds next time.
Pest infestations like carrot rust flies can be deterred with row covers, and rotating crops each year helps keep bugs at bay.
If poor germination is a problem, be sure to sow seeds shallowly, keep the soil moist until sprouts appear, and thin crowded seedlings to reduce competition.
Don’t get discouraged if your first harvest isn’t perfect! Carrot growing takes practice, and experimenting with successive plantings every few weeks not only offers more chances to learn but also brings a steady supply of fresh carrots throughout the season.
Each round is a new opportunity to tweak your methods, so stick with it—you’ll get better yields and tastier results each time.