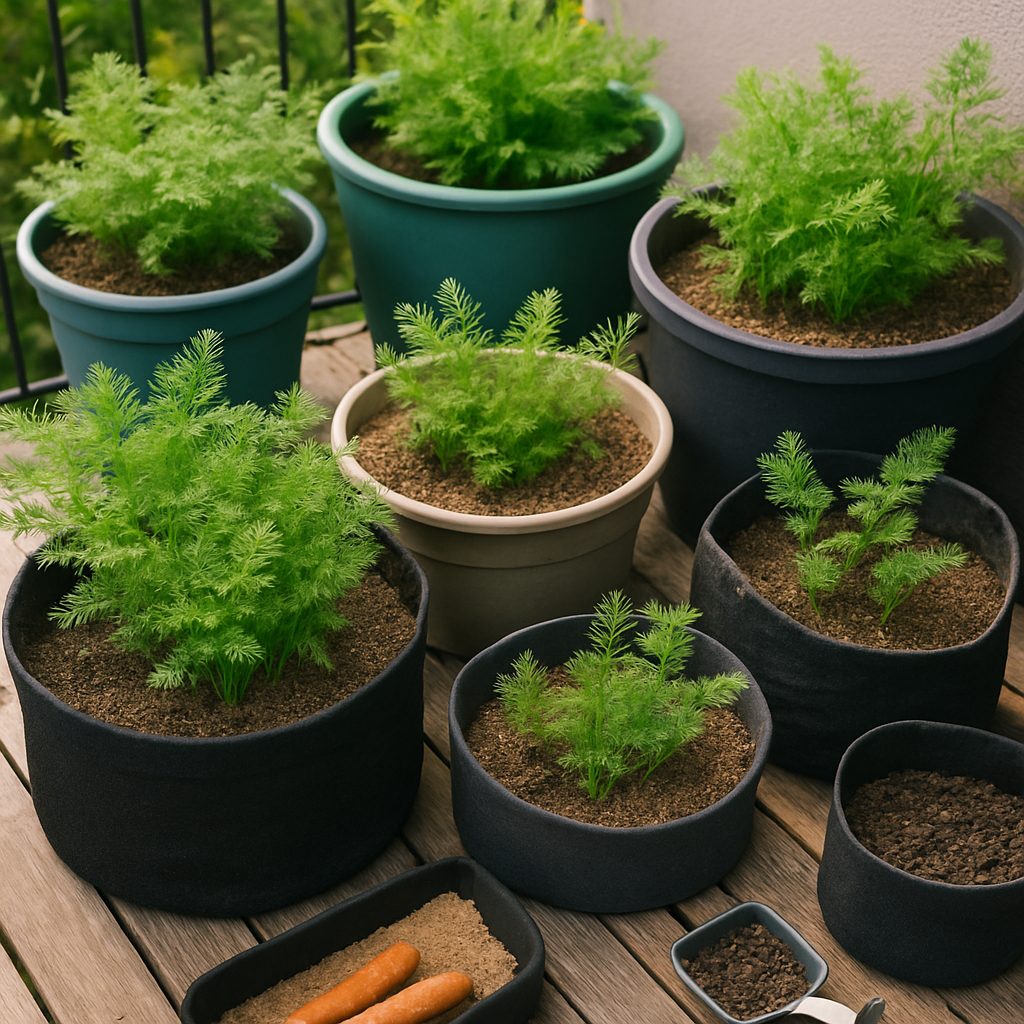
Choosing the Right Spot and Containers
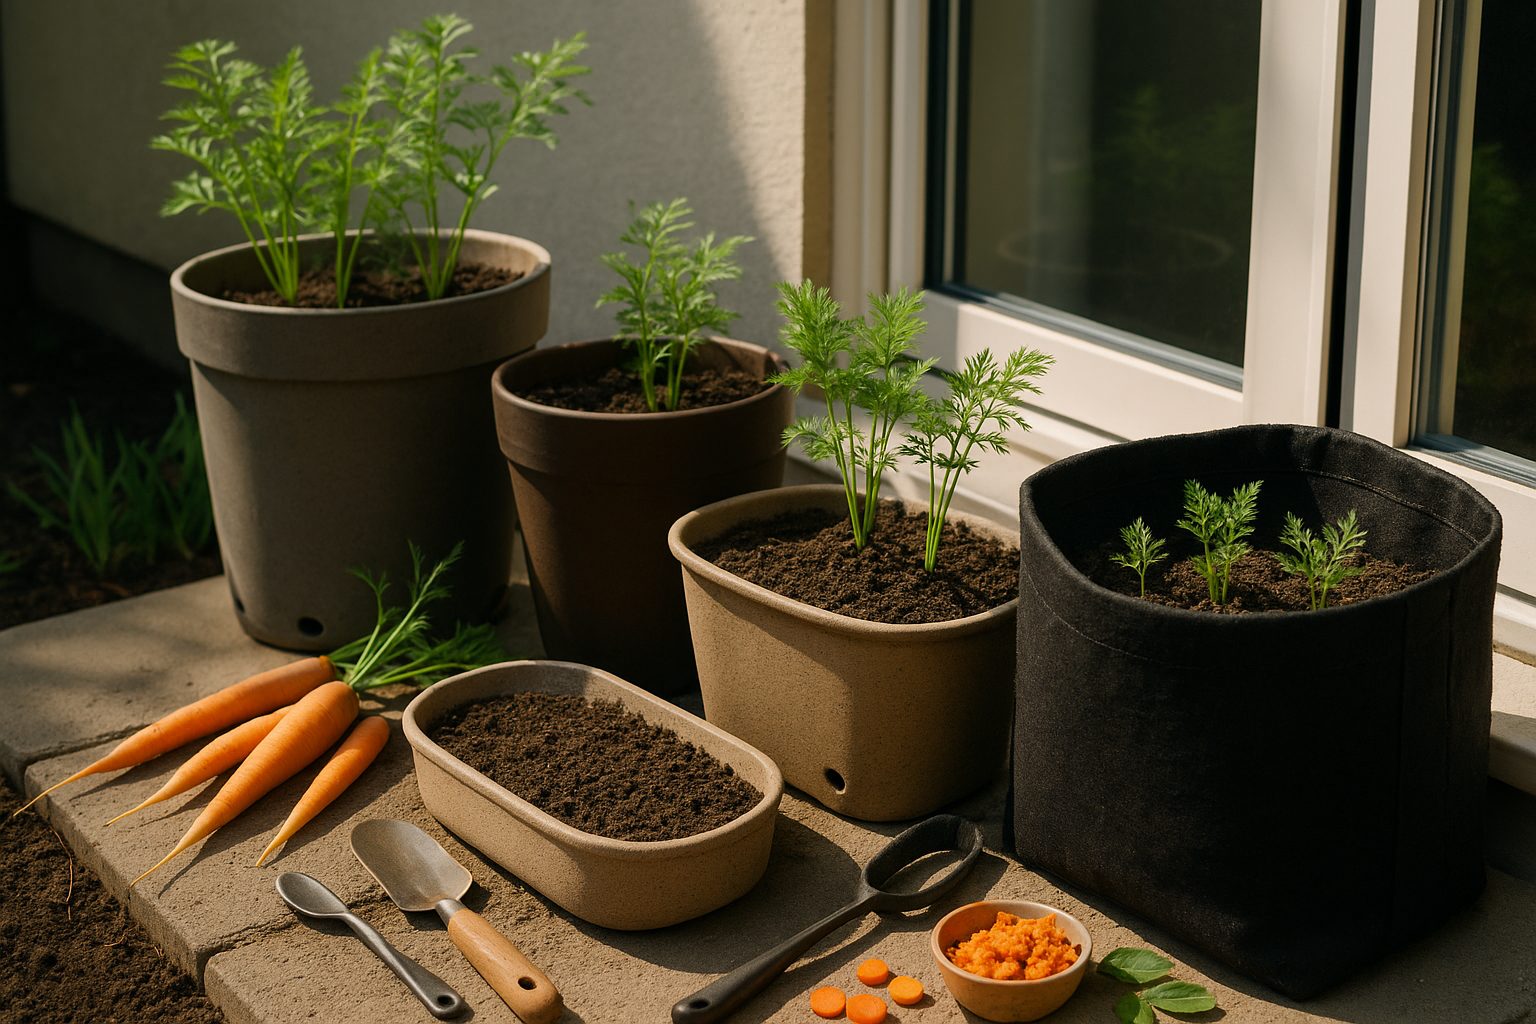
Growing carrots in small spaces isn’t just possible—it can be surprisingly productive with the right setup. To maximize your carrot harvest, choosing the optimal spot and the right containers makes a world of difference, whether you’re tucking a few pots onto an apartment balcony or working with limited garden bed space.
Carrots crave full sun—at least six hours a day—so a bright, unobstructed place is essential. Avoid shady corners, where leggy growth and small roots are common disappointments. Soil depth is another key consideration: the roots need room to stretch, especially for standard or longer carrot varieties. Containers should be at least 12 inches deep to support robust root development; shallow planters will stunt growth, producing short or misshapen carrots.
For those with only a balcony or patio, choose tall, food-safe containers made from durable materials like plastic, ceramic, or sturdy fabric grow bags. Make sure there are plenty of drainage holes to prevent soggy soil and root rot. Oval or trough-shaped planters are great for maximizing narrow ledges, and fabric grow bags can be tucked into unused corners.
As you select containers, remember that carrots don’t spread sideways much, so sacrificing a bit of width for more depth is worth it. If space allows, cluster several mid-sized pots together to create a mini carrot patch. Fill them with light, sandy, well-draining soil mix, free of rocks or debris that can cause forked roots.
Real-world tip: Test your sun exposure by observing your space at different times during the day, and move lightweight containers as needed to chase the sun. With smart choices and a little planning, carrots in small spaces can thrive, yielding sweet, crisp roots right outside your door—even if that “garden” is just a single step from your kitchen.
Preparing Soil for Healthy Carrots
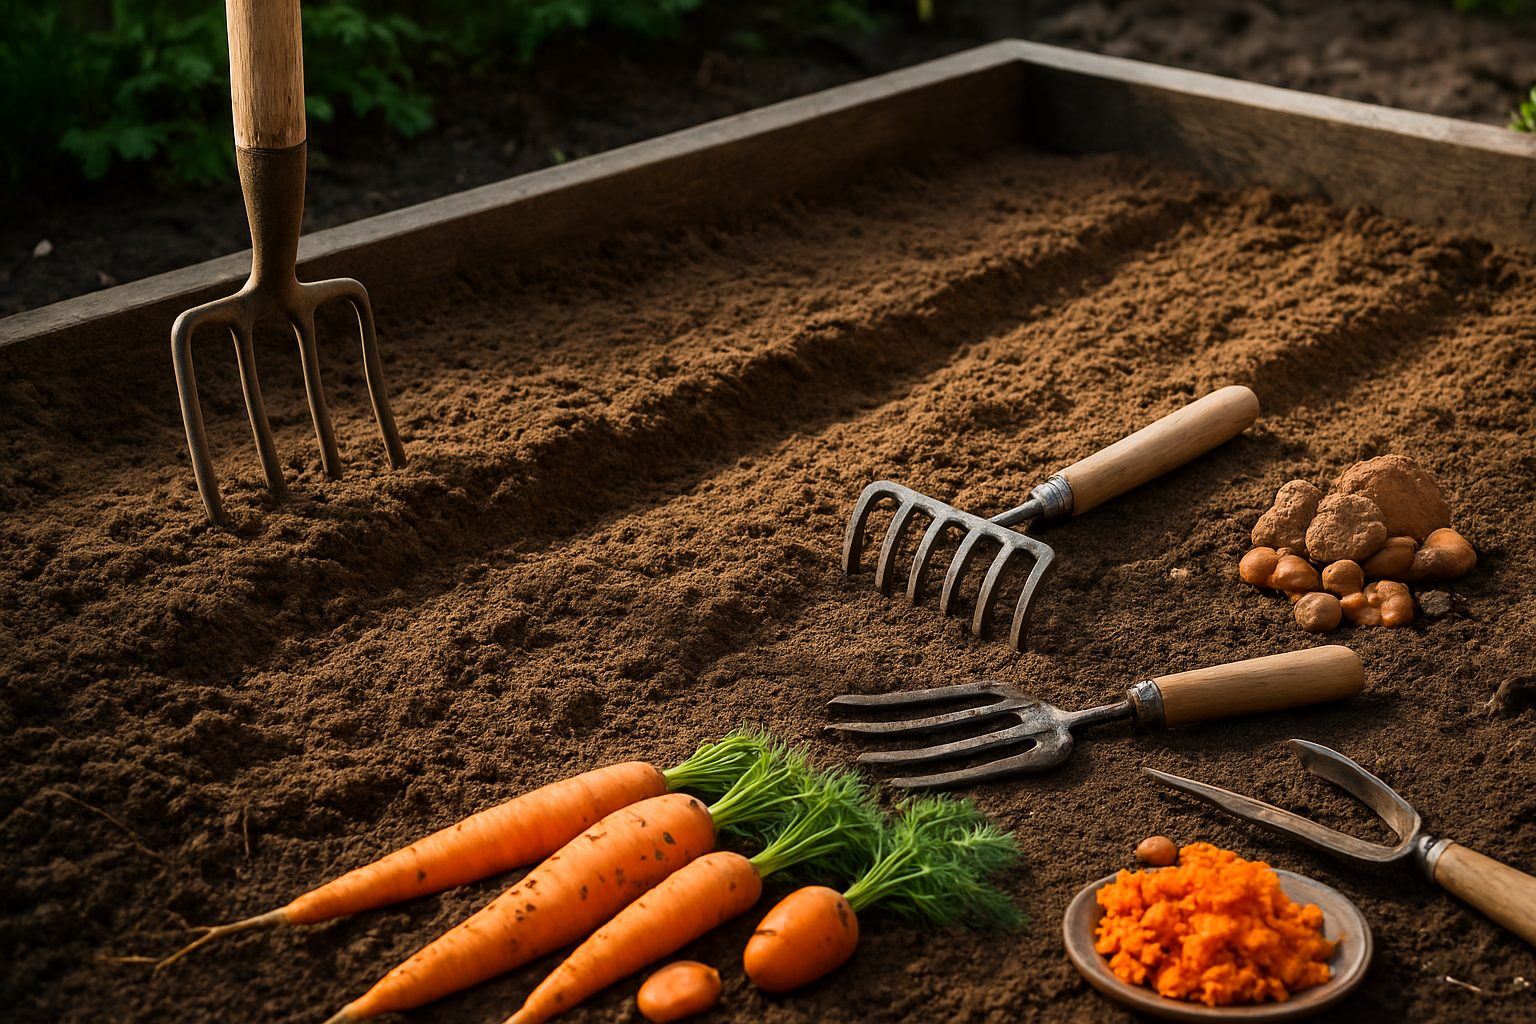
To grow straight, healthy carrots, it’s essential to start with the right soil texture and structure. Carrots thrive in loose, sandy, well-drained soils because their delicate roots need space to stretch out and grow deep without hitting resistance.
If your garden bed contains heavy clay or is full of stones, you’ll often end up with stubby, misshapen carrots. Remove rocks and debris by hand or with a rake, and if your soil is dense, break it up to at least a foot deep using a garden fork.
Mix in a generous amount of well-rotted compost to improve drainage and supply organic matter that keeps soil crumbly and airy. Aim for a soil pH between 6.0 and 6.8; if your soil is too acidic, sprinkle garden lime according to package directions.
In especially stubborn clay soils, double-digging or creating raised beds can make all the difference by boosting drainage and root space. Mulch the surface lightly to prevent crusting so young carrot seedlings can push through easily.
These simple steps help carrots develop into the sweet, straight roots gardeners love—no more forked or twisted disappointments.
Sowing and Seed Care
Getting the timing and technique right for sowing carrot seeds is key to a successful harvest. Start by picking a spot with full sun and loose, well-drained soil—compact or rocky soil leads to misshapen carrots.
Sow seeds directly outdoors in early spring when soil temperatures reach at least 50°F (10°C), as carrots prefer cooler conditions. Prepare the seedbed by removing rocks and breaking up clumps to create a fine, smooth surface; this helps the tiny carrot seeds make good soil contact.
Sow seeds about ¼ inch deep—any deeper and the fragile seedlings may struggle to break through the crust. Space the seeds thinly, around 1 inch apart, with rows 12 inches apart; overcrowding causes tangled roots. After sowing, gently water the bed so it’s moist but not soggy.
Carrot seeds are slow to germinate, taking up to 21 days, so keep the top inch of soil consistently damp—if it dries out, seeds may not sprout. Some gardeners cover the row with a board or burlap to hold in moisture, removing it as soon as the seedlings emerge.
Once seedlings are about 2 inches tall, thin them so they’re 2-3 inches apart to give the roots room to develop. A common challenge is uneven germination, often due to soil drying out, crusting, or burying seeds too deeply.
- Monitor moisture daily and avoid heavy watering that compacts the soil.
- Address weeds early since carrots compete poorly; hand-weed carefully to avoid disturbing roots.
With these practices, you’ll find your carrot crop off to its healthiest start.
Essential Carrot Care Throughout the Season
Caring for carrots throughout the growing season is key to a bountiful, healthy harvest. Start with regular, deep watering—carrots need consistent moisture, especially as roots develop deep into the soil. Aim for about an inch of water per week, using soaker hoses or drip irrigation to avoid wetting the foliage and discouraging disease.
Weeding is just as crucial since carrots compete poorly with weeds for nutrients and light; hand-pull weeds gently to prevent disturbing the delicate carrot roots. Add a layer of organic mulch, such as shredded straw or grass clippings, after seedlings emerge. This helps the soil retain moisture and keeps weeds at bay, cutting down on your maintenance time.
For fertilization, use a balanced or slightly lower-nitrogen fertilizer—too much nitrogen can give you lush tops but spindly roots. Apply a side dressing of compost or a 5-10-10 fertilizer when carrots are 3–4 inches tall, and avoid high doses during seeding.
To prevent common problems, keep your watering schedule consistent; irregular watering can cause roots to split. Thin seedlings early (when they’re about one inch tall) so remaining plants have room to grow—crowding leads to stunted, misshapen carrots. Also, avoid sowing carrots too late in the season in hot climates, as high temperatures can cause them to bolt, sending up a flower stalk instead of forming a plump, sweet root.
With these simple routine care tips, even beginner gardeners can enjoy crisp, flavorful carrots straight from the garden.
Dealing with Pests and Problems
Carrots, like many garden vegetables, can attract some pesky invaders—most notably the carrot rust fly and aphids. Carrot rust fly larvae tunnel into the roots, leaving rust-colored scars that make the carrots unappetizing or inedible. Meanwhile, aphids cluster on leaves and stems, causing yellowing, curling, and stunted growth.
To manage these pests without harsh chemicals, try using floating row covers to block rust fly adults from laying eggs. Encouraging natural predators such as ladybugs or lacewings is also effective against aphids. For small aphid colonies, hand-squashing or hosing them off with water are simple organic tactics.
Preventing diseases like fungal leaf blights is just as important as pest control. Water early in the day to let foliage dry, space plants well for air circulation, and promptly remove any infected segments.
One of the best all-around strategies is practicing crop rotation: avoid planting carrots in the same spot each year to disrupt pest and disease cycles in the soil. By rotating crops, pests lose their preferred host, and soils can recover naturally, reducing the buildup of problems season to season and helping you grow healthier, more abundant carrots.
Harvesting and Storing Carrots
Knowing when to harvest your carrots can make all the difference in their taste and texture. The best time is when the shoulders are about an inch across and the carrot tops have begun to slightly push up through the soil—usually 60 to 80 days after planting, depending on the variety.
To avoid damaging the roots, gently loosen the soil with a garden fork before pulling up the carrots. After harvesting, brush off excess dirt but avoid washing them if you plan to store them for a while—moisture can lead to rot. Trim the green tops to about half an inch, since the foliage draws moisture from the roots and causes faster wilting.
Long-Term Storage Tips
For long-term storage, layer unwashed carrots in boxes of damp sand or sawdust. Keep them in a cool, dark place like a basement or root cellar where temperatures stay just above freezing. If you don’t have a root cellar, perforated plastic bags in the crisper drawer of your fridge work well for smaller batches.
Managing Large Harvests
If you have a large harvest, consider sharing fresh carrots with neighbors or blanching and freezing them for soups and stews throughout the year. Processing carrots in manageable batches helps prevent spoilage and reduces stress.
Fun Facts and Varieties to Try
Carrots date back thousands of years, originally cultivated in Persia—not for their roots, but for their aromatic leaves and seeds. While often associated with the vibrant orange we see today (thanks to 17th-century Dutch growers), carrots actually come in a rainbow of colors: purple, yellow, red, white, and even black.
Each color boasts unique nutrients; for instance, purple carrots are packed with anthocyanins, a powerful antioxidant, while orange varieties are loaded with beta-carotene for eye health. For home gardeners, the choice of variety can make for a fun and flavorful harvest.
Try Nantes for crisp, sweet, cylindrical roots that grow well in raised beds, or the petite Thumbelina for containers and heavy soils. Adventurous growers might seek out Cosmic Purple or Solar Yellow to add color to meals and visual appeal to garden rows.
Beyond snacking, homegrown carrots shine in unexpected ways—roast them with honey and cumin for a sweet-savory side, spiralize them into nutrient-rich veggie noodles, or blend them into cakes, smoothies, and even homemade hummus. Grated carrot also makes a colorful addition to salads, wraps, and stir-fries, letting you enjoy their flavor and nutrition every day, in more ways than one.