Getting Started with Brussels Sprouts
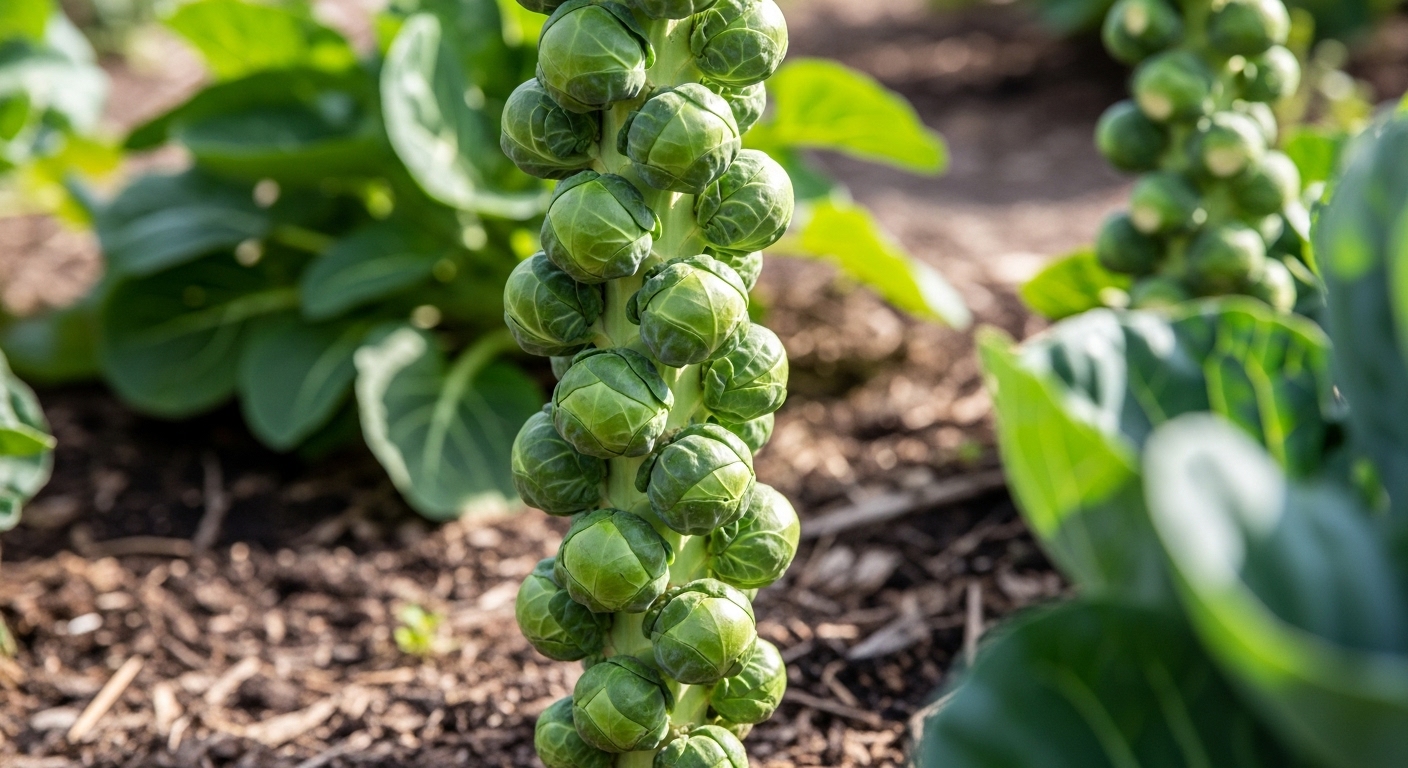
If you’ve ever wished for a bountiful, nutrient-packed vegetable that thrives when other crops fade, cold-weather brussels sprouts are your new gardening best friend. Brussels sprouts are famously hardy—these miniature cabbages often get sweeter after a light frost, making them a standout choice for home gardeners in chilly climates. Not only do they pack a punch of vitamins C and K, but their dense, leafy stalks also stand strong through the seasons most vegetables dread. Growing Brussels sprouts can be as rewarding for your dinner table as it is for your green thumb, especially if you want a harvest that delights well into late fall or even early winter.
For regions where frost comes early or the growing season feels short, quick-maturing varieties are a game-changer. Popular options such as ‘Jade Cross,’ ‘Churchill,’ and ‘Bubbles’ can be ready to pick in under 125 days. These cultivars are bred specifically to keep pace with unpredictable weather, so even gardeners north of zone 5 can enjoy robust stalks dotted with plump, tender sprouts by the time the temperature drops. ‘Long Island Improved’ is another reliable classic, maturing in just about 100 days and flourishing in garden beds and large containers alike.
Getting started with cold-weather Brussels sprouts is as simple as finding a sunny spot—these plants crave at least 6 hours of direct sunlight to reach their full potential. Brussels sprouts adore the cool, stable weather of spring and fall; they’ll often struggle with summer heat, so planting in late summer or very early spring is ideal if you want them to mature during cool temperatures. Their resilience shines in the fall garden, shrugging off light frosts and sometimes even snow. Ensure rich, well-drained soil and consistent moisture, and you’ll be celebrating homegrown sprouts just when hearty, winter-ready greens are needed most.
Planning and Planting Your Crop
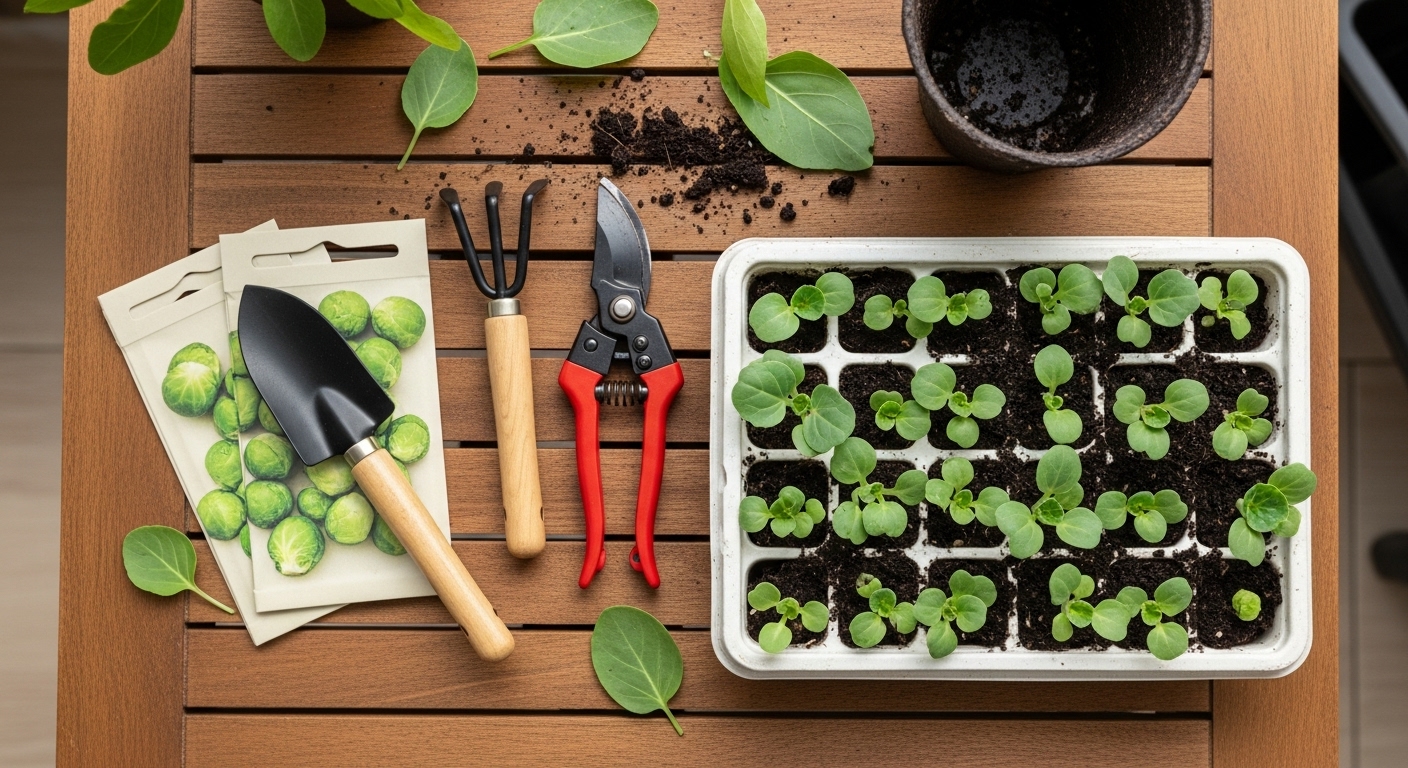
Starting your crop off right begins with smart timing—most vegetables benefit from an early indoor start, about 6–8 weeks before your area’s last expected frost. For example, tomatoes and peppers thrive when started indoors in late winter, allowing you to transplant sturdy seedlings outdoors once the soil warms and the danger of frost has passed.
Root crops like carrots or radishes are usually sown directly in the ground since they don’t transplant well; just check your seed packets for specifics. Before planting, take the time to prep your garden beds: clear weeds, loosen the soil down to a foot, and mix in compost to enrich the earth.
Look for a location that gets at least six hours of sunlight daily and drains well after rain—that’s key for most crops. When arranging your seeds or seedlings, give them plenty of space—cramped plants risk poor airflow and stunted growth.
Many veggie seedlings like basil, lettuce, or broccoli need 12–18 inches between plants, while tomatoes often need up to 2 feet to sprawl. If garden space is tight, containers or raised beds are a great alternative; five-gallon buckets work well for tomatoes, peppers, or beans—just make sure your pots have drainage holes and use a high-quality potting mix.
Vertical growing methods, such as trellising cucumbers or peas, maximize limited square footage on balconies or patios.
Finally, don’t forget to label each plant or seedling, especially if you’re growing multiple varieties. Simple wooden sticks, recycled popsicle sticks, or even plastic plant tags work well and help you keep track of what’s what throughout the season—no more mystery sprouts or lost heirloom varieties.
Thoughtful planning at the outset sets the stage for both a productive and less stressful growing season.
Caring for Growing Brussels Sprouts
Brussels sprouts are hungry, thirsty plants during their long growing season, so consistent care is key. Watering should be deep and regular—aim for about 1 to 1.5 inches weekly, whether from rain or hose. Mulching helps retain moisture and keeps roots cool, which Brussels sprouts love.
For feeding, apply a balanced fertilizer (like 10-10-10) when seedlings are settling in and again midway through the season. Organic gardeners can side-dress with compost or well-rotted manure.
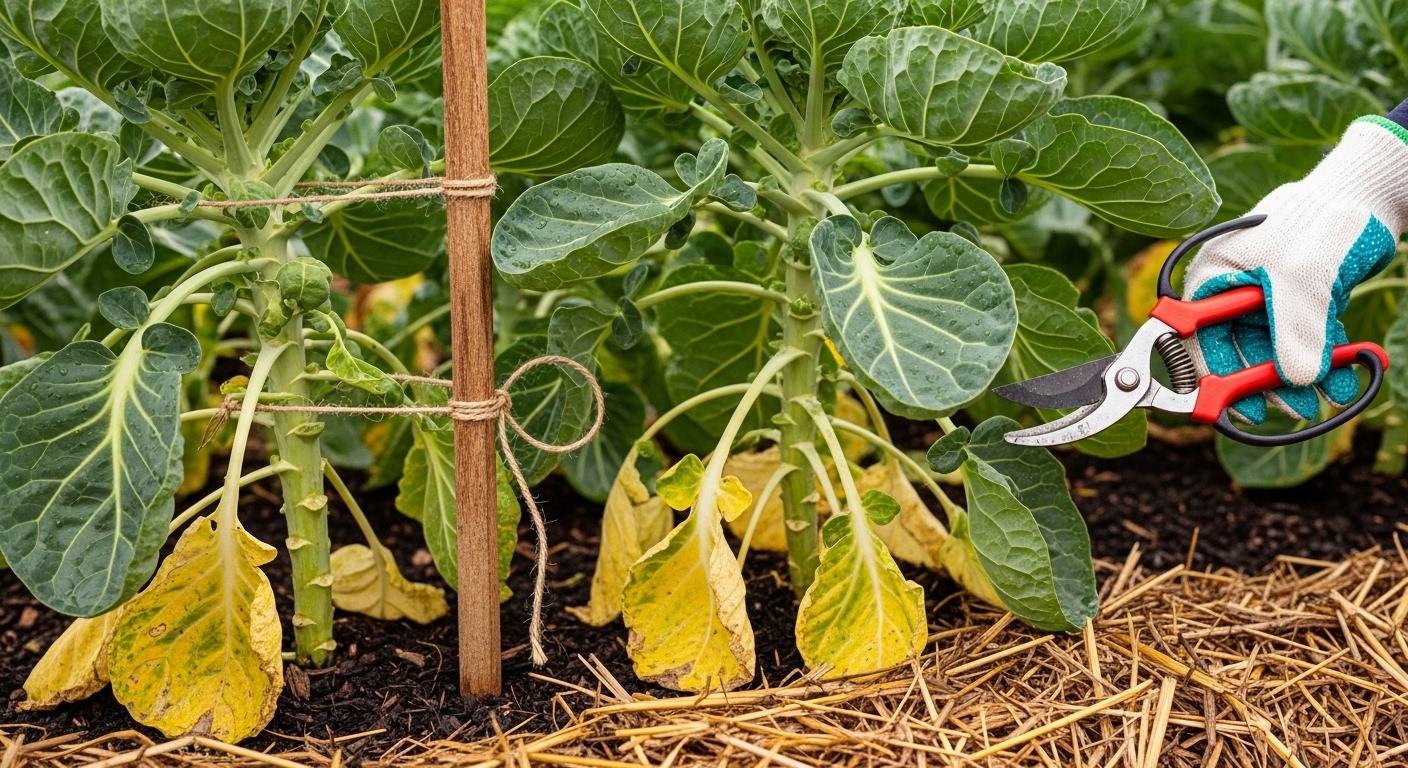
As plants grow tall, you’ll notice lower leaves starting to yellow or crowd at the base—snip these off with clean shears to boost ventilation and keep fungal diseases at bay; this also channels the plant’s energy upward.
Once the lowest sprouts have formed, consider topping or pinching the central stalk when the plant is about 30 inches tall or just as the top bud starts to form. This halts upward growth and encourages bigger, more uniform sprouts below.
Brussels sprouts can get tall and a bit top-heavy, especially in windy areas, so gently stake them or tie to a sturdy support to prevent toppling.
Finally, keep an eye out for common pests like cabbage worms, aphids, and flea beetles:
- Handpick caterpillars
- Spray aphids with a blast of water
- Cover young plants with row cover if bugs get persistent
Regular inspections and a little proactive TLC will keep your Brussels sprouts strong all season long.
Harvesting Brussels Sprouts
Brussels sprouts are a rewarding late-season crop, best harvested after they’ve experienced the first light frost. This mild chill actually sweetens the flavor, turning their natural bitterness into a nutty, more savory taste.
To know when your Brussels sprouts are ready, look for sprouts about one to two inches in diameter that feel firm and bright green—these are perfect for both texture and taste. The sprouts mature from the bottom of the stalk upward, so start checking the lower sprouts first.
Gently twist each sprout until it comes off cleanly, or use a small knife if needed. Harvesting is easiest when the leaves just below each sprout begin to yellow; simply remove those leaves as you pick.
Don’t be in a rush: Brussels sprouts continue to ripen slowly even as the weather cools, so you can return to the garden every few days to pick fresh, ready-to-eat sprouts. Try not to wait until severe frosts or prolonged freezing, though, as this can soften the sprouts and reduce their storage life.
If winter is approaching fast, the whole stalk can be cut and stored in a cool place, with the sprouts left attached—this actually helps extend freshness. For the best flavor and texture, aim to cook or store your harvested Brussels sprouts soon after picking.
With a watchful eye and gentle hands, your late-fall garden can supply you with sweet, homegrown Brussels sprouts that far outshine their grocery store counterparts.
Storing and Preserving Your Harvest
To keep your Brussels sprouts fresh after harvest, start by trimming away any yellow or damaged outer leaves and avoid washing them until you’re ready to use them; moisture speeds spoilage.
For short-term storage, place the sprouts unwashed in a breathable bag, like perforated plastic or a paper bag, and store them in the vegetable crisper drawer of your refrigerator—this typically keeps them fresh for up to a week.
If you need to store them longer, freezing or pickling are excellent options.
Freezing Brussels Sprouts
First, blanch cleaned, trimmed sprouts in boiling water for three to five minutes (smaller ones need less time), then plunge them into ice water to stop the cooking. Once drained and patted dry, spread them in a single layer on a baking sheet to freeze, and finally, seal them in airtight freezer bags or containers.
Pickling Brussels Sprouts
Pack trimmed sprouts into sterilized jars. Prepare a brine by bringing equal parts vinegar and water to a boil with salt, garlic, or spices to taste. Pour the hot brine over the sprouts, leaving a bit of headspace. Seal the jars and let them cool; they’ll keep in the refrigerator for up to two months.
Checking for Spoilage
No matter how you store them, check regularly for signs of spoilage: sliminess, unpleasant sour odors, or grayish-black spots are warning signs that your Brussels sprouts have gone bad. Discard any that show these symptoms to keep the rest of your harvest safe and enjoyable.
Troubleshooting Common Problems
Facing problems like pests, diseases, or slow growth is part of the gardening journey, but there are simple ways to tackle these challenges.
Dealing with Pests
Aphids and caterpillars are among the most common pests—you might spot tiny green bugs clustered on stems or leaves chewed at the edges. To manage them, start by spraying plants with a forceful stream of water to dislodge pests. Follow up by inspecting leaves regularly and picking off caterpillars by hand, or use insecticidal soap for persistent infestations.
Handling Fungal Diseases
Fungal diseases such as powdery mildew or black spots often show up as white fuzzy patches or dark blotches on your plants. To prevent these, space out your plants for better air movement, water at the base rather than overhead, and remove any affected leaves promptly. If you catch the problem early, a homemade spray of baking soda and water can help combat mild mildew.
Addressing Slow Growth
Slow growth, another common frustration, usually points to issues with soil quality, water, or sunlight. Make sure your garden bed receives at least six hours of direct sunlight daily, and enrich your soil with compost to provide necessary nutrients. Overcrowding can also stunt growth, so thin out seedlings where needed.
Benefits of Mulching
Mulching is a practical habit that addresses several problems at once. Apply a two- to three-inch layer of organic mulch like straw, wood chips, or shredded leaves around plants. This not only suppresses weeds and keeps soil moist but also helps regulate temperature, protecting roots from sudden weather changes.
By staying observant, addressing problems promptly, and using these straightforward solutions, you’ll keep your garden healthy and productive.
Enjoying Your Brussels Sprouts
Brussels sprouts fresh from the garden have a mild sweetness that store-bought sprouts often lack, and simple prep methods let that flavor shine. Start by trimming the ends and peeling away any loose outer leaves. Then, halve or quarter larger sprouts to help them cook evenly.
For a quick, delicious option, toss them in olive oil, salt, and pepper, then roast on a baking sheet at 425°F for about 20 minutes, shaking once. Roasting caramelizes their edges and brings out their natural sugars.
For a softer, richly flavored dish, try braising: cook the sprouts in a skillet with a little butter, garlic, and chicken or vegetable broth until they’re tender and savory. Both methods pair well with a squeeze of lemon or a sprinkle of grated Parmesan.
If your harvest is bountiful, consider sharing with neighbors or family—a homegrown bundle makes a thoughtful, healthy gift. You can also preserve your surplus by blanching and freezing sprouts for later use; just boil for three to five minutes, dunk in ice water, drain, and store in airtight bags.
However you enjoy them, remember that the freshest Brussels sprouts need little fuss—simple, classic recipes truly let their garden-fresh goodness stand out.