Introduction
brussels sprouts have surged in popularity in recent years, thanks in part to their rich nutritional profile—they’re loaded with vitamins, fiber, and antioxidants, making them a staple for home gardeners and health-conscious cooks alike. But cultivating this superfood isn’t without its hurdles, and cabbage worms on Brussels sprouts present one of the biggest headaches growers face.
These small green pests can quickly devastate your crop, leaving chewed leaves, weakened plants, and a lot of frustration in their wake. Unfortunately, by the time you spot the damage, cabbage worms are often well established and harder to remove. Whether you’re planting a backyard patch or tending a city container garden, understanding how to identify, prevent, and control cabbage worms is crucial for a successful Brussels sprouts harvest.
In this post, we’ll help you recognize the early warning signs of infestation, share proven prevention strategies—from companion planting to row covers—and offer practical, effective control techniques. With a little knowledge and a few simple steps, you can outsmart these plant-munching pests and enjoy hearty harvests of delicious, healthy Brussels sprouts all season long.
Why Pest Control is Important for Brussels Sprouts
Keeping pests in check is crucial if you want healthy, tasty Brussels sprouts on your table. Pests like aphids, cabbage loopers, and flea beetles can quickly ruin your crop, leading to smaller yields and stunted, misshaped sprouts. You might notice yellowing leaves, tiny holes, or a sticky residue—all telltale signs that insects are feasting on your plants.
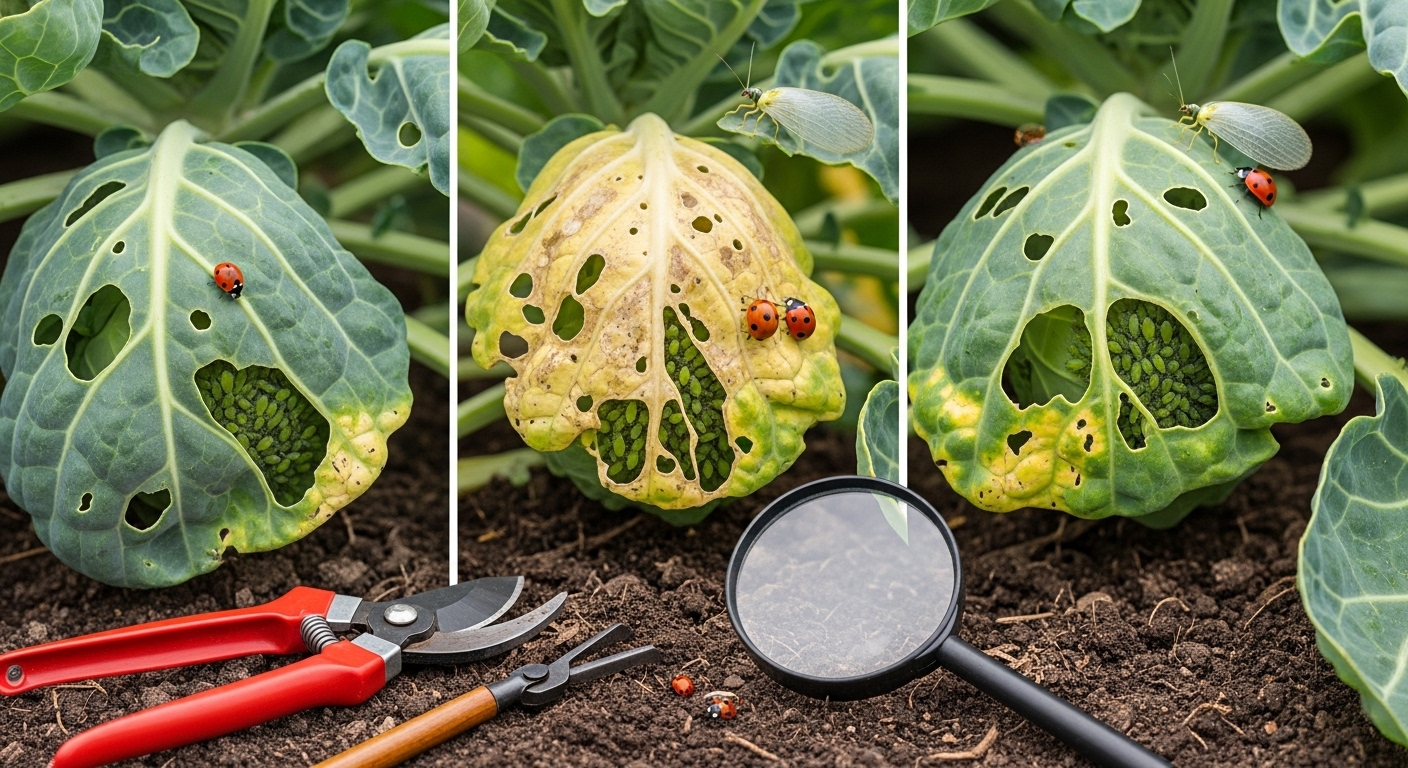
Beyond just appearance, pest infestations often impact flavor, making sprouts bitter or unappetizing. Early detection is your best defense; inspect leaves regularly, especially the undersides where pests tend to hide, and look for chewed edges or clusters of eggs.
Integrated pest management (IPM) is an effective and sustainable way to protect your crop. This means combining smart gardening practices like crop rotation, introducing natural predators—such as ladybugs to eat aphids—and, when necessary, using targeted organic sprays.
For example, planting aromatics like dill nearby can help repel unwanted insects, while spacing your sprouts properly improves air circulation and discourages infestations. By acting quickly and using a variety of strategies, you safeguard your harvest, ensuring your Brussels sprouts grow with better flavor, texture, and appearance.
Frequent checks and proactive care can make all the difference between thriving plants and a disappointing season.
Common Brussels Sprout Pests (and How to Identify Them)
Brussels sprouts, like other brassicas, often attract a variety of pests that can quickly compromise your harvest if left unchecked. One of the most frequent culprits is the aphid, particularly the gray-green cabbage aphid, which forms dense clusters on the undersides of leaves and within sprout buds. You’ll spot their soft, pear-shaped bodies along with a sticky residue called honeydew and distorted, yellowing foliage. Aphids thrive on Brussels sprouts because they’re drawn to the plant’s sap, which offers them an easy meal and shelter.
Another common invader is the cabbage looper, a pale green caterpillar with white stripes running down its back. These inchworm-like pests chew irregular holes in leaves, leaving behind clusters of dark frass (droppings) and ragged leaf edges. They mainly feast on the upper parts of the plant.
Flea beetles, tiny shiny black or bronze beetles, are notorious for quickly hopping away when disturbed. Look for small, round “shot holes” pockmarking seedling leaves; young plants are particularly vulnerable as flea beetles prefer tender, new growth.
Caterpillars, including imported cabbageworms and diamondback moth larvae, feed voraciously on Brussels sprout leaves. They create large holes and “skeletonize” the foliage so that only the veins remain. You’ll often find the pale green, fuzzy imported cabbageworm or the slimmer, wriggling diamondback larvae hidden beneath leaves or camouflaged along stems.
Slugs and snails are yet another threat, especially in moist gardens or mulched beds. Tell-tale signs include irregular holes in leaves and stems and a trail of silvery slime. Sprouts at or near ground level are most at risk from these nocturnal feeders.
These pests are attracted to Brussels sprouts mainly because of the plants’ tender, nutrient-rich leaves and the shelter the dense crop spacing or mulch can provide. Regularly inspecting your crop for these pests will help you catch infestations early, making the difference between healthy, productive Brussels sprouts and a disappointing harvest.
Best Practices to Prevent Pest Infestations
Preventing pest infestations starts with smart planting choices, and a little groundwork goes a long way. Give your plants enough space—crowded beds trap moisture and invite disease, making it easier for pests to move from one plant to another.
Pay close attention to soil: healthy, well-drained soil rich in organic matter grows stronger plants that are better able to fend off insects. Regular mulching and composting can make a big difference. Watering at the base of plants in the morning keeps leaves dry and less attractive to pests like slugs or mildew-loving bugs.
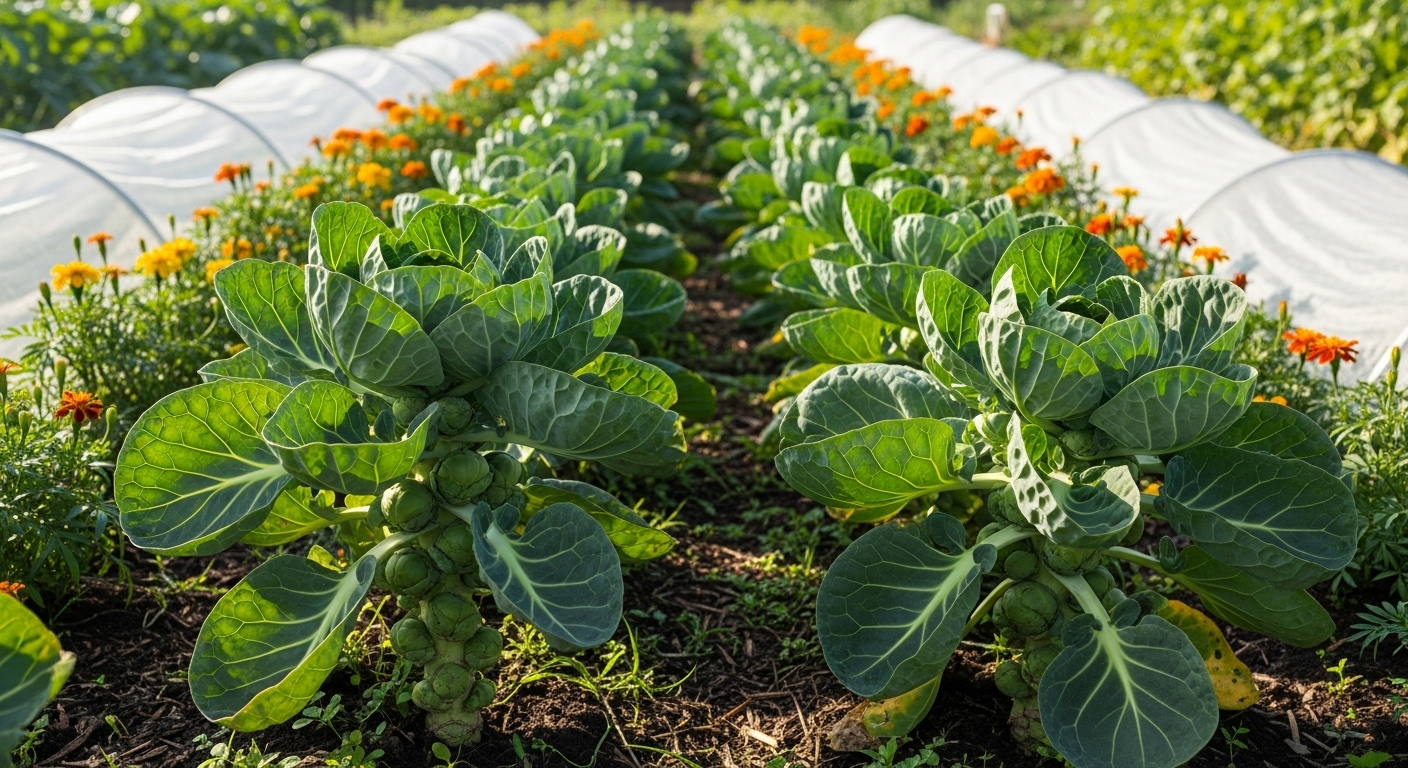
Rotating crops each season is another powerful tool because it confuses pests and interrupts their life cycles—try not to plant crops from the same family in the same spot year after year. Alongside this, companion planting boosts plant defenses naturally; for example, marigolds deter nematodes and aphids, while basil planted near tomatoes can help repel whiteflies.
For even more protection, use lightweight row covers to physically block pests from reaching young seedlings—just make sure to anchor the edges securely and remove them before plants flower if they need pollination.
Regularly inspect your plants for signs of trouble like chewed leaves, sticky residue, or clusters of eggs; catching these early lets you act before an issue gets out of hand. Cleanliness in the garden is key, too: remove dead or fallen leaves and pull up spent plants as soon as harvests are finished, since debris can harbor overwintering pests.
You can also encourage helpful insects like ladybugs, lacewings, and hoverflies by planting nectar-rich flowers (think dill, fennel, or alyssum) around your plot, providing habitats such as bug hotels or leaving a few undisturbed wild corners. These predator insects naturally keep pest populations in check, reducing your reliance on pesticides.
By weaving together these healthy growing practices, you create a resilient, balanced garden that is much less likely to suffer from destructive infestations.
Natural and Organic Pest Control Methods
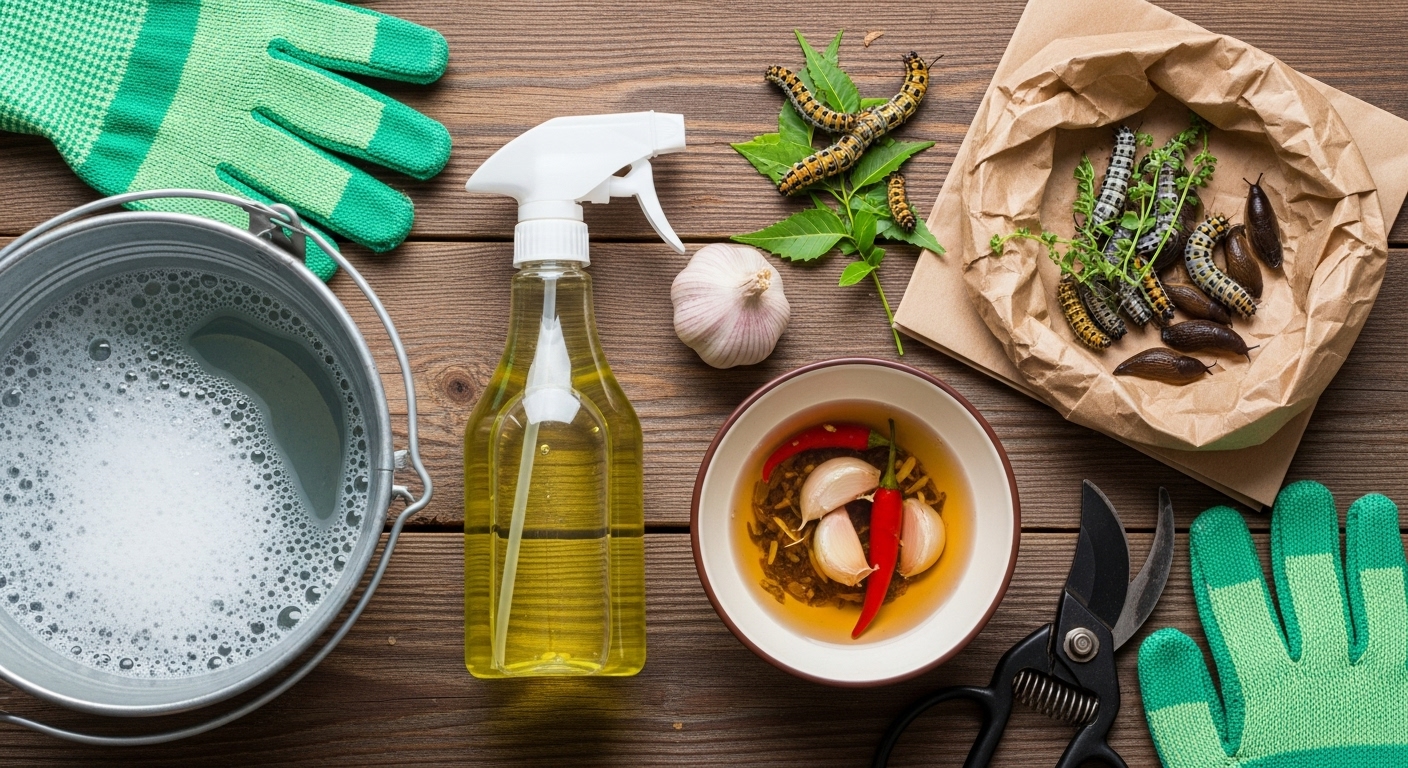
When it comes to managing pests in your garden naturally, handpicking is one of the simplest and most effective techniques. It’s as straightforward as it sounds: take a stroll through your plants early in the morning or late in the evening, when pests like beetles, caterpillars, or slugs are most active, and remove them by hand. Drop the collected pests into a bucket of soapy water to dispose of them safely — this can make a noticeable difference, especially with larger invaders like tomato hornworms or Japanese beetles. While handpicking works well for small gardens or minor infestations, more persistent problems might call for organic solutions like insecticidal soap.
Made from potassium salts of fatty acids, insecticidal soaps break down quickly in the environment and target soft-bodied pests such as aphids, spider mites, and whiteflies. To use, spray the affected plant thoroughly, covering both the tops and undersides of leaves; it’s best applied during cooler parts of the day to avoid damaging the foliage.
Neem Oil
Neem oil, derived from the seeds of the neem tree, is another safe and widely used organic remedy. Neem works on a range of pests, from aphids and mealybugs to fungal diseases like powdery mildew. It acts both as a repellent and disruptor, interfering with insect feeding and reproduction.
For best results, mix neem oil with water and a few drops of mild liquid soap, then spray onto affected plants every 7-10 days. It’s crucial to apply neem oil during the early morning or late evening to prevent leaf scorching in sunlight and to avoid harming beneficial pollinators, which are less active at these times.
DIY Solutions
DIY solutions can also provide a gentle touch. For example, a spray made from a tablespoon of dish soap (make sure it’s free from degreasers or synthetic additives) mixed with a quart of water can help control aphids and spider mites. Another homemade remedy involves steeping crushed garlic or hot peppers in water overnight, straining out the solids, and spraying it on plant leaves to deter pests like caterpillars and leafhoppers.
Always test a small area of the plant first to ensure it’s not sensitive, and reapply after rain or regular watering for maximum effect.
Timing and Monitoring
Timing is vital for all these methods. Regularly monitoring your plants lets you catch pest problems early, before they spiral out of control. Early intervention means you can often rely on the least invasive methods, like handpicking, minimizing the need for sprays.
When using sprays — organic or homemade — target the pests at the right stage of their life cycle, typically when they’re young and more vulnerable. This means checking the undersides of leaves for eggs and newly hatched larvae. Also, remember that even organic sprays can disrupt helpful insects, so treat only infested plants and avoid blanket spraying the entire garden.
Integrating Good Gardening Practices
Finally, integrating these methods with good gardening practices can reduce pest pressure over time. Rotate crops each season to disrupt pest life cycles, keep your garden tidy to eliminate hiding spots, and encourage beneficial insects by planting a variety of flowering plants nearby.
With patience and regular attention, organic and natural pest control techniques can keep your garden healthy, reduce your reliance on chemicals, and create a safer space for pollinators and pets alike.
When to Use Chemical Pesticides (and How to Stay Safe)
Sometimes, despite your best efforts with crop rotation, hand-picking pests, and using organic sprays, Brussels sprouts can still fall victim to relentless infestations—think severe aphid outbreaks or persistent cabbage loopers that overwhelm natural controls. In these situations, chemical pesticides may be the only realistic option to save your crop.
For Brussels sprouts, consider targeted pesticides like pyrethroids for caterpillars or insecticidal soaps for aphids if organic solutions fail entirely. Always choose products specifically labeled safe for edible brassicas, follow all application instructions carefully, and never exceed the recommended amounts.
Apply pesticides during the early morning or late evening when pollinators and other helpful insects are less active, and avoid spraying on windy days to prevent drift onto non-target plants. After application, allow the recommended waiting period before harvesting or consuming your Brussels sprouts.
To protect beneficial insects such as ladybugs and bees, use spot treatments instead of blanket sprays, and try placing floating row covers over your crops immediately after treatment to keep pollinators away from the residue.
Dispose of any leftover chemicals responsibly—never dump them in drains or gardens—and store them in clearly labeled containers out of reach of children and pets. Taking these careful steps will help you control destructive pests when necessary while still preserving the balance of your garden ecosystem.
Conclusion
Consistent monitoring and integrated pest management are essential for keeping your crops healthy and productive. By regularly checking your plants for early signs of pests or disease, you can take action before small problems become unmanageable.
Use a combination of practical methods—like crop rotation, introducing beneficial insects, and removing infected leaves—to protect your garden without relying solely on chemicals. For example, setting up yellow sticky traps helps catch flying pests early, while attracting ladybugs naturally controls aphids.
Remember to adjust your strategies as the season changes or if you notice new challenges popping up. Stay flexible and pay attention to your plants’ needs, because effective crop protection is an ongoing process.
With observation and a proactive mindset, you’ll be well equipped to safeguard your harvest and enjoy a thriving garden year after year.