Introduction
If you’ve ever wondered about the brussels sprouts growth stages or considered adding this nutrient-packed vegetable to your garden, you’re not alone. Brussels sprouts are gaining popularity among home gardeners for their distinct flavor, impressive nutritional value, and ability to thrive in cooler seasons. These mini-cabbage lookalikes not only add variety to your meals but also serve as a rewarding crop that matures just as many gardens wind down in the fall or early winter.
With more people discovering the benefits of growing Brussels sprouts at home, understanding their unique development cycle is key to success. In this easy guide, we’ll walk you through each Brussels sprouts growth stage step by step, so you’ll know exactly what to expect and how to care for your sprouts during every phase. Get ready for a gratifying harvest as you nurture these cool-season champions from seed to plate!
Understanding Brussels Sprouts & Their Growing Needs
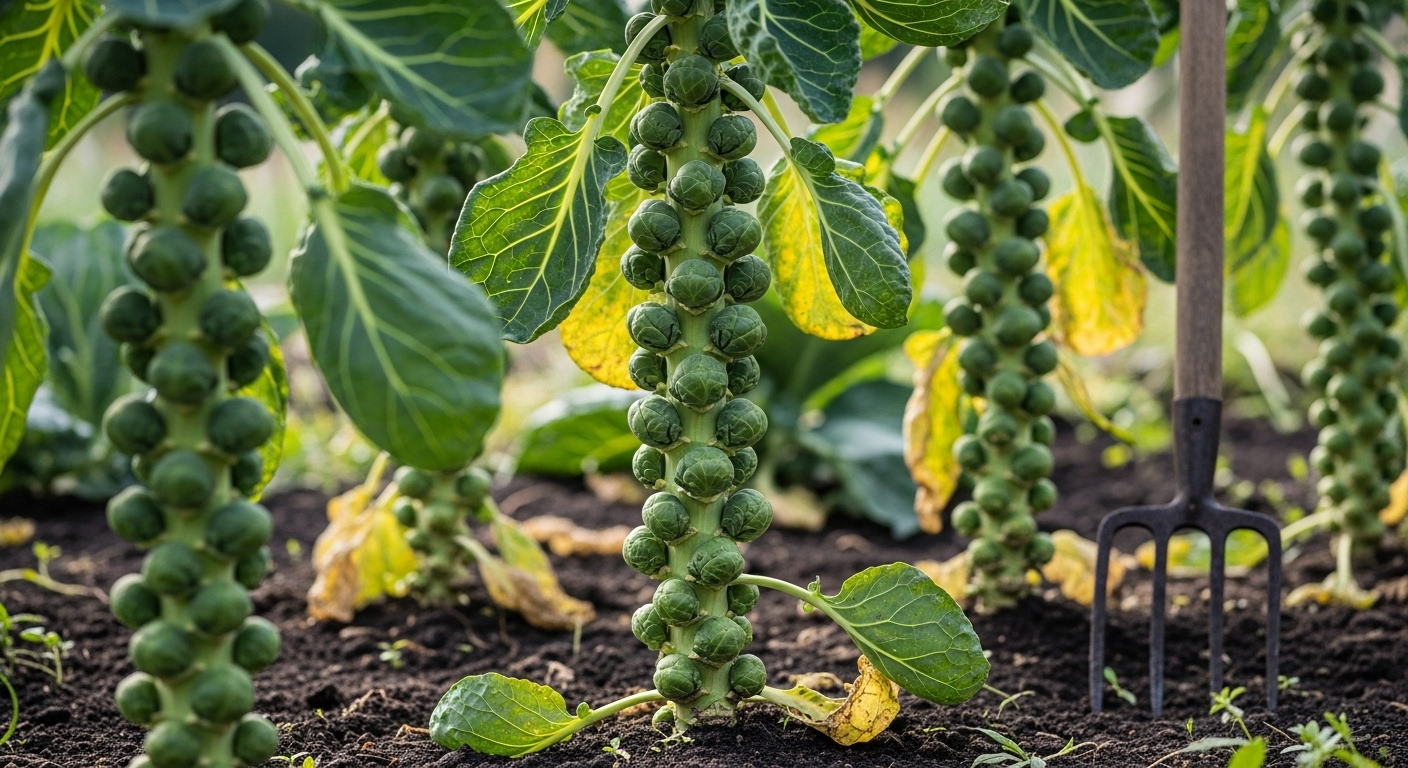
Brussels sprouts are compact, leafy green plants that develop tall stalks studded with miniature cabbage-like buds. Each stalk can reach up to three feet high, lined with rows of edible sprouts that mature along the stem. The leaves are broad and lush, giving the plant a sturdy, ornamental look in the garden.
When harvested at their peak, Brussels sprouts offer a sweet, nutty flavor with just a hint of earthiness—the perfect upgrade for salads, stir-fries, or classic roasted vegetable dishes.
These veggies thrive in cooler temperatures, growing best when average daytime heat stays between 60 and 70°F. High summer heat can lead to bitter, loose sprouts, so timing your planting is key.
For most regions, it’s best to plant in late summer for a fall harvest, taking advantage of the plant’s frost tolerance for the sweetest, most flavorful results.
If you live in milder climates—such as USDA zones 7-10—start seeds outdoors in midsummer or early fall and harvest through winter. In cooler northern regions, sow seeds indoors in early spring, transplanting once the soil is workable.
Always check your local frost dates and count back about 90-100 days before the first hard frost to determine the best time to start. With the right timing and a little attention, Brussels sprouts can be a show-stopping, productive addition to your cool-season garden.
Starting Brussels Sprouts: Seeds vs. Transplants
When deciding whether to start Brussels sprouts from seeds or use transplants, consider your growing season length and desired convenience. Starting from seeds gives you more variety to choose from and is usually cheaper, but requires an early start—about 6-8 weeks before your last spring frost.
Sow seeds indoors in seed trays or small pots using a high-quality seed starting mix, and keep them in a bright, cool spot (around 60-70°F). Water consistently and use a fan for airflow to prevent damping off. Once seedlings are 3-4 inches tall and have at least two sets of true leaves, they’re ready to harden off by gradually introducing them to outdoor conditions for a week before transplanting them into the garden.
Transplants, on the other hand, are great if you’re short on time or missed the indoor sowing window. You can buy sturdy young plants at your local nursery and set them directly in the garden after the last frost.
Direct sowing seeds outdoors is only recommended if you have a long, cool growing season—typically in zones 7 or warmer—because Brussels sprouts need up to 100 days to mature and prefer temperatures under 75°F.
For all methods, timing is key: aim to get mature sprouts forming as fall temperatures cool, rather than during peak summer heat. This often means transplanting seedlings outside in late spring to early summer so sprouts are ready for harvest after the first light frost, which actually sweetens their flavor.
With thoughtful timing and careful transplanting, you’ll maximize your yield of sweet, firm Brussels sprouts.
Planting Brussels Sprouts in the Garden
Growing healthy Brussels sprouts starts with preparing the right soil, as these vegetables thrive in fertile, well-draining ground with a slightly alkaline pH—ideally between 6.5 and 7.5. Begin by loosening the soil to a depth of about 12 inches using a garden fork or tiller, then mix in at least 2 to 4 inches of well-rotted compost to boost nutrients and organic matter.
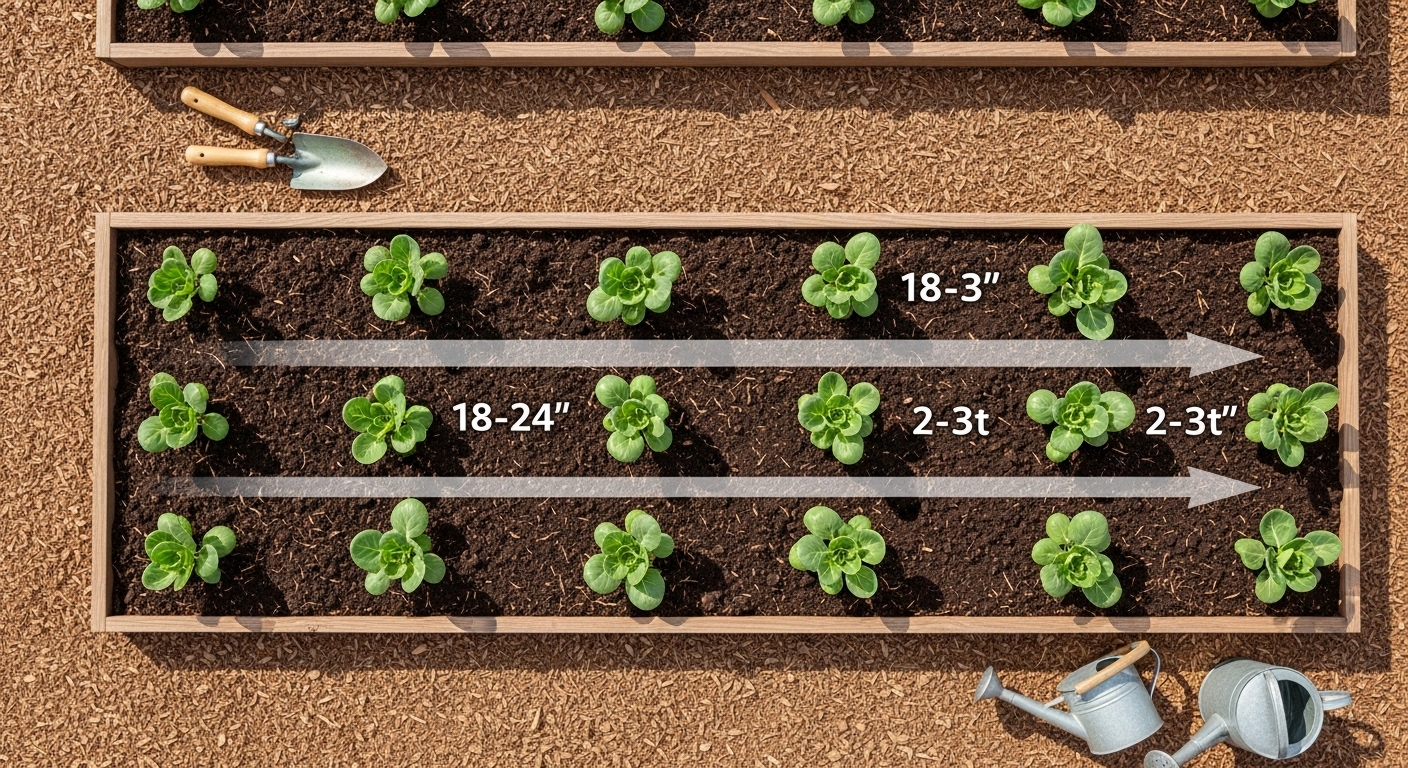
Good drainage is crucial to prevent root rot, so if your soil is heavy clay, add some sand or plant your sprouts in raised beds for better water flow. When planting seedlings or transplants, space each plant 18 to 24 inches apart in rows set 2 to 3 feet apart—this gives the large, leafy plants enough room to mature and allows for good air circulation.
Each seedling should be set in a hole deep enough so the soil comes just below the first set of leaves, then gently pressed into place for stability. Brussels sprouts love sunlight, so choose the sunniest spot in your garden, which encourages sturdy, robust growth.
Water your plants immediately after planting and aim to keep the soil consistently moist but never soggy; a thorough watering once or twice a week is usually sufficient, adjusting for rain and hot spells. At planting time, an all-purpose vegetable fertilizer, raked lightly into the soil around your seedlings, can give young plants a helpful boost—just follow package directions to avoid overdoing it.
If you’re gardening in a small space or don’t have in-ground beds, Brussels sprouts can also be grown in large containers. Choose pots at least 12 to 16 inches deep and wide, use high-quality potting mix, and remember that container plants may dry out more quickly, so monitor soil moisture closely.
With a little planning and proper care from the start, you’ll be set up for a successful Brussels sprout harvest later in the season.
Caring for Your Brussels Sprouts (Watering, Fertilizing & Summer Care)
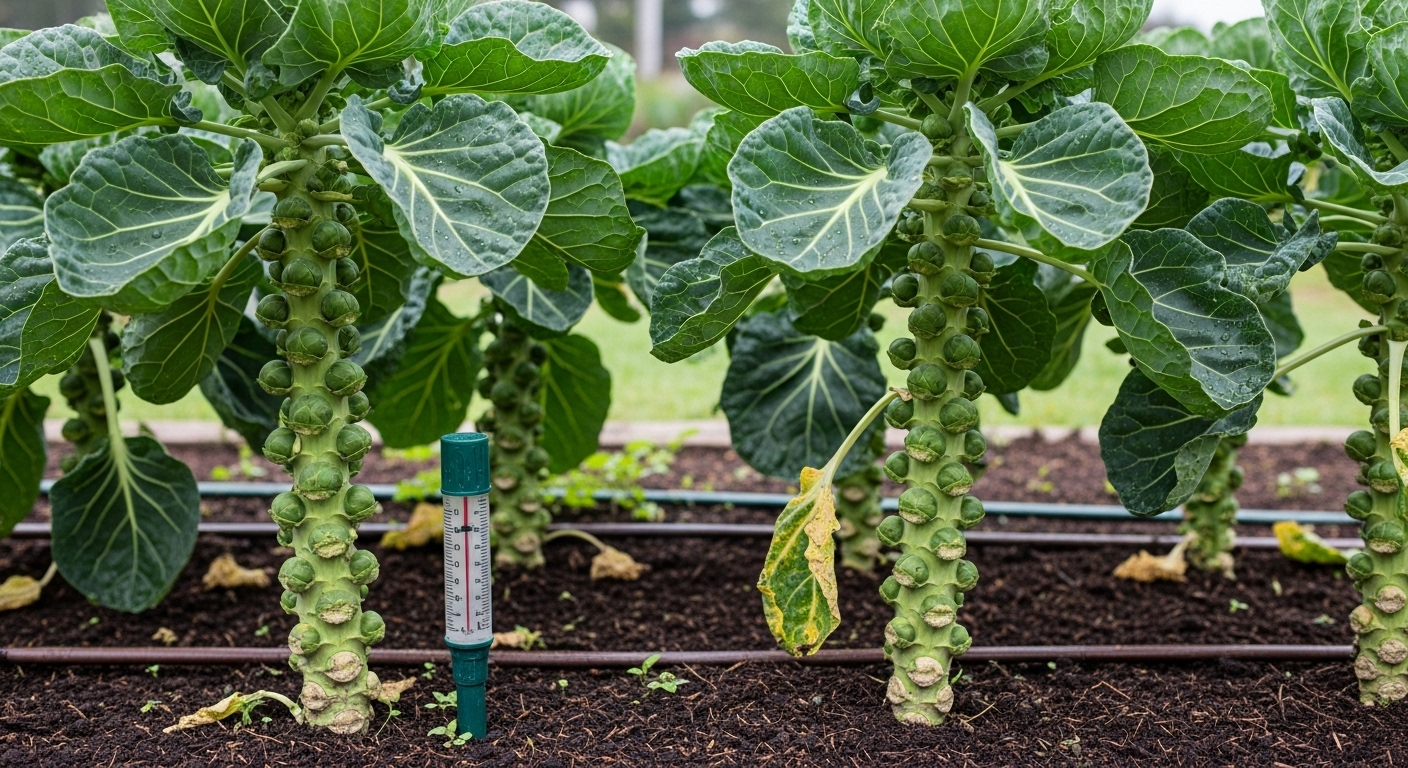
Keeping your Brussels sprouts healthy starts with consistent soil moisture—these plants like their soil to stay evenly damp, not soggy or bone dry. Check the soil with your finger every couple of days; if the top inch feels dry, it’s time to water. Aim for deep, slow watering at the base rather than frequent light sprinkles, which can lead to shallow roots. Early mornings are best, allowing leaves to dry in the sun and reducing disease risk.
As for feeding, Brussels sprouts are heavy feeders and benefit from a balanced fertilizer applied when planting and again about halfway through the growing season. A slow-release granular fertilizer or a diluted liquid fertilizer every three to four weeks can boost growth, but avoid over-fertilizing, which can lead to lush leaves and fewer sprouts.
Mulching around the plants with straw or chopped leaves helps lock in moisture, keep roots cool, and suppress weeds—just be sure not to pile mulch right against the stems.
Summer heat can stress Brussels sprouts, so provide shade during the hottest parts of the day, especially in warmer regions. Use row covers, shade cloth, or even a strategically placed garden umbrella on sweltering afternoons.
Tall, top-heavy plants can struggle in the wind and may topple over, so stake them with garden canes or soft ties as they grow; this keeps them upright and ensures sunlight reaches all levels, helping the sprouts develop evenly up the stalk.
By paying close attention to water, nutrients, protection, and support, you’ll set the stage for sturdy plants and a tasty, bountiful harvest.
Dealing with Pests, Diseases, and Common Problems
Growing your own Brussels sprouts can be incredibly rewarding, but pests and diseases can quickly threaten your harvest. Common insect pests like aphids and caterpillars (especially cabbage loopers and imported cabbageworms) often show up on the undersides of leaves, leaving behind sticky residue or noticeable holes.
Regularly inspect your plants; if you spot small clusters of pests, knock them off with a blast of water or gently remove them by hand. For larger infestations, neem oil or insecticidal soap are safe organic options that are easy to apply.
Fungal diseases also pose a threat—powdery mildew appears as a white, powdery coating on leaves, while clubroot causes swollen, distorted roots and stunted growth. Prevent fungal issues by rotating crops every season, watering at the base instead of overhead, and keeping the garden free of decaying leaves where spores can thrive. If disease takes hold, remove and destroy affected plants to stop the spread.
Other problems, like undersized sprouts or plants that are all leaves with few edible buds, often result from planting too late, crowded spacing, or over-fertilization—especially with nitrogen.
- Sow seeds early and give plants plenty of space (about 24 inches apart) so they have room to grow.
- Feed with a balanced organic fertilizer and avoid heavy nitrogen boosts after the initial leafy growth.
- If you notice yellowing or purple leaves, your soil may be lacking nutrients like nitrogen or phosphorus; a soil test kit can help you pinpoint the issue, allowing you to amend the soil accordingly.
By staying vigilant and using preventive organic strategies, you’ll boost your plants’ resilience and enjoy a healthy crop of Brussels sprouts.
How and When to Harvest Brussels Sprouts
Knowing when to harvest Brussels sprouts can make all the difference in taste and yield. Look for sprouts that are about one to two inches in diameter—roughly the size of a large marble or a small egg. Ready-to-pick sprouts should feel firm and have tight, vivid green leaves. Avoid picking any that feel soft or look yellow or brown.
Start harvesting from the bottom of the stalk upwards, as the lower sprouts mature first. To pick a sprout, grasp it firmly and twist downward until it snaps off cleanly; this method prevents damage to the stalk and encourages the plant to keep producing new sprouts higher up.
As for timing, Brussels sprouts are often at their peak after the first light frost. Cold temperatures trigger the plant to convert starches into sugars, improving the sweetness and overall flavor—so don’t rush the harvest at summer’s end.
After picking, remove any yellowing lower leaves to help the plant funnel energy into new growth. When storing your harvest, keep the unwashed sprouts in a breathable container in the refrigerator; they’ll stay fresh for up to a week.
If you have an abundant crop, Brussels sprouts also freeze well. Simply blanch them in boiling water for a few minutes, cool quickly in an ice bath, and then freeze in an airtight bag for later use. This way, you can enjoy the fruits of your labor well beyond the growing season.
Popular Varieties & Final Tips for a Successful Crop
When choosing garlic for your garden, consider your local climate and cooking goals. Softneck varieties like California Early thrive in mild winters and store well, making them perfect for Southern growers. If you live in a colder region, hardneck types such as German Extra Hardy or Music are your best bet—they withstand frigid winters and have easy-to-peel cloves, which cooks love.
For something truly eye-catching, try purple or striped varieties like Purple Glazer or Creole Red. Their vivid bulbs add a gourmet look to both gardens and dishes without sacrificing flavor.
To boost your chances of a bountiful harvest, follow these tips:
- Use seed garlic (not supermarket bulbs)
- Plant in well-drained soil and full sun
- Mulch well to retain moisture and prevent weeds
- Stop watering a few weeks before harvest to allow bulbs to dry properly
Once the leaves begin to yellow, gently lift the bulbs with a fork, handling them carefully to avoid bruises. Cure them in a dry, shaded place for a couple of weeks before storing.
When cooking, you’ll love the fresh, bold flavor that homegrown garlic adds to roasts, stir-fries, or even raw in salad dressings. With these tips and the right variety for your region, even new gardeners can grow a healthy, flavorful crop that stores well throughout the year.
Conclusion
Growing Brussels sprouts at home is easier than you might think, and the rewards are well worth it. Start with healthy seedlings, plant them in rich, well-drained soil, and provide plenty of sunlight and consistent water. Keep an eye out for pests and support the tall stems as your crop matures. With a bit of patience, you’ll enjoy homegrown sprouts packed with flavor.
If you give it a try, let us know how it goes—share your tips in the comments or ask any questions you have. We’d love to hear about your Brussels sprout adventures!