Introduction to Arugula and Its Benefits
Wondering when to harvest arugula for the freshest, most flavorful salads and dishes? Arugula, also known as rocket, is a leafy green that has earned a special place in kitchens and gardens worldwide—thanks to its bold, peppery taste and speedy growth. Its distinctive bite adds a gourmet touch to everything from sandwiches to pizzas, making it a favorite not only among chefs but also among home gardeners keen on elevating their meals.
Rich in vitamins A, C, and K, as well as essential minerals like calcium, potassium, and folate, arugula packs a nutritional punch that supports immune health, bone strength, and healthy skin. It’s also loaded with antioxidants and phytonutrients that help reduce inflammation and protect against certain diseases.
Growing arugula at home isn’t just good for your health—it’s also incredibly rewarding and accessible, even if you’re a complete beginner. This hardy leafy green thrives in containers or directly in the ground, germinates quickly, and tolerates a range of weather conditions. In fact, you can often enjoy your first harvest just a few weeks after sowing the seeds.
Whether you have a sprawling backyard or a small sunny balcony, you’ll find that arugula’s short growing season and cut-and-come-again harvesting method make it a reliable and productive addition to any edible garden. Let’s dive into how to recognize the perfect time to gather your crop and enjoy arugula at its flavorful peak!
When and Where to Plant Arugula
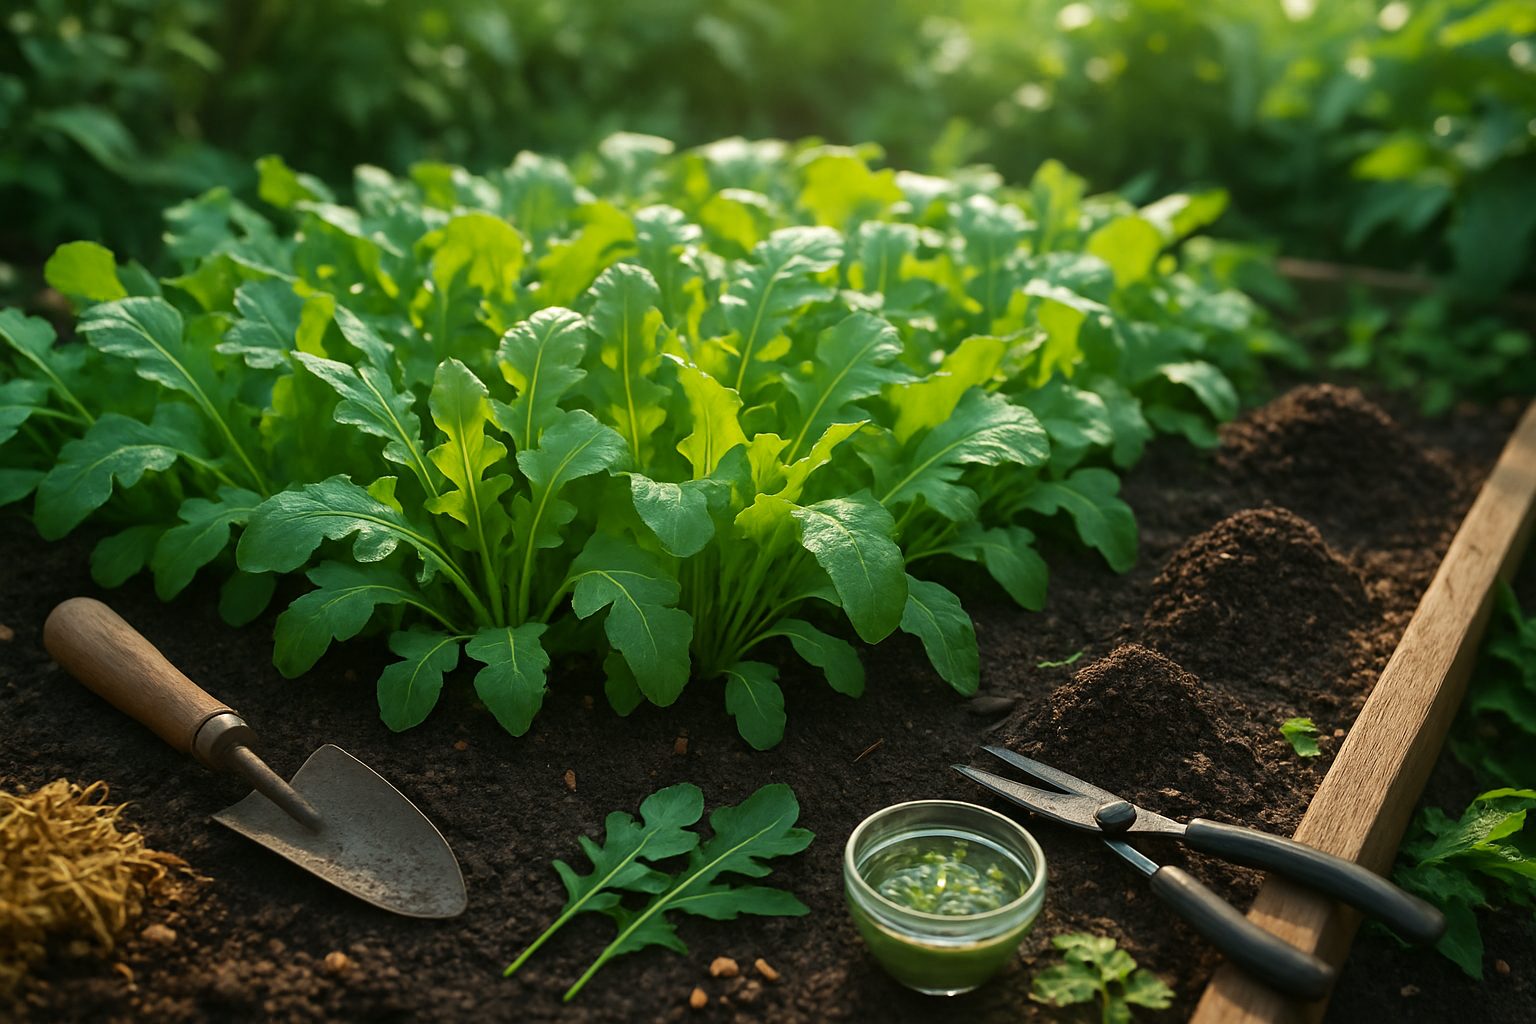
Arugula thrives best when planted in the cool, mild temperatures of spring and fall, making these seasons ideal for sowing seeds outdoors. In most regions, aim to start arugula about two to four weeks before your last expected frost in spring or in late summer for a fall harvest. These periods help avoid the harsh heat that can make the leaves bitter and cause the plants to bolt (go to seed prematurely).
Arugula loves full sun but can tolerate partial shade, especially in warmer climates where afternoon shade can actually help extend the growing season. For soil, well-draining, fertile earth rich in organic matter is best—consider mixing in compost before planting for a nutrient boost. Keep the soil consistently moist but not waterlogged.
The great thing about arugula is its versatility: it grows well in traditional garden beds, raised beds, or containers if you’re working with limited space, such as a balcony or patio. Even indoors, arugula can flourish on a sunny windowsill or under a grow light, making it a fantastic option for apartment dwellers or anyone looking to grow fresh greens year-round.
Just be sure your container is at least six inches deep to allow for strong root development, and thin seedlings so each plant has room to grow. Whether you’re planting rows in your backyard or scattering seeds in a countertop tray, arugula’s adaptability means you can enjoy peppery, homegrown leaves almost anywhere with just a little attention to timing and environment.
How to Plant and Grow Arugula Successfully
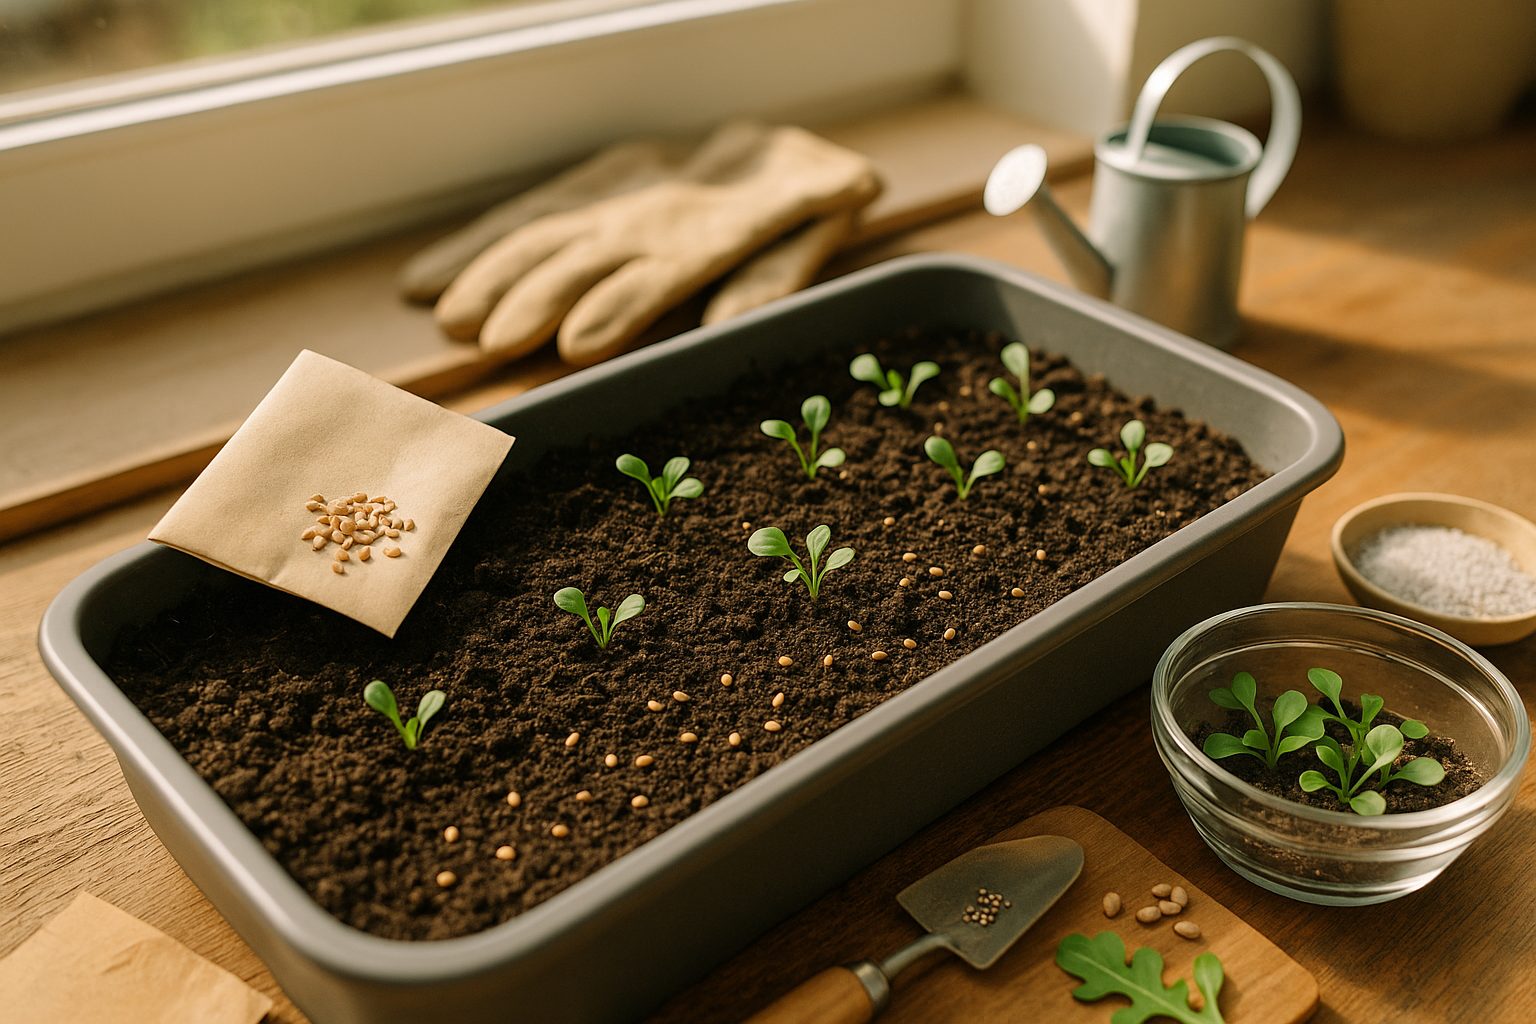
Planting arugula starts with choosing a sunny or partially shaded spot in well-drained soil enriched with compost. Sow seeds directly in the garden as soon as the soil can be worked, typically in early spring or fall when temperatures are cool.
Scatter seeds in rows spaced about 12 inches apart, planting each seed around a quarter-inch deep—simply press them into the soil and lightly cover. Water gently but thoroughly to keep the soil moist without flooding, and continue to mist daily or as needed to promote quick germination.
Once seedlings appear and grow their first true leaves, thin them to about 4 to 6 inches apart to give each plant room to flourish and ensure airflow that prevents disease. Mulch around the bases with straw or shredded leaves to retain soil moisture and keep weeds at bay, helping arugula thrive even in dry spells.
Succession Planting for Continuous Harvests
For continuous harvests, practice succession planting by sowing a new batch of seeds every two to three weeks during the cool season; this ensures you always have fresh leaves ready to pick. Whenever you harvest leaves, choose the outer, mature ones and let the inner ones keep growing—this cut-and-come-again method keeps the plant productive.
Fertilizing and Care
Feed arugula lightly with a balanced, all-purpose fertilizer once or twice during its growing season, but don’t overdo it, as too much nitrogen can make leaves bitter. With regular care—watering in the morning, checking for pests like flea beetles, and pulling out any weeds—your arugula patch will deliver a steady supply of crisp, peppery greens ideal for salads and sandwiches all season.
Caring for Arugula: Watering, Pests, and Common Problems
Arugula thrives in soil that stays consistently moist but never soggy. It’s important to water deeply whenever the top inch of soil feels dry—usually about once or twice a week, depending on weather and soil type. Avoid overhead watering since wet foliage can attract fungal problems; instead, use a watering can or drip hose directed at the base.
To prevent overwatering, plant arugula in well-drained soil and ensure containers have drainage holes. Yellowing leaves are often a sign of overwatering, while wilting or browning leaves can mean it’s time to water more frequently.
Managing Pests
Pests like flea beetles and aphids are common with arugula but can be managed without chemicals:
- Protect young plants with floating row covers until they’re established.
- Handpick visible pests or rinse them off with a gentle spray of water.
- For aphids, introduce helpful insects like ladybugs or spritz leaves with a mild solution of water and dish soap.
Common Problems and Solutions
Frequent issues like yellowed or hole-riddled leaves can also result from nutrient deficiencies or overcrowding. Thin seedlings to allow air flow and feed with diluted compost tea every few weeks. If mildew appears, remove affected leaves and water early in the day so foliage dries out by evening.
Mulching with straw or shredded leaves helps retain moisture and suppress weeds, making arugula care much more manageable. Regularly check the undersides of leaves, as pests often hide there. Pick arugula while the leaves are tender to encourage more growth and prevent bitterness.
With these simple organic practices, you’ll have a healthy, productive patch of arugula all season long.
Harvesting Arugula for Best Flavor
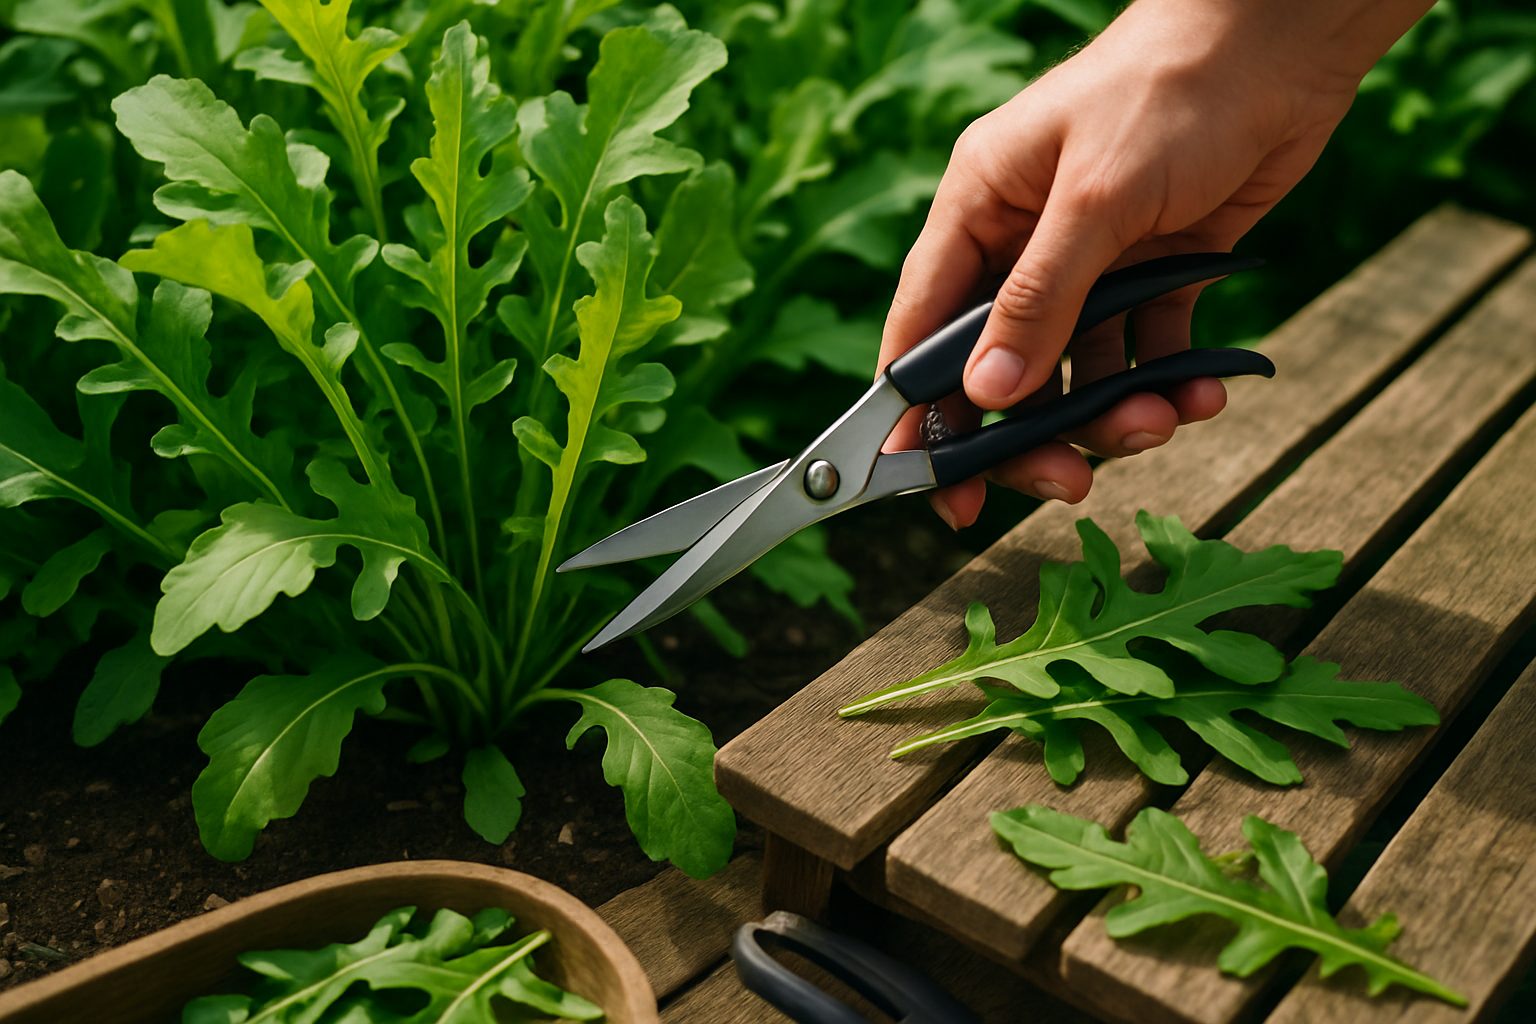
Arugula is at its peak flavor when the leaves are young and tender, typically around 3 to 4 inches long, which usually occurs about 4 to 6 weeks after planting. For the best taste, aim to harvest your arugula in the morning before the sun gets too warm—cooler temperatures help preserve the plant’s peppery flavor and delicate texture.
Instead of pulling up the entire plant, use clean scissors or garden shears to snip off the outer leaves first, leaving the smaller, central leaves to continue growing. This selective “cut and come again” method encourages ongoing production, letting you harvest fresh arugula for several weeks.
Avoid taking more than a third of the plant at any one time, as this can stress the leaves and slow regrowth. If arugula is left too long or exposed to high heat, the flavor can turn bitter and the leaves become tougher, so harvest regularly before the plants start to flower (bolt).
To maintain consistent tenderness, water your arugula evenly and avoid letting the soil dry out between harvests. With these simple steps, you’ll enjoy a continuous supply of flavorful, homegrown arugula all season long.
Saving Seeds and Enjoying Your Arugula
saving seeds from mature arugula plants is a simple, rewarding way to keep your garden going year after year. Allow a few healthy arugula plants to bolt and form tall seed stalks. Once the seed pods turn brown and dry on the plant, carefully snip them off and place them in a paper bag.
After a week or two in a cool, dry spot, gently crush the pods to release the tiny seeds. Sift out the chaff and store your seeds in a labeled envelope until next spring.
Meanwhile, don’t let those fresh arugula leaves go to waste! Toss them into salads for a peppery punch, layer them on sandwiches or pizza, or quickly sauté them with garlic for an easy side dish.
A handful of arugula adds zip to scrambled eggs or homemade pesto—it’s incredibly versatile and works in so many meals.
There’s something special about enjoying greens you’ve nurtured from seed to table; every bite is a reminder of your effort and patience. Growing your own arugula means fresher flavor and the satisfaction of knowing exactly how your food was grown—so savor those crisp, homegrown leaves with pride.