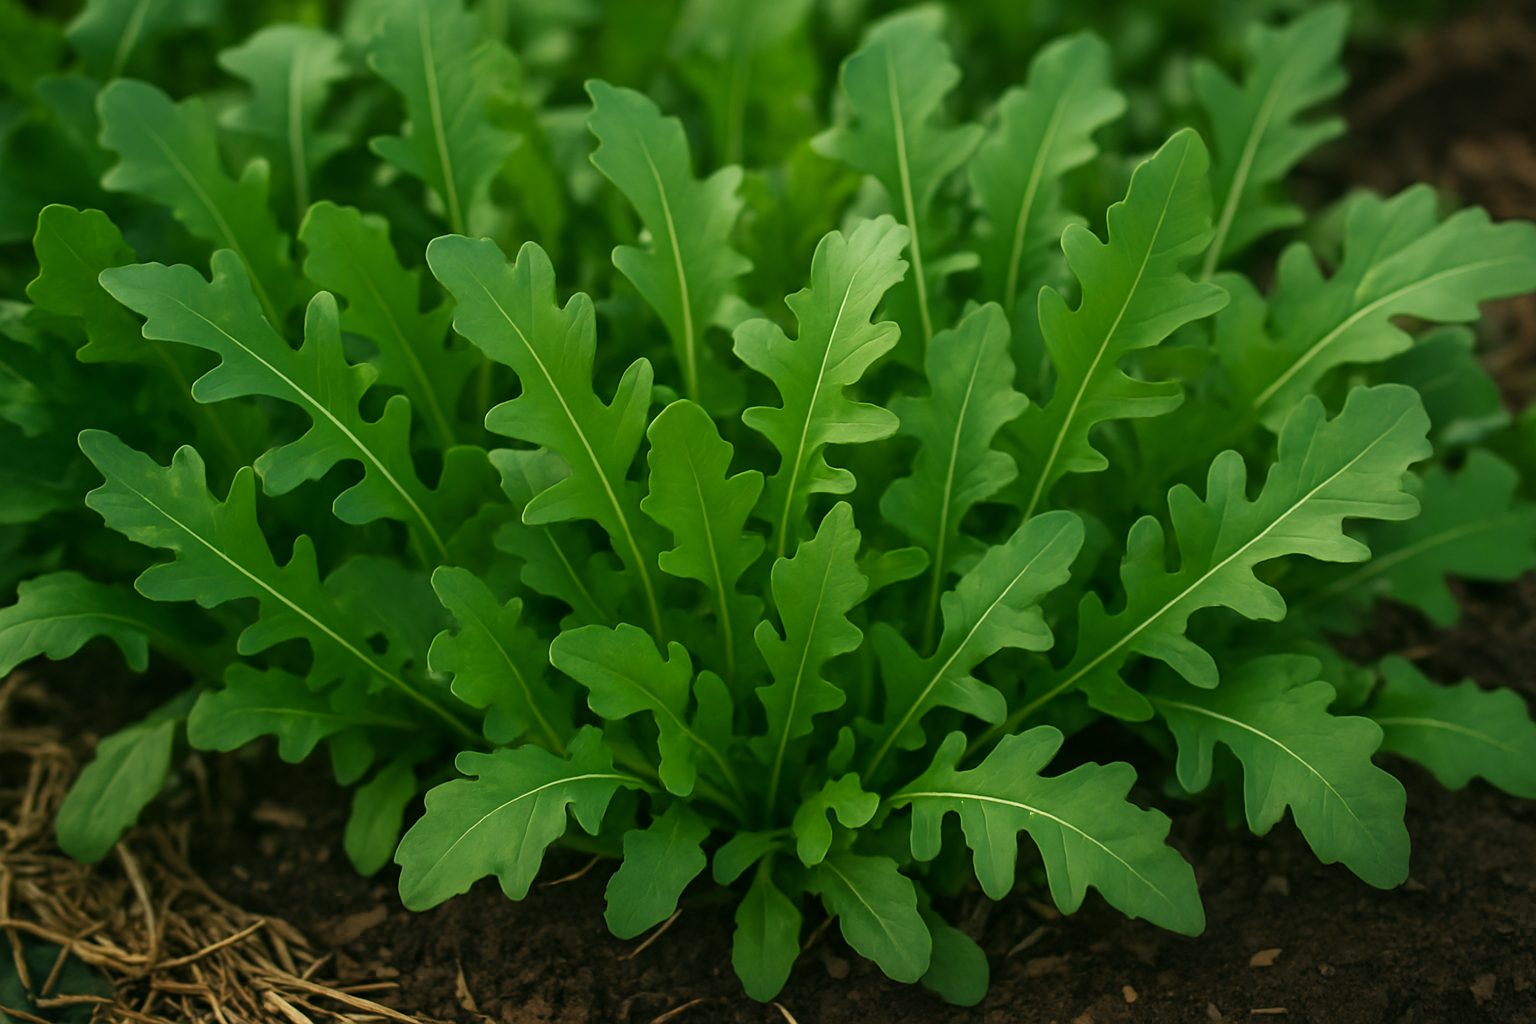
Understanding Arugula
Fertilizing arugula is an essential step if you want a thriving patch of these peppery, crisp greens in your backyard or on your windowsill. Arugula, with its signature zesty flavor and fast-growing nature, has won the hearts of home gardeners everywhere—whether sprinkled atop salads, layered in sandwiches, or tossed into pasta.
This leafy green stands out for its nutritional punch: packed with vitamins A, C, and K, arugula also boasts folate, calcium, and antioxidants that support immune function, bone health, and even help your body fend off harmful free radicals.
Because arugula grows quickly, you’ll often be able to harvest leaves mere weeks after planting—making it a fast, fresh addition to your kitchen. Plus, it tolerates cooler weather, giving you fresh produce even during shoulder seasons when other plants slow down.
For anyone looking to boost their daily greens intake or experiment with kitchen gardening, growing arugula at home offers both challenge and reward. By understanding the basics of fertilizing arugula and giving it what it needs, you’ll enjoy continuous harvests and crisp, flavorful leaves that elevate any dish.
Ideal Growing Conditions for Arugula
Arugula thrives in rich, well-drained soil loaded with organic matter like compost or aged manure mixed in before planting. The ideal soil pH ranges from 6.0 to 7.0—slightly acidic to neutral—which helps the plant absorb nutrients efficiently and grow strong. If you’re unsure about your soil’s pH, a simple soil test kit from your local garden center can be a game-changer.
When it comes to sunlight, arugula prefers full sun to partial shade, needing about 4 to 6 hours of sunlight daily. Excessive summer heat can cause arugula to bolt (go to seed), so if you’re in a hot climate, consider planting where it gets morning sun and afternoon shade, or use a lightweight row cover for protection.
Arugula is a cool-season crop, happiest when temperatures are between 45°F and 65°F—think early spring or fall for planting. For garden placement, choose a spot with good air circulation to cut down on fungal diseases.
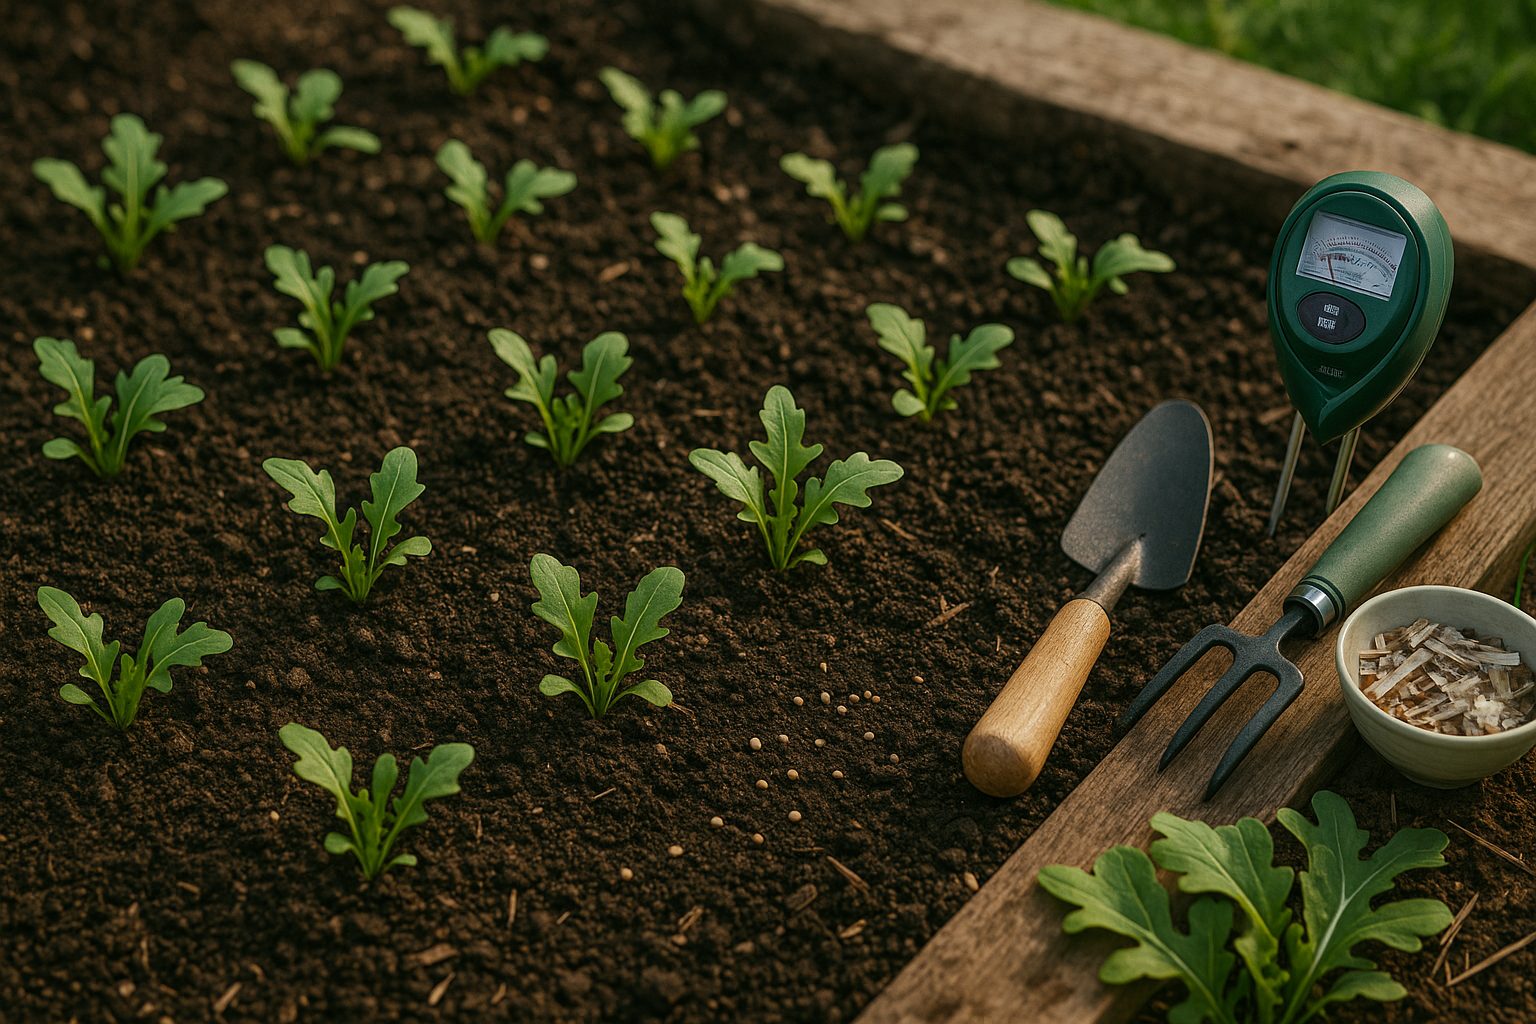
Space seeds or transplants about 4 to 6 inches apart in rows 12 to 18 inches apart. This gives leafy greens plenty of room to grow without crowding, improving their overall health and reducing pest problems. If you’re short on space, arugula grows well in containers too—just make sure your pot is at least six inches deep and has drainage holes.
By tailoring these growing conditions to your local climate, you’ll set your arugula up for a successful, flavorful harvest.
When and How to Plant Arugula
Arugula is a cool-season leafy green that thrives when planted at the right time for your climate. In most regions, it’s best to sow arugula seeds in early spring as soon as the soil can be worked, typically when daytime temperatures hover between 50–65°F (10–18°C).
In warmer southern zones, arugula can also be grown as a fall crop; simply plant seeds about six to eight weeks before your first expected frost. For gardeners in very mild climates (zones 8–10), arugula can be seeded throughout the winter for a steady harvest.
Planting Tips
Choose a spot with well-draining soil and partial to full sun. If you’re using a garden bed, start by loosening the top few inches of soil and mixing in some compost for nutrients. In containers, fill with potting mix, ensuring your pot is at least six inches deep.
Sow seeds directly into the soil, spacing them about 1 inch apart in rows set 12–18 inches apart to allow the plants room to spread. Press seeds lightly into the soil, or cover them with just 1/8 to 1/4 inch of fine soil, as arugula seeds need light to germinate well. Water gently to keep the soil moist but not soggy, and you’ll usually see sprouts in 7–10 days.
Maintaining Your Crop
For ongoing harvests throughout the season, plant a new batch of seeds every two to three weeks. By following these simple steps and timing your plantings to your climate, you’ll enjoy crisp, peppery leaves whether you’re growing arugula in the ground or in a pot on your patio.
Watering, Fertilization, and Care
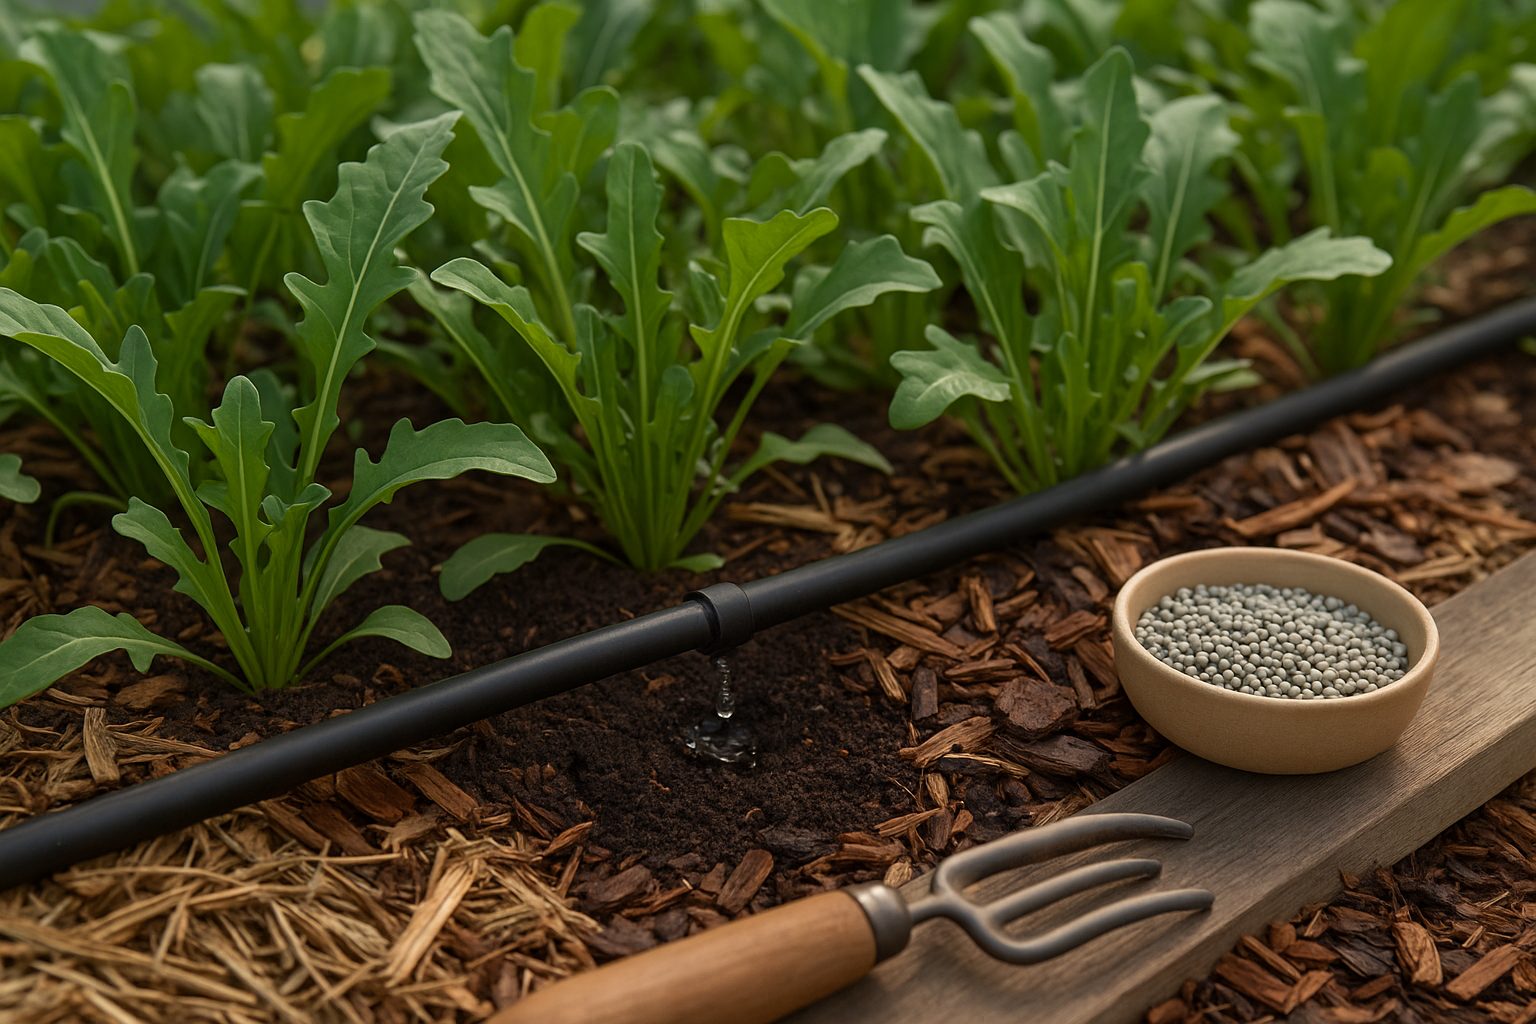
Proper watering is key to healthy, thriving plants, so start by understanding your garden’s specific needs. Most vegetables and flowers prefer deep, infrequent watering rather than daily light sprinkles—aim for one to two inches of water per week, adjusting for rainfall. Drip irrigation or a soaker hose makes this easy and efficient, targeting water directly to the roots while minimizing evaporation and leaf disease. To check if you’re watering enough, stick your finger into the soil; if the top inch is dry, it’s time to water.
When it comes to fertilization, choose a balanced, slow-release fertilizer for most gardens, such as a 10-10-10 (N-P-K) mix, but pay attention to your plants’ specific requirements. Leafy greens like extra nitrogen, while fruiting crops benefit from a phosphorus boost. Feed most plants every four to six weeks during the growing season, but always read the package instructions—over-fertilizing can do more harm than good.
Routine care goes beyond watering and feeding; regular weeding is essential since weeds compete for nutrients and moisture. Try mulching with straw, wood chips, or shredded leaves to suppress weeds, lock in moisture, and regulate soil temperature. Also, check regularly for pests and remove damaged foliage to keep growth robust.
To encourage strong, leafy development, pinch back young plants to promote bushier shapes, and provide support like stakes or cages for taller varieties. With these simple habits, you create a resilient, productive garden that rewards your efforts throughout the season.
Managing Pests and Diseases
Arugula, like many leafy greens, is susceptible to several pests and diseases that can quickly damage crops if left unchecked. The most common culprit in home gardens is the flea beetle—tiny, jumpy black or bronze insects that riddled arugula leaves with small holes, making them look lacey and less appealing.
To keep flea beetles at bay, try floating row covers over your crops right after sowing, which act as a physical barrier. Hand-picking beetles early in the morning and planting arugula alongside strong-smelling herbs like mint or basil may also help deter them.
Another persistent problem is downy mildew, a fungal disease that causes yellowish patches and fuzzy gray mold on the undersides of leaves. This thrives in overly damp conditions, so always water your arugula at the base instead of from above, ensure good air circulation by spacing plants properly, and remove any infected leaves ASAP to slow its spread.
Slugs and aphids are also frequent visitors. For slugs, scatter crushed eggshells or diatomaceous earth as a natural, gritty barrier; for aphids, a strong blast of water or the application of insecticidal soap can help.
Practice crop rotation each season to prevent disease buildup. Regularly check your arugula (at least twice a week) for early signs like chewed holes, discoloration, or sticky residue. Early detection means you can act fast—removing affected leaves, applying organic controls, and avoiding widespread loss.
Growing arugula in raised beds or containers also lets you spot issues quickly and control soil conditions. By combining physical barriers, natural predators like ladybugs, and vigilant gardening habits, you can manage most pest and disease problems organically and enjoy a healthy harvest without resorting to harsh chemicals.
Harvesting and Preserving Arugula
You’ll know your arugula is ready to harvest when the leaves are big enough to eat—typically about 3 to 4 inches long and vibrant green. If you wait too long, especially in hot weather, the leaves may taste bitter and start to bolt (produce flowers), so aim to harvest early and often for the best flavor.
To harvest, use clean scissors or garden shears to snip off the outer leaves about an inch above the base. Leave the inner leaves and core untouched; this method, called “cut and come again,” encourages your arugula to regrow for several more harvests. Water the plants after harvesting to help them rebound faster.
For storage, gently rinse the leaves in cool water and pat them dry with a towel or spin them in a salad spinner. Once dry, wrap the arugula loosely in a paper towel and place it inside a perforated plastic bag in your refrigerator’s crisper drawer. This helps prevent wilting and extends freshness for up to a week.
If you have a bumper crop, you can also preserve arugula by making pesto—simply blend it with olive oil, garlic, cheese, and nuts, then freeze in small portions for later use. Avoid freezing whole leaves, as they become mushy, but arugula pesto holds up well and adds a peppery kick to sauces or pastas long after the harvest season.
Troubleshooting & Common Growing Problems
Growing arugula is usually straightforward, but several common issues can pop up—thankfully, they’re easy to fix with a little know-how.
Bolting
If your arugula suddenly sends up tall stalks and quickly starts flowering (known as bolting), it’s usually a sign of hot weather or stress. Try planting in early spring or fall, and consider providing afternoon shade to keep your greens cooler.
Yellowing Leaves
yellowing leaves often point to overwatering, poor drainage, or nutrient deficiencies. Make sure your soil drains well, water deeply but less often, and add compost or a balanced fertilizer as needed.
Poor Germination
Poor germination can result from old seeds, sowing too deeply, or soil that’s too dry. Always use fresh seeds, plant them just a quarter-inch deep, and keep the soil evenly moist until sprouts appear.
Maintaining Healthy Beds
To keep your arugula beds healthy, harvest leaves regularly—this both encourages new growth and prevents plants from getting leggy.
Pest Control
Watch out for pests like flea beetles; using a floating row cover can save your crop without chemicals.
Crop Rotation
Finally, rotate your crops each year to minimize disease risk.
With these quick fixes and preventative tips, you’ll enjoy a steady harvest of tender, peppery arugula all season long.