Introduction
Growing baby lettuce isn’t just for seasoned gardeners—it’s one of the easiest and most rewarding ways to elevate your homemade salads. Baby lettuce refers to those young, tender leaves harvested just a few weeks after planting, prized by chefs for their soft texture, mild flavor, and beautiful burst of color on any plate.
Unlike mature lettuces, these delicate greens make every bite silky and gentle, never overwhelming your palate but instead highlighting the freshness of your ingredients. Their tiny, crisp leaves are perfect for gourmet salads, adding an elegant touch that’s both visually stunning and satisfying to eat.
The best part? Growing baby lettuce at home is incredibly simple, whether you have a sprawling outdoor bed or just a sunny windowsill to spare. Even if you’re new to gardening, all you need is a shallow tray, quality soil, and the right seeds. The process is so quick that you could be enjoying your first harvest in as little as three weeks.
Imagine snipping off a handful of fresh, pesticide-free greens minutes before dinner—it’s a game-changer for anyone who loves great food and fresh flavors. Let’s explore just how easy and fun it is to grow your own baby lettuce for gourmet salads.
Choosing the Right Baby Lettuce Varieties
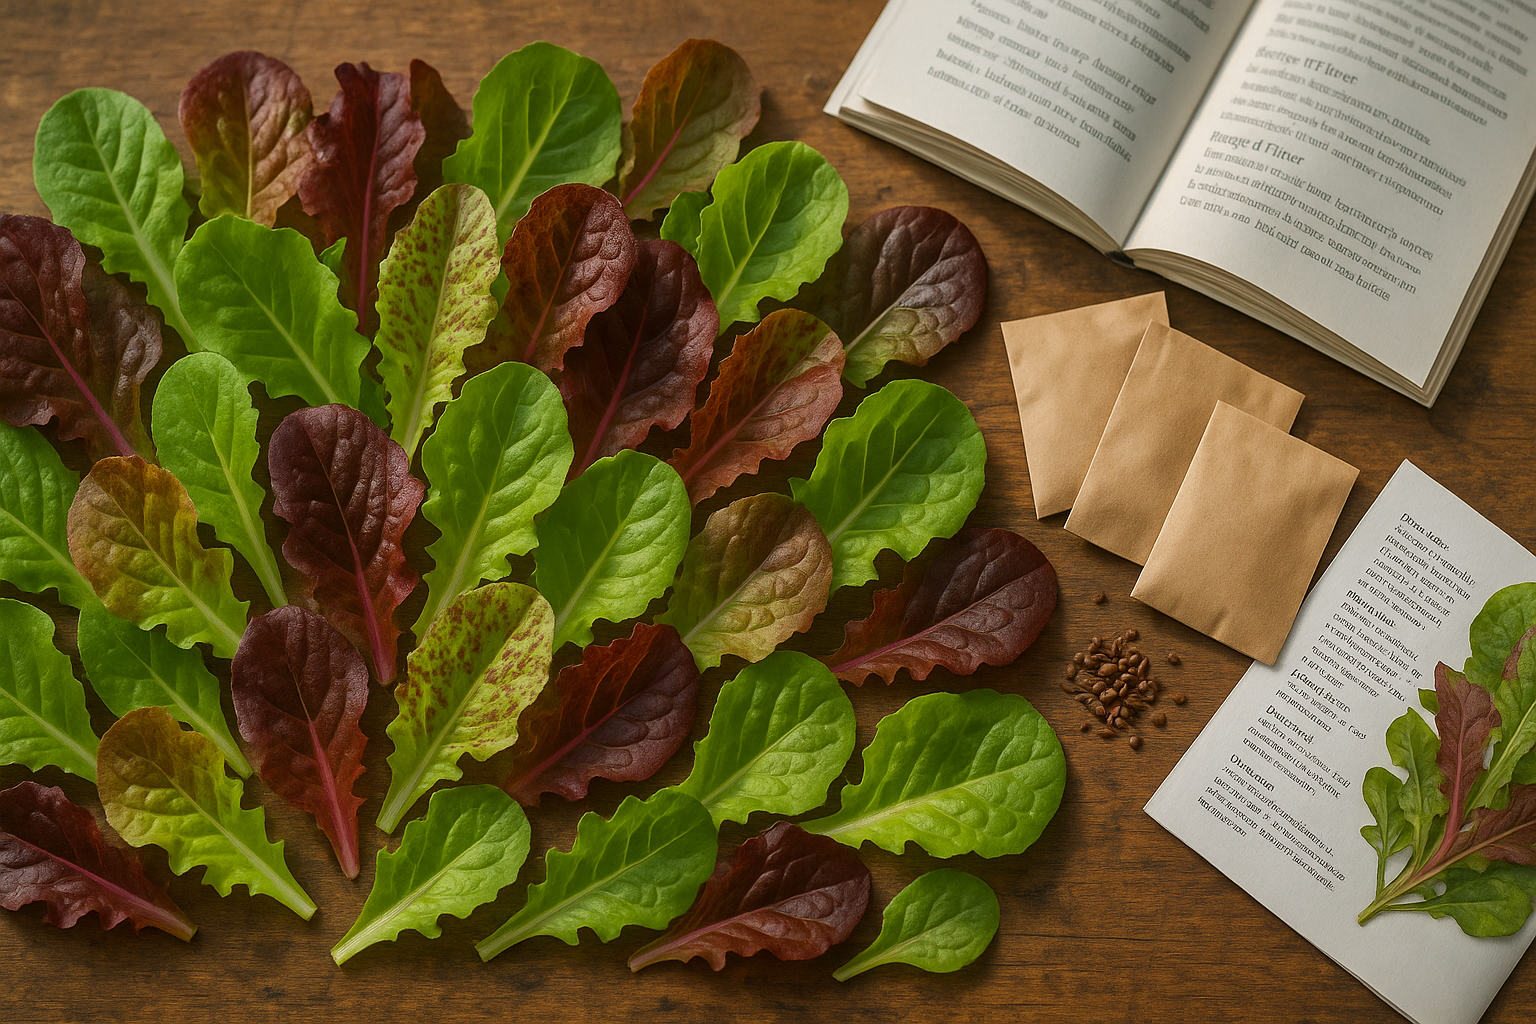
When selecting baby lettuce varieties for cut-and-come-again harvesting or broadcast sowing, it’s best to choose types that thrive in dense plantings and deliver fresh flavor with every snip. Butterhead lettuces like ‘Bibb’ or ‘Buttercrunch’ are favorites thanks to their delicate, melt-in-the-mouth leaves and consistently tender texture, even when picked young.
Oak leaf lettuces—such as ‘Red Oak Leaf’ and ‘Green Oak Leaf’—grow quickly, stay soft at any stage, and add playful shapes and lovely colors to your salad bowl. Romaine types offer a subtle crunch and balance; try compact varieties like ‘Little Gem’ for deeper greens and a nutty-sweet flavor in baby leaves.
For the ultimate color and taste diversity, consider a mesclun mix, which blends baby greens from different species—think lettuce, chicory, arugula, and even young mustards—into a ready-to-pick patchwork of hues and flavors.
What to Look for When Buying Seeds
- Prioritize seeds labeled “cut-and-come-again” or those suited for dense sowing.
- Choose fast-growing selections that are ready to harvest within 25-35 days after sowing to maintain a steady supply.
- Tenderness is key for baby lettuce appeal, along with flavor—look for tasting notes in seed catalogs or customer reviews to match your palate preferences.
- Visual diversity is important; red, bronze, and speckled varieties like ‘Freckles’ or ‘Rouge d’Hiver’ make salads pop and elevate presentations for guests or market stalls.
- Always source seeds from reputable suppliers who offer untreated, non-GMO, and, if possible, organic or heirloom seeds. This supports sustainable growing practices and preserves unique, time-tested flavors and genetic diversity—essential for gardeners who want the healthiest, most vibrant greens season after season.
Preparing Soil and Containers (Indoors or Outdoors)
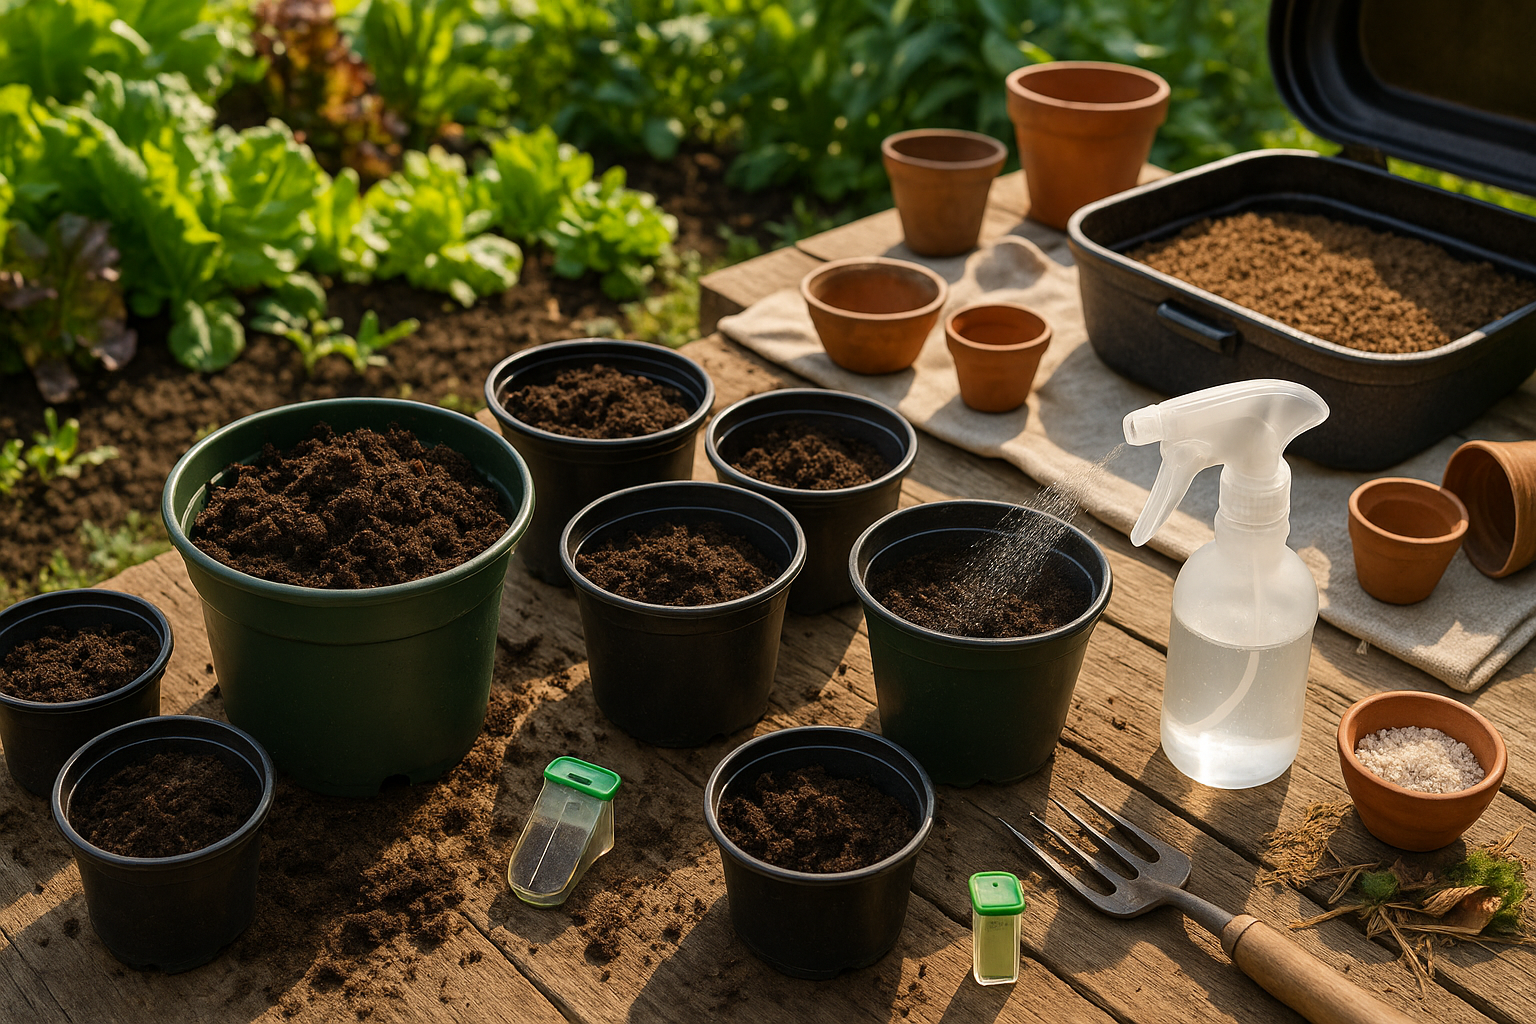
Getting soil right is essential for growing healthy plants, whether you’re gardening indoors or outdoors. Start with well-drained soil that’s rich in organic matter—this helps roots breathe and prevents water from pooling and causing rot. Aim for a slightly acidic to neutral pH range, generally between 6.0 and 7.0; you can test this with an affordable home soil kit.
If you’re planting in garden beds, loosen the soil and mix in compost or aged manure to boost nutrients. For container growing, especially indoors, use a high-quality potting mix rather than garden soil, which is often too dense and can harbor pests.
Make sure each container has drainage holes—at least one per pot—so excess water can escape and prevent soggy roots. Pot size also matters; larger containers (at least 12 inches deep and wide) give roots ample space and help maintain consistent moisture.
Indoors, sterilize your potting mix before filling containers by baking it in the oven at 180°F for 30 minutes to kill harmful pathogens and pests that could threaten seedlings. This step is especially crucial since indoor conditions often allow diseases to spread quickly.
If you’re repurposing old containers, wash them thoroughly with soap and water, then rinse with a dilute bleach solution (one part bleach to nine parts water) to remove lingering diseases.
Whichever method you choose, keep an eye on moisture levels—soil should be damp but never waterlogged. By paying attention to these details, you’ll give your plants the best possible start, whether they’re outside in a garden bed or thriving in containers on your windowsill.
Sowing & Spacing Baby Lettuce
When planting baby lettuce, you have two main options: direct-sowing by broadcasting or sowing in rows. Broadcasting involves scattering seeds thinly over a prepared bed and gently pressing them into the soil. It’s quick and works well for small or raised garden spaces but can result in uneven growth. For more uniform spacing, many gardeners prefer sowing in shallow rows about ¼ inch deep and 6-8 inches apart. This makes it easier to manage weeds and allows better air circulation.
Regardless of the sowing method, baby lettuce thrives when seeded early in the spring or late summer, as it prefers cool soil temperatures (45-65°F) and at least four to six hours of sunlight daily. After seeds sprout—usually within a week—thinning is crucial for healthy growth. Once seedlings have their first true leaves, gently remove extras so the remaining plants are 2-3 inches apart; use scissors instead of pulling to avoid disturbing roots.
This spacing ensures baby lettuce has enough room to grow tender leaves without competing for nutrients or light. If you find it hard to pull tiny plants, try harvesting the thinnings as microgreens for salads. Consistent moisture is key during germination, so use a fine mist to keep soil damp but not soggy.
Remember, baby lettuce grows fast: with the right spacing, light, and timing, you’ll be enjoying fresh greens in as little as 30 days. By choosing the method that best fits your space and thinning diligently, you’ll get a steady supply of tender, sweet lettuce all season long.
Watering and Daily Care
Proper watering is the backbone of healthy plants, especially if you’re growing tender vegetables and herbs. Aim to water deeply but less often—typically once or twice a week—so roots grow down and drought stress is minimized. The goal is to keep soil consistently moist without it ever becoming waterlogged or muddy, which can lead to root rot.
You can check moisture levels by poking your finger an inch into the soil; if it feels dry, it’s time to water. For the best results, water early in the morning to limit evaporation and give foliage time to dry before nightfall, reducing disease risk.
To maintain plant health and encourage tender growth, use a balanced liquid fertilizer every two or three weeks during the peak growing season. Watch how your plants respond and adjust amounts if you notice yellowing leaves or weak growth.
Shading is important for leafy greens and herbs in hot climates—use a lightweight shade cloth during the hottest part of the day or plant taller crops nearby to provide natural shelter. High humidity helps prevent leaves from drying out but can also lead to fungal issues; keep the air moving by spacing plants well and, if growing indoors, use a small fan.
Be proactive against common problems like aphids and spider mites—inspect the undersides of leaves often and spray pests off with water, or use insecticidal soap if needed.
Bolting, when a plant prematurely flowers and goes to seed, happens if temperatures spike or if watering is inconsistent; keep soil cool with mulch and steady moisture. Fungal diseases, such as powdery mildew, thrive in wet, crowded conditions, so avoid overhead watering and prune regularly for airflow.
With a little daily observation and care, your garden will stay thriving and productive.
Harvesting for Maximum Tenderness
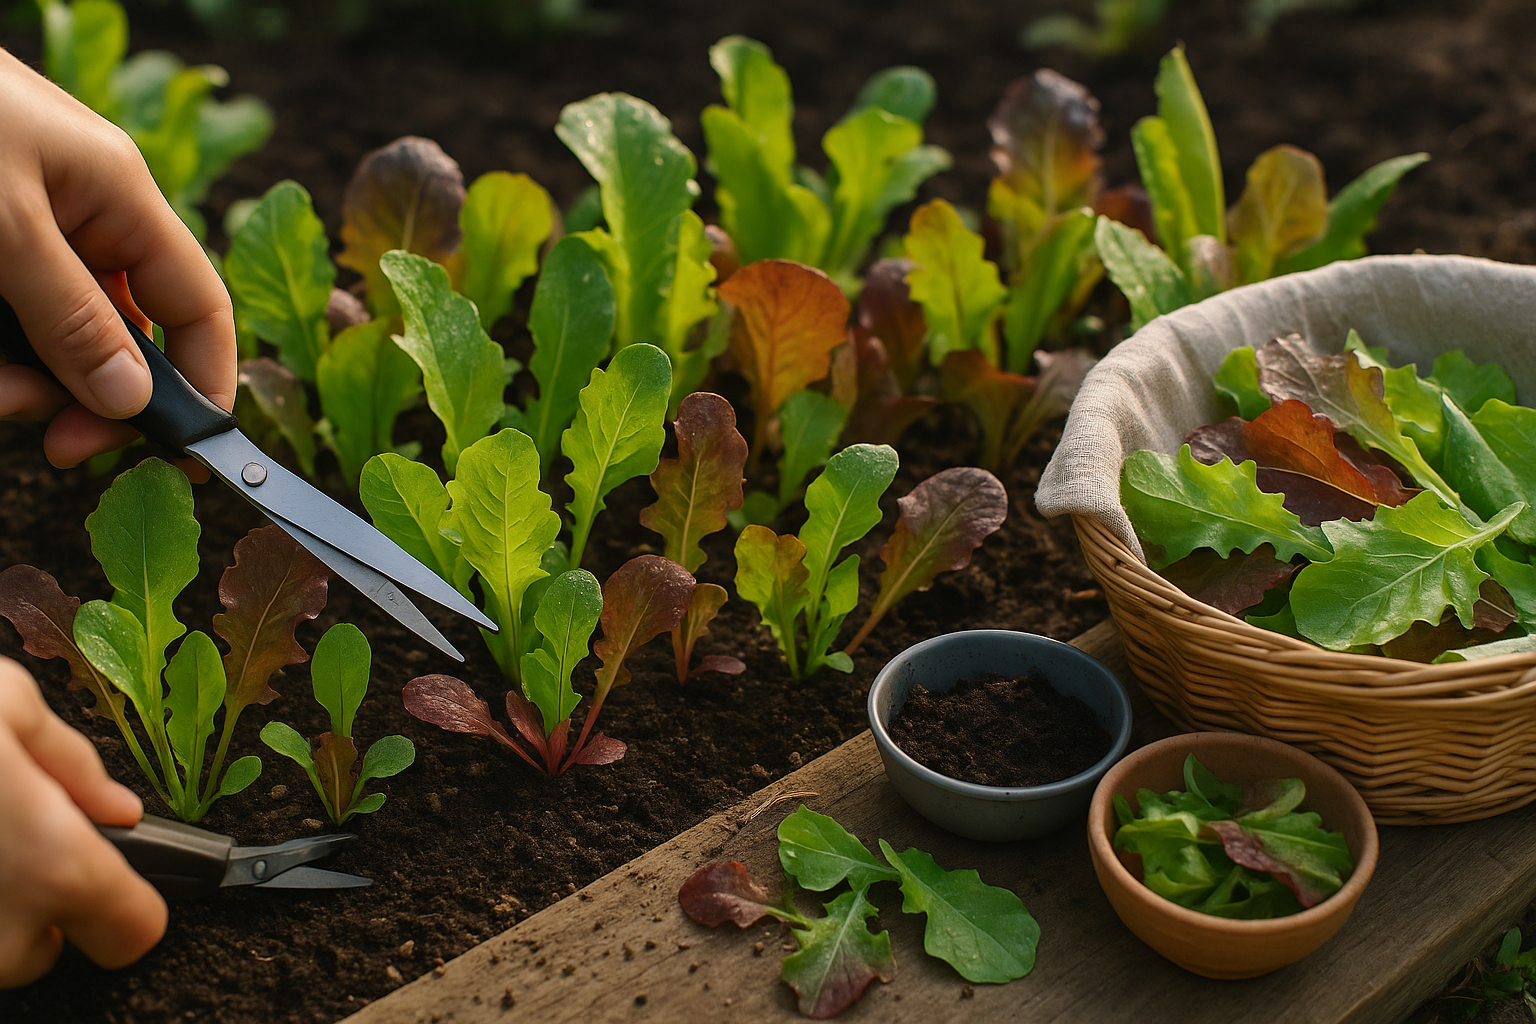
Harvesting baby leaves at just the right time is the secret to truly tender salads with unbeatable flavor. The ideal moment to snip them is when each leaf is about two to four inches long—big enough to harvest easily, yet still young and sweet, without a hint of bitterness.
Morning is the best time for harvesting, as the leaves are at their crispest and least stressed from the sun’s heat. To keep your greens growing strong and tasty week after week, use the cut-and-come-again method: simply trim the outer leaves an inch above the soil, leaving the center of the plant untouched so it can regrow. This way, you’ll enjoy multiple harvests from the same patch all season long.
For harvesting tools, opt for clean, sharp scissors or garden shears—dull blades can crush stems, causing bruising and shortening shelf life. Always wash your hands before heading out, and sterilize your tools with a quick swipe of rubbing alcohol to prevent spreading disease between plants.
Work gently, grasping the leaves near their base and snipping cleanly to avoid damaging delicate growth. Place harvested leaves straight into a clean basket or bowl in the shade, and rinse them in cool water promptly to maintain freshness and crunch.
With this attentive approach, you’ll enjoy baby greens that are not only tender and flavorful but also abundant throughout the growing season.
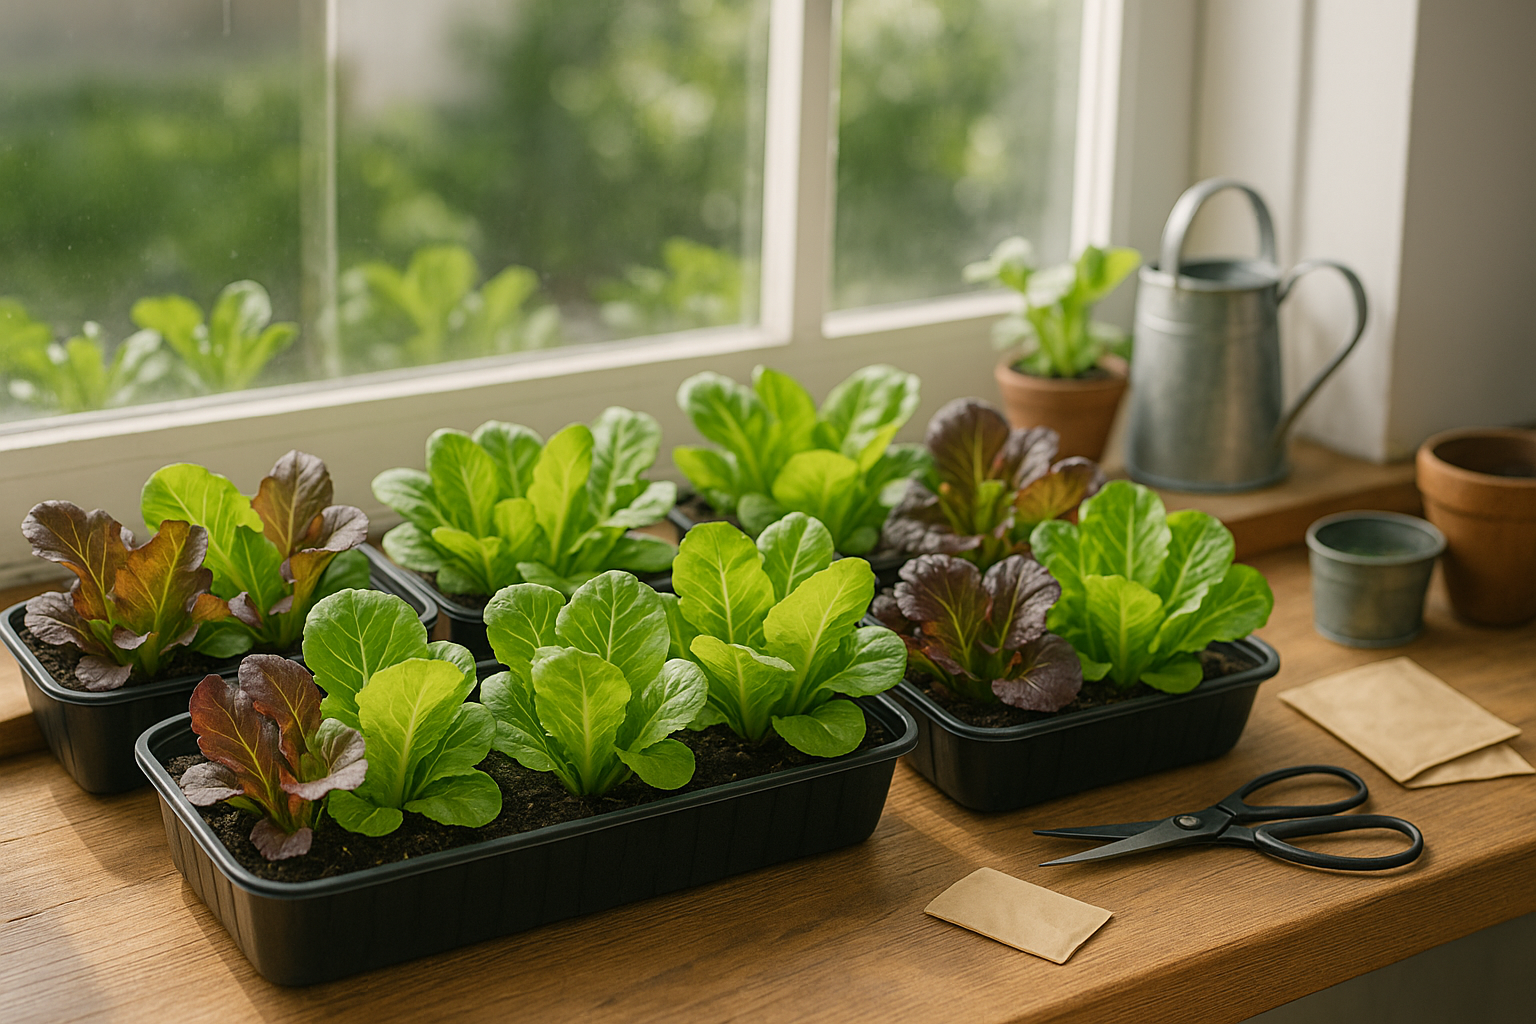
Tips for Growing Baby Lettuce Indoors
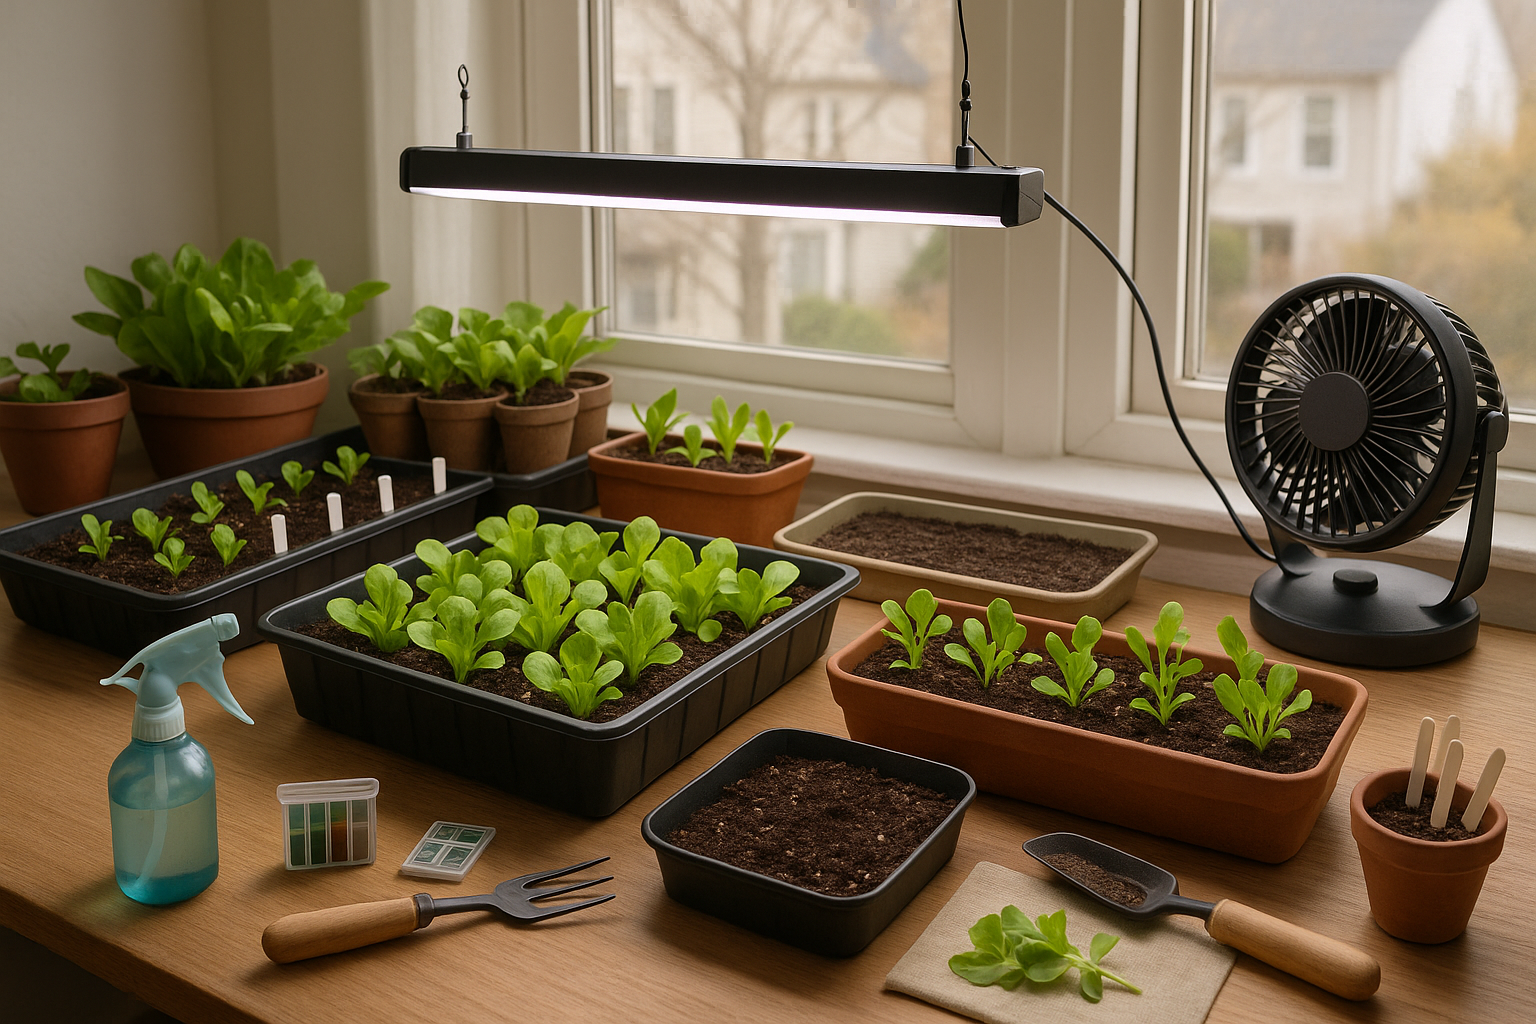
Growing baby lettuce indoors is a rewarding way to enjoy fresh, tender greens year-round, even if you don’t have outdoor garden space. To set yourself up for success, start by picking a spot in your home that gets at least six hours of sunlight each day—south-facing windowsills are ideal.
If natural light is limited, consider using full-spectrum LED grow lights, which mimic sunlight and ensure your lettuce thrives regardless of the season. Choose shallow containers—like seed trays or repurposed food containers with drainage holes—since baby lettuce roots stay short and the soil only needs to be about two to three inches deep. Use a lightweight potting mix to prevent waterlogging and promote healthy growth.
One of the biggest advantages of indoor growing is that you control the environment, so there’s no worry about outdoor pests or harsh weather changes. However, keeping the soil evenly moist without overwatering can be a challenge, and stagnant indoor air may lead to mildew; placing a small fan nearby can improve airflow and reduce this risk.
Watch for signs of weak or leggy growth, which usually means your plants need more light—move them closer to the window or increase the time under grow lights if this happens. Be realistic about yields: while indoor baby lettuce offers convenience and a steady supply, the harvests will be smaller than a garden bed.
Still, for the freshest salads, simply snip leaves as needed and reseed every couple of weeks for continuous greens. With these practical tips and a little experimentation, you’ll discover how simple—and satisfying—it can be to grow your own lettuce indoors.
Conclusion
Growing baby lettuce at home is wonderfully simple and adds unmatched flavor to your meals. You don’t need much space—just a sunny windowsill or a few pots on the patio will do. Experiment with different lettuce varieties like butterhead or romaine, and try varying your planting times to discover what thrives best in your space. With just a little effort, you can enjoy crisp, fresh salads whenever you like, picked straight from your own garden. Start today, explore the possibilities, and make delicious, homegrown greens a vibrant part of your daily routine.