Choosing the Right Container and Location
Wondering if you can successfully grow bell peppers in grow bags? The answer is yes! With a few smart choices, your bell peppers will thrive from seedling to harvest.
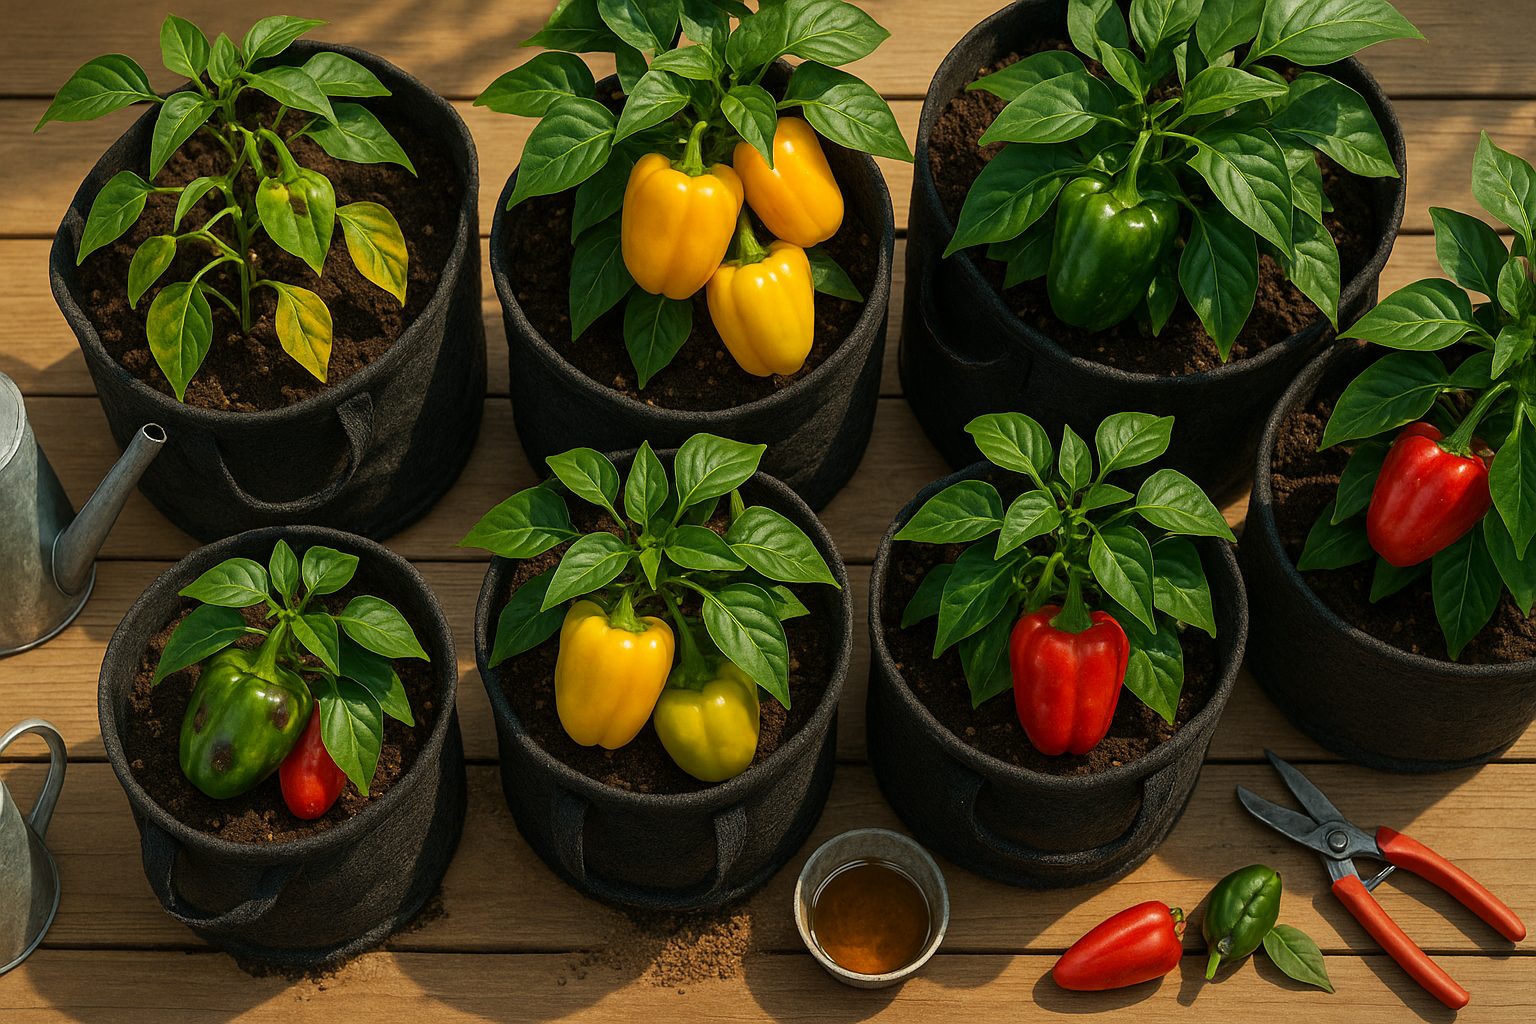
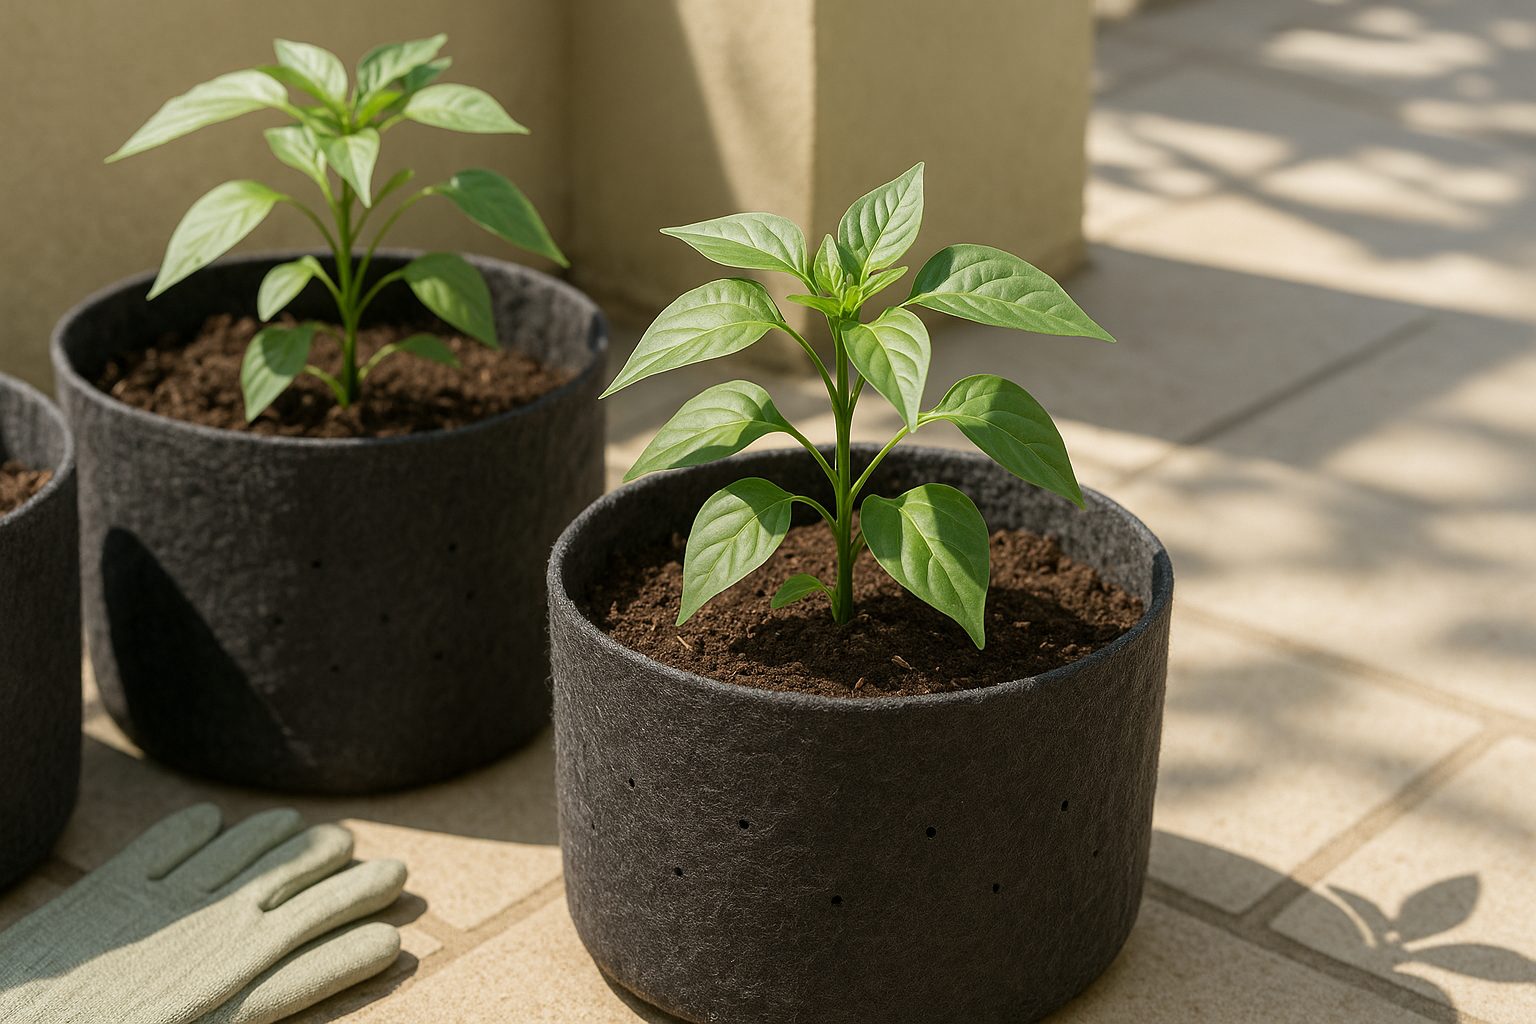
The first step is picking the right grow bag—size matters more than you might expect. Bell peppers need bags that hold at least 5 to 7 gallons of soil, giving their roots enough space to stretch and absorb nutrients. The material is equally important—breathable fabric grow bags are a top choice. Unlike plastic or ceramic pots, fabric bags provide excellent airflow, helping prevent overheating and promoting healthy root development for robust, flavorful harvests.
Proper Drainage
Proper drainage can’t be overlooked. Too much water sitting at the roots will quickly spell disaster for your peppers, leading to dreaded root rot. Fabric grow bags naturally offer good drainage compared to rigid containers, but it’s still wise to use high-quality potting mix and avoid compacted soils. If you’re using a different material, make sure you drill or check for adequate drainage holes before filling the bag.
Choosing the Right Location
Location is another crucial factor. Bell peppers are sun lovers, needing a minimum of 6 to 8 hours of direct sunlight each day. The more light, the better the yield and flavor. Position your grow bags on patios, balconies, or any sun-drenched spots you can find.
One huge advantage of using grow bags is their portability—you can easily move them throughout the day or season to chase the sun or shield your peppers from harsh midday heat or sudden storms. For example, if a late spring cold snap threatens or if you spot one area of your yard that gets brighter afternoon rays, simply pick up the bag and move it for the best possible growing conditions.
Final Tips
With the right container, smart drainage, and careful placement, growing bell peppers in grow bags is not only doable—in many cases, it’s the easiest way to enjoy bountiful, healthy peppers even if ground space is limited. Let your containers work for you, and watch your plants thrive wherever you choose to grow them!
Selecting Pepper Varieties for Containers
When growing peppers in containers, choosing the right variety can make all the difference. Look for compact or dwarf pepper plants that thrive in small spaces—some great choices for sweet peppers include ‘Lunchbox Mix,’ ‘California Wonder,’ and the mini ‘Sweet Banana.’ For those who like heat, try ‘Jalapeño Early,’ ‘Cayenne Compact,’ or the charming ‘Basket of Fire,’ which produces fiery little chilies and boasts a naturally bushy growth perfect for patios.
Starting from seed lets you access a wider range of varieties, including specialty and heirloom options not found in local nurseries. But keep in mind that seeds require more time, a warm germination spot, and a head start indoors—usually 8 to 10 weeks before the last frost.
Nursery-grown plants offer convenience and instant garden gratification; they’re especially helpful if you’re new to gardening or want to save time. However, the selection might be limited and not as unique as what you’d find from seed catalogs.
Whichever route you choose, prioritize reputable sources:
- Order seeds from trusted companies like Johnny’s Selected Seeds, Baker Creek, or Renee’s Garden to ensure good germination and true-to-type plants.
- If picking up young plants, shop at local nurseries known for healthy, pest-free starts—skip any with yellow leaves or roots circling inside their pots.
- Avoid big-box store plants that often sit stressed on shelves.
Choosing robust, high-quality seeds or transplants sets you up for a productive, beautiful container pepper garden—with abundant harvests right at your doorstep.
Planting Peppers at the Right Time & Starting the Right Way
Getting peppers off to a strong start begins with timing your planting right. In warmer climates, like the southern U.S., you can sow seeds indoors as early as late January or February. Cooler regions should wait until 8–10 weeks before the last expected frost, usually between March and April.
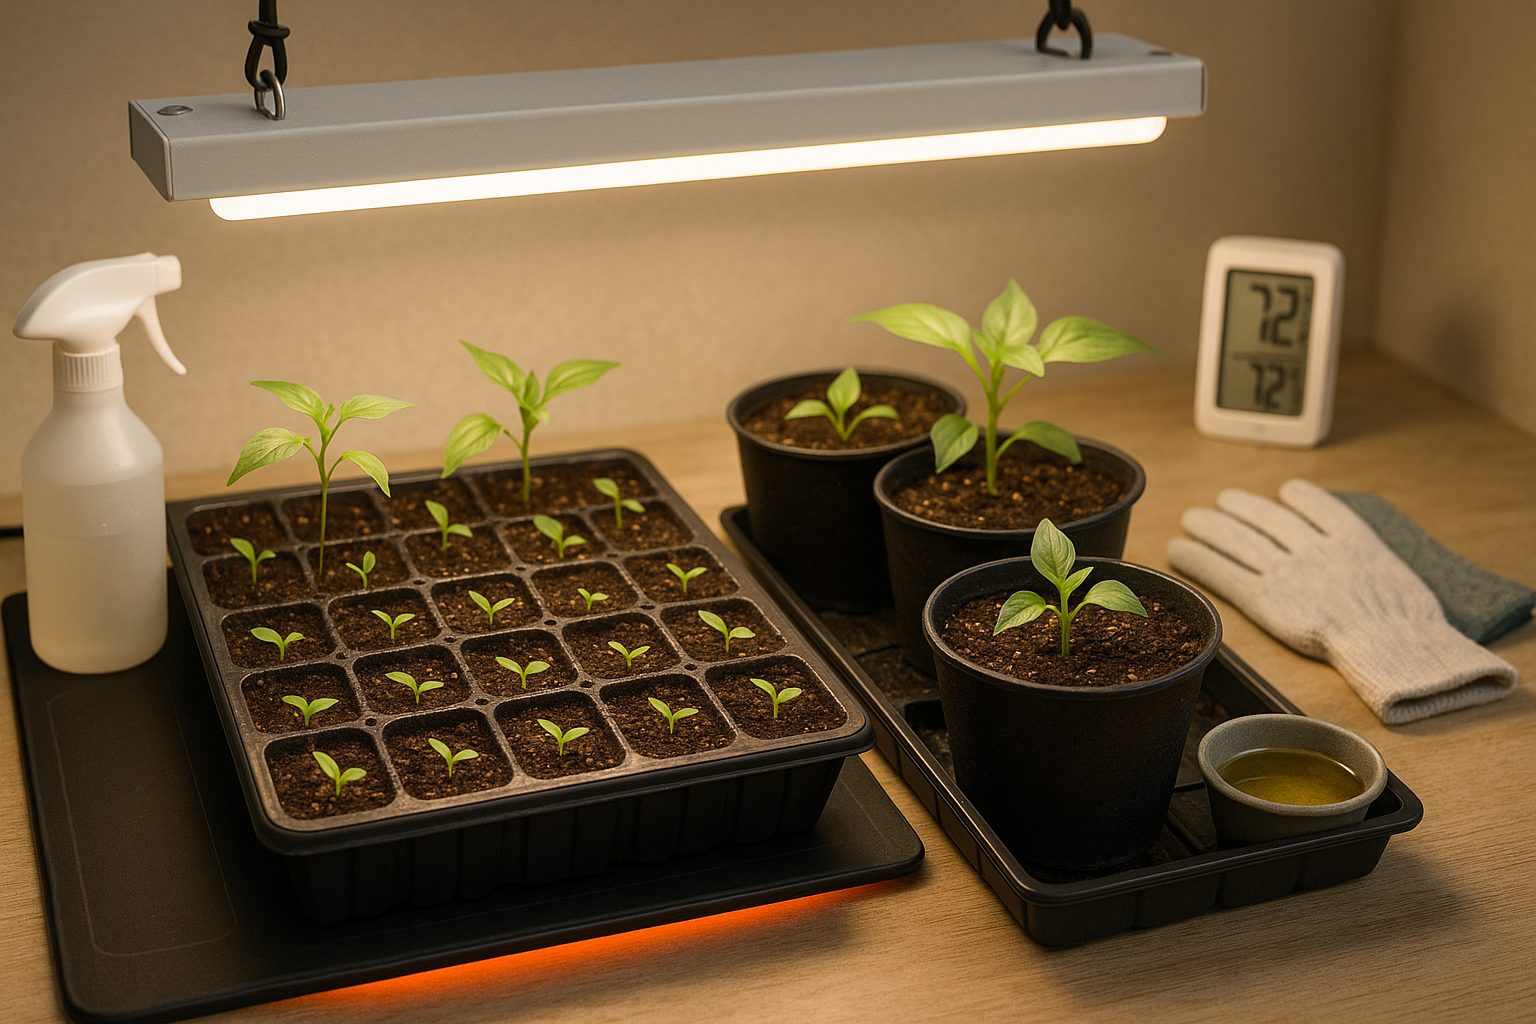
Start by filling seed trays or small pots with seed-starting mix and sow the seeds about 1/4 inch deep. Pepper seeds need steady warmth, around 75–85°F (24–29°C), to germinate. Using a heat mat can help maintain the right temperature and speed up sprouting.
Once seedlings emerge, place them in a sunny window or under grow lights for 12–16 hours daily, turning the trays occasionally for even growth. Keep the soil moist but not soggy, and fertilize lightly once the seedlings have their first true leaves.
When seedlings reach 2–3 inches tall and the outdoor soil has warmed up (consistently above 60°F/16°C at night), start hardening them off. This means taking the seedlings outside for a few hours a day, gradually increasing their time outdoors over a week to toughen them up for wind and sun.
If you’re growing in containers, choose pots at least 12 inches wide, use nutrient-rich potting mix, and ensure proper drainage. Once peppers are transplanted, give them a sunny spot—at least 6–8 hours of sun per day is ideal.
By paying attention to climate and patiently nurturing your seedlings, you’ll give your pepper plants the best shot at producing a bumper harvest.
Watering and Fertilizing Container Peppers
Proper watering and fertilizing are crucial for healthy, productive container peppers, since containers dry out faster and have limited soil reserves compared to in-ground beds. Aim to water your peppers when the top inch of soil feels dry—usually once a day in hot weather, but possibly every other day in cooler conditions.
Watch for warning signs: drooping leaves often indicate underwatering, while yellowing, soft, or wilted leaves can signal overwatering and root rot. Use pots with drainage holes, and try bottom watering by placing the pot in a shallow tray of water for 15–30 minutes. This encourages even moisture and helps prevent fungal issues.
Drip irrigation systems designed for containers offer hands-off consistency, but even simple mulch (like straw or shredded leaves) on top can help retain moisture.
Feeding Your Peppers
When it comes to feeding, peppers in containers benefit from a balanced liquid fertilizer (like 10-10-10 or a tomato food), applied every 2–3 weeks according to label directions, starting once small fruits appear. If you prefer organics, consider fish emulsion, worm tea, or diluted compost tea for gentle, steady nutrition.
Granular slow-release fertilizers work too but use sparingly and mix them thoroughly into the soil at planting.
Unlike their in-ground counterparts, container peppers depend entirely on you for nutrients and water; they have no way to seek out more if you fall short. Consistent care is key for big harvests and healthy plants.
Caring for Your Pepper Plants: Pruning, Pest Patrol & General Maintenance
Proper care is key to thriving pepper plants, especially when grown in containers. Pruning is an easy but often overlooked step—snipping off the top inch or two of young plants (when they reach about 6–8 inches tall) encourages bushier growth and more peppers later on.
As the season progresses, periodically remove yellowing leaves and cut back any stems that block sunlight from reaching the center of the plant. Always use clean, sharp scissors to avoid spreading disease. Timing your pruning is important: prune lightly early in the growing season, but avoid heavy pruning once the plant is flowering and setting fruit.
Pest Patrol: Identify and Manage Common Invaders
Pests like aphids, spider mites, and whiteflies commonly target peppers. Inspect the undersides of leaves regularly, and if you spot these bugs, a gentle spray with diluted dish soap or neem oil can help clear them out. Watch for diseases too—yellow spots or mushy stems may signal fungal or bacterial trouble.
Prevention Tips
- Water at the base of the plant (not on the leaves) to reduce disease risk.
- Space containers for good airflow to discourage pests and mold.
- Clear away dead leaves quickly to prevent infestation and illness.
General Maintenance for Healthy Growth
Make plant inspections part of your routine—take a minute each time you water to check for pests, leaf damage, or signs of wilting. Remove debris from the soil surface, keep the container free of weeds, and feed your plant with a balanced, slow-release fertilizer as directed.
A little regular upkeep, combined with early action when something seems off, can keep your pepper plants healthy, productive, and looking their best all season long.
Harvesting Peppers from Containers
Knowing exactly when to harvest peppers from containers can make a big difference in both flavor and yield. Most pepper varieties start green and change color as they ripen—commonly turning red, yellow, orange, or even purple depending on the type. Check the seed packet or plant tag for your variety’s mature color and estimated days to harvest.
Generally, peppers are ready when they’re firm, glossy, have reached full size, and show their final color. If you prefer a milder taste, pick them when they’re green; for a sweeter, richer flavor, let them stay on the plant until they fully color up.
To harvest, hold the pepper gently and use clean garden scissors or pruners to snip the stem about a half-inch above the fruit—this helps avoid breaking branches or damaging the plant. Tugging or twisting can stress the plant and reduce future harvests.
After picking, check plants regularly—every couple of days is ideal—as frequent harvesting signals the plant to keep producing new peppers. Removing any damaged or overripe fruits also encourages more blooms and fruits to set.
To further boost ongoing production, feed container peppers every two weeks with a balanced, water-soluble fertilizer, and be sure they’re getting at least six hours of sun per day. Consistent watering keeps the plants healthy and productive, but avoid letting soil get soggy.
With these tips, your container peppers will reward you with a steady supply of crisp, delicious fruit all season long.
Troubleshooting and End-of-Season Tips
Container-grown peppers can run into a few common problems, but many have simple solutions. If leaves are turning yellow, check for overwatering or poor drainage—make sure your pots have holes and let the soil dry slightly between waterings.
Curling leaves or tiny webs usually signal pests like aphids or spider mites; try gently hosing them off or using an insecticidal soap. Slow growth or pale leaves could indicate a need for more sunlight or a balanced fertilizer—move your pots to a sunnier spot or feed every couple of weeks.
As the growing season ends, you have two main options: overwinter your pepper plants indoors, or prep your containers for next spring.
Overwintering Peppers
- Cut the plant back by a third.
- Check for pests.
- Bring it inside to a sunny, warm window.
- Water sparingly through the winter months.
Preparing Containers for Next Spring
- Remove dead plants and spent soil.
- Clean pots with soapy water.
- Store them inside or upside down to avoid cracking.
No matter which route you choose, jot down what worked or didn’t—maybe your peppers liked a particular fertilizer or struggled with a certain bug. With each season, you’ll get better at spotting issues early and tweaking your setup for tastier, healthier peppers year after year.
Growing peppers in containers is a learning process, so embrace the challenges and look forward to better harvests ahead!