How Are Bay Leaves Dried and Why?

Bay leaves, known for their subtle yet distinctive aroma, are a staple in kitchens worldwide. They are often added to soups, stews, and braises to infuse dishes with earthy, slightly floral notes. While fresh bay leaves can be used straight from the plant, most recipes call for dried leaves because they offer a more concentrated flavor and can be stored for months without losing potency.
Drying bay leaves not only intensifies their trademark fragrance but also makes it easy to crumble and incorporate them into recipes without introducing excess moisture. For home cooks, drying is a practical option since it allows you to stock up and preserve your bay leaves for year-round use, decreasing spoilage and food waste.
However, the starting point is crucial: always choose healthy, vibrant leaves—preferably freshly picked and free of blemishes or spots—since damaged or old bay leaves may dry poorly or lose their essential oils. By starting with prime leaves and drying them gently (air-drying in a cool, shaded spot works well), you can ensure the best texture, flavor, and longevity for your bay leaf stash, elevating your homemade meals with every pinch.
Harvesting and Selecting the Best Bay Leaves
Harvesting bay leaves at the right time ensures you get the most flavor and aroma. The best season to harvest is late summer, when the leaves are mature, glossy, and deep green but before new growth appears in spring.
Choose healthy, undamaged leaves that have reached full size—usually 2–4 inches long—and feel thick and leathery to the touch. Younger leaves may be tender but tend to have a milder taste and lose their color more quickly when dried.
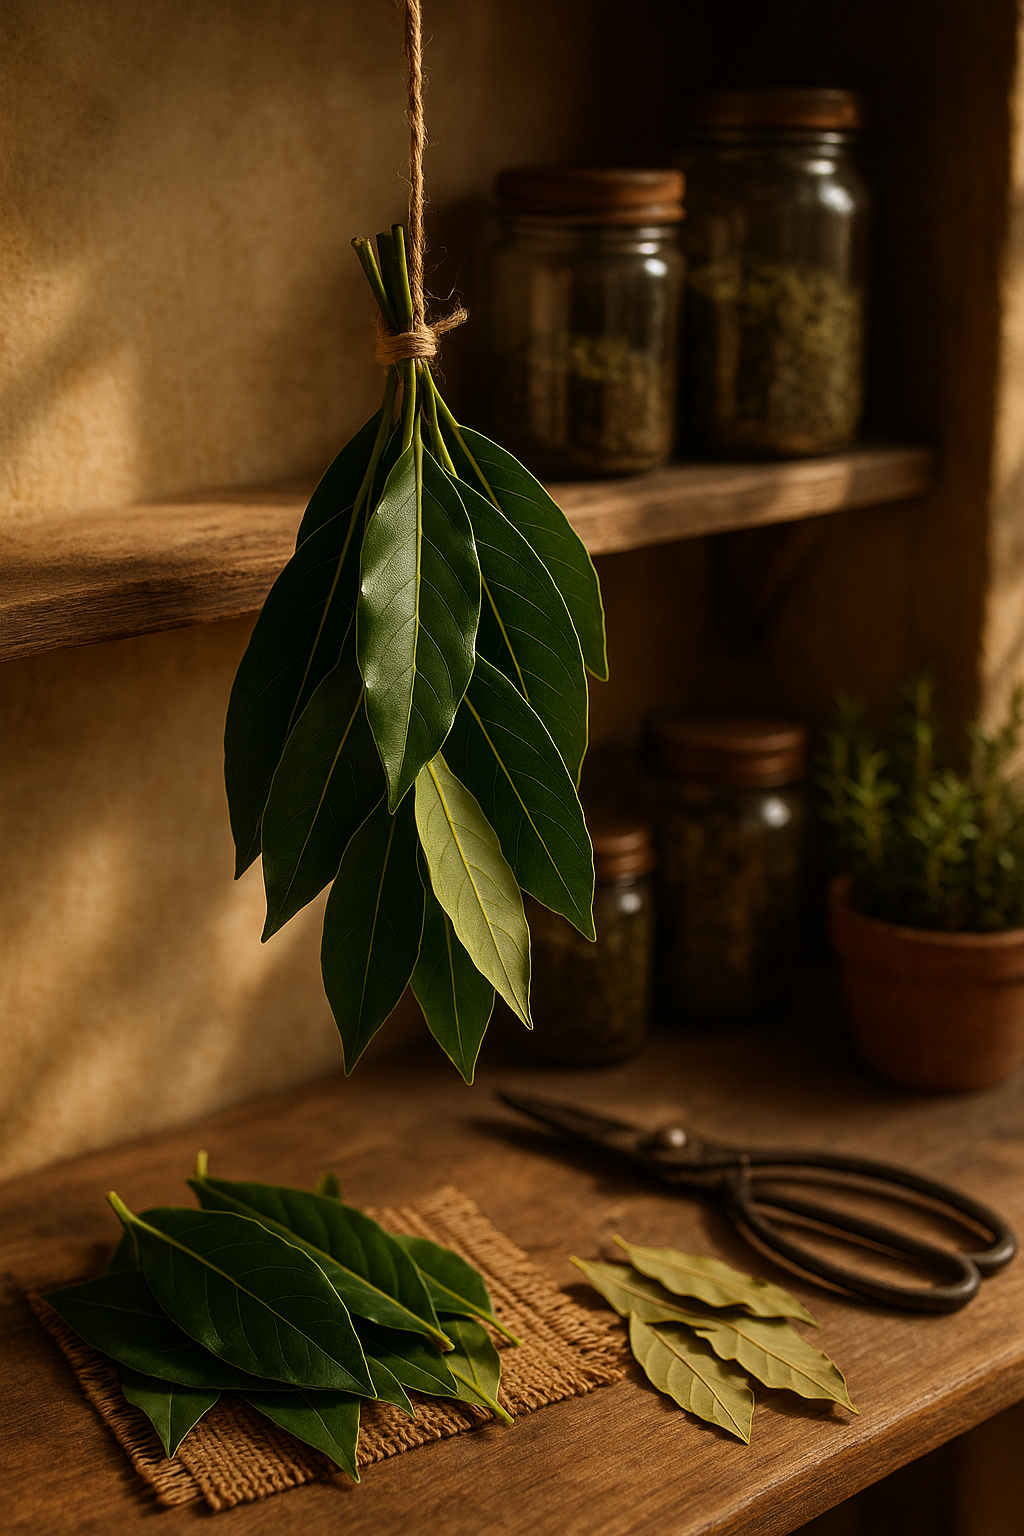
To avoid stressing your bay laurel plant, only pick a few leaves from each branch, focusing on older, lower leaves rather than the fresh top growth. Always use clean, sharp scissors or pruning shears to snip the leaves, cutting close to the stem without tearing or bruising—this minimizes the risk of infection or disease.
If you’re cultivating your own bay tree, harvest sparingly so the plant remains lush and healthy year-round. In contrast, store-bought fresh bay leaves can be a convenient alternative, but they often lack the intense fragrance of homegrown leaves, which lose their oils the longer they sit in transport and packaging.
Whenever possible, opt for organic or local sources if you can’t grow your own, and give store-bought leaves a good rinse before using. Whether fresh or dried, proper harvest and selection will give your dishes a deeper, more authentic flavor, making the extra effort well worth it.
Methods for Drying Bay Leaves at Home
Drying bay leaves at home is simple and rewarding, and you have a few effective options to choose from—air-drying, oven-drying, or using a dehydrator.
Air-drying is the most traditional and gentlest way to preserve bay leaves’ essential oils and flavor. To air-dry, gather a small bunch of fresh, clean leaves and tie the stems together. Hang them upside down in a dry, well-ventilated area away from direct sunlight—like in a kitchen with good airflow or a pantry. Leave them to dry for about one to two weeks. Leaves are ready when they feel crisp and snap easily.
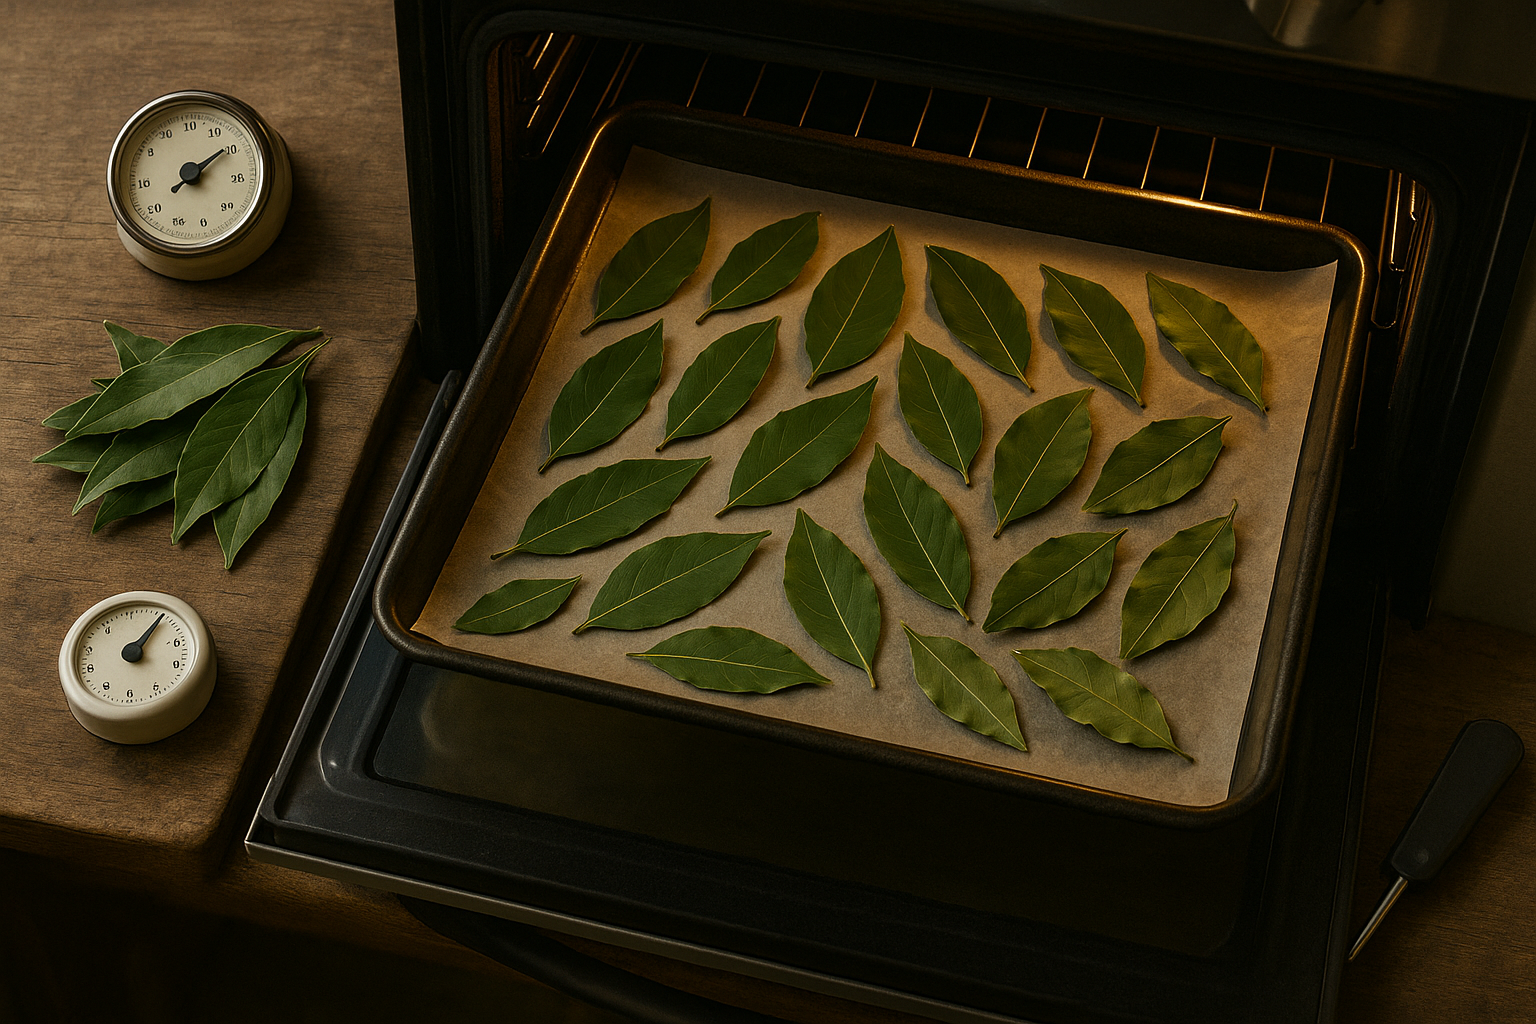
For oven-drying, lay the leaves in a single layer on a baking sheet and set your oven to its lowest temperature (ideally below 200°F/93°C). Prop the oven door open slightly to allow moisture to escape and bake for 1–2 hours, checking every 30 minutes.
Dehydrator drying is similar: set the machine to 95–115°F (35–46°C) and dry for 1–4 hours, turning the leaves occasionally.
To preserve flavor and prevent mold, always ensure leaves are completely dry—if they feel bendy or soft, keep drying. Avoid overcrowding regardless of your method, as stacking or layering leaves increases the risk of uneven drying and mold. Make sure leaves are clean and completely free of moisture before starting.
Don’t rush the process by cranking the heat too high or packing leaves tightly; this can cause partial drying or even bake away delicate oils. Store your fully dried bay leaves in an airtight container away from light and humidity, and check them for any signs of mold before use.
Done right, your bay leaves will retain their aromatic punch for months.
Tips for Perfectly Dried Bay Leaves
Testing bay leaves for complete dryness is simple if you know what to look for: perfectly dried bay leaves should feel very crisp and brittle to the touch, snapping easily rather than bending. Their color should remain a vibrant olive green—avoid leaves that have turned brown or gray, as this can indicate excessive heat or improper drying, which may affect flavor and safety.
Gently rub a dried leaf between your fingers; if it breaks cleanly and releases a fresh, herbal aroma, you’ve done it right. Store your dried bay leaves in an airtight container away from sunlight and moisture to protect both flavor and safety, as light and humidity can cause the leaves to lose potency or grow mold.
Drying Tips
- Dry your leaves at a low temperature (no higher than 110°F/43°C if using an oven or dehydrator).
- Spread them out in a single layer with good air circulation.
- If your leaves turn brown, you might be using too much heat or drying them for too long—try lowering the temperature and checking more frequently.
- If leaves remain leathery or dull green after several days, they may still have moisture: return them to the dryer or oven for short intervals until they snap crisply.
Following these tips ensures your bay leaves retain their flavor and shelf stability.
How to Store Dried Bay Leaves for Long-Term Use
To keep your dried bay leaves fresh and aromatic for as long as possible, store them in airtight containers made of glass or metal, such as small mason jars or spice tins with tight-fitting lids. Avoid plastic bags, as they can allow air and moisture to seep in over time.
Place these containers in a cool, dry, and dark spot—think a pantry or a closed cupboard away from heat sources, sunlight, and humidity (like stoves or dishwashers). Light and air are the enemies of fragrant herbs, so keep containers tightly sealed and out of sight.
Don’t forget to label each container with the storage date; bay leaves typically keep their best flavor for up to two years, but quality can begin to fade after about 12 months.
To check for freshness, gently crush a leaf between your fingers—if the aroma is still strong and the leaf is crisp, it’s good to use. If it’s lost its scent or feels limp, it’s time to replace it.
You’ll get better shelf life and flavor retention by storing bay leaves whole, as crushed leaves lose essential oils faster and can become stale or flavorless within months. However, pre-crushing is convenient for quick use—just keep in mind you might sacrifice some potency and need to restock more often. For top results, crush leaves only right before using them in your recipes.
Smart storage habits can make a big difference in the flavor they add to your soups, sauces, and stews.
Creative Ways to Use Dried Bay Leaves in Cooking
Dried bay leaves are a classic addition to soups, stews, and braises, infusing dishes with a subtle herbal aroma and depth. Next time you’re simmering chicken soup or beef stew, toss in one or two dried bay leaves early in the cooking process—this gives them time to release their nuanced flavor.
For even better extraction, lightly crush the leaves before adding them, or bruise them with your fingers to help unlock their essential oils. Just be sure to always remove the leaves before serving; they’re tough, have sharp edges, and aren’t meant to be eaten.
You can also drop a bay leaf into a pot of rice or lentils for extra fragrance, or add it to tomato sauce for a Mediterranean flair. Remember, a little goes a long way, so start with one leaf and adjust to taste with future batches—your kitchen will smell amazing!