
Introduction
Wondering if you can grow chamomile from seed? The answer is a definite yes—starting chamomile from seeds is not only possible, but it’s also straightforward and rewarding. Gardeners love this cheerful herb for its fragrant, daisy-like blooms that look beautiful in any flower bed, and for its many uses, especially soothing homemade teas.
Plus, chamomile is pretty forgiving for beginners, thriving in small pots on a windowsill or right in your backyard patch. It’s no wonder so many people want to grow chamomile from seed; it’s easy, affordable, and gives you organic, natural blooms to enjoy.
In this post, you’ll discover exactly how to get started: from picking the right chamomile variety and preparing your soil, to step-by-step planting instructions. We’ll cover simple tips to help your seeds sprout successfully, and how to care for your plants as they grow. Plus, if any troubles pop up—like leggy seedlings or patchy sprouts—you’ll learn how to fix those, too.
Whether you’re dreaming of fresh chamomile tea or just want a pollinator-friendly addition to your garden, this guide will show you everything you need to know to succeed with chamomile from seed.
Choosing the Right Chamomile Variety & Seeds
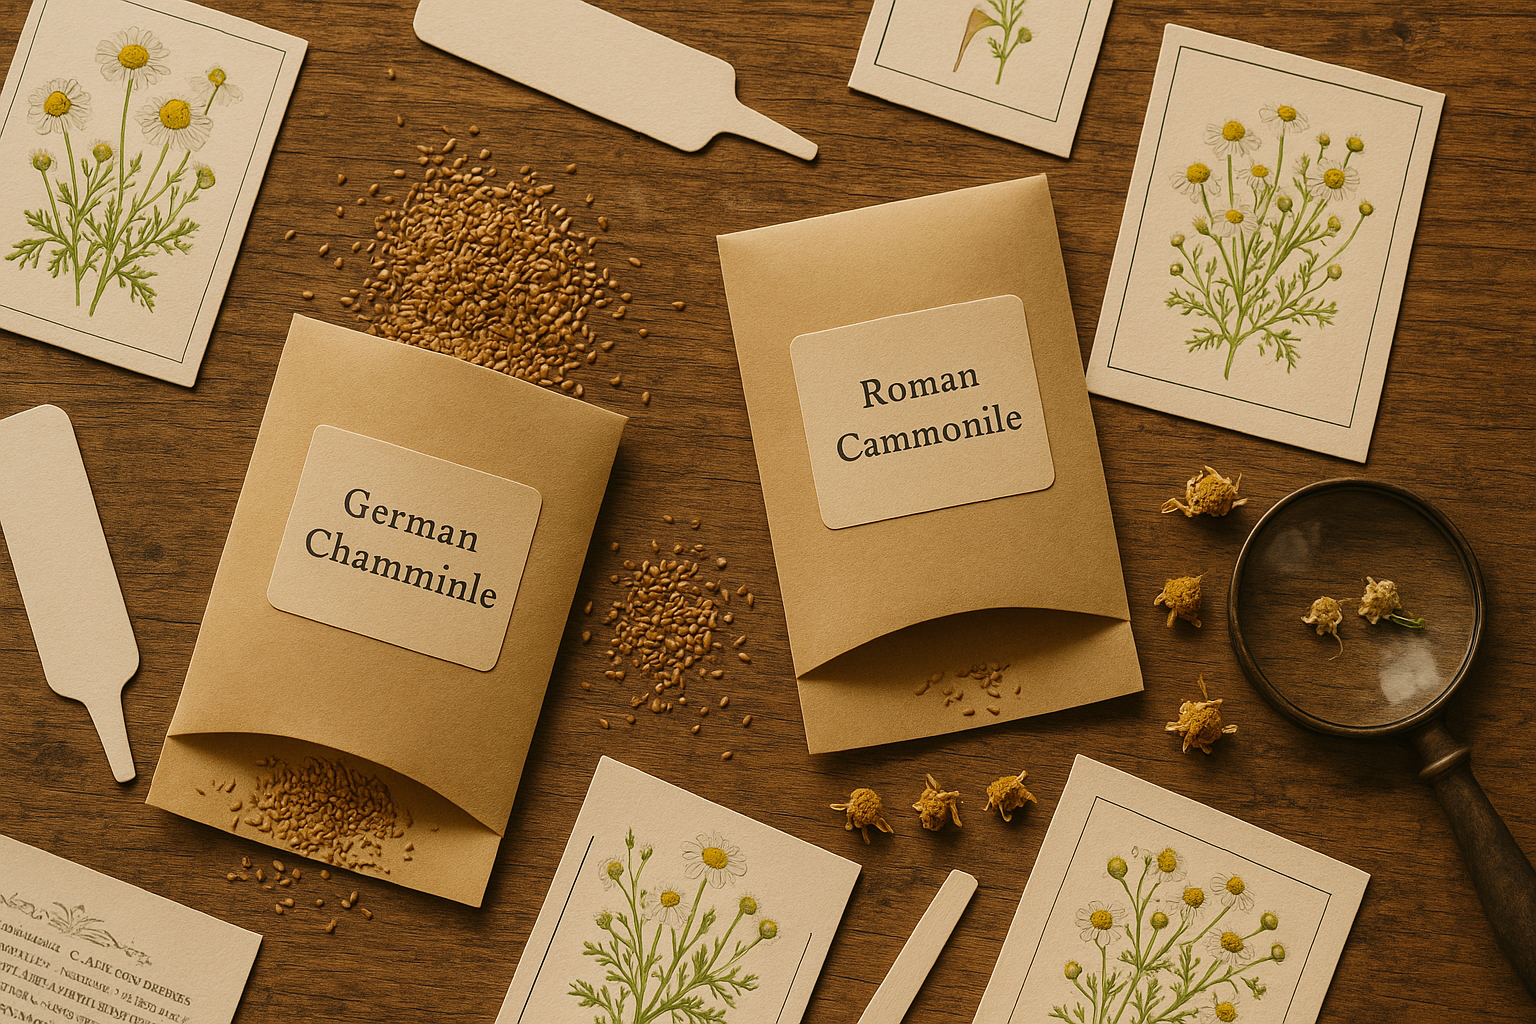
When it comes to growing chamomile in your garden, picking the right variety and seeds is key to a successful harvest. There are two main types to consider: Roman chamomile (Chamaemelum nobile) and German chamomile (Matricaria chamomilla).
Roman chamomile is a low-growing perennial known for its apple-like fragrance and use as a ground cover. It’s usually propagated by cuttings or divisions rather than seeds and is less commonly grown from seed by home gardeners. German chamomile, on the other hand, is an annual that grows taller and is the preferred choice for seed starting due to its reliability, abundant flowers, and high yield—making it ideal for teas and herbal remedies.
When shopping for seeds, look for reputable suppliers such as botanical seed companies or organic gardening stores. Online retailers like Baker Creek Heirloom Seeds, Johnny’s Selected Seeds, and local nurseries often offer fresh, non-GMO varieties. Aim for seeds labeled with recent harvest dates to ensure the best germination rates, and avoid packets that look old, faded, or damaged.
If you want to be sure of what you’re getting, check for botanical names—Matricaria chamomilla for German chamomile and Chamaemelum nobile for Roman chamomile—and seek organic or untreated seeds if you plan to use chamomile for consumption.
Healthy seeds should be small, tan to brown in color, and free from visible mold or debris. Remember: fresher seeds mean better sprouting, so always check expiration or packed-for dates before buying. Store any extra seeds in a cool, dry place for the next planting season.
When & Where to Plant Chamomile Seeds
The best time to plant chamomile seeds depends on your local climate and whether you’re starting seeds indoors or outdoors. For most regions, begin seeds indoors about 6-8 weeks before your last expected frost date—typically late winter or early spring. This gives young chamomile plants a head start, especially in areas with short growing seasons.
Outdoors, direct sow chamomile seeds after the last threat of frost has passed and the soil has started to warm up, usually mid to late spring. Chamomile thrives in full sun but will tolerate partial shade, so choose a spot that receives at least 4-6 hours of direct sunlight daily.
Whether you’re planting in the ground or in pots, well-draining soil is key to healthy chamomile. Aim for light, sandy loam soil; if your soil is heavy or clay-rich, amend it with compost or a bit of sand to improve drainage. Containers should have sufficient drainage holes to prevent waterlogging.
Before planting, gently rake the area to remove debris and break up clumps, mixing in compost or well-rotted manure to boost fertility. Avoid overly rich soil, as too much nitrogen can result in lush leaves but fewer flowers.
Scatter seeds on the surface and press them lightly—they need light to germinate, so don’t bury them. Water gently and keep moist until seedlings appear, usually in 7-14 days.
With these easy steps, you’ll set the stage for a healthy chamomile patch, whether on a sunny balcony or in a backyard garden.
How to Sow Chamomile Seeds
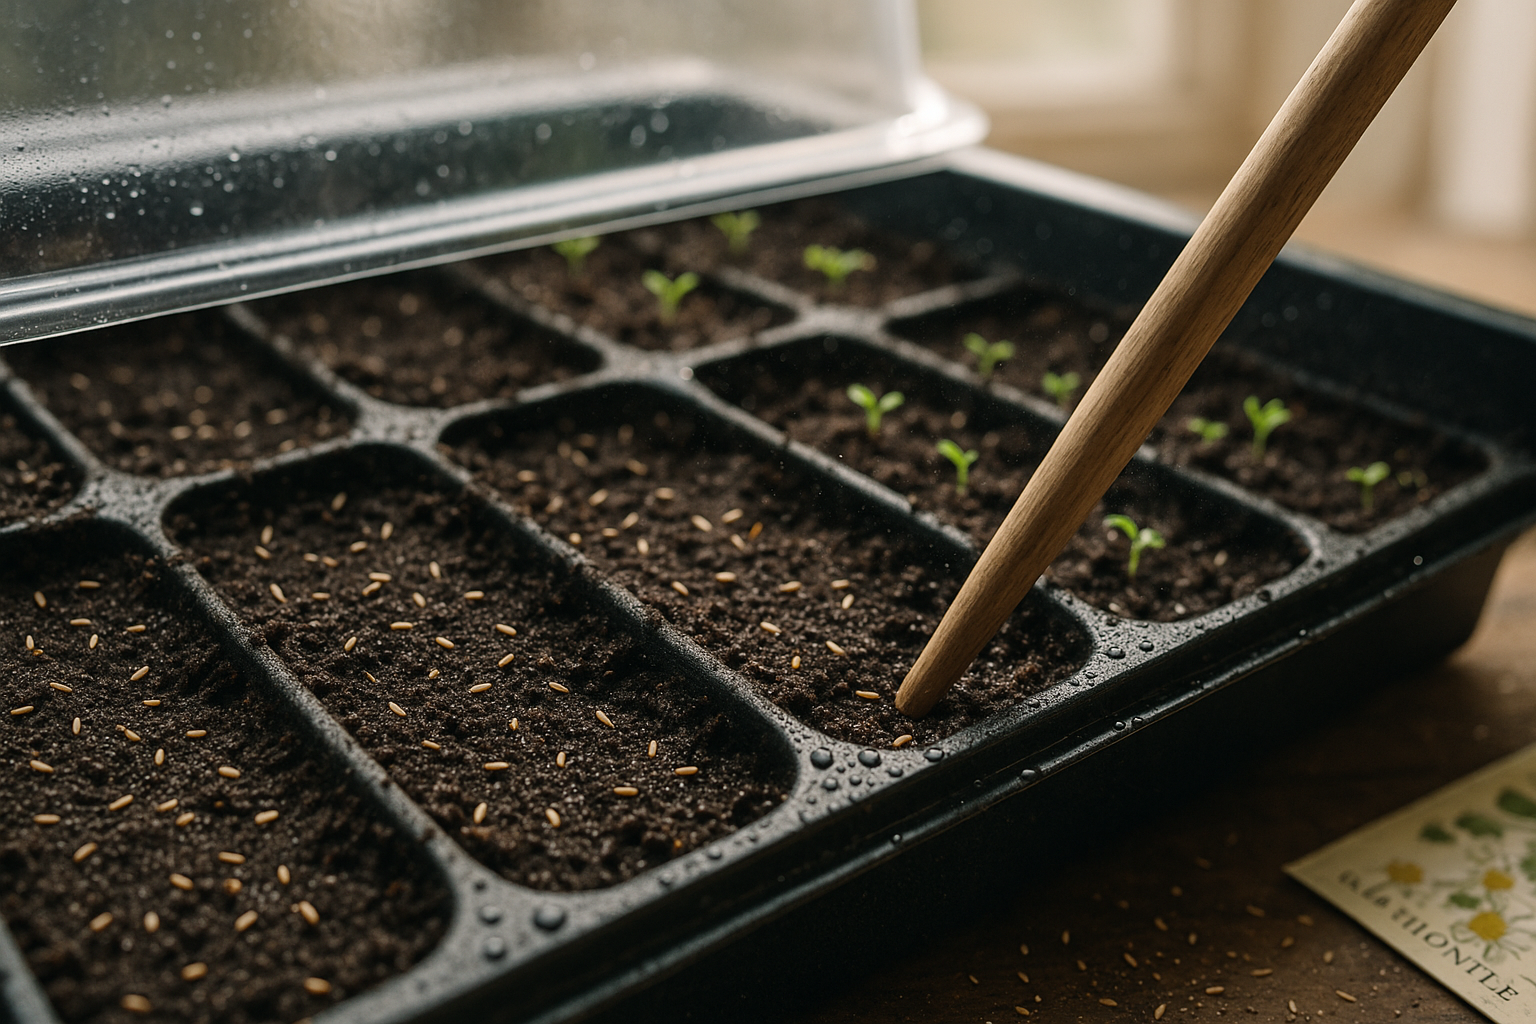
Sowing chamomile seeds is a simple, rewarding process that begins with choosing your method—indoors or outdoors. For a head start on the season, sow chamomile seeds indoors 6-8 weeks before the last expected frost.
Sprinkle the tiny seeds on the surface of seed-starting mix; do not cover them, as chamomile needs light to germinate. Gently press the seeds to ensure good soil contact, then mist with water to keep the surface moist but not soggy. Space seeds about 1 inch apart and maintain a temperature between 65-70°F (18-21°C). Covering the tray with plastic can help retain humidity.
If you prefer direct sowing outdoors, wait until after the last frost and scatter seeds onto prepared, well-draining soil in a sunny spot, using the same surface sowing method. Thin seedlings to about 6-8 inches apart for healthy airflow as they grow.
Indoors, you have better control over temperature and moisture, which usually means higher germination rates; outdoors, you avoid transplant shock and the work of moving seedlings, but you’re more vulnerable to weather changes and pests. Chamomile seeds typically sprout within 7-14 days.
Avoid common mistakes like burying seeds too deep, letting the soil dry out, or exposing seeds to extreme heat or cold, all of which can stall or prevent germination. Light is key—place indoor trays near a bright window or use a grow light, and for outdoor seeds, make sure your spot gets at least 6 hours of sun.
With these steps, you’ll soon have a tray or patch full of aromatic, cheerful chamomile ready for tea or garden beauty.
Caring for Chamomile Seedlings and Plants
Chamomile seedlings are delicate, so start by watering them gently—keep the soil moist but not soggy, as overwatering can lead to root rot. Once seeds have sprouted and developed a couple of true leaves, thin them out so each plant has at least 4–6 inches of space; this reduces competition for light and nutrients.
If you’ve started chamomile indoors, transplant the seedlings outside after the last spring frost, handling them with care to avoid disturbing their sensitive roots. Chamomile thrives in relatively poor soil, so go light on fertilizer—an occasional feeding with a diluted organic liquid fertilizer, like seaweed or fish emulsion, is sufficient.
Mulching around the plants with straw or leaf litter helps retain moisture, suppress weeds, and keep soil temperatures steady, which encourages strong growth.
Pest and Disease Management
For pest control, watch out for aphids and thrips—these can usually be managed by spraying with a mild solution of water and a drop of organic dish soap or by introducing natural predators like ladybugs. To prevent fungal diseases, water at the base of the plants in the morning, allowing leaves to dry off by evening.
Encouraging Growth and Flowering
For bushier, healthier chamomile, pinch back the growing tips once plants are 4–6 inches tall; this encourages branching and more flower production. Deadhead spent blooms regularly to keep the plants looking tidy and to extend their flowering season.
Remember, chamomile generally prefers a little neglect over too much fuss, so aim for a light-touch approach—with well-timed watering, thoughtful spacing and mulching, and regular picking, your patch will flourish with minimal trouble.
Harvesting & Using Homegrown Chamomile
Harvesting homegrown chamomile is simple and rewarding, but timing is key for the best flavor and medicinal effects. Pick flowers in the morning after the dew has dried but before the midday sun—this is when the blooms are most fragrant and their oils are most concentrated.
Gently pinch or snip only the fully open flowers, leaving the stems and unopened buds to continue maturing. Lay the harvested flowers in a single layer on a clean sheet or screen in a warm, shaded area with good airflow. Avoid direct sunlight, which can fade the color and reduce potency.
The flowers should be fully dry in about a week. Test by gently crushing one; it should crumble easily. Store the dried chamomile in an airtight jar or tin away from light and moisture to preserve its soothing properties for up to a year.
For homemade chamomile tea, steep a tablespoon of dried blossoms in hot (not boiling) water for 5–10 minutes, then strain before sipping. You can also infuse the dried flowers in oil for a calming skin remedy or blend them into DIY bath salts.
Don’t forget about seed saving: as some flowers fade, let them dry on the plant. Once the seed heads turn brown and the seeds feel dry and loose, snip them off and gently shake out the tiny seeds. Store them in a labeled paper envelope in a cool, dry place, and you’ll have plenty for next season’s garden.
Troubleshooting & Common Problems
Growing chamomile can come with a few hiccups, but most problems are easy to fix with a little know-how. Poor germination often happens if seeds are buried too deep—try gently pressing seeds onto the surface of moist soil instead.
If your seedlings appear leggy or stretched, it usually means they’re not getting enough light. Move them to a sunnier windowsill or provide a grow light for sturdier growth.
Pests like aphids can cluster on new growth, but a quick spray of water or a mild solution of soapy water usually sends them packing.
Keep an eye out for powdery mildew or damping off, but improve air circulation and water at the base to prevent these fungal issues.
Remember, chamomile is naturally tough and can bounce back from minor setbacks. Even if something goes wrong, don’t be discouraged—chamomile thrives in less-than-perfect conditions and often recovers with a little extra care.
Stick with it, and you’ll be rewarded with cheerful blooms and soothing tea before you know it.
Conclusion & Next Steps
Growing chamomile from seed is a rewarding project that almost anyone can tackle, even if you’re new to gardening. With a little sun, well-drained soil, and consistent watering, you’ll be amazed at how quickly tiny seeds can bloom into a patch of fragrant, daisy-like flowers.
Once your chamomile is thriving, don’t hesitate to get creative—try steeping your own soothing tea, using the blooms in homemade skincare, or planting chamomile near veggies to help deter pests naturally. Each small experiment can teach you more about both the plant and your own preferences.
Whether you have a garden or just a sunny windowsill, take the leap and start your first batch of chamomile seeds. If you give it a try, let us know how it goes! Share your tips, triumphs, or questions in the comments so we can all learn and grow together.