Introduction to Propagating Rosemary
If you’ve ever wanted to bring the fresh, piney scent and robust flavor of rosemary into your cooking, learning how to grow rosemary from cuttings is a game changer. Rosemary is an indispensable kitchen herb, cherished for its ability to elevate everything from roasted potatoes to homemade breads with its unmistakable aroma.
While you might be tempted to buy new plants or start from seed, growing rosemary from cuttings has some clear advantages. It’s a cost-effective approach—no need to buy new seedlings each year—and it’s surprisingly reliable, allowing you to clone a healthy plant and ensure consistent flavor in your harvests. Even better, it’s much faster than waiting for slow-germinating seeds to sprout.
In this guide, I’ll walk you through the straightforward process of propagating rosemary at home: choosing the right stem, prepping your cuttings, rooting them successfully, and caring for your young plants. Whether you’re a seasoned gardener or a curious beginner, you’ll soon discover it’s simple to start your own thriving rosemary patch with just a few snips and a bit of patience. Let’s dig in and set you up for aromatic, homegrown success!
When and How to Take Rosemary Cuttings
The best time to take rosemary cuttings is in spring or early summer, when the plant is actively growing and stems are more likely to root quickly. Aim for a cool morning to reduce stress on both the parent plant and the cuttings.
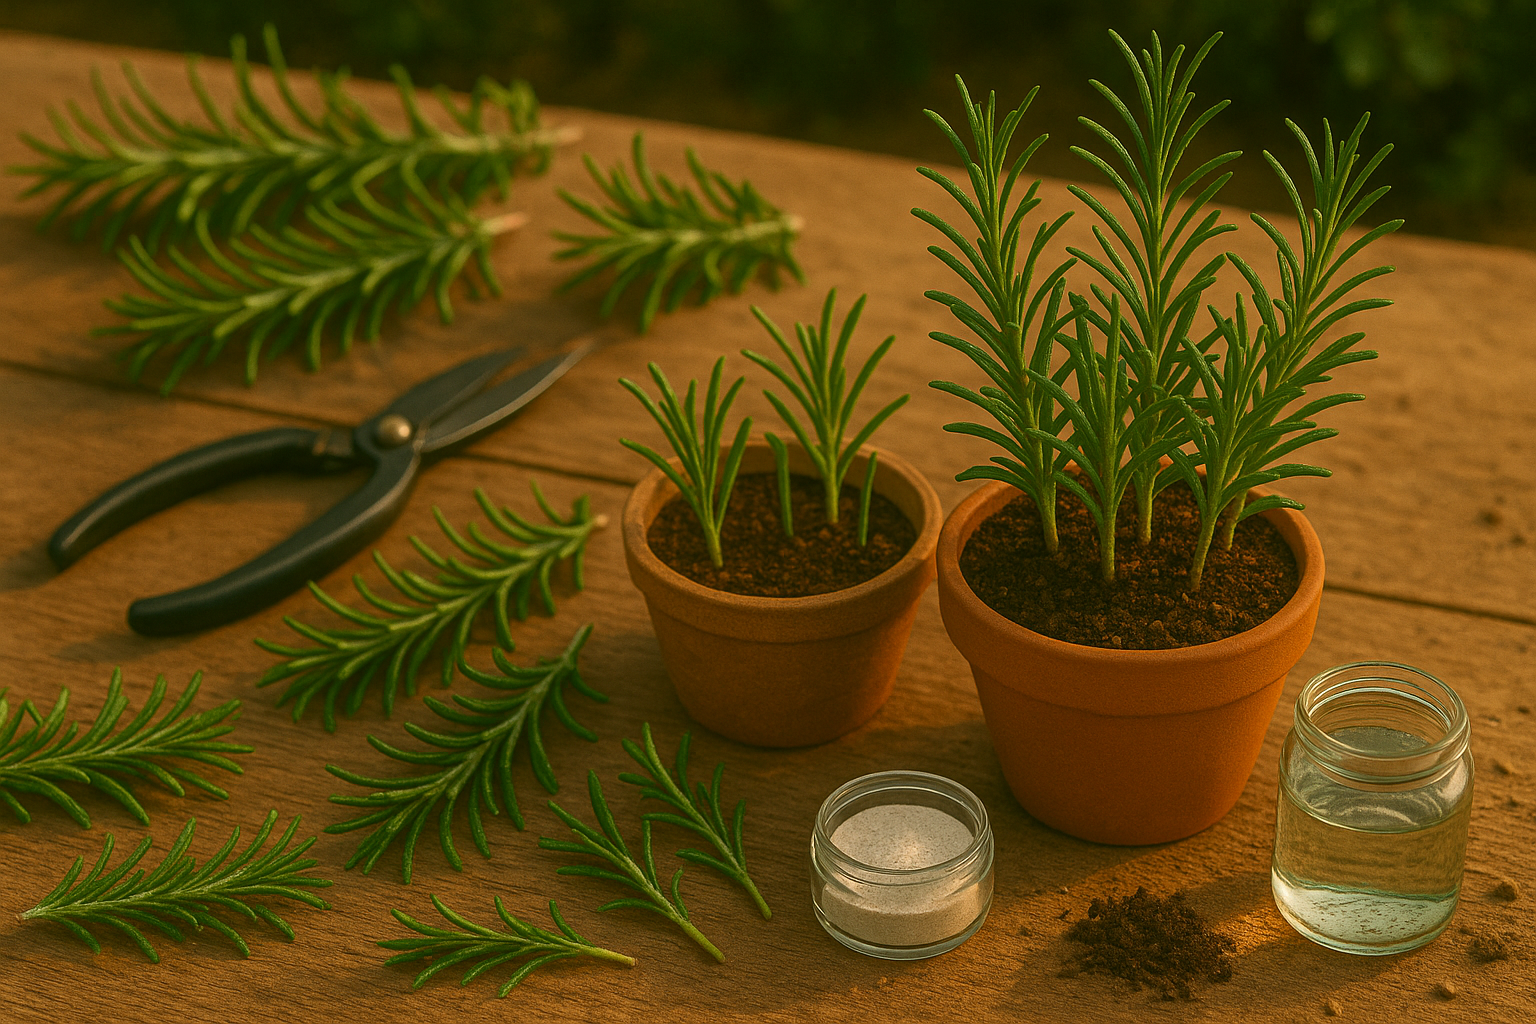
Start by selecting robust, healthy stems—avoid any that are flowering or look woody, as these root less efficiently. Non-flowering stems focus on growing leaves and roots, making them much more likely to thrive as new plants. When choosing a cutting, look for firm, green shoots about 4 to 6 inches long, and make sure they’re free of any signs of disease or damage.
For the task, you’ll need:
- Sharp, clean pruning shears or scissors (to ensure a clean cut and prevent infection)
- A small container filled with well-draining potting mix
- Optionally, rooting hormone to boost your chances of success
- A clear plastic bag or mini greenhouse to keep humidity high while the cutting roots
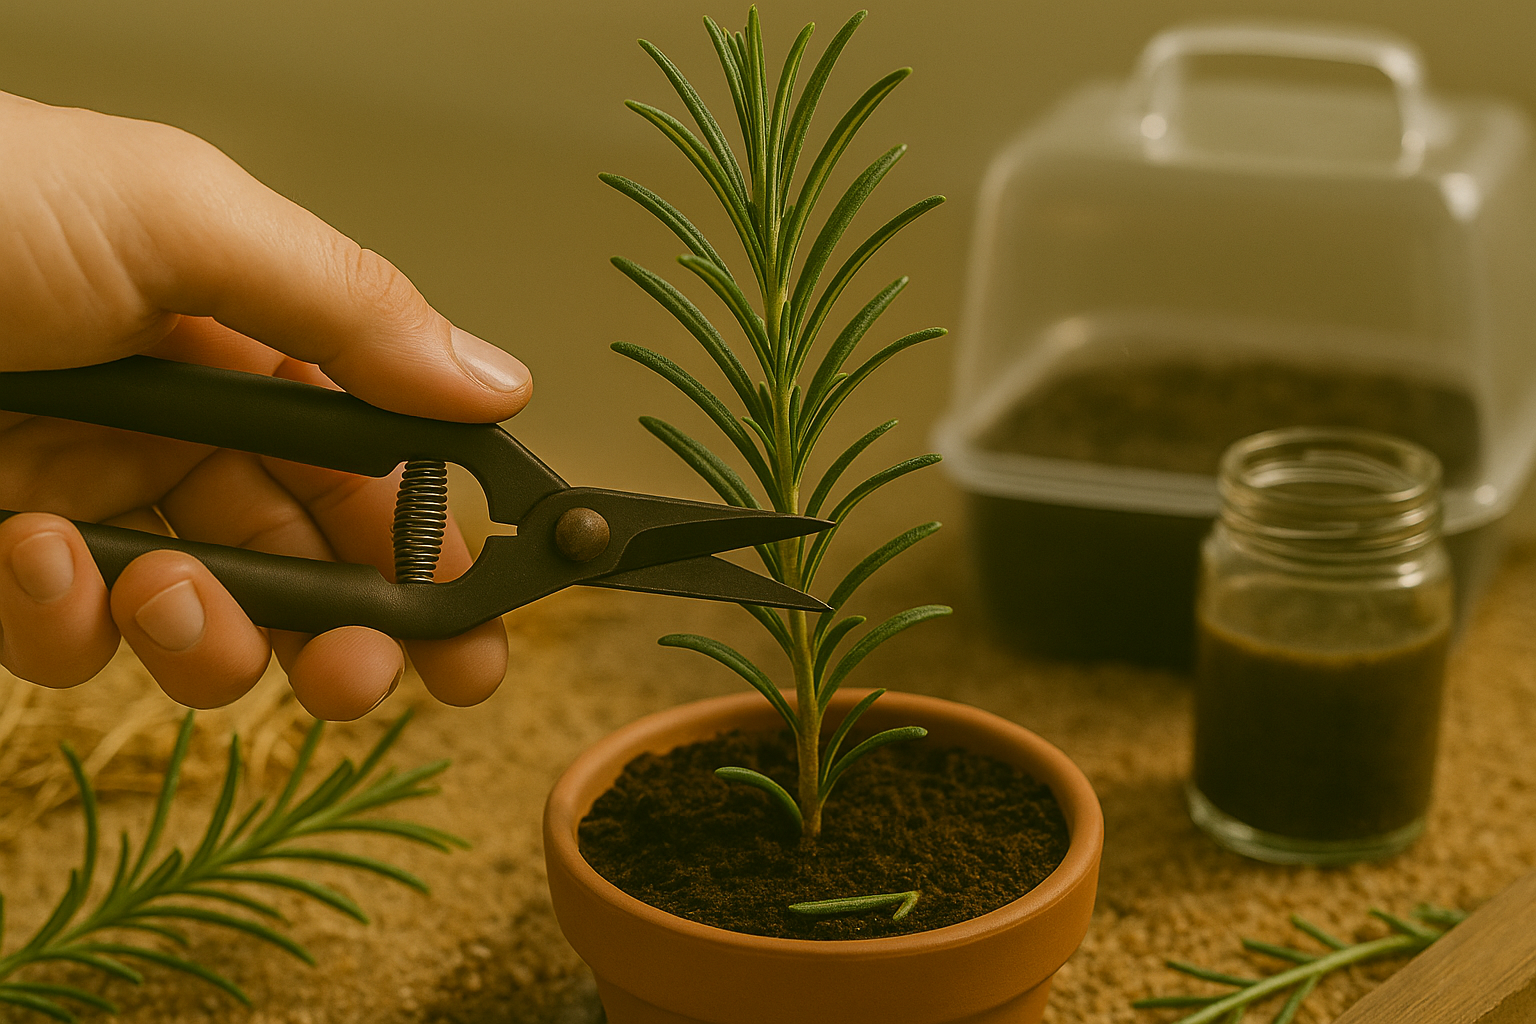
To take the cutting, snip just below a leaf node and strip the lower leaves to expose a couple of inches of bare stem—this is where roots will form. Gently dip the cut end in rooting hormone before planting it into moist potting mix.
Place the container in a warm, bright spot out of direct sunlight, mist regularly, and be patient—new roots usually develop after a few weeks. With these practical steps, you’ll be able to grow healthy rosemary plants from cuttings right at home.
Preparing Rosemary Cuttings for Propagation
Preparing rosemary cuttings for propagation isn’t difficult, but a little attention to detail can really improve your chances of success. Start by choosing healthy, non-flowering stems from a mature rosemary plant. Using clean, sharp scissors or garden shears, snip off a stem about 4 to 6 inches long—cutting at an angle just below a leaf node helps maximize the cutting’s ability to take up water.
Next, gently strip off the lower leaves from the bottom third of the cutting; leaving a bare stem here is essential since you don’t want leaves rotting below the soil or water. If the top leaves look large or dense, trim them down slightly to reduce moisture loss and stress on your cutting.
For an extra boost, dip the freshly cut end of your stem into rooting hormone powder—while not mandatory, it encourages faster root development and helps prevent rot, especially for beginners. Stick your prepared cuttings in a well-draining potting mix or a glass of water, and keep them in bright, indirect light.
Many new propagators make the mistake of using dull scissors (which can crush the stem and invite disease) or leaving too many leaves at the bottom, leading to mold or rot. Others cut stems that are too short, reducing their chances of rooting. Always work with healthy, newer growth rather than woody, older stems for the best results.
With these tips in mind, you’ll be well on your way to growing new rosemary plants from cuttings successfully.
Propagating Rosemary in Water vs. Soil
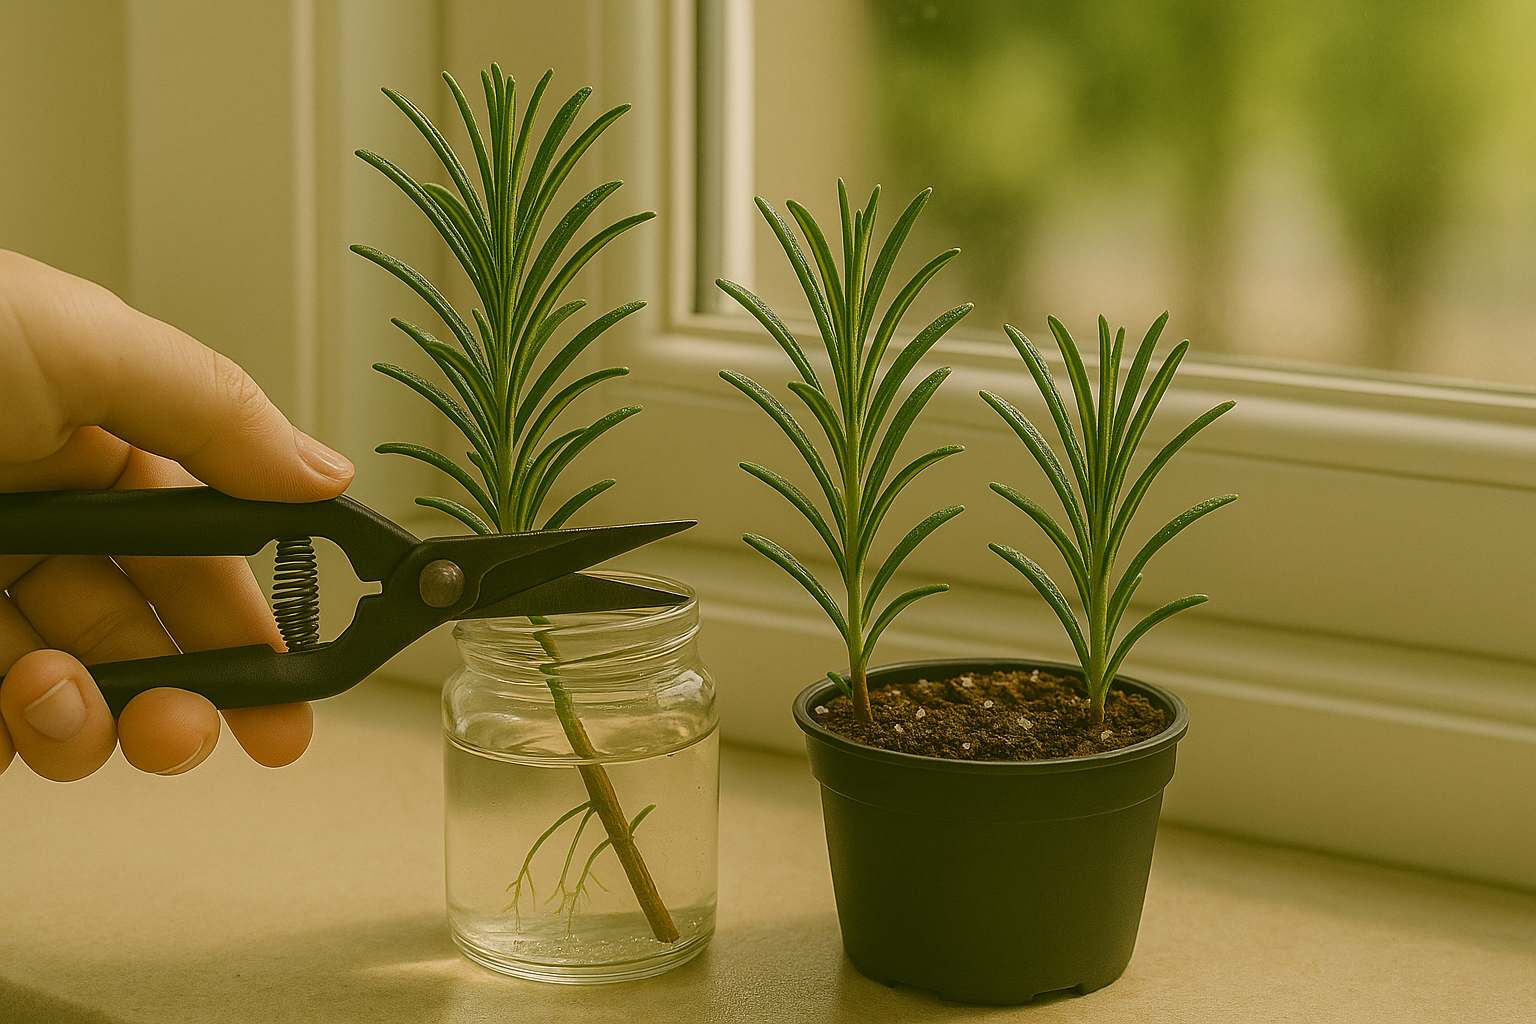
When propagating rosemary, you can root cuttings either in water or directly in soil, and each method has its own benefits and challenges. Water rooting is visually satisfying—you can watch the roots form, making it a great choice for beginners.
Use a clear glass jar or cup, filling it with room-temperature water just enough to submerge the bottom 2 inches of each rosemary stem. Strip off the lower leaves, then place the cutting so the bare stem sits under water while the leaves stay dry. Change the water every 2-3 days and keep the jar in bright, indirect sunlight.
While this method makes monitoring progress easy, it has some drawbacks: rosemary roots formed in water can be delicate and may struggle when transplanted to soil. Rot can also develop if old leaves sit underwater or if the water isn’t refreshed regularly.
Soil Propagation
Soil propagation offers sturdier root development that adapts better to garden or pot conditions. To start, fill a small container with well-draining potting mix, preferably with added perlite or sand. Moisten the soil, poke a pencil hole, and plant a prepared cutting (again, stripping the lower leaves).
Gently firm the soil around the stem and cover the container loosely with a plastic bag to hold humidity—just ensure it doesn’t touch the cuttings. Place the pot in a warm, bright spot out of direct sun.
While soil rooting can take a bit longer, it builds stronger plants with roots that are less prone to transplant shock.
Monitoring and Troubleshooting
Whichever method you choose, watch for signs of trouble: yellowing leaves may indicate excess water or poor light, while a musty smell, mold, or blackened stems are all signs of rot—common risks if there’s too much moisture or not enough airflow.
- For water rooting, trim off any mushy sections and start with a fresh cutting if rot appears.
- For soil propagation, allow the soil to dry slightly between waterings and remove any moldy debris.
With attention to these details, you’ll set your rosemary cuttings up for rooting success.
Caring for Rooted Rosemary Cuttings
You’ll know your rosemary cuttings are ready to transplant when strong, white roots are poking out from the drainage holes of the starter tray or pot, or when you gently tug and feel resistance from the cutting. This usually takes 3-6 weeks.
For transplanting, choose small pots with good drainage or a spot in the garden that receives at least 6 hours of sunlight daily. Before moving cuttings outside, acclimate them by gradually exposing them to outdoor conditions over 5-7 days to prevent transplant shock. Start by placing them in filtered light for a few hours, then slowly increase their time outdoors.
When planting, handle the roots gently and keep the stem buried at the same depth as before. Water immediately after transplanting, but avoid keeping the soil soggy—rosemary dislikes wet feet, and root rot is a common beginner’s mistake. Let the soil surface dry out before watering again.
For indoor pots, place your rosemary in a sunny spot, like a south-facing window, and rotate the pot weekly to encourage even growth. Avoid heavy fertilizing in the first month; established cuttings don’t need much at first, and too much fertilizer can harm delicate roots.
Watch for wilting in the first week—this can signal either too much sun too soon or overwatering. By paying attention to root development, sunlight balance, and careful watering, your young rosemary plants will thrive as they settle into their new home.
Long-term Rosemary Plant Care & Problems
Caring for a rosemary plant over the long term is straightforward but requires consistency and attention to detail. Rosemary prefers to dry out slightly between waterings, so let the top inch of soil dry before watering deeply—especially during cooler months, when overwatering can cause root rot.
Give your plant at least six to eight hours of sunlight daily; a south-facing window or a sunny spot outdoors is ideal. Pruning is key to maintaining a healthy, bushy plant: trim back a third of the growth each spring, and snip off tips regularly for kitchen use. This encourages fuller growth and prevents legginess.
Fertilize lightly in spring with a balanced, all-purpose fertilizer. Too much fertilizer can affect flavor and make the plant vulnerable to disease.
Common Problems
- Pests: Spider mites and aphids can appear; combat these by spraying leaves with a mild soapy water solution.
- Fungal Issues: Powdery mildew and root rot may develop in humid or poorly ventilated conditions. Ensure good airflow and avoid wetting the foliage.
- Growth Issues: If growth slows or leaves turn yellow, check for drainage problems or compacted soil and repot if needed.
Harvesting & Winter Care
Harvest by cutting stems as needed, but always leave at least half the plant intact to allow for regrowth. During winter, bring potted rosemary indoors to a bright spot, reduce watering, and occasionally mist the leaves to counter dry indoor air.
With regular care and a watchful eye, your rosemary plant will thrive and provide fragrant, flavorful sprigs for years to come.
Conclusion & Quick Tips
Propagating rosemary from cuttings is a rewarding process that saves money and lets you enjoy fresh herbs year-round. Watching new roots form and taking pride in nurturing a plant from a small cutting to a lush bush is deeply satisfying, especially for beginners.
To boost your success, keep these tips in mind:
- Always snip healthy, non-flowering stems.
- Remove the lower leaves before planting.
- Dip the cut end in rooting hormone if you have it.
- Use a well-draining potting mix and keep the cuttings lightly moist, not soaked.
- Place your pot in bright, indirect light—avoid harsh sun until roots develop.
Don’t be discouraged if some cuttings don’t make it; this is part of the learning process. Keep experimenting, and you’ll soon have a thriving rosemary plant that can be harvested for kitchen use, gifts, or even more cuttings. Give it a try—growing rosemary is a simple, deeply enjoyable way to connect with gardening.