“`html
Introduction
If you’ve ever wanted to add a gourmet touch to your kitchen garden, learning how to grow tarragon from cuttings is a smart and rewarding choice. French tarragon, prized for its vibrant flavor and versatility, is a favorite among home gardeners and chefs alike.
Unlike growing from seeds—which can be unreliable since French tarragon rarely produces viable seeds—propagating tarragon from cuttings guarantees you’ll get the authentic herb with its signature taste. Plus, rooting cuttings means faster results and a stronger start for your plants.
In this post, we’ll walk you through everything you need to know to grow healthy, thriving tarragon from cuttings, from selecting the right stems to ensuring successful rooting and transplanting. Whether you’re a gardening novice or a green-thumbed pro, you’ll find practical tips and step-by-step guidance to help you enjoy fresh tarragon straight from your garden.
“`
Tarragon Varieties
When starting your herb garden, it’s essential to understand the differences between tarragon varieties, as your choice will impact both flavor and ease of cultivation. French tarragon (Artemisia dracunculus ‘Sativa’) is the gold standard for culinary uses thanks to its sweet, anise-like notes that can elevate classic dishes like béarnaise sauce, chicken, or salad dressings.
Russian tarragon (Artemisia dracunculoides), on the other hand, has larger, coarser leaves and a flavor that’s bland or slightly bitter, making it a poor substitute in the kitchen. This explains why chefs and home cooks overwhelmingly prefer French tarragon, despite it being a bit more finicky to grow.
French tarragon rarely produces viable seeds, so it must be propagated by taking stem cuttings or dividing established plants. If you’re sourcing plants at a nursery, always check the label: don’t be fooled by seed packets labeled simply “tarragon”; these are likely the inferior Russian type.
Other varieties you might encounter include Mexican tarragon (Tagetes lucida), which offers a similar licorice flavor and can be a good substitute in hot climates where French tarragon struggles.
No matter what, choosing the right type from the start ensures the most rewarding results for your kitchen and your garden.
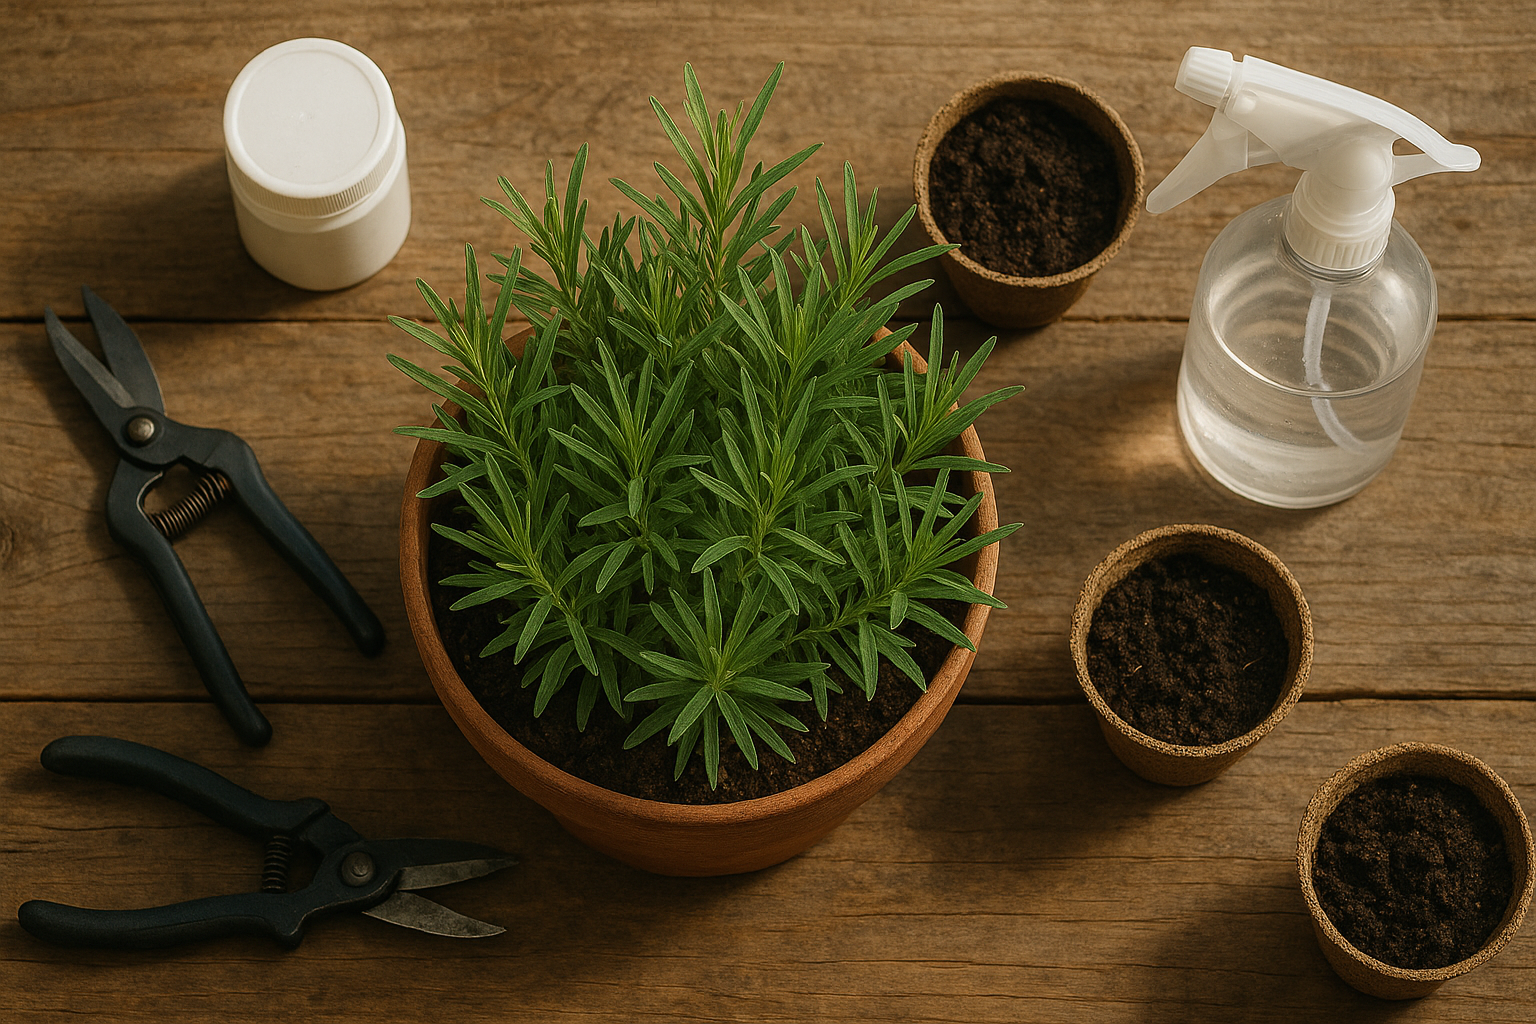
When and How to Take Tarragon Cuttings
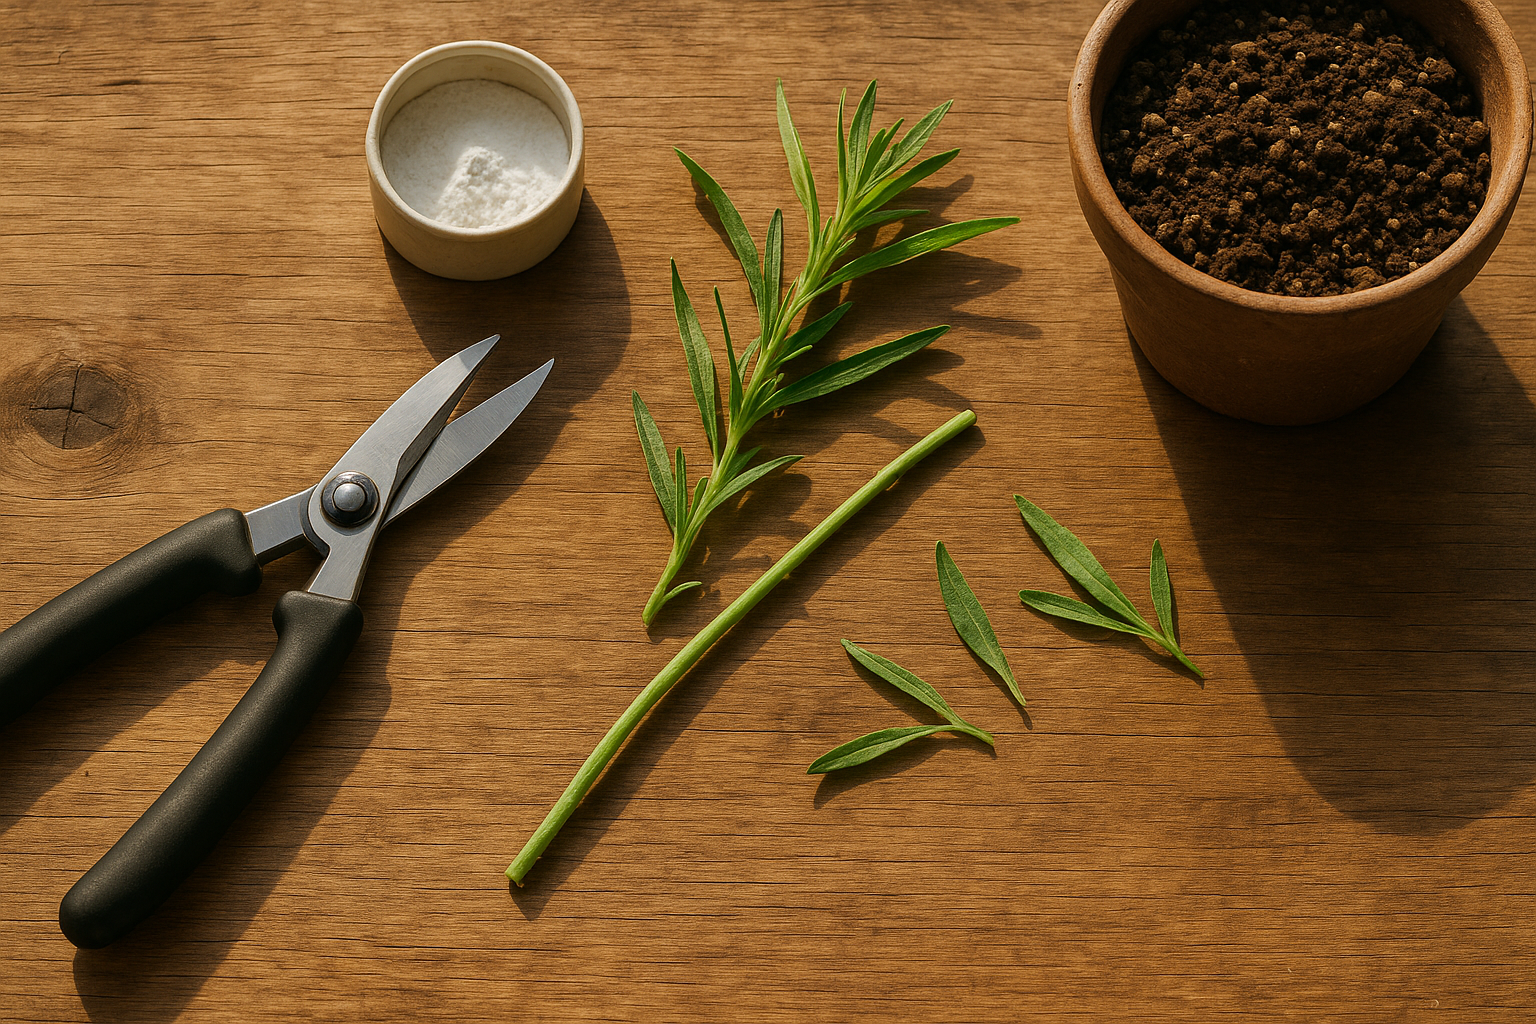
The best time to take tarragon cuttings is in late spring to early summer, when the plant is actively growing and its stems are green and pliable. Look for healthy, non-flowering stems on a well-established tarragon plant—these should be free of any signs of disease or insect damage. Choose stems that are about 4 to 6 inches long and have several sets of leaves.
Start by using clean, sharp scissors or pruners to snip your selected stem just below a leaf node (the spot where leaves sprout from the stem), as this is where roots will most readily form. Immediately remove the leaves from the lower half of the cutting to reduce water loss and create a clean section to insert into the growing medium. You can gently pinch off these leaves by hand or use small scissors. Leave a couple of leaves at the top of the stem so the cutting can continue to photosynthesize.
If you’d like, dip the cut end into rooting hormone powder to boost your chances of success, but this is optional for tarragon.
Place the prepared cutting into a small pot filled with moist, well-draining potting mix or a mixture of sand and peat. Press the soil gently around the cutting to hold it upright. Keep the pot in a warm, bright spot out of direct sunlight and mist regularly to maintain humidity, covering with a plastic bag if desired.
Roots typically form in two to four weeks—just tug gently to check progress.
Rooting Tarragon Cuttings
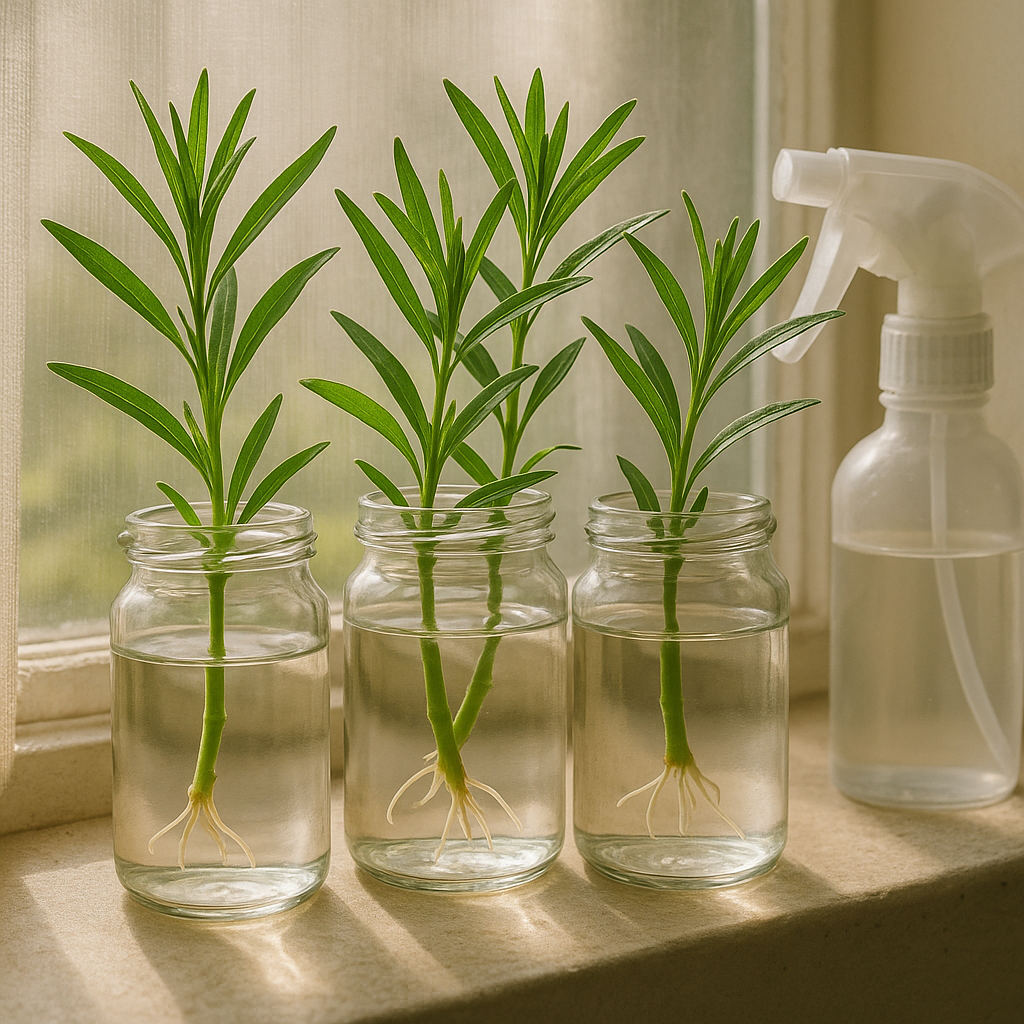
To root tarragon cuttings successfully, start by snipping healthy, non-flowering stems about 4 to 6 inches long. Make your cut just below a leaf node, where roots are most likely to form. Remove the lower leaves, leaving a few at the top, so the cutting can focus its energy on producing roots instead of supporting unnecessary foliage.
If you want an extra boost, dip the freshly cut end in rooting hormone powder or gel—this step is optional but often speeds up the process and increases your chances of success.
Choose your rooting medium carefully: placing cuttings in water with a clear glass lets you watch roots develop, while using a well-draining potting mix or coarse sand in a small pot or tray can produce sturdier, transplant-ready roots. Make sure containers have drainage holes to prevent waterlogging, which can rot the cuttings.
Place your cuttings in a spot with bright, indirect light—too much direct sunlight can scorch them, while too little slows root growth. Maintain high humidity by loosely covering the cuttings with a plastic bag or placing them in a mini greenhouse. Aim for a temperature of 65–75°F (18–24°C) for the best results.
Check regularly for roots: in water, look for white roots sprouting from the base within two to three weeks; in soil or sand, gentle tugging after three to four weeks should give slight resistance. New leafy growth is another good sign that your tarragon cutting has established roots and is ready for potting up or planting outdoors.
Potting Up and Transplanting Tarragon
Transplanting tarragon rooted cuttings is best done in spring after the last frost, once the cuttings have developed strong roots and at least two sets of leaves. Whether you’re moving them into pots or garden beds, choose a location with well-draining soil—tarragon dislikes wet feet.
If you’re potting up, select containers with drainage holes and use a light, sandy potting mix. For garden beds, enrich the soil by mixing in compost or aged manure and check the pH level, aiming for slightly alkaline soil around 6.5 to 7.5. Boost drainage in heavy soils with coarse sand or perlite.
Before transplanting outdoors, acclimate your tarragon by gradually hardening off the plants: move them outdoors for a couple of hours each day, slowly increasing the time over a week to ten days. Protect them from harsh sun and wind during this period.
When planting, set the cuttings at the same depth they grew indoors and water well but avoid soaking. Keep the soil evenly moist for the first couple of weeks as the roots establish.
With these steps, your tarragon should thrive and be ready to flavor your dishes all season long.
Caring for Growing Tarragon Plants
Caring for growing tarragon plants is straightforward, but a little attention goes a long way toward healthy, flavorful harvests. Start by watering consistently—tarragon likes soil that’s moist but not soggy, so let the top inch dry out before watering again to prevent root rot.
Place your plant where it receives plenty of sunlight; six hours of direct sun daily is ideal, but tarragon will tolerate light afternoon shade if you live in a hot climate.
Feeding is simple: add compost or a balanced organic fertilizer once in spring, but avoid over-fertilizing, as too much nitrogen can dull its distinctive flavor.
Watch for pests like aphids and spider mites, which you can deter by spraying leaves with a mix of water and mild soap or by encouraging beneficial insects like ladybugs.
Powdery mildew sometimes appears in humid conditions; provide good airflow by spacing plants properly and watering at the base to keep foliage dry.
Pruning and pinching tarragon is essential for bushier, healthier growth—start pinching off the top inch of stems when plants reach about six inches high. Regularly trim back stems to encourage branching and prevent flowering, which helps keep the leaves tender and tasty for longer harvests.
Harvesting and Using Tarragon
For the best flavor, harvest tarragon in late spring to early summer, just before the plant flowers. Use clean, sharp scissors or garden snips to cut stems in the morning when the essential oils are most concentrated. Take only the top third of each stem to encourage bushier growth and avoid over-harvesting from a single plant.
After cutting, rinse sprigs gently and pat dry. Fresh tarragon can be stored in the refrigerator by wrapping it in a slightly damp paper towel and placing it inside a plastic bag—this keeps it vibrant for up to two weeks.
To preserve it long-term, bundle the stems and hang them upside down in a cool, dark, and well-ventilated place until thoroughly dried. Then, crumble and store the leaves in an airtight container away from heat and sunlight.
Tarragon freezes well, too; simply chop the leaves and place them in ice cube trays with a little water or olive oil.
In the kitchen, tarragon shines in homemade salad dressings, béarnaise sauce, and as a flavorful addition to roasted chicken, fish, or eggs. For a refreshing twist, infuse vinegar or make tarragon butter to enjoy its licorice-like flavor throughout the year.
Conclusion
Growing your own tarragon from cuttings is simple and rewarding. Start by choosing healthy stems, cutting them just below a leaf node, and placing them in moist soil or water. Keep the cuttings in a warm, bright spot but out of direct sunlight, and be patient as roots form in a few weeks.
With a little care, you’ll have fresh tarragon to elevate your cooking! Ready to try it yourself? Give it a go and enjoy homegrown flavor.
Have you grown tarragon or have tips to share? Drop your experiences in the comments—we’d love to hear from you!