Introduction
When it comes to boosting both the flavor and nutrition of your meals, parsley microgreens have quickly earned a spot among the most sought-after kitchen staples. As microgreens gain popularity for their concentrated nutrients and vibrant flavors, home growers and foodies alike are turning to these tiny greens to level up salads, sandwiches, and garnishes. Parsley, known for its fresh, slightly peppery taste, makes a particularly attractive microgreen. Not only does it add a beautiful pop of green and a distinctive zing to any dish, but it’s also loaded with vitamins A, C, and K, making it a powerhouse addition to your diet. Their compact size makes parsley microgreens especially versatile—perfect for growing in small indoor spaces or even on a sunny windowsill, requiring just a little light and care.
But it’s not just about their taste and nutrition—growing parsley microgreens is a rewarding hobby that suits both beginners and seasoned gardeners. Whether you’re a home chef looking for a fresh garnish within arm’s reach or a wellness enthusiast searching for the next superfood, cultivating your own parsley microgreens offers a fun, sustainable way to liven up your kitchen routine. In this guide, you’ll discover everything you need to know: from choosing the right seeds and setting up your growing space to perfect harvesting techniques and creative ways to use your parsley microgreens every day. Let’s get started on your journey to fresher, greener, and tastier meals right from your own home.
Parsley Microgreens Basics
Parsley microgreens are tiny, tender shoots harvested just days after germination, well before the plant reaches full maturity. Unlike mature parsley, which has robust stems and broad leaves, these microgreens are delicate and intensely flavorful, offering a fresh, slightly peppery taste that’s more vibrant than their fully grown counterpart.
These miniature greens pack a nutritional punch, often containing higher concentrations of vitamins C, K, and beta-carotene compared to both mature parsley and many other common microgreens like radish or alfalfa. They’re also rich in antioxidants and essential nutrients, making them a smart addition to any diet—especially for those looking to boost their immune system or support bone health.
In the kitchen, parsley microgreens are incredibly versatile. They shine as a finishing touch on soups, salads, and omelets, providing a burst of color and flavor without overpowering the main ingredients. You can sprinkle them over avocado toast, layer them in sandwiches for extra crunch, or add them to grain bowls and pasta dishes.
Their fresh, bright profile also makes them a perfect garnish for roasted vegetables or grilled fish, turning simple meals into restaurant-worthy plates with minimal effort. For anyone looking for an easy and fast way to upgrade both nutrition and presentation, parsley microgreens are a tiny but mighty option.
Choosing the Right Parsley & Supplies
When starting your microgreen garden, picking the right parsley is key—choose between curly and flat-leaf varieties based on taste and aesthetics. Curly parsley has bright, frilly leaves and a mild flavor, making it a favorite for garnish, while flat-leaf (Italian) parsley offers a robust, aromatic taste that shines in recipes.
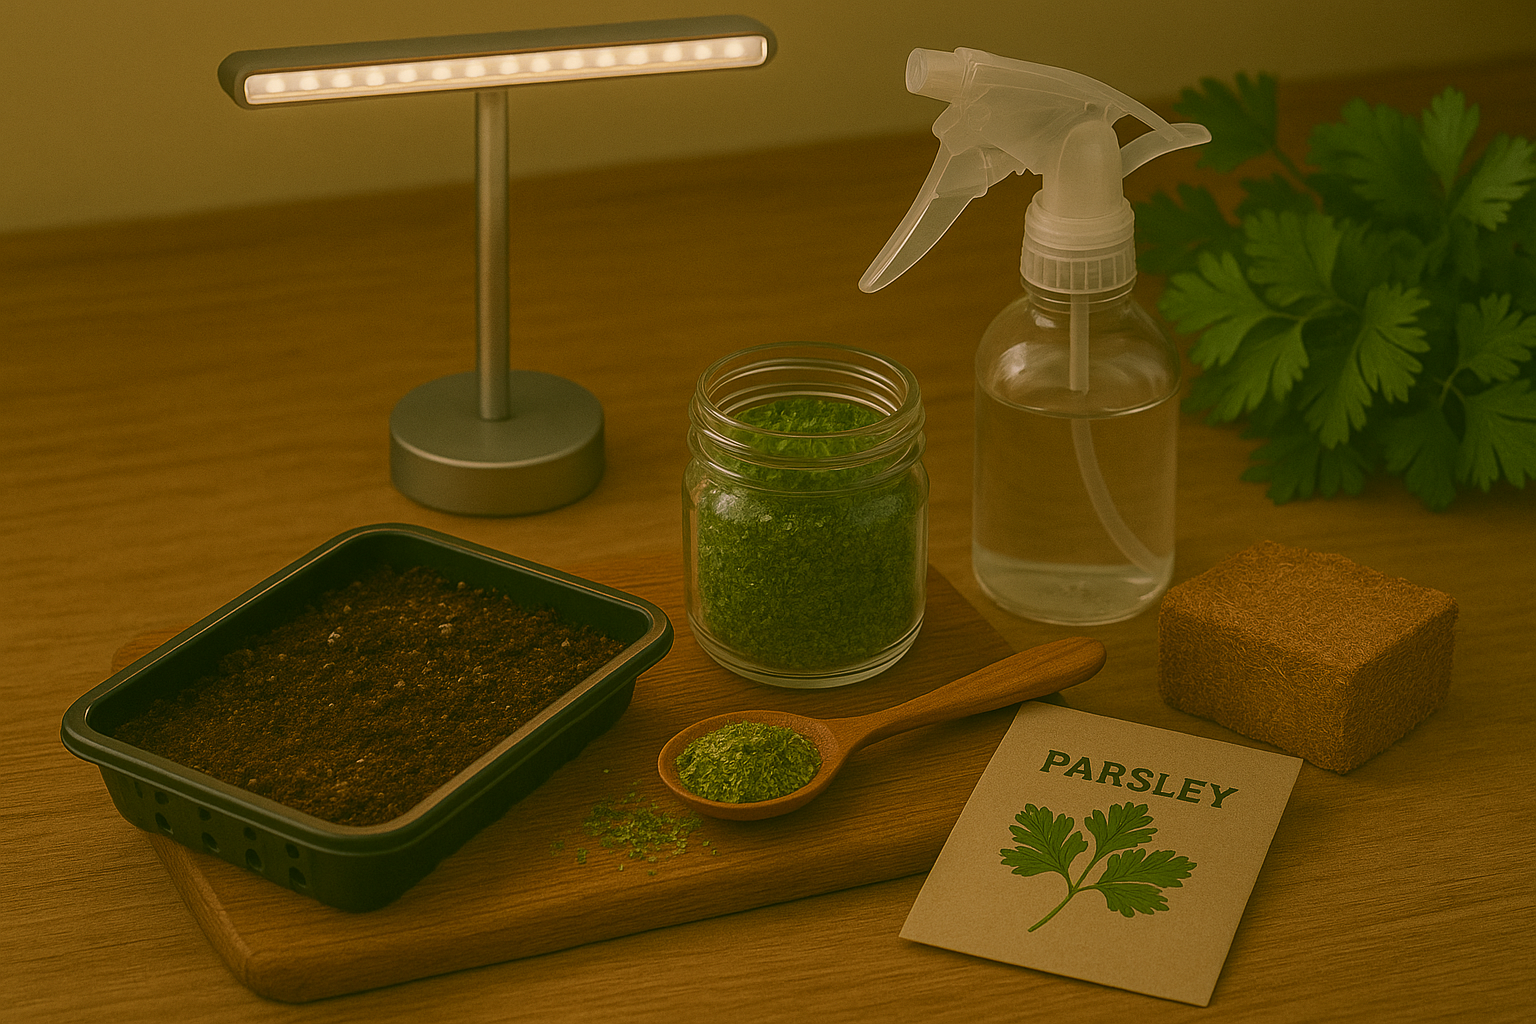
For the best results, buy organic, untreated seeds from reputable suppliers like local nurseries or trusted online stores; avoid standard garden seeds, which may be treated with chemicals.
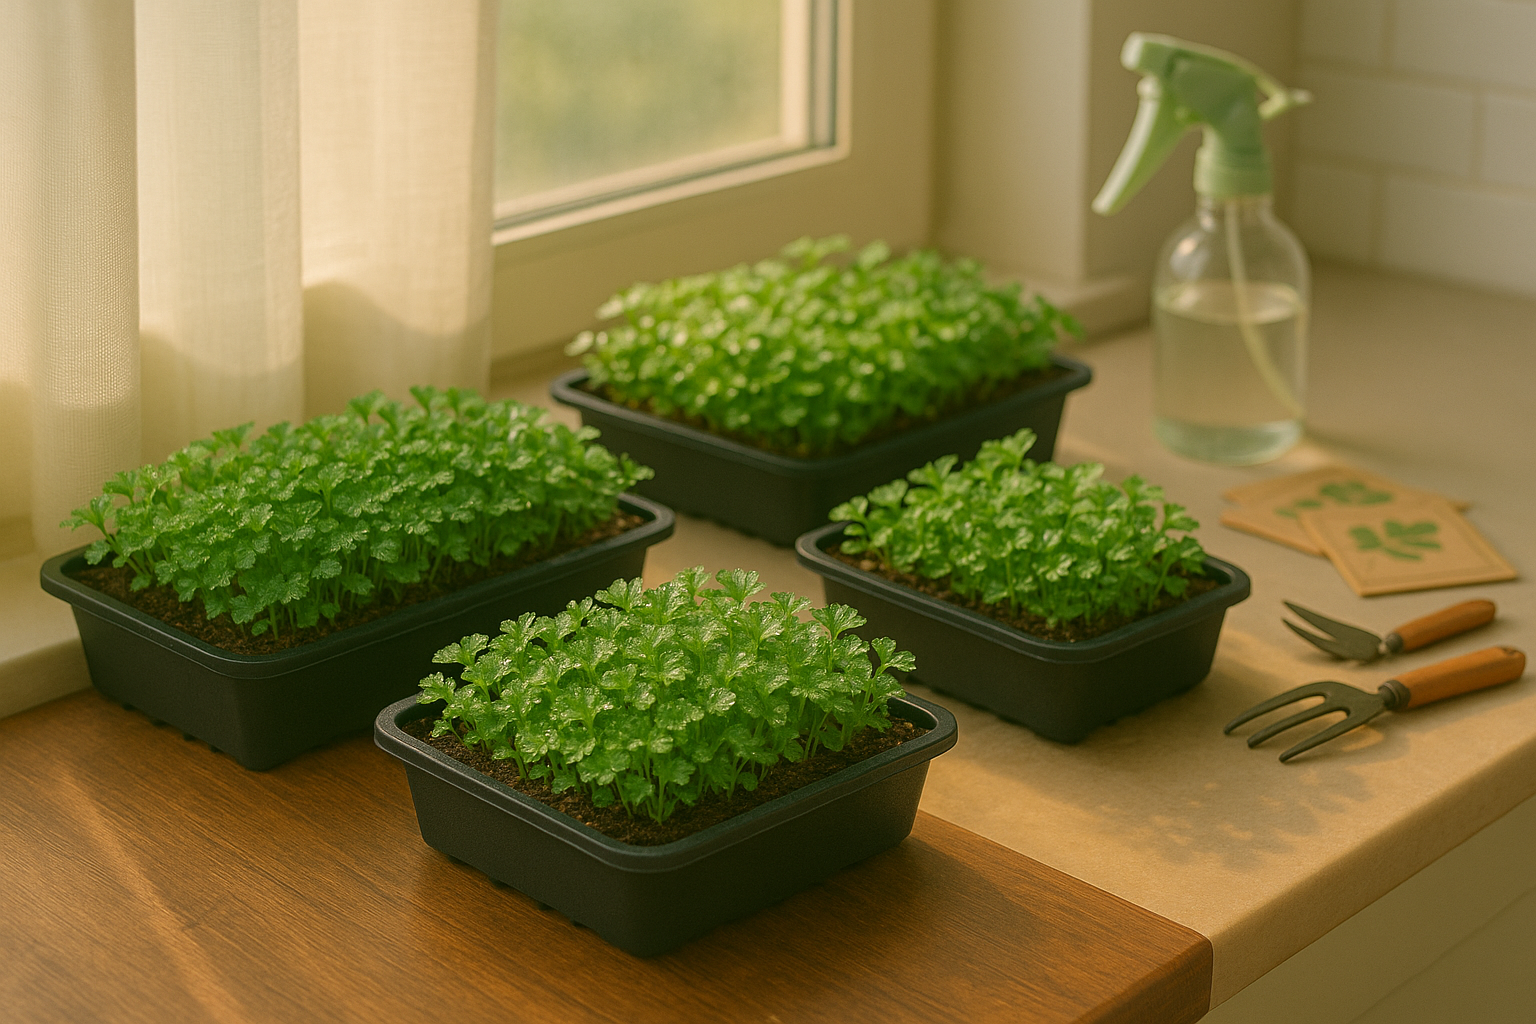
For supplies, a sturdy tray or shallow container works well—look for ones with drainage holes if you’re using soil, or choose hydroponic trays for water-based growing. Use a fine, sterile seed-starting mix or coconut coir for soil setups, as they provide the right balance of drainage and moisture. If you opt for hydroponics, look for quality grow mats designed for microgreens.
Good lighting is essential—if natural sunlight is limited, invest in an affordable LED grow light to ensure your parsley microgreens thrive. Water gently, making sure not to overwhelm the seeds; a spray bottle is great for even moisture.
For small spaces, stackable trays or vertical garden systems are a game-changer, allowing you to maximize countertop or windowsill space. Even a simple setup using a recycled food container with holes punched in the bottom can yield fresh parsley microgreens for your kitchen.
Step-by-Step

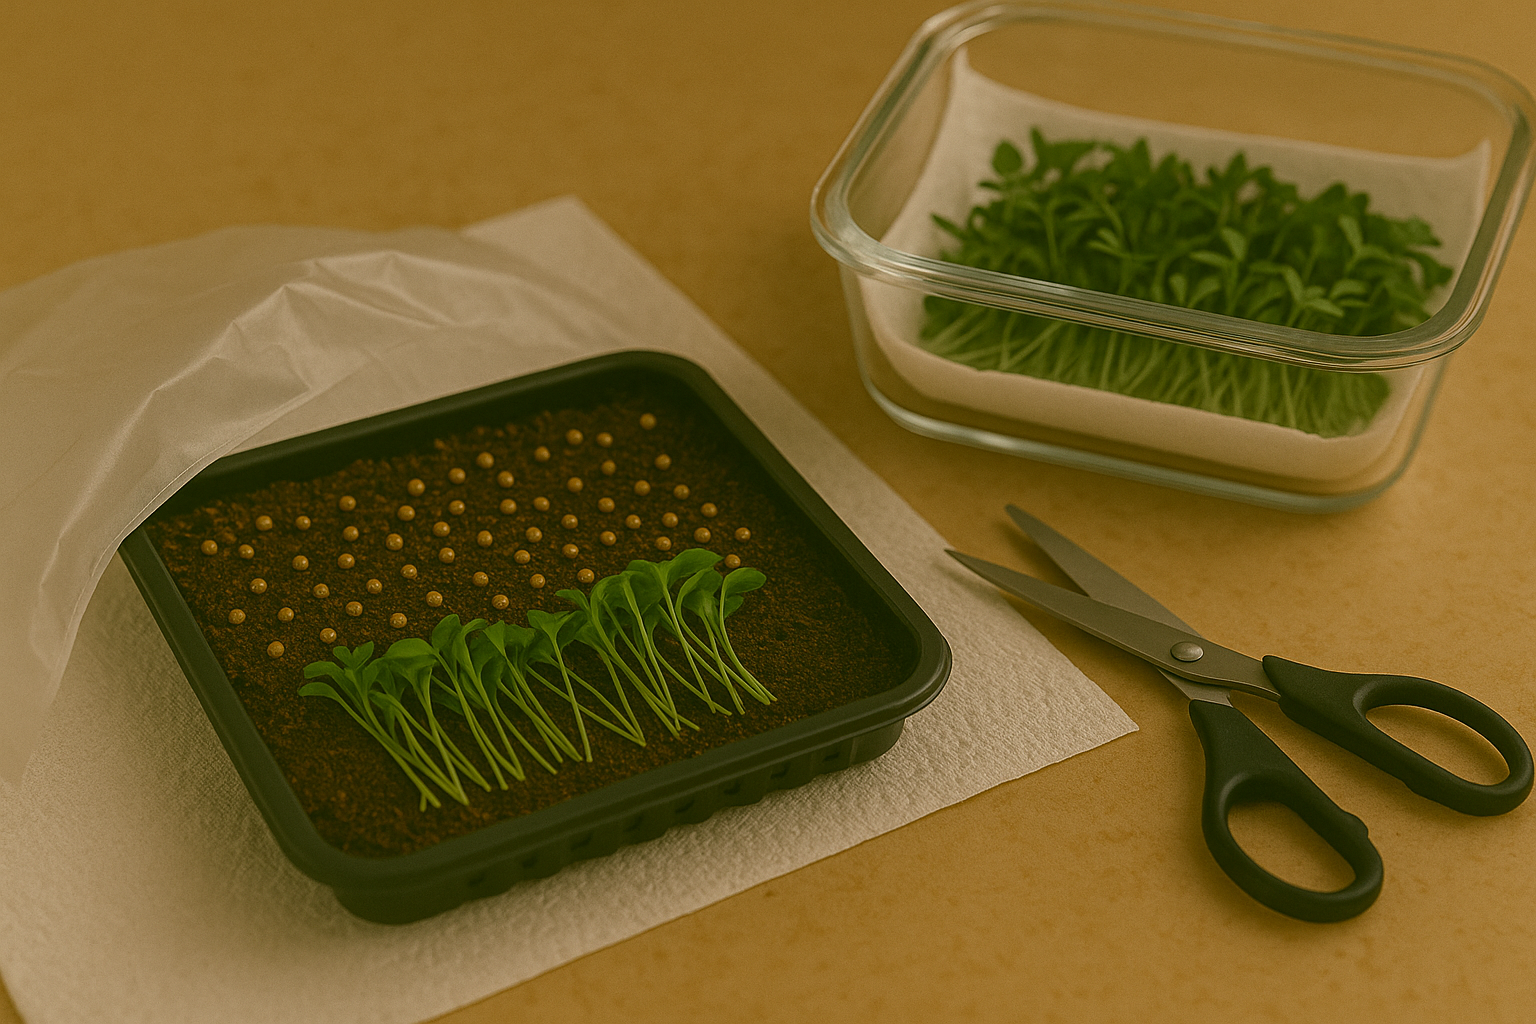
Before you start planting parsley microgreens, give your seeds a head start by soaking them in lukewarm water for 6-8 hours or overnight. This helps break the seed’s natural dormancy and boosts germination rates. Once soaked, drain and rinse the seeds, then evenly scatter them over a shallow tray filled with about an inch of moistened, sterile seed-starting soil or coconut coir.
Gently press the seeds down to ensure good contact with the surface, but don’t bury them—they need light to germinate. Mist the seeds with water and cover the tray loosely with a breathable lid or plastic wrap to retain humidity. Place your tray in a warm spot with indirect sunlight or under a grow light, aiming for temperatures around 70°F (21°C) and moderate humidity (about 50-60%).
Check daily to keep the soil consistently moist, not soggy. Using a spray bottle helps avoid overwatering and disturbing the soil. After 4-7 days, remove the cover once you see sprouts, and continue providing bright light for 12-16 hours a day.
If your seeds don’t germinate well, it’s often due to old seed stock, so always use fresh seeds and soak them before sowing. Mold can appear if conditions are too wet or air circulation is poor—combat this by watering less, removing the cover sooner, and ensuring good airflow with a small fan if needed.
Within 2-3 weeks, your parsley microgreens will be lush and ready to harvest when they reach 2-3 inches tall, offering a fresh, nutritious boost to salads and garnishes.
Harvesting & Storing Your Microgreens
Knowing when to harvest parsley microgreens is crucial for the best flavor and nutrition. Look for the first set of true leaves (the second pair after the initial seed leaves) and stems about 1.5–2 inches tall. For parsley, this usually means they’re ready between 18 and 25 days after planting, though factors like room temperature and light may cause slight variations.
To harvest, always wash your hands and use clean, sharp scissors or a knife. Snip just above the soil line, avoiding contact with the soil to prevent contamination. For extra safety, sanitize your tools beforehand and handle the greens gently to reduce bruising.
After harvesting, lay the microgreens in a single layer on a paper towel or clean kitchen towel and let them air-dry briefly to remove excess moisture. Never wash the greens right before storage, as wet greens spoil faster.
Store your parsley microgreens in an airtight container lined with a dry paper towel, and keep them in the crisper drawer of your refrigerator. This can maintain their freshness and nutritional value for up to a week.
As a practical tip, only harvest what you’ll use in a few days if possible, and always check for signs of spoilage like sliminess or off smells before eating. By following these simple steps, you can ensure safe, crisp, and nutrient-rich parsley microgreens in every dish.
Nutritional Benefits & Culinary Uses
Parsley microgreens pack a surprising nutritional punch, making them a smart addition to any diet. Rich in vitamins A, C, and K, these tiny greens also deliver a healthy dose of antioxidants, iron, and folate—all essential for supporting immunity, bone health, and cell function.
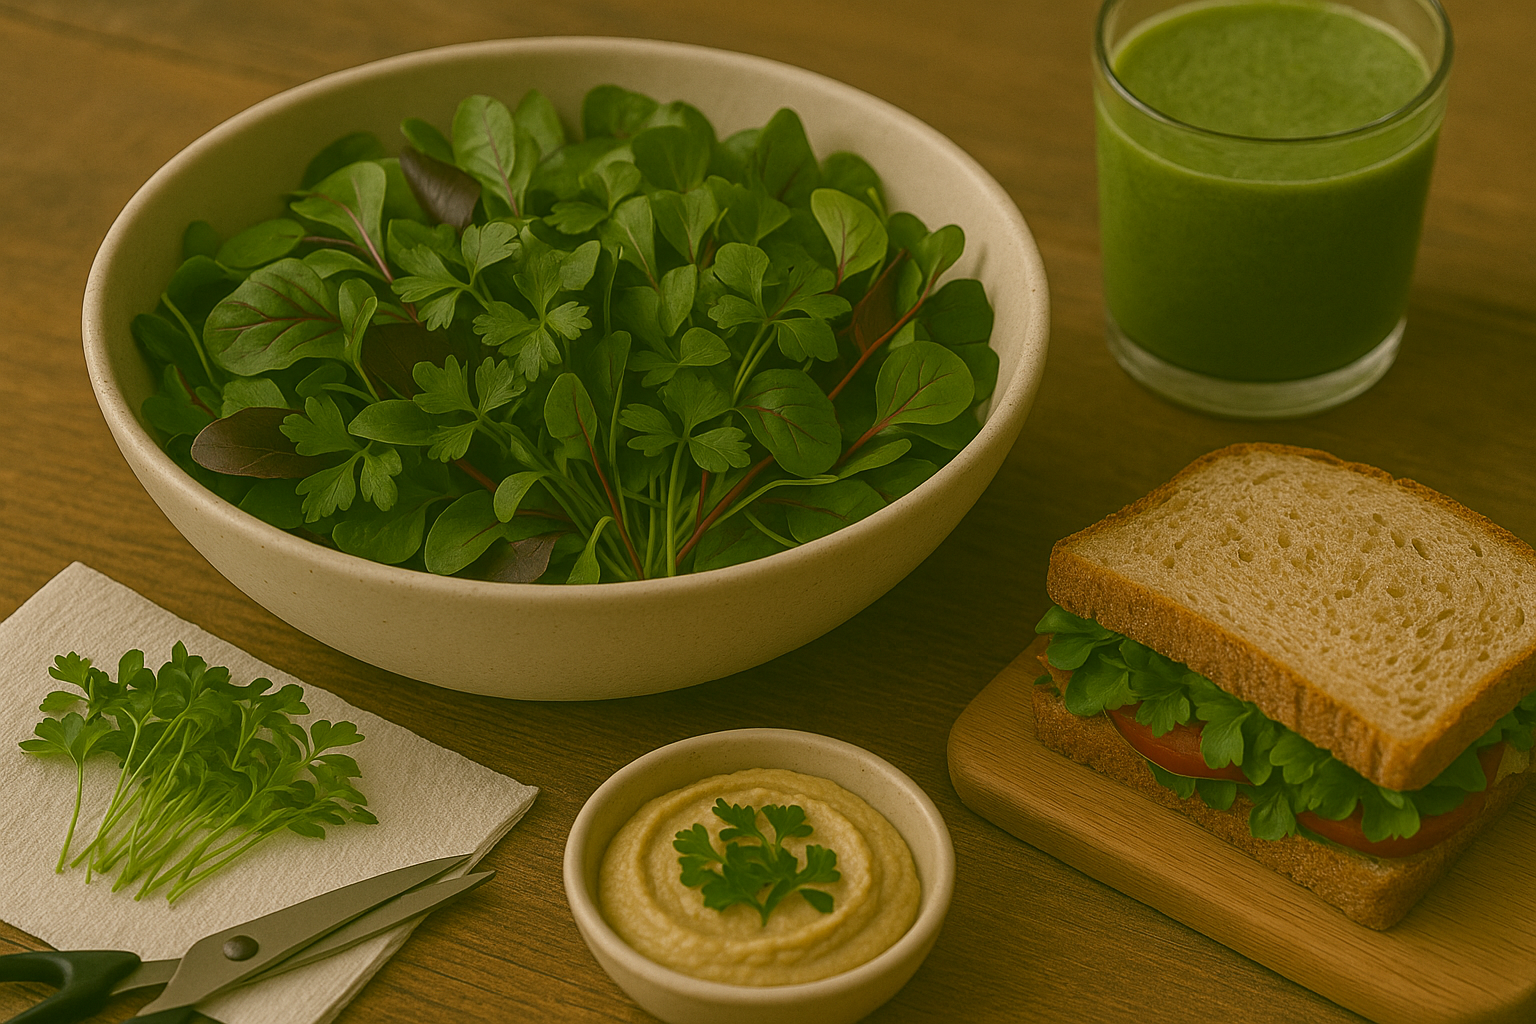
Their mild, fresh flavor makes them easy to sneak into all sorts of meals. Toss a handful into salads for an herbal twist or sprinkle them over roasted veggies and grilled meats as a bright, nutrient-boosting garnish. They blend seamlessly into smoothies, bringing a subtle earthiness and a burst of green nutrition without overpowering fruit flavors.
For something different, try layering parsley microgreens onto sandwiches, mixing them into hummus, or stirring them into scrambled eggs just before serving. Pairing parsley microgreens with other varieties—like peppery radish microgreens, nutty sunflower shoots, or mildly sweet pea shoots—can amplify both flavor and nutritional benefits.
For example, a salad combining parsley and broccoli microgreens offers a double hit of vitamin C, while blending parsley with spicy mustard greens in a wrap adds dimension and depth. Rotate combinations to keep meals interesting and maximize the wide array of antioxidants, phytonutrients, and flavors these tender greens offer.
Whether as a standalone star or part of a vibrant microgreen medley, parsley microgreens offer a simple, versatile way to boost daily nutrition and turn any dish into something special.
Troubleshooting & FAQs
Growing microgreens is rewarding, but beginners often face a few common challenges like slow growth, pest issues, or leggy (overstretched) plants. If your microgreens are growing slowly, make sure they’re getting enough light—ideally, place them on a sunny windowsill or use a grow light for 12–16 hours a day.
Leggy plants usually stretch in search of more light, so boost your lighting and avoid overwatering. Pests, such as gnats, can be deterred by keeping your growing area clean and using well-draining soil.
One frequent question is, “Why are my microgreens turning yellow?” This is often due to a lack of light or nutrients. Another common question is, “How do I know when to harvest?” Most microgreens are ready when they’re 2–3 inches tall and have opened their first set of true leaves.
Beginners also ask, “What’s the best way to avoid mold?” Good air circulation, clean trays, and watering from below are effective strategies.
For more tips, check out resources like microgreens-focused YouTube channels, gardening forums, or trusted sites such as Johnny’s Selected Seeds and the Microgreens Farmer blog, where you’ll find step-by-step guides and community advice.