Introduction to Bay Leaf Propagation
If you’ve ever wondered how to regrow bay leaf from store cuttings, you’re not alone—this practical method is gaining popularity among home gardeners. Bay leaf trees (Laurus nobilis) are aromatic evergreens prized for their flavorful leaves, which add depth and fragrance to stews, soups, and countless dishes worldwide.
Many people grow bay leaf trees at home to enjoy a steady supply of fresh leaves, save money on repeated store purchases, and experience the satisfaction of nurturing a culinary plant from scratch. One of the most cost-effective and surprisingly simple ways to start your own bay tree is by propagating a cutting from a grocery store bunch.
While turning a handful of store-bought bay leaves or cuttings into a thriving potted tree might sound ambitious, it’s entirely possible with patience and the right technique. Propagation requires attention to details like humidity, warmth, and gentle handling. Keep in mind, bay trees grow slowly and can take several months to root—you won’t see heaps of new leaves overnight.
But the payoff is worth it: you’ll have fresher, more pungent leaves on hand, plus the unique reward of knowing you grew your own herbal staple right from kitchen scraps.
Selecting and Preparing Your Grocery Store Cutting
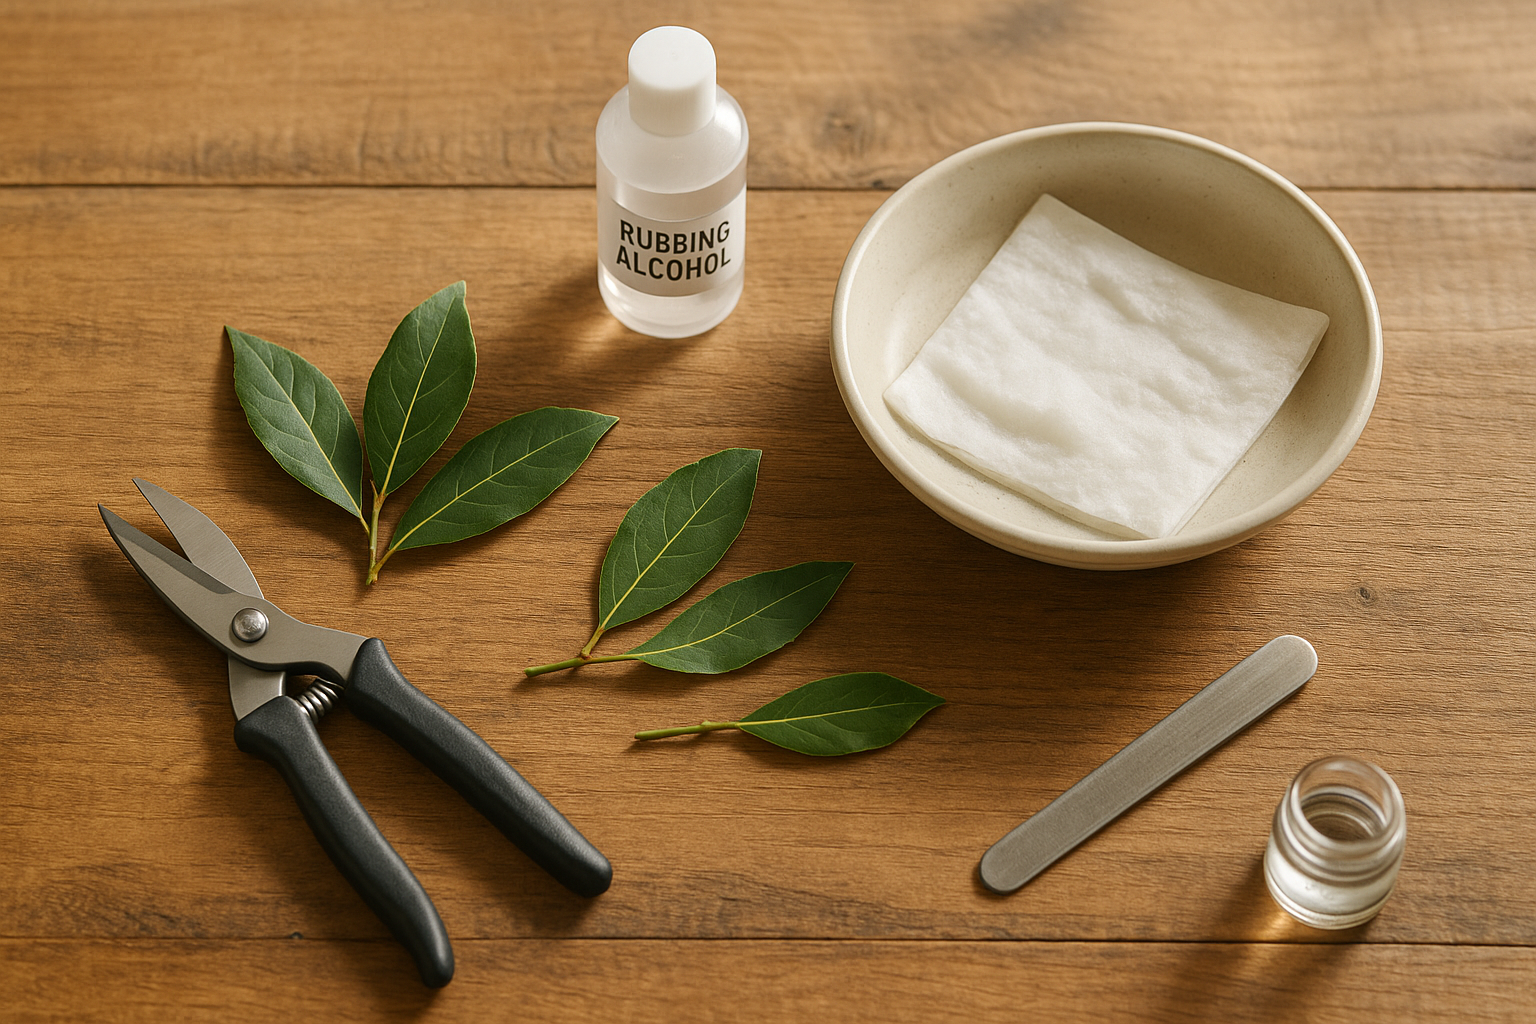
When selecting cuttings from fresh herbs or plants at the grocery store, focus on stems that look vibrant and healthy. Avoid any that show signs of wilting, discoloration, or mushiness, as these may not root well. The best stems are semi-woody—meaning they’re not too soft and green but not so old that they’re tough or brittle. Look for stems that “snap” crisply rather than bend limply.
For successful propagation, each cutting needs to include a section of stem with at least one node—the spot where leaves attach—because this is where roots form. Start by choosing a stem about 4 to 6 inches long and snip it off just below a node using sharp, clean scissors or pruning shears; a sterile, clean cut helps prevent disease.
Remove any leaves from the lower half to ensure they don’t sit in water or soil and rot, while leaving a few leaves at the top so the cutting can continue to photosynthesize. It’s also helpful to gently trim larger remaining leaves by half to reduce moisture loss.
The essential tools for preparing your cuttings include:
- Sharp scissors or pruning shears
- Rubbing alcohol for sterilizing your tools
- A small container of clean water or moist paper towels to keep cuttings hydrated before planting
With these quick, careful steps and proper tools, your grocery store cuttings will have the best chance of rooting successfully and thriving in their new home.
Rooting Your Bay Leaf Cutting

Rooting bay leaf cuttings is exciting and pretty straightforward when you choose the right method—water or soil propagation. For water rooting, simply place a 4-6 inch healthy cutting (with the lower leaves stripped off) in a clear jar filled with filtered, room-temperature water. Change the water every few days to keep it fresh and prevent rot. Roots usually appear in 3 to 6 weeks, and you’ll know you’ve succeeded when you see healthy white roots about two inches long.
For soil propagation, dip the cut end in rooting hormone before planting it in a moist, well-draining mix (a peat and perlite blend works great). Rooting hormone boosts your chances by speeding root growth and protecting against fungus, especially since bay cuttings can root slowly.
Whichever method you choose, place your cuttings in a warm, bright spot out of direct sunlight—a sunny windowsill with a sheer curtain is ideal. Humidity is key: use a plastic bag or cloche to retain moisture but vent it daily to prevent mold. The soil or water should stay damp but not soggy; if rooting in soil, let the top inch dry out between waterings.
Watch for new leaf growth and gentle resistance when you tug the cutting—both are reliable signs that roots are forming. Patience pays off, as rooting can take anywhere from a few weeks to a couple of months, but proper care will help you grow a healthy, ready-to-pot bay laurel for your herb garden.
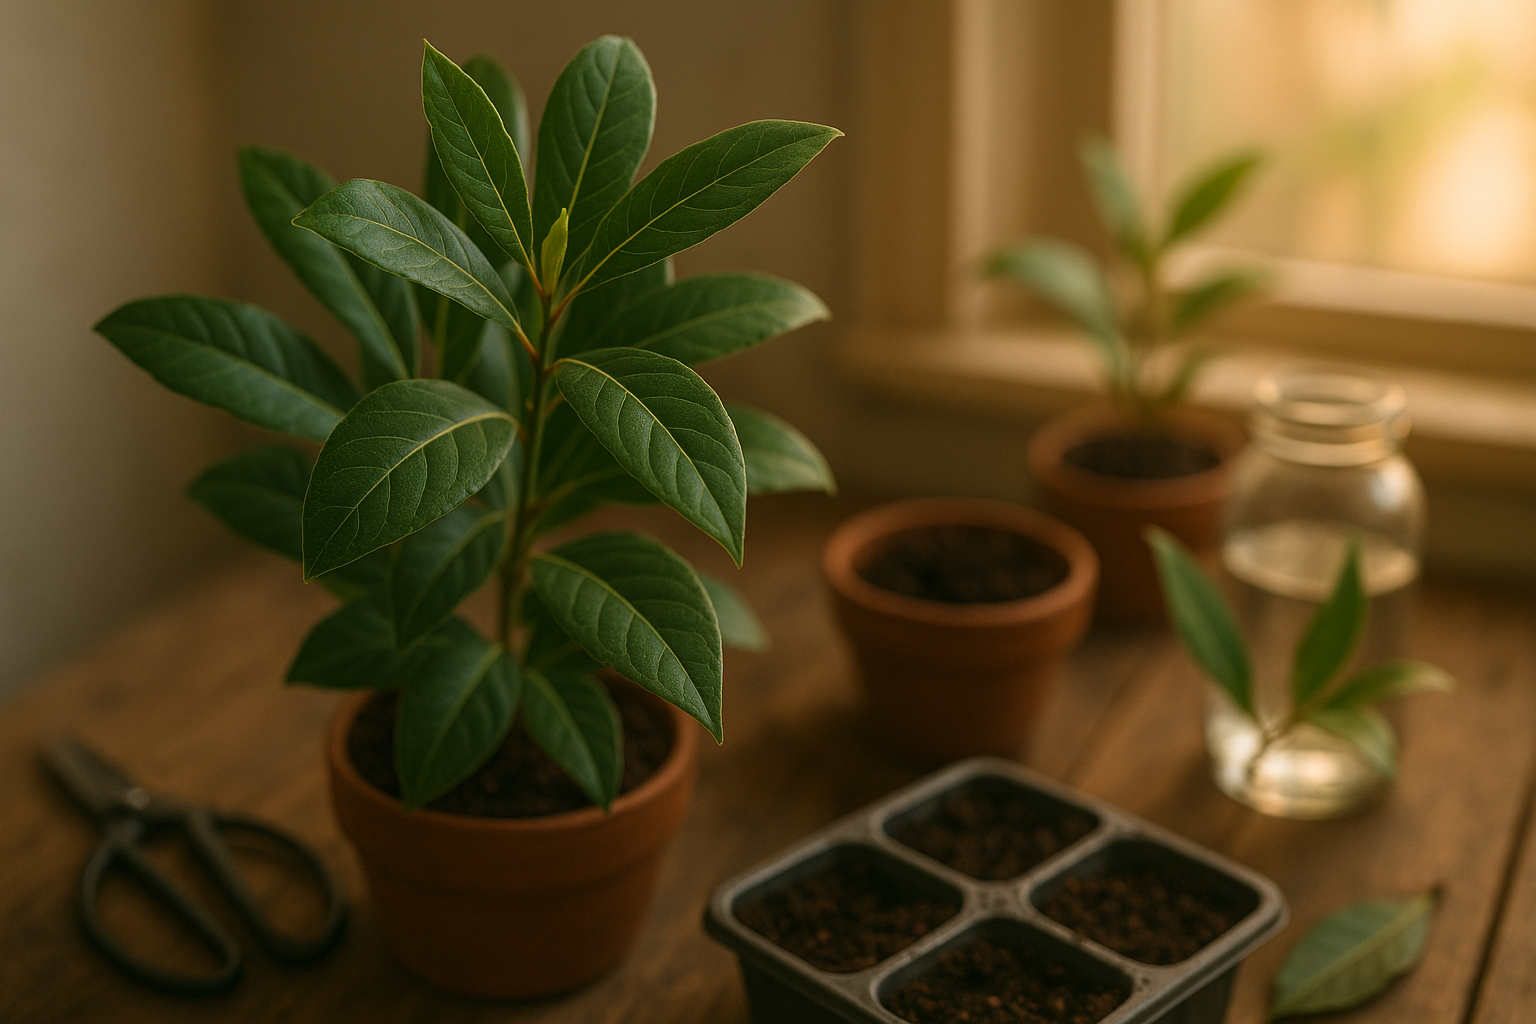
Potting Up and Early Care for Young Bay Trees
Transplanting young bay tree cuttings into pots is a delicate process, but with the right approach, your new plants will thrive. Start by choosing small pots (about 4–6 inches wide) with drainage holes to prevent waterlogged roots.
Gently remove each rooted cutting from its propagation tray, handling the delicate roots as little as possible. An ideal potting mix for bay trees is a blend of high-quality peat-free compost, perlite, and a touch of grit or sand—this balances moisture retention and drainage, which bay trees love.
After potting up, water lightly so the mix is damp but not soggy, and place pots in a bright spot with indirect sunlight. Bay trees prefer temperatures between 60–75°F (16–24°C) and should be sheltered from cold drafts or intense heat.
Aim to keep the soil barely moist—overwatering is a common mistake and can cause root rot. Let the top inch of soil dry out before watering again. Slow growth is normal for bay trees, especially in the first year; patience is key.
Leaves should look healthy and deep green, though a sparse appearance at first isn’t cause for alarm. Watch for yellowing or wilting leaves, which can indicate too much water or poor drainage, and check for signs of mold or pests.
With regular gentle care and careful observation, your young bay trees will gradually establish, rewarding you with fragrant foliage for years to come.
Troubleshooting & Common Propagation Challenges
Propagating plants can sometimes be tricky, with common issues like mold, leaf drop, wilting, and slow or weak root development. If you notice mold on cuttings or soil, it’s usually a sign of excess moisture or poor air circulation—try moving your cuttings to a brighter spot, remove any affected material, and use a sterilized tool when trimming.
Leaf drop and wilting can be caused by sudden temperature changes, overwatering, or underwatering; keeping the environment consistent and allowing the cutting to dry slightly between waterings helps a lot.
Weak or slow root growth often results from low humidity, old cuttings, or low light—using a humidity dome or placing the cuttings in indirect light can encourage stronger roots, and always propagate with healthy, vigorous plant pieces.
If your cuttings turn mushy, smell foul, or show no roots after several weeks, it’s best to start over with fresh material.
Signs that your propagation is succeeding include:
- Firm, green stems
- The appearance of new leaves
- Visible white roots emerging from the cutting’s base
Being patient, clean, and observant are your best allies for propagation success.
Long-Term Bay Laurel Tree Care & Harvesting
Caring for a mature bay laurel tree is simple with a consistent routine that keeps it healthy, whether you grow it as a houseplant or outdoors. Water the tree when the soil is dry about an inch below the surface, but avoid letting the roots sit in soggy conditions. Provide bright, indirect sunlight indoors or at least partial sun if grown outdoors.
Mature bay trees can grow leggy, so prune lightly in early spring or midsummer to shape the tree and encourage bushier growth. Just snip back the longest stems, cutting just above a leaf node. Remove any damaged or yellowing leaves throughout the year to keep the plant tidy and healthy.
Harvesting Bay Leaves
Harvesting bay leaves works best once the tree is well-established. Snip mature, dark green leaves with clean scissors throughout the growing season, avoiding new, tender foliage that won’t have much flavor yet. For the best taste, pick leaves in the late morning after the dew has dried but before the hot afternoon sun.
After harvesting, rinse the leaves, pat them dry, and spread them on a screen or paper towel in a single layer out of direct sunlight until they’re crisp—usually about two weeks. Store dried leaves whole in an airtight jar, away from light and heat, to preserve their aromatic oils. Crush the leaves only when you’re ready to cook with them.
With regular care and smart harvesting, your bay laurel will supply flavorful leaves for years.